Discovery 2. Manual — part 461
EMISSION CONTROL - V8
REPAIRS 17-2-43
REPAIRS
Canister - EVAP
$% 17.15.13
Remove
1. Raise vehicle on lift.
2. Remove 2 bolts securing canister bracket to
chassis.
3. Remove bolt securing canister to bracket and
remove bracket.
4. Release clip and disconnect atmosphere vent
pipe from canister.
5. Release and remove purge and tank vent pipes
from canister.
6. Remove EVAP canister.
CAUTION: Always fit plugs to open
connections to prevent contamination.
Refit
1. Ensure all connections are clean.
2. Position new canister and connect purge and
tank vent pipes.
3. Connect atmospheric vent pipe to canister and
secure with clip.
4. Fit bracket to canister and secure with bolt.
5. Fit canister and bracket and secure with bolts.
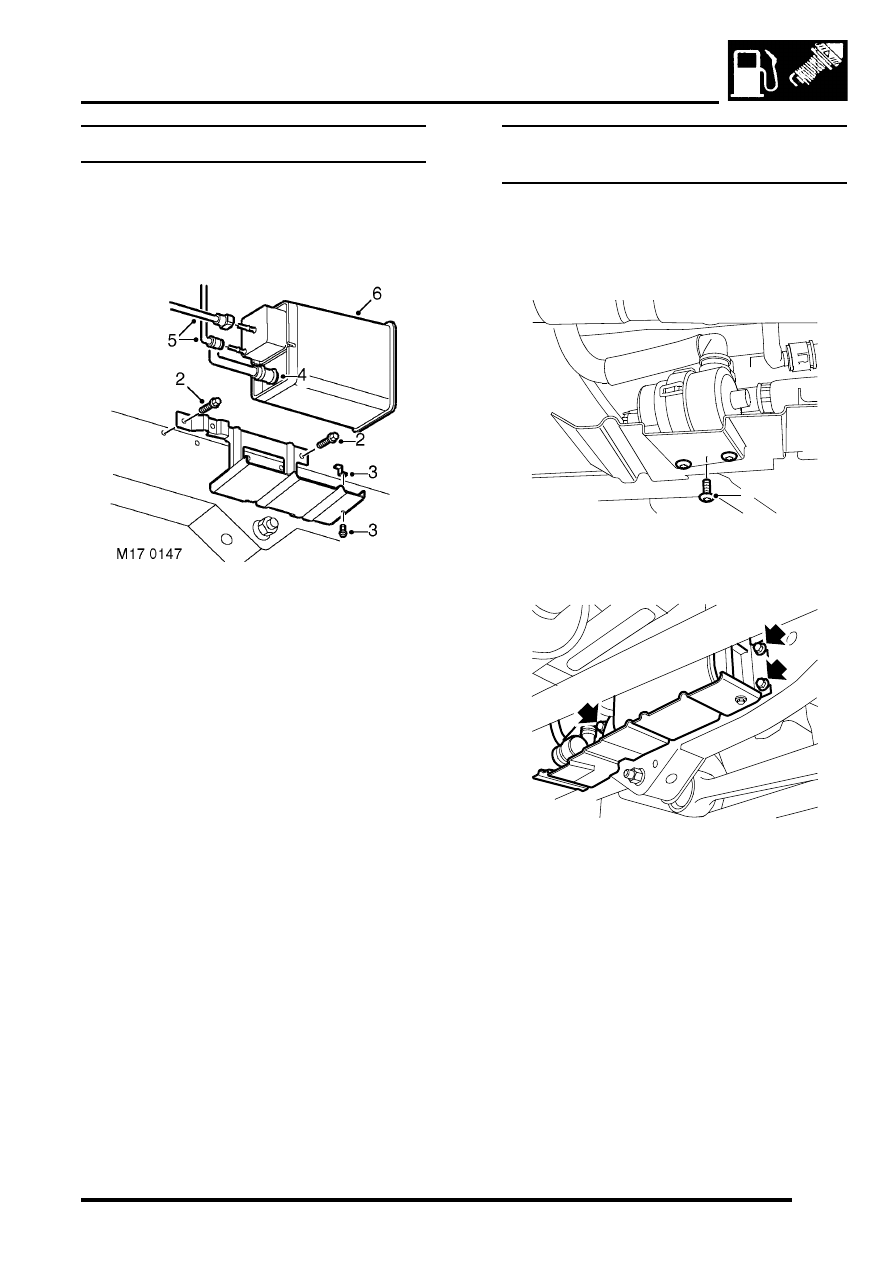
Canister - EVAP - Models with Fuel Leak
Detection Pump - up to 03MY
$% 17.15.13
Remove
1. Raise vehicle on lift.
2. Remove 3 Torx screws securing fuel leak
detection pump to mounting bracket.
3. Remove 3 bolts securing EVAP canister
mounting bracket to chassis longitudinal.
M17 0219
2
M17 0220

EMISSION CONTROL - V8
17-2-44 REPAIRS
4. Remove 2 bolts securing EVAP canister to
mounting bracket and collect clamp.
5. Remove mounting bracket.
6. Position cloth to absorb any fuel spillage.
7. Release purge and tank vent pipes from EVAP
canister.
8. Remove clip securing fuel leak detection pump
pipe to EVAP canister.
9. Release pipe from EVAP canister and remove
canister.
CAUTION: Plug the connections.
Refit
1. Remove plugs and ensure all connections are
clean.
2. Connect fuel leak detection pump pipe to EVAP
canister and secure with clip.
3. Connect purge and tank vent pipes to EVAP
canister.
4. Position mounting bracket to EVAP canister
and secure with bolts.
5. Position mounting bracket to chassis
longitudinal and tighten bolts.
6. Fit Torx screws securing fuel leak detection
pump to mounting bracket.
7. Lower vehicle.
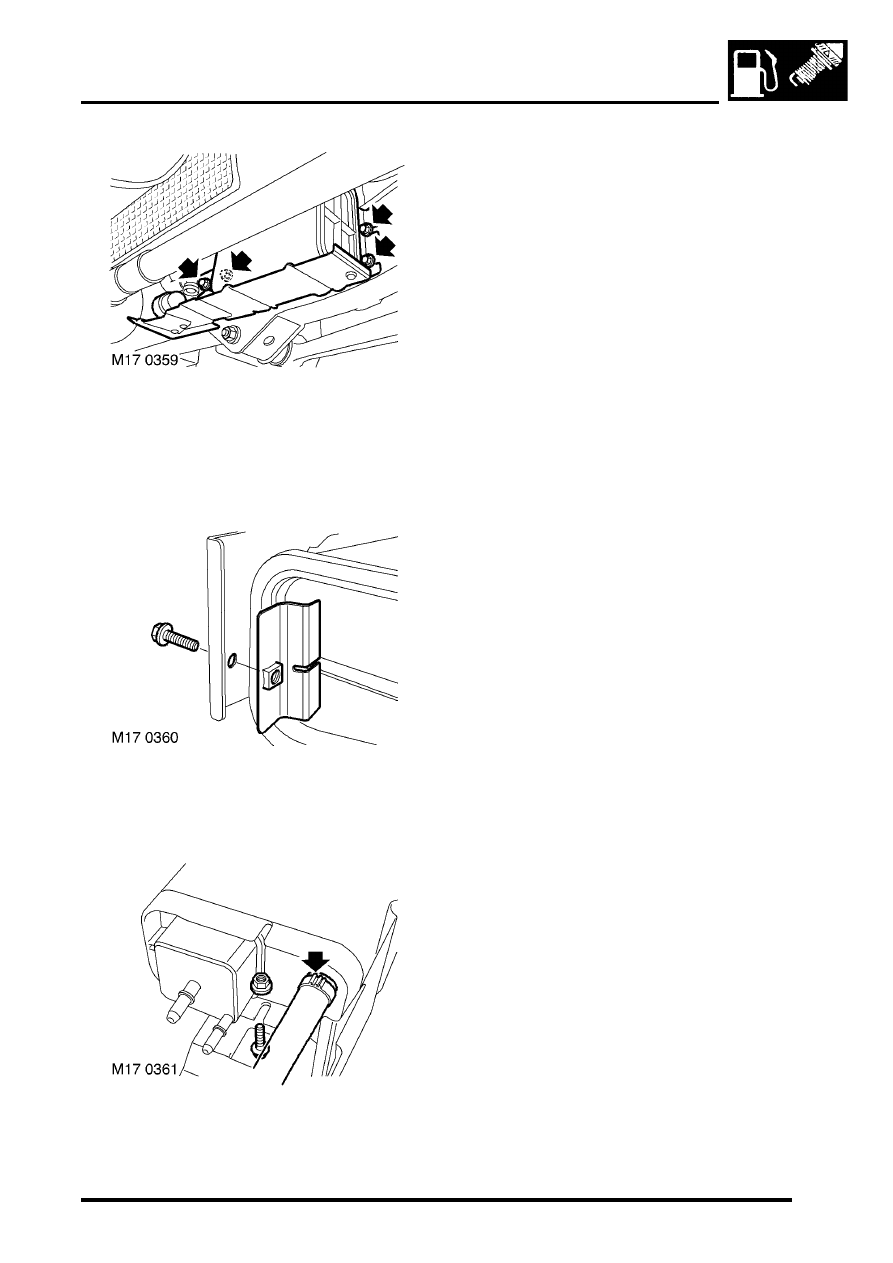
Canister - EVAP - Models with Fuel Leak
Detection Pump - from 03MY
$% 17.15.13
Remove
1. Raise the vehicle on lift.
2. Disconnect multiplug from the fuel leak
detection pump.
3. Disconnect the fuel leak detection filter pipe
from the fuel leak detection pump.
4. Release clips and disconnect 2 vent pipes from
the EVAP canister.
CAUTION: Always fit plugs to open
connections to prevent contamination.
M17 0221
4
4
4
9
7
7
5
8
EMISSION CONTROL - V8
REPAIRS 17-2-45
5. Remove and discard 4 bolts securing EVAP
canister mounting bracket to the chassis and
remove the EVAP canister assembly.
NOTE: Do not carry out further dismantling if
component is removed for access only.
6. Remove bolt securing EVAP canister retaining
clamp to the mounting bracket and collect the
clamp.
7. Remove nut and bolt securing EVAP canister to
the mounting bracket.
8. Remove and discard clip securing fuel leak
detection pump fuel pipe to the EVAP canister
and disconnect the fuel pipe.
9. Remove the EVAP canister.
Refit
1. Position EVAP canister to the mounting
bracket.
2. Connect fuel leak detection pump fuel pipe to
the EVAP canister and secure with a new clip.
3. Fit nut and bolt securing EVAP canister to the
mounting bracket and tighten to 10 Nm (7 lbf.ft).
4. Position EVAP canister retaining clamp to the
mounting bracket, fit bolt and tighten to 10 Nm
(7 lbf.ft).
5. Position EVAP canister mounting bracket to the
chassis, fit new bolts and tighten to 25 Nm (18
lbf.ft).
6. Connect vent pipes to the EVAP canister.
7. Connect multiplug to the fuel leak detection
pump.
8. Connect the fuel leak detection filter pipe to the
fuel leak detection pump.
9. Lower the vehicle lift.
EMISSION CONTROL - V8
17-2-46 REPAIRS
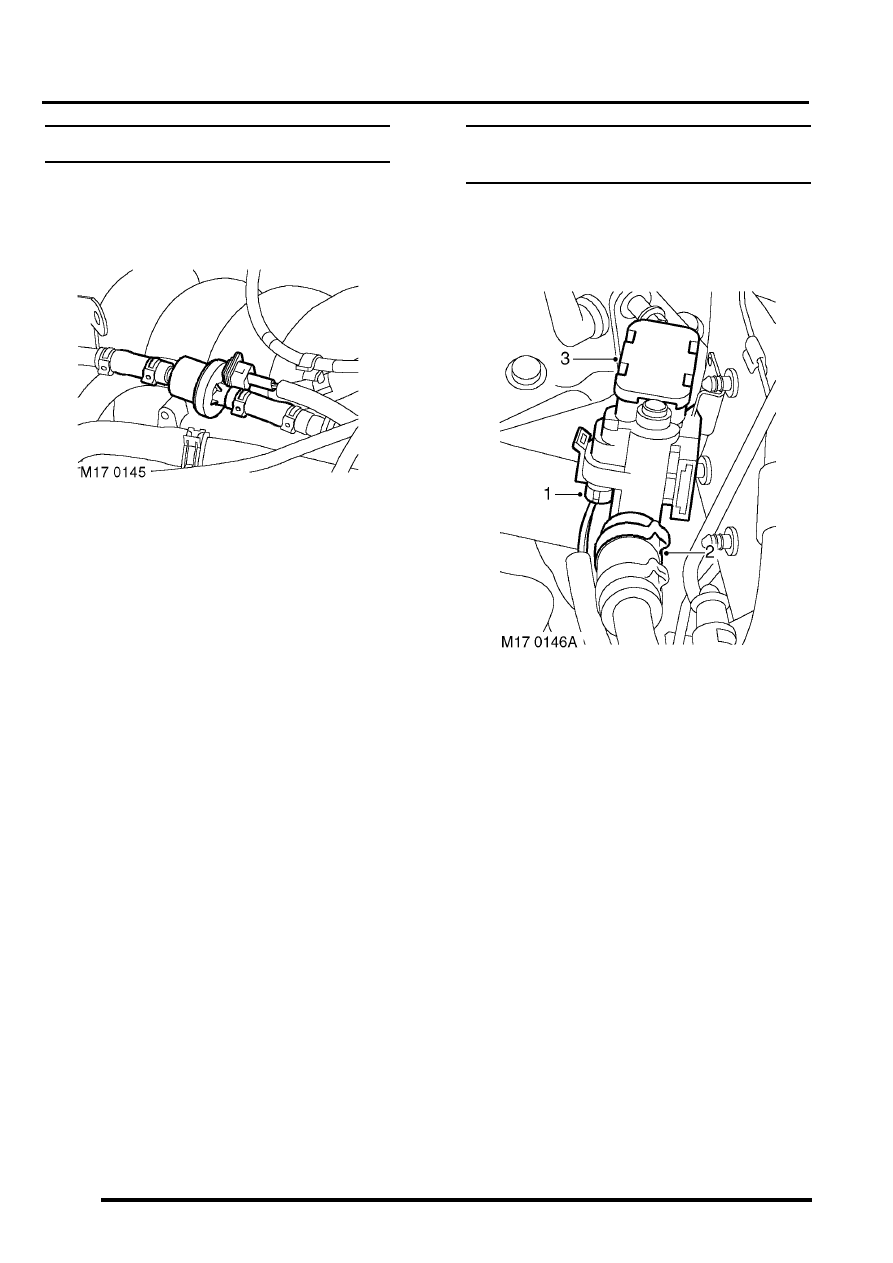
Valve - purge control
$% 17.15.39
Remove
1. Disconnect multiplug from purge control valve.
2. Release clips securing hoses to purge control
valve.
3. Disconnect hoses from purge control valve and
remove valve.
CAUTION: Always fit plugs to open
connections to prevent contamination.
Refit
1. Position purge control valve and connect
hoses.
2. Fit clips to secure hoses to purge control valve.
3. Connect multiplug to purge control valve.
Solenoid - evap canister vent solenoid
(CVS) valve
$% 17.15.47
Remove
1. Disconnect multiplug from CVS unit.
2. Remove clip and disconnect hose from vent
valve.
CAUTION: Always fit plugs to open
connections to prevent contamination.
3. Remove CVS unit from bracket.
Refit
1. Fit CVS unit to bracket.
2. Connect hose to vent valve and secure with
clip.
3. Connect multiplug to CVS unit.
Нет комментариевНе стесняйтесь поделиться с нами вашим ценным мнением.
Текст