Discovery 2. Manual — part 348
HARNESSES
REPAIRS 86-7-15
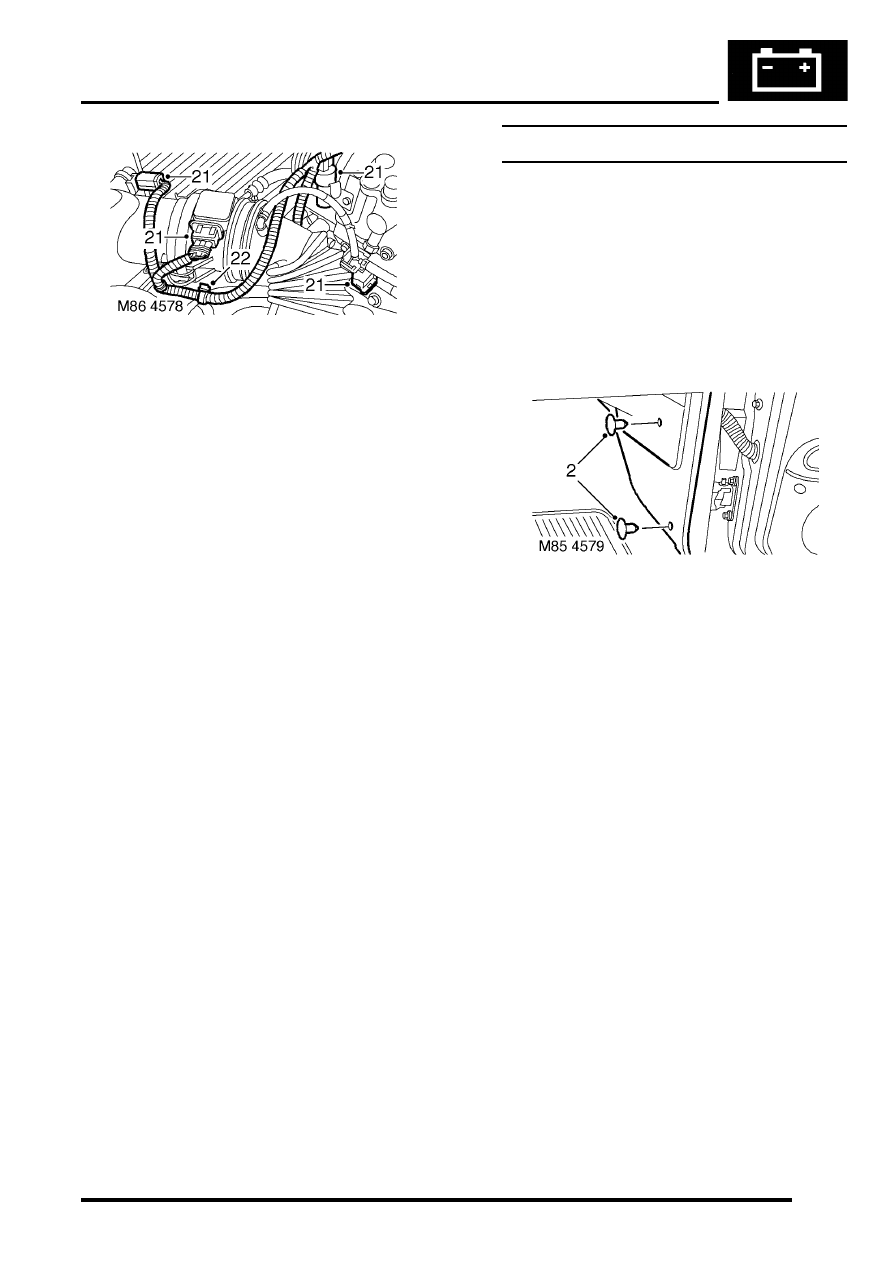
21. Disconnect multiplugs from A/C compressor,
turbocharger solenoid valve, AAP sensor and
MAF sensor.
22. Release harness clips from coolant hose and
PAS hose.
23. Note the route of the engine harness, release
from underneath of inlet manifold and remove
from engine.
Refit
1. Position harness on engine.
2. Connect multiplugs to A/C compressor,
turbocharger solenoid valve, AAP and MAF
sensors.
3. Position harness clips to coolant and PAS
hoses.
4. Connect multiplug to ECT sensor.
5. Position harness to front of cylinder head and
tighten bolts to 10 Nm (7 lbf.ft).
6. Connect injector multiplug.
7. Connect multiplug and position battery cable to
alternator and tighten nut.
8. Connect multiplug to fuel temperature sensor.
9. Connect multiplug to MAP sensor.
10. Connect glow plugs.
11. Connect CKP sensor multiplug.
12. Connect Lucar to starter solenoid.
13. Connect battery lead to starter solenoid and
tighten nut to 10 Nm (7 lbf.ft).
14. Position harness clip to coolant pipe.
15. Locate harness over bell housing and connect
multiplug to oil pressure switch.
16. Connect 2 multiplugs to EGR solenoids.
17. Connect engine harness multiplug to ECM and
main harness.
18. Connect engine harness multiplugs to fuse
box.
19. Position glow plug lead to fuse box and tighten
bolt to 3.5 Nm (2.6 lbf.ft).
20. Position battery and alternator leads to fuse
box and tighten bolts to 6 Nm (4.4 lbf.ft).
21. Fit engine compartment fuse box cover.
22. Fit battery carrier.
23. Fit engine acoustic cover.
Harness - main
$% 86.70.07
Remove
1. Remove heater assembly.
REPAIRS, Heater assembly - models with
air conditioning.
REPAIRS, Heater assembly - models
without air conditioning.
2. Remove 4 clips securing LH and RH trim
panels to lower 'A' post.
3. Remove both lower 'A' post trim panels.
4. Remove air filter assembly.
V8, REPAIRS, Air cleaner assembly.
5. Remove battery tray.
6. Remove front bumper.
HARNESSES
86-7-16 REPAIRS
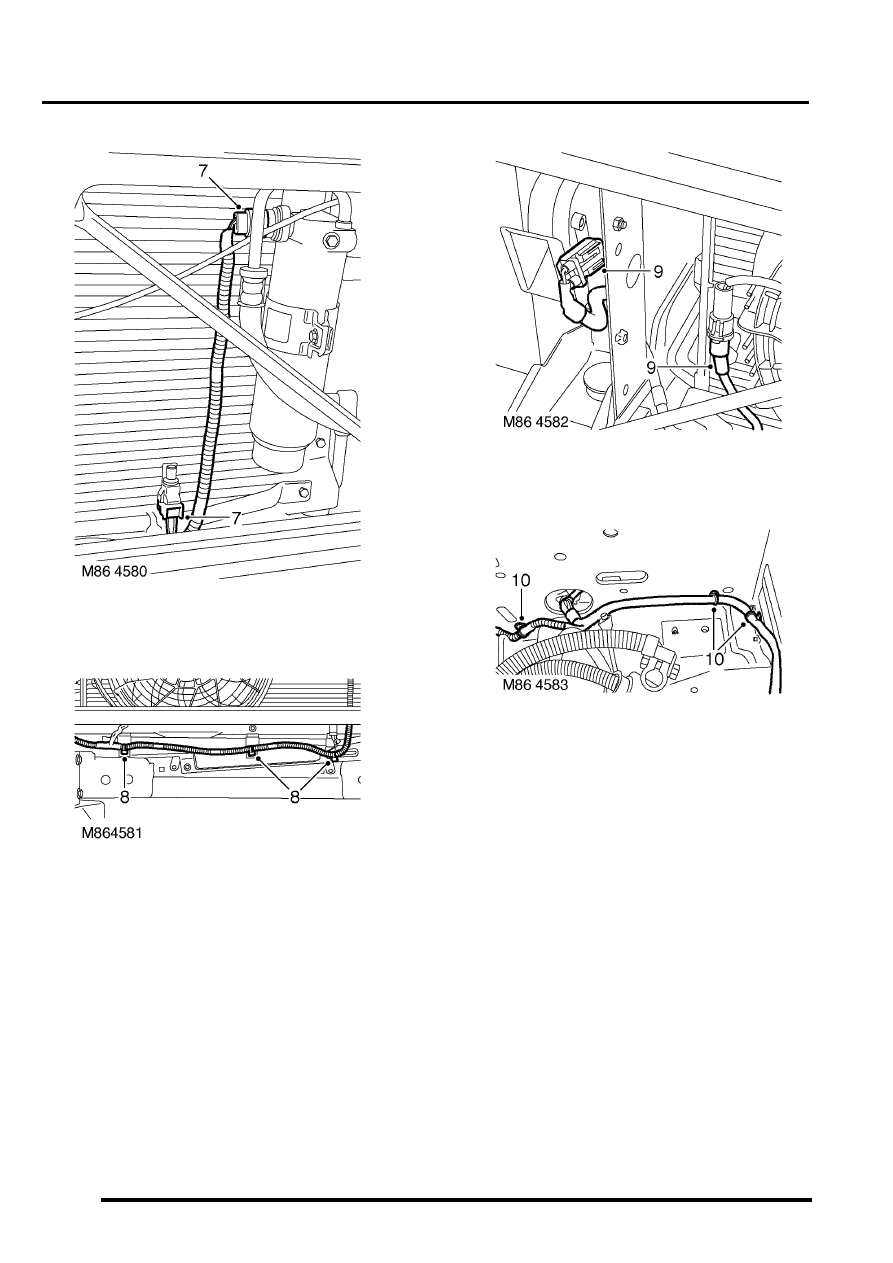
7. Disconnect multiplugs from receiver drier and
air temperature sensor.
8. Release 3 cable tie clips securing harness to
lower support rail.
9. Disconnect multiplugs from cooling fan and
horn.
10. Release 3 cable tie clips from front RH panel.
11. Remove RH indicator lamp.
HARNESSES
REPAIRS 86-7-17
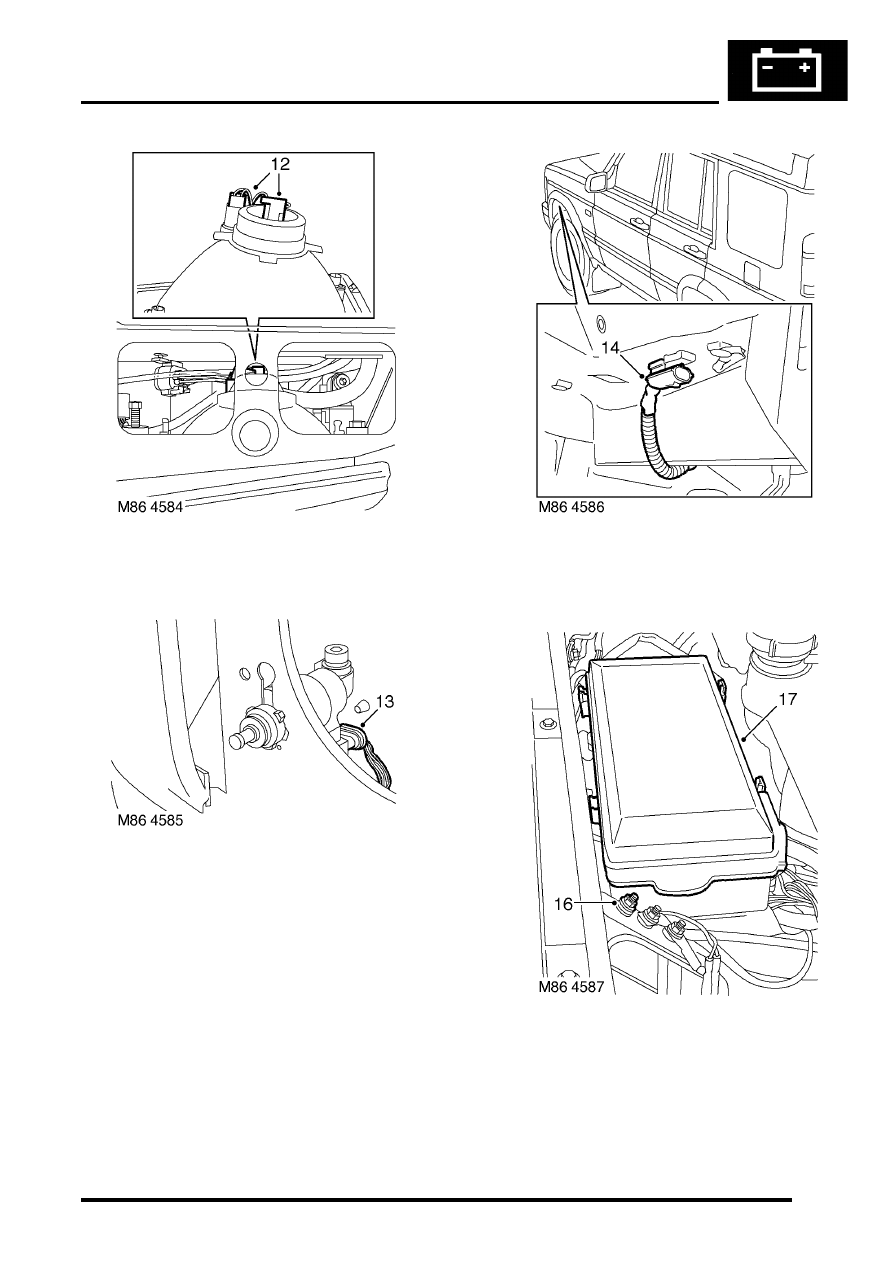
12. Disconnect multiplugs from headlamp and
sidelamp.
13. Disconnect multiplug from headlamp levelling
motor.
14. Release clip securing fog lamp multiplug.
15. Withdraw harness to engine compartment fuse
box.
16. Remove nut securing harness earth to body.
17. Release 4 clips and remove engine
compartment fusebox cover.
HARNESSES
86-7-18 REPAIRS
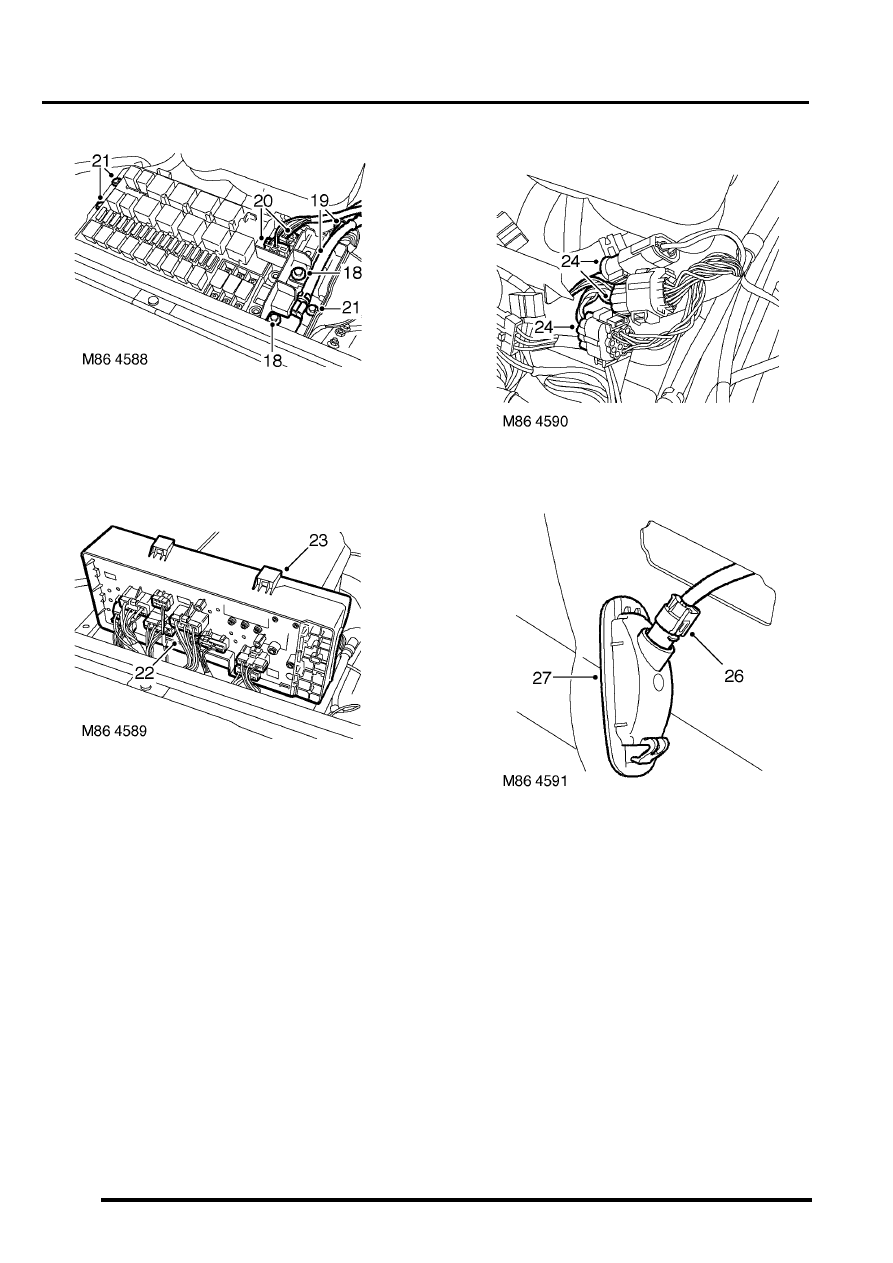
18. Remove 2 bolts securing battery and starter
lead to fuse box.
19. Release leads from fusebox.
20. Remove 2 multiplugs from fusebox front.
21. Remove 3 bolts securing fusebox to body.
22. Release fuse box and remove 9 multiplugs
from rear of fuse box.
23. Remove fuse box.
24. Disconnect 3 multiplugs from chassis harness.
25. Remove RH front indicator repeater lamp from
wing.
26. Disconnect multiplug from repeater lamp.
27. Remove repeater lamp.
28. Attach draw string to indicator lamp harness.
29. Withdraw harness to fuse box.
30. Remove draw string and secure.
Нет комментариевНе стесняйтесь поделиться с нами вашим ценным мнением.
Текст