Discovery 2. Manual — part 215
BRAKES
REPAIRS
70-35
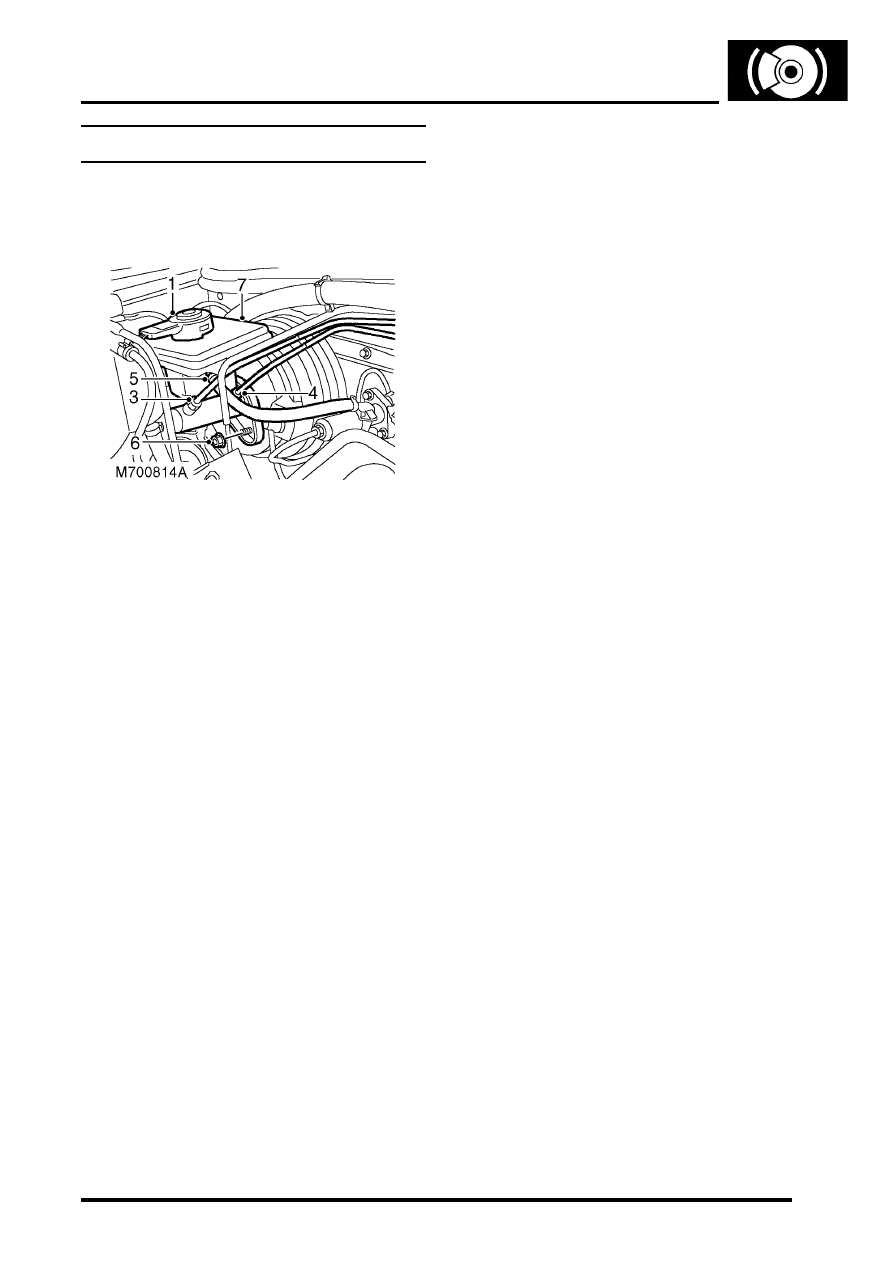
Master cylinder - brake
$% 70.30.08
Remove
1. Disconnect multiplug from fluid level switch.
2. Position cloth under master cylinder to absorb
spilled fluid.
CAUTION: Brake fluid will damage paint
finished surfaces. If spilled, immediately
remove fluid and clean area with water.
3. Disconnect secondary system pipe union from
master cylinder.
4. Disconnect primary system pipe union from
master cylinder.
5. Manual gearbox only: Release clip and
disconnect clutch fluid supply hose from
reservoir.
CAUTION: Always fit plugs to open
connections to prevent contamination.
6. Remove 2 nuts and washers securing master
cylinder to servo.
7. Remove master cylinder.
Refit
1. Clean master cylinder and servo mating
surfaces.
2. Align push rod and position master cylinder to
servo.
3. Fit nuts and washers securing master cylinder
to servo and tighten to 25 Nm (18 lbf.ft).
4. Connect primary and secondary brake pipes,
and tighten unions to 25 Nm (18 lbf.ft).
5. Manual gearbox only: Connect clutch fluid
hose to reservoir, secure with clip.
6. Connect fluid level switch multiplug.
7. Bleed brake system using TestBook/T4.
BRAKES
70-36
REPAIRS
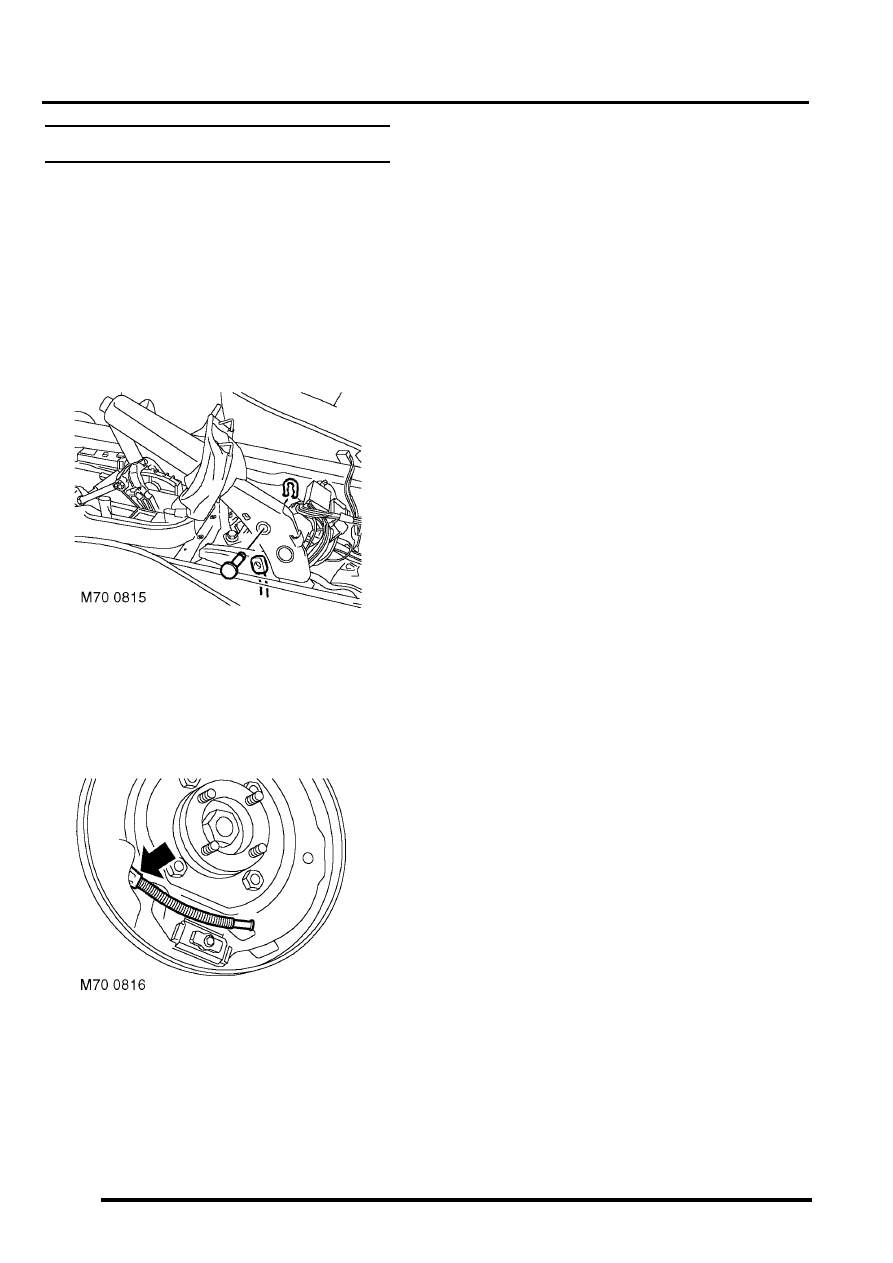
Cable - handbrake
$% 70.35.25
Remove
REPAIRS, Console - centre - automatic
models.
REPAIRS, Console - centre - manual
models.
2. Remove clip and clevis pin securing cable to
hand brake lever.
3. Remove brake shoes from hand brake
assembly.
BRAKES, REPAIRS, Brake shoes -
4. From below the vehicle, pull handbrake cable
through transmission tunnel.
5. Release handbrake cable from backplate.
Refit
1. Fit and secure handbrake cable to backplate.
2. Position hand brake cable through
transmission tunnel.
3. Fit brake shoes to hand brake assembly.
BRAKES, REPAIRS, Brake shoes -
4. Align cable to hand brake lever and secure with
clip and clevis pin.
5. Fit centre console.
REPAIRS, Console - centre - automatic
models.
REPAIRS, Console - centre - manual
models.
6. Adjust handbrake.
BRAKES
REPAIRS
70-37
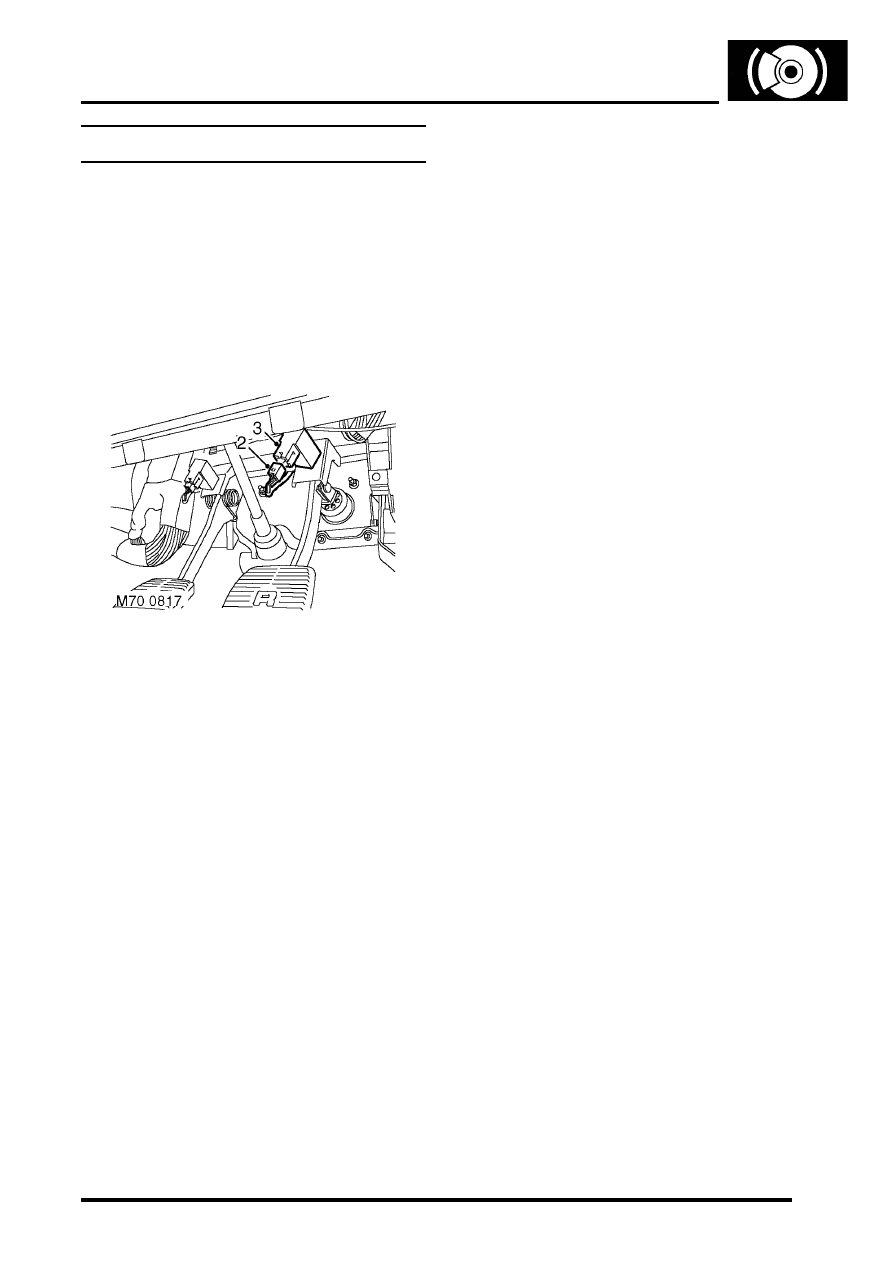
Switch - brake light
$% 70.35.42
The brake switch is set automatically during fitment.
If the setting is disturbed, the switch can be reset by
depressing the brake pedal and pulling the plunger
out of the switch body, until it contacts the pedal.
Remove
1. Remove 3 fasteners and move drivers side
lower closing panel aside.
2. Disconnect multiplug from brake light switch.
3. Remove brake light switch from pedal bracket.
Refit
1. Engage switch fully into pedal bracket location
and connect multiplug.
2. Position lower closing panel and secure with
fasteners.

BRAKES
70-38
REPAIRS
Brake pads - front
$% 70.40.02
WARNING: Brake pads must be renewed in axle
sets only, otherwise braking efficiency may be
impaired.
Remove
1. Raise front of vehicle.
WARNING: Do not work on or under a
vehicle supported only by a jack. Always
support the vehicle on safety stands.
2. Remove road wheel(s).
3. Remove lower guide pin bolt from caliper and
pivot caliper housing upwards.
4. Remove 2 brake pads from caliper carrier.
Shims are part of the brake pads.
Refit
1. Rotate disc by hand and scrape all scale and
rust from around edge of disc.
2. Scrape rust from pad locating surfaces on
caliper.
3. Clean dust from calipers using brake cleaning
fluid.
WARNING: Do not use compressed air to
clean brake components. Dust from friction
materials can be harmful if inhaled.
4. Using tool LRT-70-500, press caliper pistons
fully into bores. Ensure that displaced fluid
does not overflow from reservoir.
5. Fit brake pads with chamfer towards leading
edge of disc.
6. Lower caliper housing over pads.
7. Ensure flats on guide pins locate with lugs on
caliper housing. fit new pivot bolt and tighten to
30 Nm (22 lbf.ft).
8. Fit road wheel(s) and tighten nuts to 140 Nm
(103 lbf.ft).
9. Remove stand(s) and lower vehicle.
10. Depress brake several times to set pad to disc
clearance.
11. Check and top-up brake fluid.
Нет комментариевНе стесняйтесь поделиться с нами вашим ценным мнением.
Текст