Discovery 2. Manual — part 141
TRANSFER BOX - LT230SE
OVERHAUL
41-67
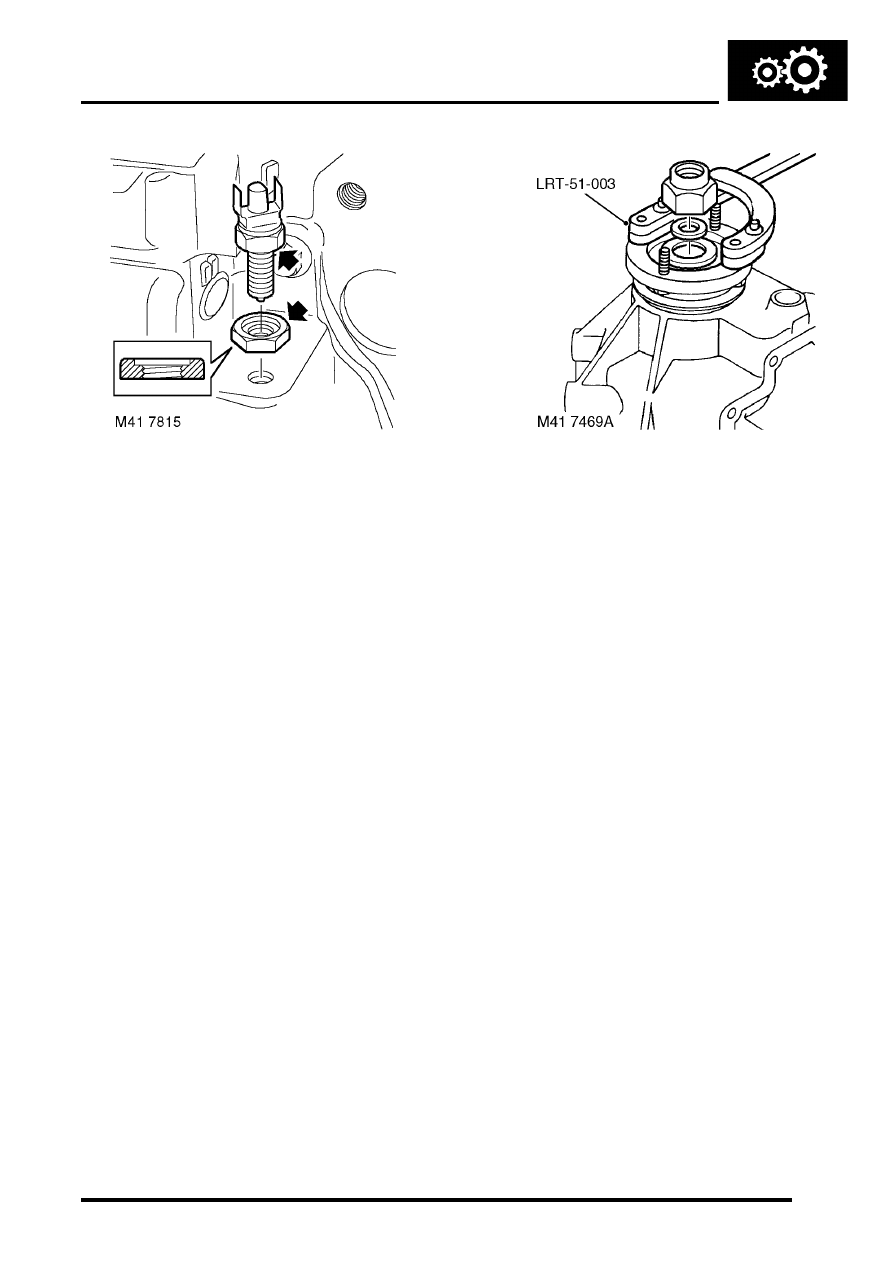
31. Clean threads of differential lock warning lamp
switch(es).
32. Uo to 03 Model year: Fit nut to switch head
with counterbore positioned towards switch
head. The nut acts as a spacer to ensure
that switch setting is correct. Always
ensure that nut is fully tightened to switch
head (no gap).
33. Uo to 03 Model year: Apply sealant, Part No.
STC 50552 to threads of differential warning
lamp switch.
34. Uo to 03 Model year: Position switch into front
output housing until nut bottoms out on
housing, tighten nut to 11 Nm (8 lbf.ft).
35. 03 Model Year onwards: Fit new aluminium
sealing washers to differential lock warning
lamp switches.
CAUTION: Ensure that replacement
washers are the same thickness as the
originals.
36. 03 Model Year onwards: Apply sealant, Part
No. STC 50552 to threads of both switches.
37. 03 Model Year onwards: Fit switches and
tighten to 25 Nm (18 lbf.ft).
38. If fitted: Operate differential lock selector lever
and check that detent ball can be felt to
positively engage/disengage with grooves in
shaft.
39. Up to 03 Model Year: Screw plug in or out until
setting is correct
40. Apply sealant, Part No. STC 4600 to mating
face of differential lock selector side cover.
41. Apply sealant, Part No. STC 50552 to threads
of side cover bolts.
42. Position differential lock selector side cover to
front output shaft housing, fit bolts and tighten
25 Nm (18 lbf.ft).
43. Fit output flange, new felt and steel washers
and new retaining nut.
44. Using tool LRT-51-003 to restrain flange,
tighten output flange nut to 162 Nm (119 lbf.ft).
TRANSFER BOX - LT230SE
41-68
OVERHAUL
Input gear/bearing
$% 41.20.60
Disassembly
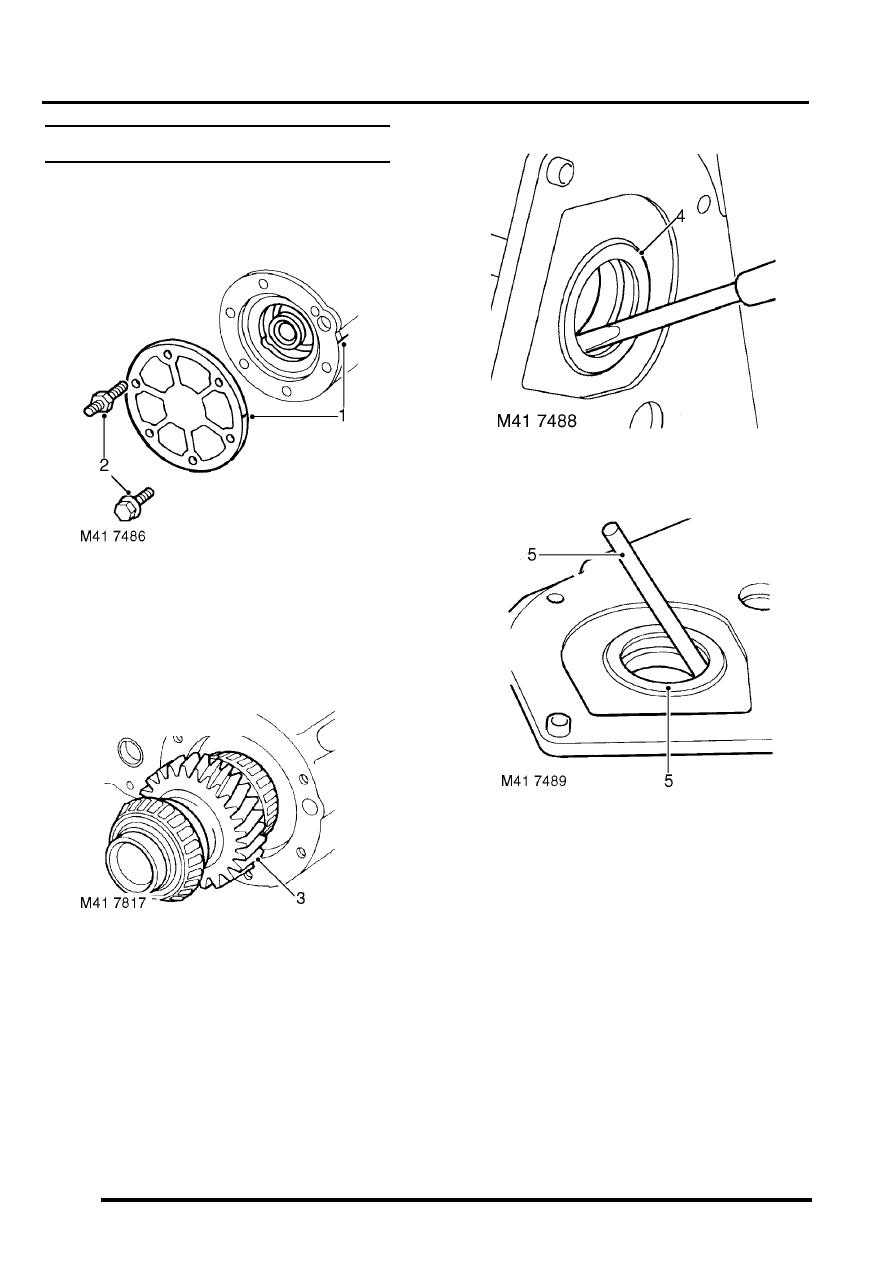
1. Make alignment marks between cover plate/
bearing housing and main casing.
2. Remove 5 bolts and stud nut securing cover/
bearing housing to main casing. Remove cover
and bearing housing.
3. Remove input gear assembly.
4. Remove and discard oil seal from main casing.
5. Drift out bearing track from main casing.
TRANSFER BOX - LT230SE
OVERHAUL
41-69
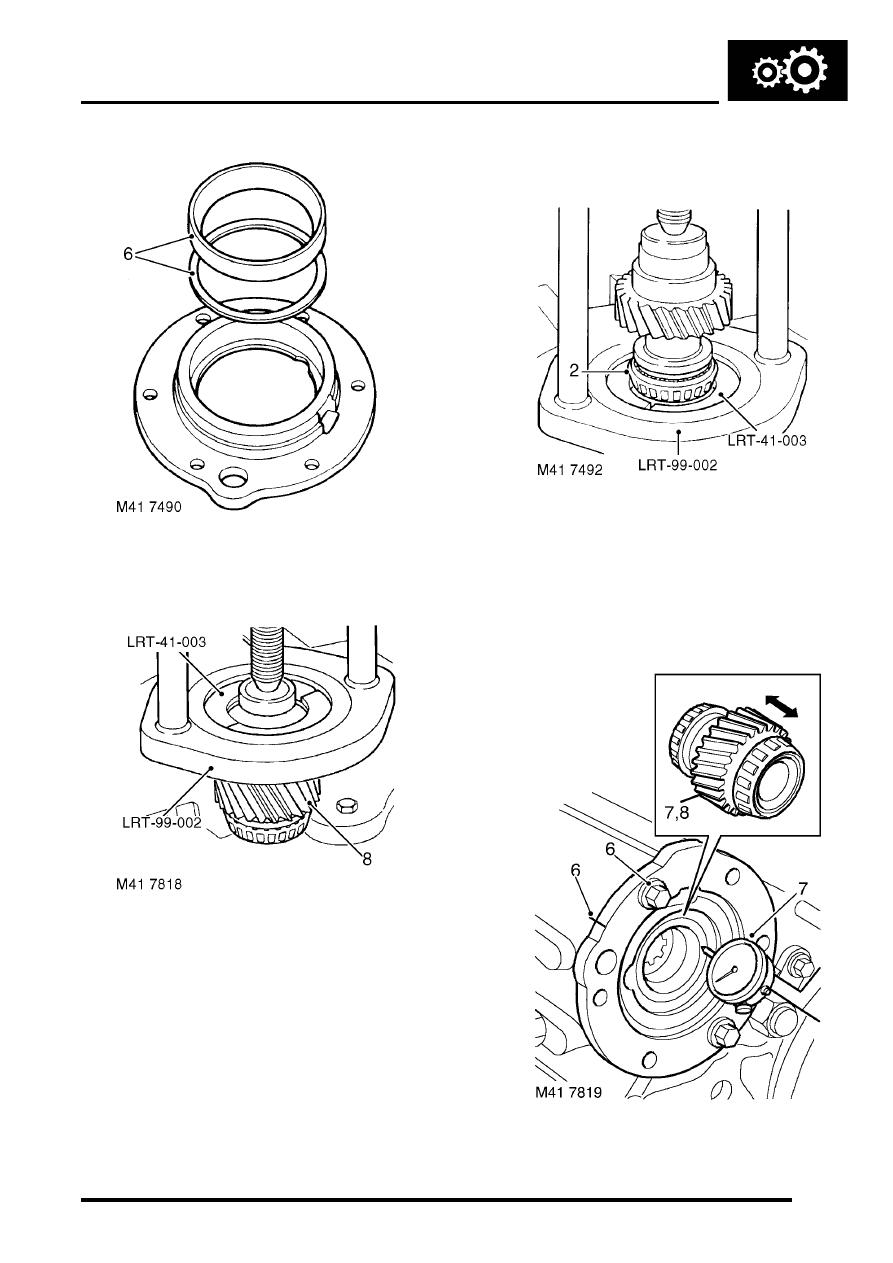
6. Drift out bearing track from housing and collect
selective shim.
7. Position tool LRT-99-002 to vice.
8. Assemble tool LRT-41-003 to bearing, position
input gear to hand press and remove bearing.
9. Repeat procedure for remaining bearing.
Reassembly
1. Clean input gear, cover/bearing housing and
main casing.
2. Using tool LRT-99-002 and LRT-41-003 fit
new bearings to input gear.
3. Using a suitable mandrel, fit bearing track to
main casing.
4. Fit a 3.15 mm (0.12 in) thick shim to bearing
housing and using a suitable mandrel fit
bearing track to housing.
5. Position input gear to main casing.
6. Fit bearing housing, ensuring reference marks
are aligned, secure bearing housing with 2
bolts and tighten to 25 Nm (18 lbf.ft).
TRANSFER BOX - LT230SE
41-70
OVERHAUL
7. Position dial gauge with stylus contacting input
gear, push input gear rearwards and zero
gauge.
8. Push input gear forwards and note gauge
reading.
9. Calculate thickness of shim required using the
formula - A+B+C=D where:
l
A= Thickness of installed shim - 3.15 mm
(0.12 in)
l
B= Recorded end-float.
l
C= Required pre-load - 0.05 mm (0.002 in).
l
D= Thickness of shim required.
10. If an alternative shim is required to establish
correct pre-load, fit an alternative shim. Shims
are available from 3.15 to 4.00 mm (0.12 to
0.16 in) thickness, in increments of 0.05 mm
(0.002 in).
11. Remove 2 bolts, remove bearing housing and
input gear.
12. Lubricate input gear and bearings with
recommended oil.
13. Position input gear into main casing.
14. Apply sealant, Part No. STC 4600to bearing
housing and cover.
15. Apply sealant, Part No. STC 50552 to threads
of cover bolts and stud nut.
16. Position bearing housing/cover, align reference
marks and tighten bolts and stud nut by
diagonal selection to 45 Nm (33 lbf.ft).
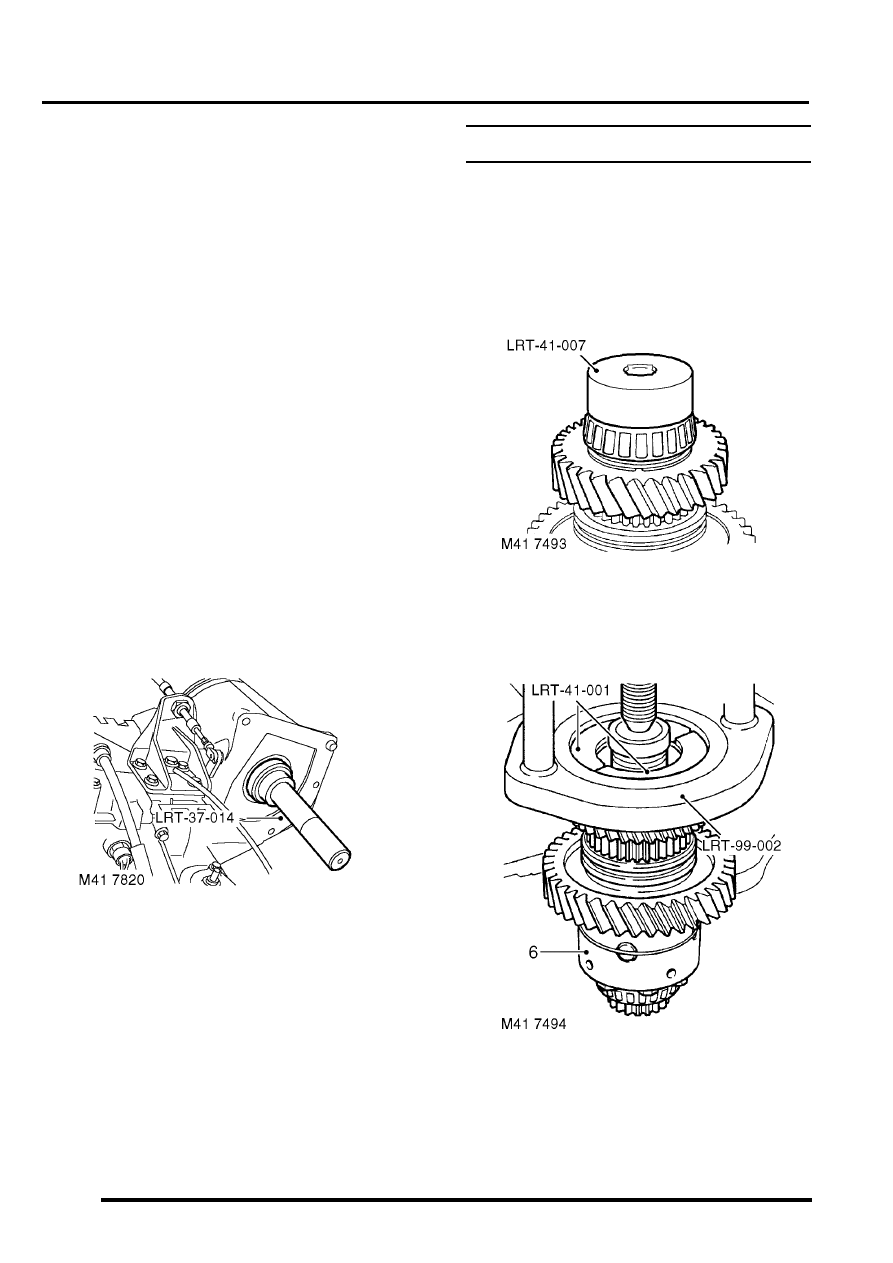
17. Using tool LRT-37-014 fit new input shaft oil
seal.
CAUTION: Oil seal must be fitted dry.
Low gear - differential
$% 41.20.62
Disassembly
OVERHAUL, Dog clutch - differential lock.
2. Secure differential in a soft jawed vice.
3. Release staking from bearing retaining nut.
4. Using tool LRT-41-007 remove and discard
bearing retaining nut.
5. Position tool LRT-99-002. to a vice.
6. Position tool LRT-41-001 around rear
differential bearing, position differential to tool
LRT-99-002 and press off bearing.
Нет комментариевНе стесняйтесь поделиться с нами вашим ценным мнением.
Текст