Discovery 2. Manual — part 309
WIPERS AND WASHERS
REPAIRS
84-29
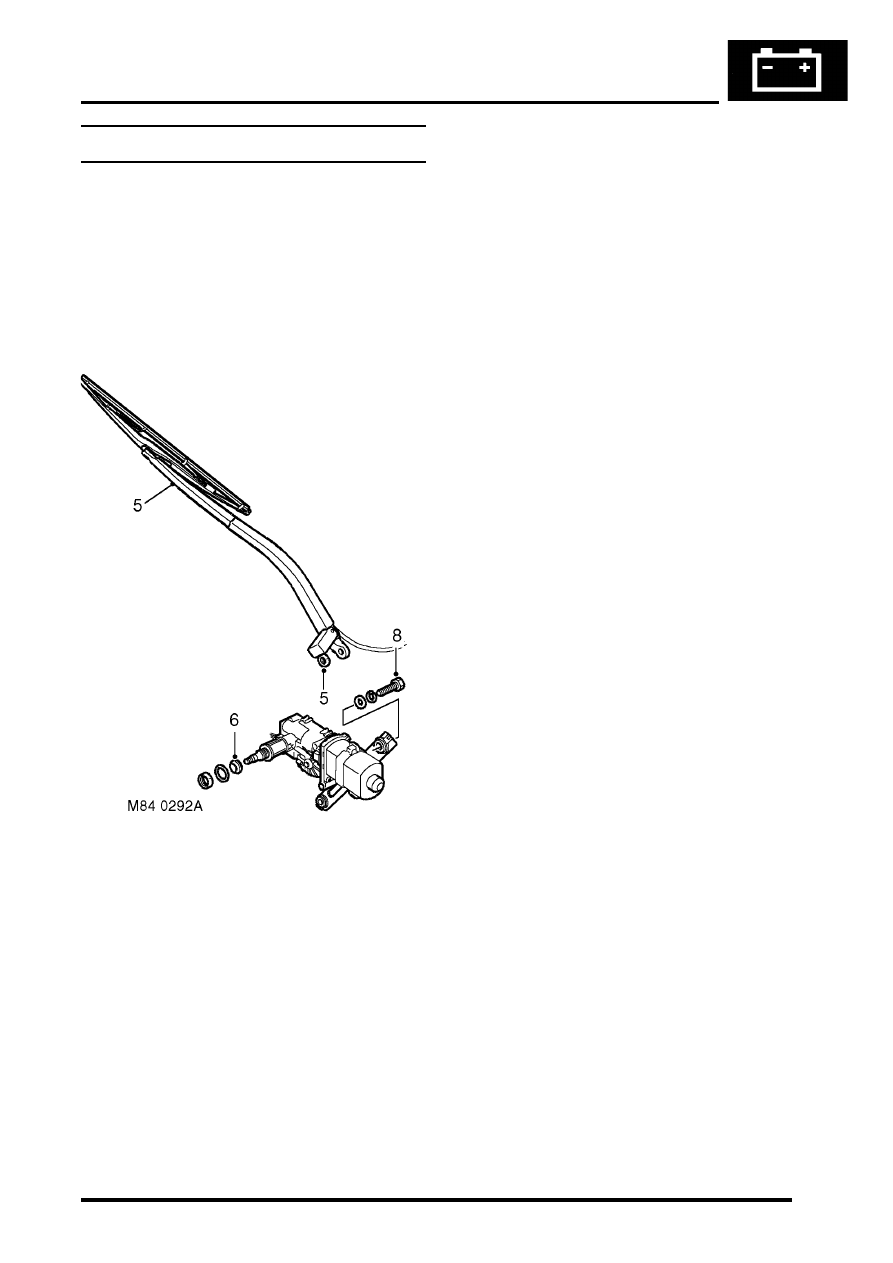
Motor - wiper - rear screen
$% 84.35.12
Remove
1. Remove spare wheel from taildoor.
2. Remove tail door trim casing.
DOORS, REPAIRS, Trim casing - tail
3. Remove tail door water shedder.
4. Disconnect washer tube
5. Raise nut cover, remove nut and release wiper
arm.
6. Remove spindle nut and flat washer and
discard rubber seal.
7. Disconnect taildoor harness multiplug from
wiper motor.
8. Remove 2 bolts securing wiper motor to tail
door.
9. Remove wiper motor.
Refit
1. Position wiper motor to door and secure with
bolts.
2. Connect tail door harness multiplug to wiper
motor.
3. Fit rubber seal, flat washer and spindle nut.
Tighten spindle nut to 3 Nm (2.2 lbf.ft).
4. Position wiper arm to tail door and connect
washer tube.
5. Tighten wiper arm nut to 20 Nm (15 lbf.ft) and
fit nut cover.
6. Fit tail door water shedder.
7. Fit tail door trim casing.
DOORS, REPAIRS, Trim casing - tail
8. Fit spare wheel to tail door.
WIPERS AND WASHERS
84-30
REPAIRS
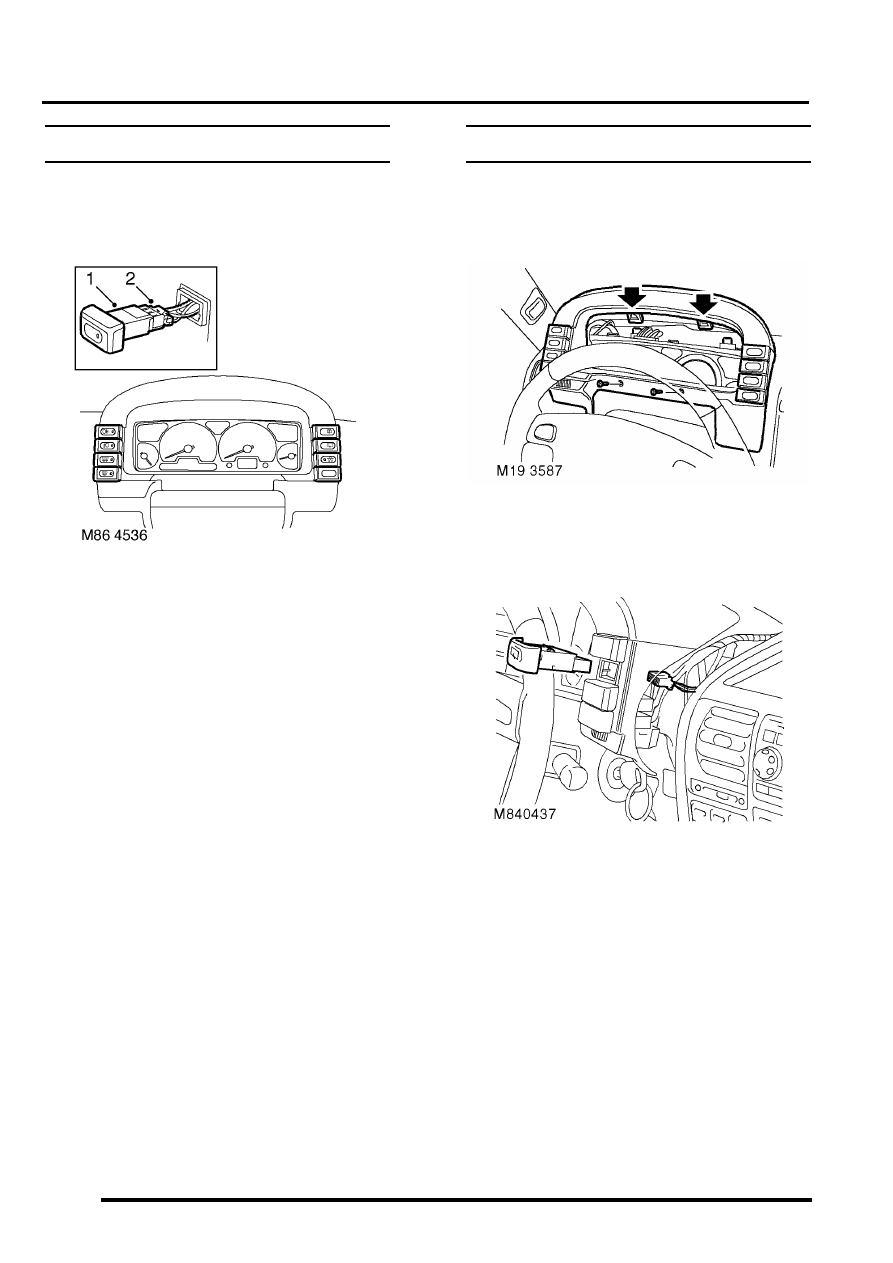
Switch - wiper - rear - up to 03MY
$% 84.35.33
Remove
1. Carefully remove switch from instrument cowl.
2. Disconnect multiplug and remove switch.
Refit
1. Position new switch and connect multiplug.
2. Carefully push switch into instrument cowl.
Switch - wiper - rear - from 03MY
$% 843533
Remove
1. Remove 2 screws securing instrument cowl to
fascia and release the cowl from the retaining
clips.
2. Disconnect multiplug from the rear wiper
switch.
3. Remove the rear wiper switch from the
instrument cowl.
Refit
1. Fit and secure the rear wiper switch to the
instrument cowl and connect the multiplug.
2. Fit the instrument cowl to the fascia and secure
with screws.
CHARGING AND STARTING
REPAIRS
86-1-1
CHARGING AND STARTING
REPAIRS
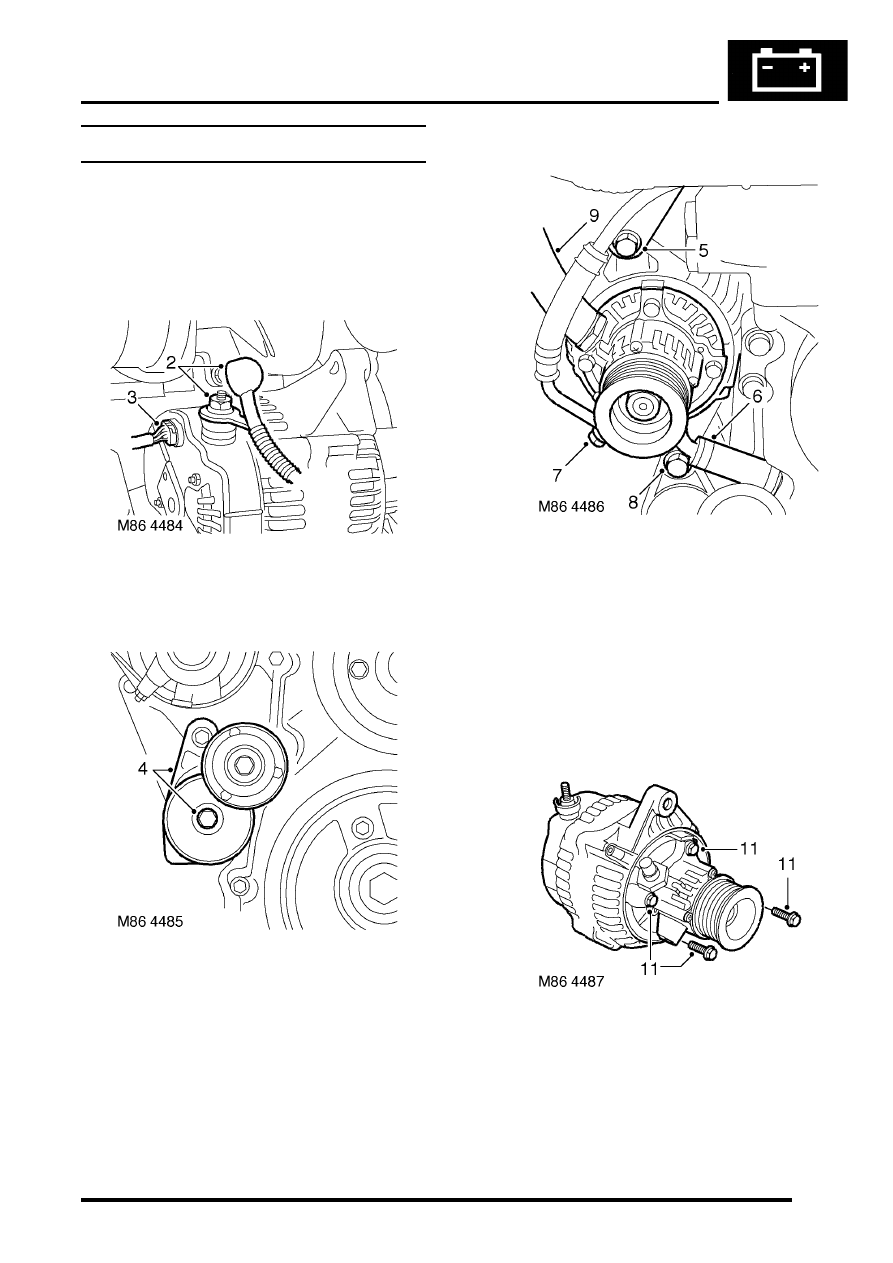
Alternator - diesel
$% 86.10.02
Remove
1. Remove auxiliary drive belt.
REPAIRS, Belt - auxiliary drive.
2. Release cover and remove nut securing lead
to alternator.
3. Disconnect alternator multiplug.
4. Remove bolt (LH thread) and remove auxiliary
drive belt tensioner.
5. Remove bolt securing support stay to
alternator.
6. Release clip and disconnect oil drain hose from
vacuum pump.
7. Disconnect vacuum pump oil supply pipe from
cylinder head and discard 'O' ring.
8. Remove bolt securing alternator and release
from mounting bracket.
9. Disconnect vacuum hose from vacuum pump.
10. Remove alternator. Take care not to damage
radiator cooling fins.
11. Remove 4 bolts, and remove vacuum pump
from alternator.
CAUTION: Always fit plugs to open
connections to prevent contamination.
CHARGING AND STARTING
86-1-2
REPAIRS
Refit
1. Clean mating faces of alternator and vacuum
pump.
2. Fit vacuum pump to alternator and tighten
bolts to 8 Nm (6 lbf.ft).
3. Position alternator to engine and connect
multiplug.
4. Connect vacuum hose and oil drain hose to
vacuum pump and secure clips.
5. With assistance align alternator to mounting
bracket and fit but do not tighten bolt.
6. Fit bolt securing support stay to alternator and
tighten to 25 Nm (18 lbf.ft) .
7. Tighten bolt securing alternator to mounting
bracket to 45 Nm (33 lbf.ft).
8. Using new 'O' ring, connect oil supply pipe to
cylinder head and tighten to 10 Nm (7 lbf.ft).
9. Connect lead to alternator and tighten nut to 6
Nm (4.4 lbf.ft).
10. Fit auxiliary drive belt tensioner and tighten bolt
to 50 Nm (37 lbf.ft).
11. Fit auxiliary drive belt.
Нет комментариевНе стесняйтесь поделиться с нами вашим ценным мнением.
Текст