Discovery 2. Manual — part 651
EXTERIOR FITTINGS
REPAIRS
76-2-3
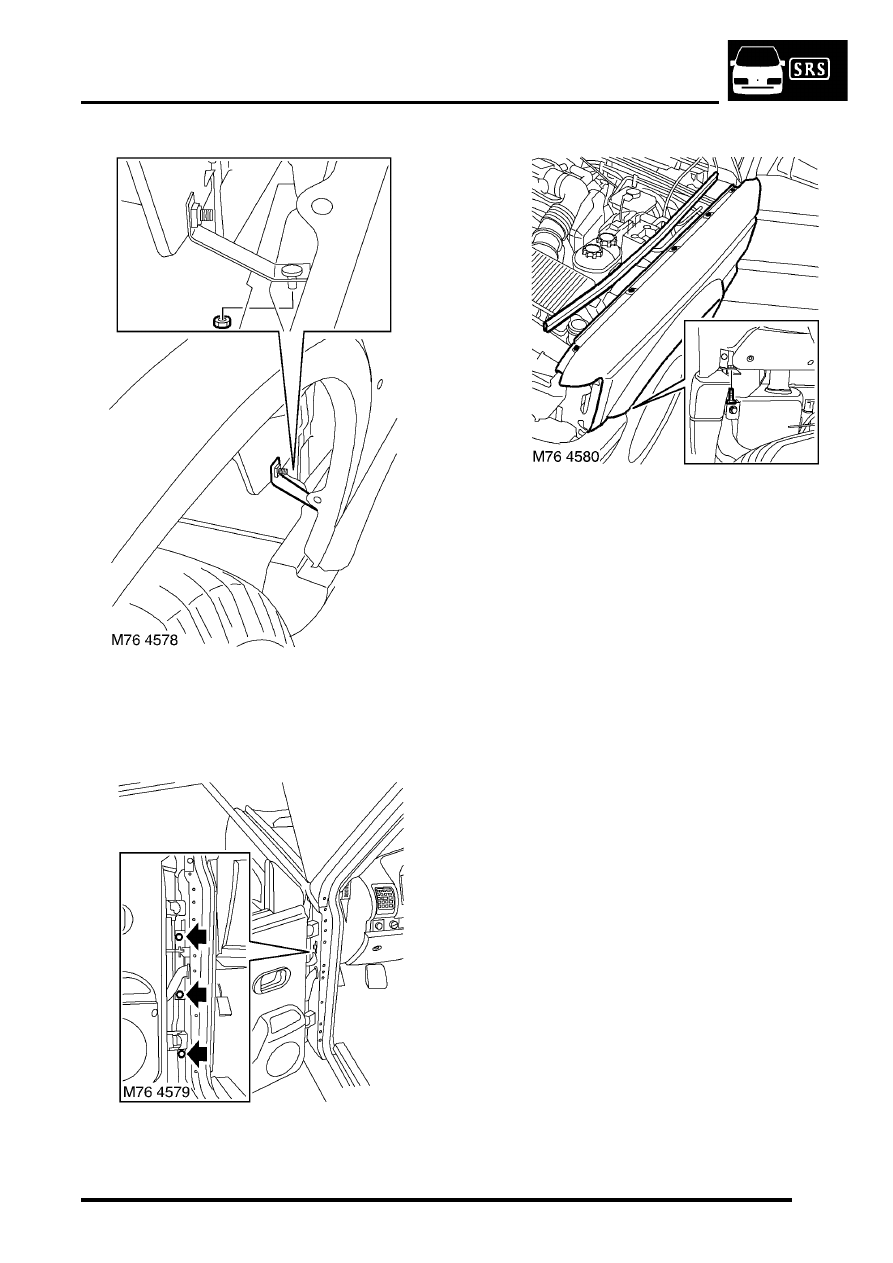
6. Remove bolt securing front wing lower support
bracket to the body.
7. Remove nut securing sill finisher to the front
wing lower support bracket.
8. Remove 3 bolts securing front wing rear edge
to the body and collect the bracket.
9. Remove bonnet sealing rubber from the front
wing flange.
10. Remove bolt securing front wing to the front
support bracket.
11. Remove 5 bolts securing front wing to the body
and remove the front wing.
NOTE: Do not carry out further dismantling if
component is removed for access only.
12. Remove nut securing lower support bracket to
the front wing and remove the bracket.
13. Remove the front wing wheel arch finisher.
Refit
1. Clean front wing body mounting brackets.
2. Fit and secure the front wheel arch finisher to
the front wing.
3. Position lower support bracket to the front wing,
fit nut and tighten to 8 Nm (6 lbf.ft).
4. Position front wing to body, fit bracket and bolts
but do not tighten at this stage.
5. Check and adjust alignment of the front wing to
the bonnet and door.
6. Tighten the front wing retaining bolts to 8 Nm (6
lbf.ft).
7. Fit bonnet sealing rubber to the front wing
flange.
8. Fit bolt securing lower support bracket to the
body and tighten to 8 Nm (6 lbf.ft).
9. Fit nut securing sill finisher to the front wing
lower support bracket and tighten to 8 Nm (6
lbf.ft).
10. Fit bolt securing front wing to the front support
bracket and tighten to 8 Nm (6 lbf.ft).
11. Fit side repeater lamp to the front wing and
connect the multiplug.
EXTERIOR FITTINGS
76-2-4
REPAIRS
12. Fit front wheel arch liner extension panel to the
front bumper and secure with screws.
13. Fit and tighten screw securing front wheel arch
liner extension panel to the inner wing.
14. Fit the front wheel arch liner.
15. Fit the headlamp assembly.
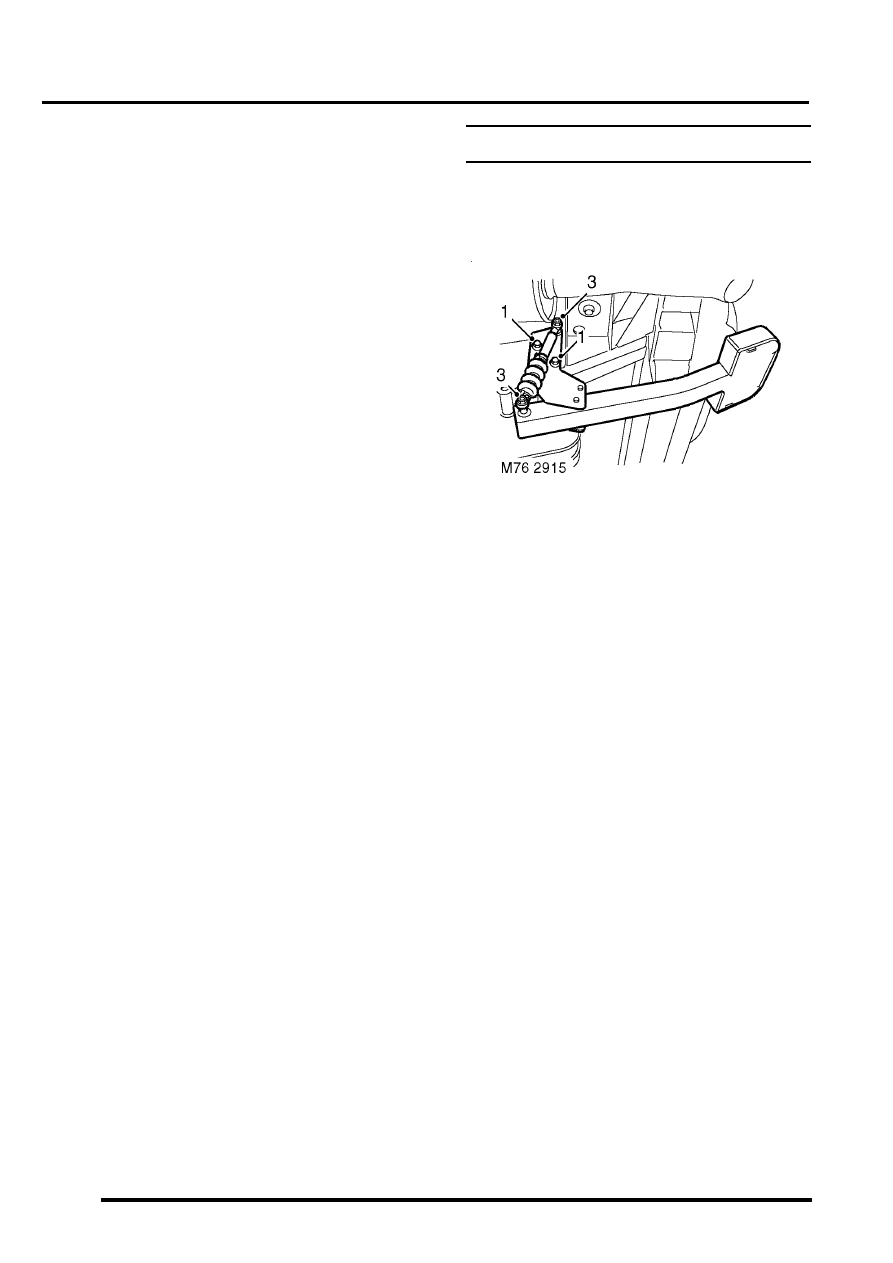
Rear folding step
$% 76.10.41
Remove
1. Remove 2 bolts securing step and damper
assembly to chassis.
2. Remove step and damper assembly.
3. Remove 2 patch lock nuts securing damper to
step and discard nuts.
4. Remove damper from step.
Refit
1. Fit damper to step and secure with new patch
lock nuts. Tighten nuts to 17 Nm (13 lbf.ft).
2. Position step and damper assembly to chassis
and secure with bolts. Tighten bolts to 45 Nm
(33 lbf.ft).
EXTERIOR FITTINGS
REPAIRS
76-2-5
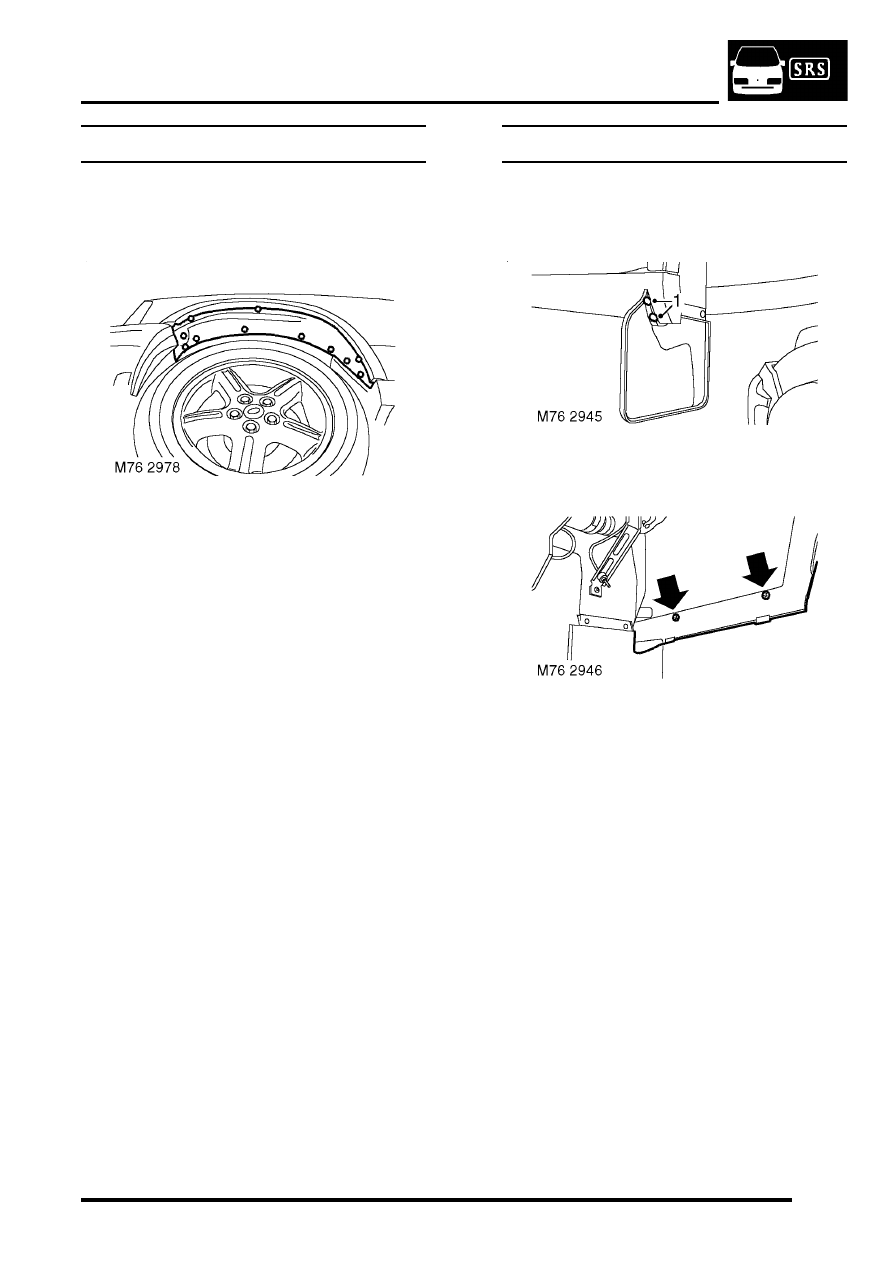
Liner - wheel arch - front
$% 76.10.48
Remove
1. Remove 3 screws securing wheel arch liner to
wing.
2. Remove 2 screws securing wheel arch liner to
wheel arch liner extension.
3. Remove centres of 6 trim clips securing wheel
arch liner to body.
4. Remove outers of trim clips.
5. Remove wheel arch liner.
Refit
1. Position wheel arch liner to body.
2. Fit trim clip outers to liner.
3. Fit centres to trim clips.
4. Fit and tighten screws securing wheel arch liner
to wing and wheel arch liner extension.
Liner - wheel arch - rear
$% 76.10.49
Remove
1. Remove 2 trim clips securing rear mud flap to
bumper side section.
2. Remove 2 screws securing bumper side
section to body.
3. Remove bumper side section.
EXTERIOR FITTINGS
76-2-6
REPAIRS
4. Drill out 2 rivets securing mud flap to wheel
arch liner.
5. Remove mud flap.
6. Drill out rivet securing wheel arch liner to
support bracket.
7. Drill out 3 rivets securing wheel arch liner to
body.
8. Remove wheel arch liner.
Refit
1. Position wheel arch liner to vehicle and secure
to body with rivets.
2. Fit rivet securing wheel arch liner to support
bracket.
3. Fit mud flap to wheel arch liner and secure with
rivets.
4. Fit rear bumper side section to body and
secure with screws.
5. Fit trim clips securing mud flaps to side section.
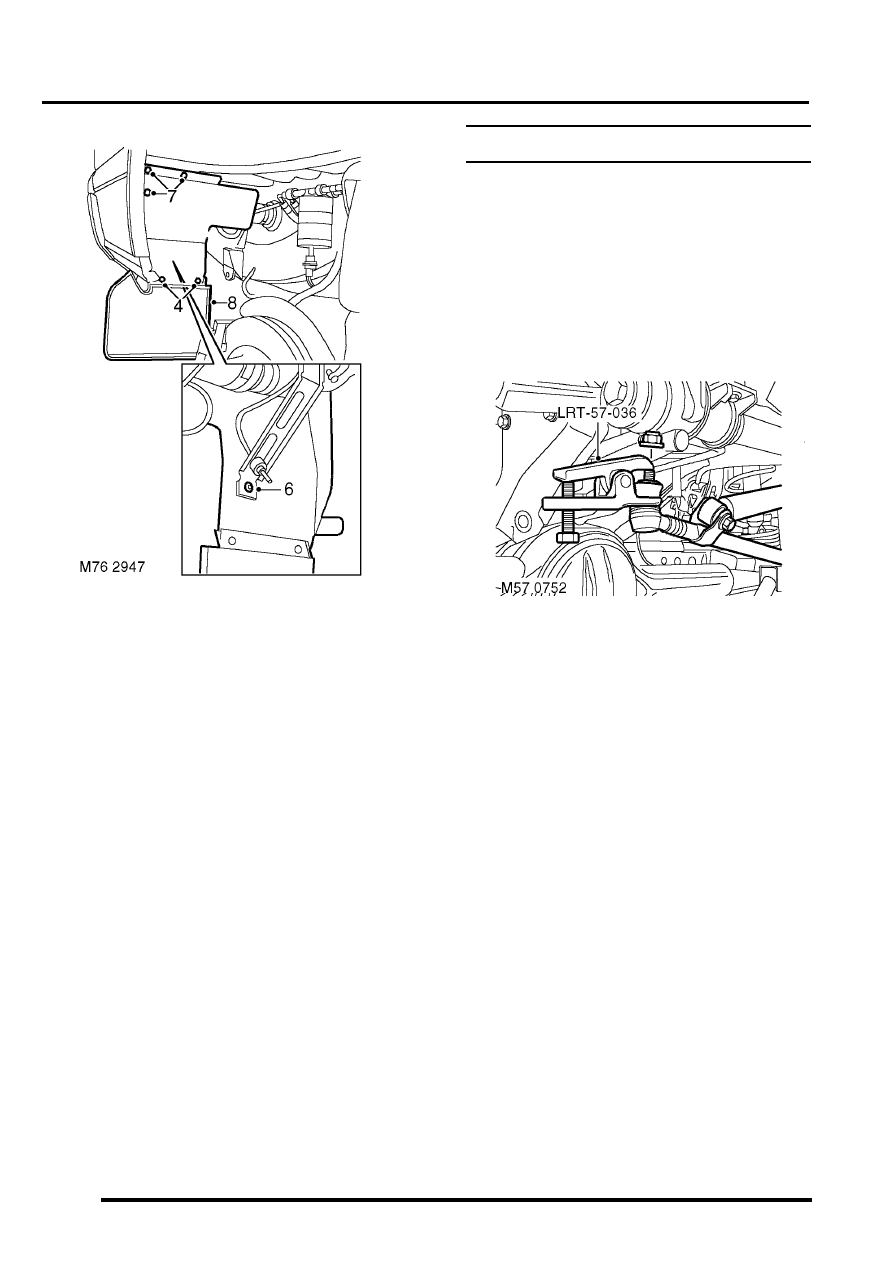
Panel - underbelly
$% 76.10.50
Remove
1. Raise front of vehicle, support underbody and
lower front axle
WARNING: Do not work on or under a
vehicle supported only by a jack. Always
support the vehicle on safety stands.
2. Remove nut securing drag link to drop arm.
3. Using tool LRT-57-036 break taper joint and
release drag link from drop arm.
4. Remove nut and bolt securing steering damper
to chassis and remove damper.
5. Remove 7 screws securing underbelly panel.
6. Remove underbelly panel.
7. Remove 7 studs securing sound deadening to
underbelly panel.
8. Remove sound deadening.
Refit
1. Position sound deadening to underbelly panel
and secure with studs.
2. Fit underbelly panel and secure with screws.
3. Position steering damper, fit nut and bolt and
tighten to 125 Nm (92 lbf.ft)
4. Fit drag link to drop arm and tighten nut to 80
Nm (59 lbf.ft).
5. Lower front of vehicle.
Нет комментариевНе стесняйтесь поделиться с нами вашим ценным мнением.
Текст