Discovery 2. Manual — part 352
HARNESSES
REPAIRS 86-7-31
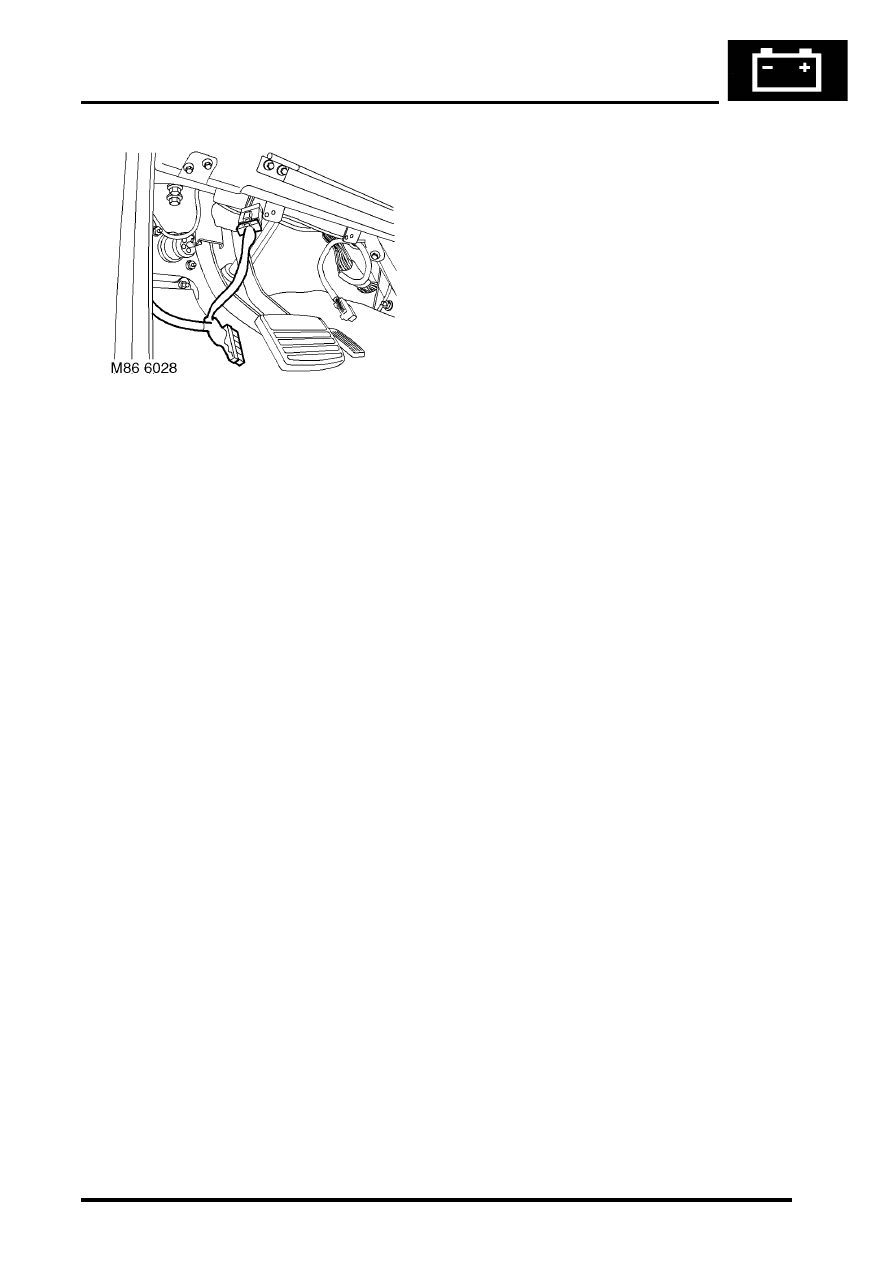
17. Disconnect DVD main harness multiplug from
vehicle fuse box link harness.
18. Remove DVD main harness from above
headlining and from fascia.
Refit
1. Fit DVD main harness to fascia and above
headlining.
2. Connect DVD main harness multiplug to
vehicle fuse box link harness.
3. Secure harness behind clamps at 'A' post and
multiplug to DVD unit mounting bracket.
4. Fit upper finisher to 'B' post.
5. Fit 'A' post lower finisher and secure with
fixings.
6. Fit seals to front and rear door apertures.
7. Fit screws to secure stowage pocket.
8. Position sun visor and connect multiplug.
9. Fit sun visor and secure with screws.
10. Fit finisher securing clips to 'A' post.
11. Position 'A' post upper finisher and connect
tweeter multiplug.
12. Fit 'A' post upper finisher.
13. Fit grab handles, tighten screws and fit screw
covers.
14. Fit DVD player unit.
REPAIRS, DVD screen/player unit.
15. Fit CD switch box.
REPAIRS, Switch box - CD/DVD player.
16. Connect battery earth lead, fit and secure
battery cover.
HARNESSES
86-7-32 REPAIRS
Harness - link - CD/DVD switch box
$% 86.70.26
Remove
1. Remove battery cover and disconnect the
battery earth lead.
2. Remove centre console.
REPAIRS, Console - centre - automatic
models.
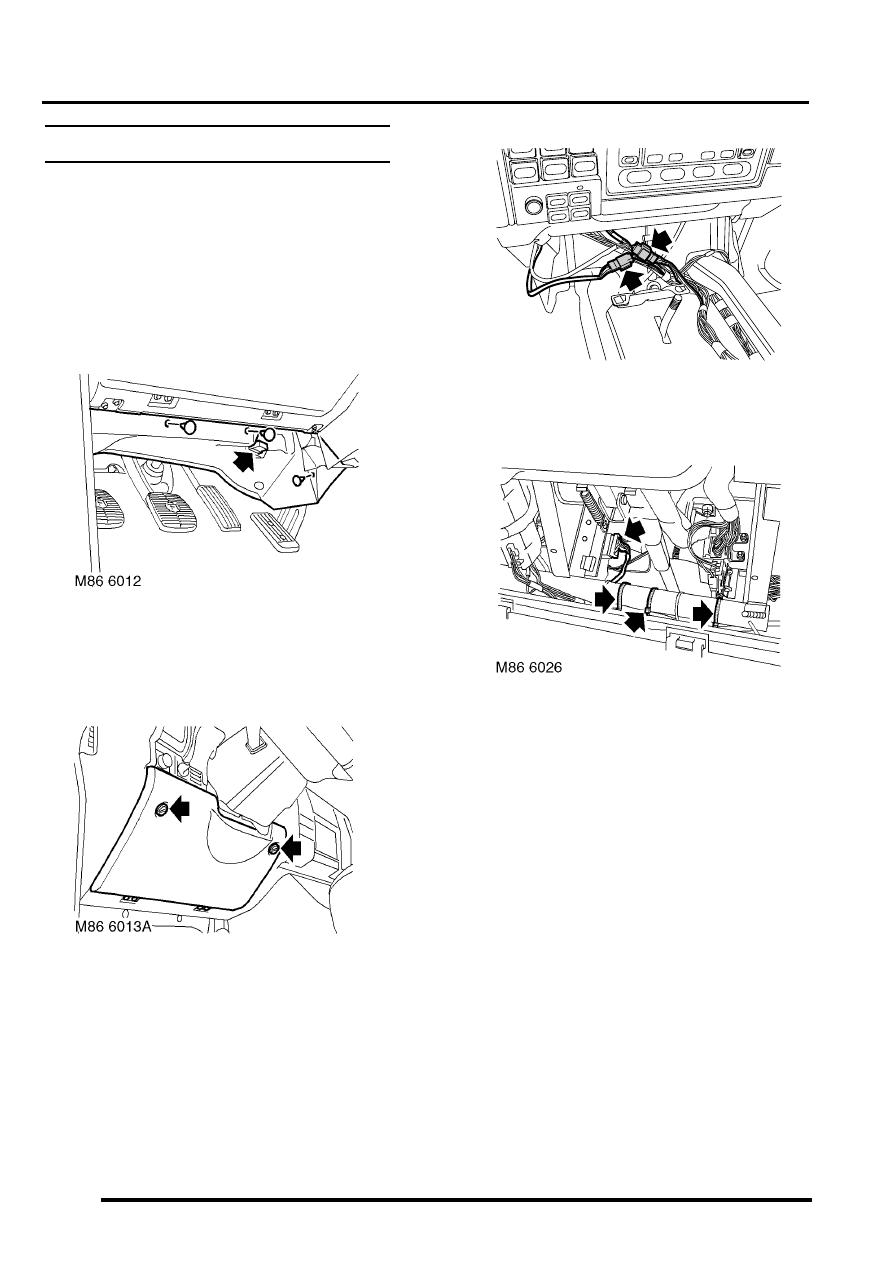
3. Remove 3 fasteners and release drivers side
lower closing panel.
4. Release diagnostic socket and remove closing
panel.
5. Rotate turnbuckles and lower fuse box access
panel.
6. Disconnect 2 CD switch box link harness
multiplugs from vehicle main harness.
7. Disconnect link harness multiplug from CD
switch box.
8. Remove 3 cable ties securing CD switch box
link harness to fascia support bracket and
remove harness.
Refit
1. Fit CD switch box link harness and connect
multiplugs to vehicle main harness.
2. Connect link harness multiplug to CD switch
box.
3. Align CD switch box link harness to fascia
support bracket and secure with cable ties.
4. Close and secure fuse box access panel.
5. Position fascia closing panel and fit diagnostic
socket.
6. Fit closing panel and secure with fasteners.
7. Fit centre console.
REPAIRS, Console - centre - automatic
models.
8. Connect battery earth lead, fit and secure
battery cover.
M86 6027
DRIVING AIDS
DESCRIPTION AND OPERATION
86-8-1
DRIVING AIDS
DESCRIPTION AND OPERATION
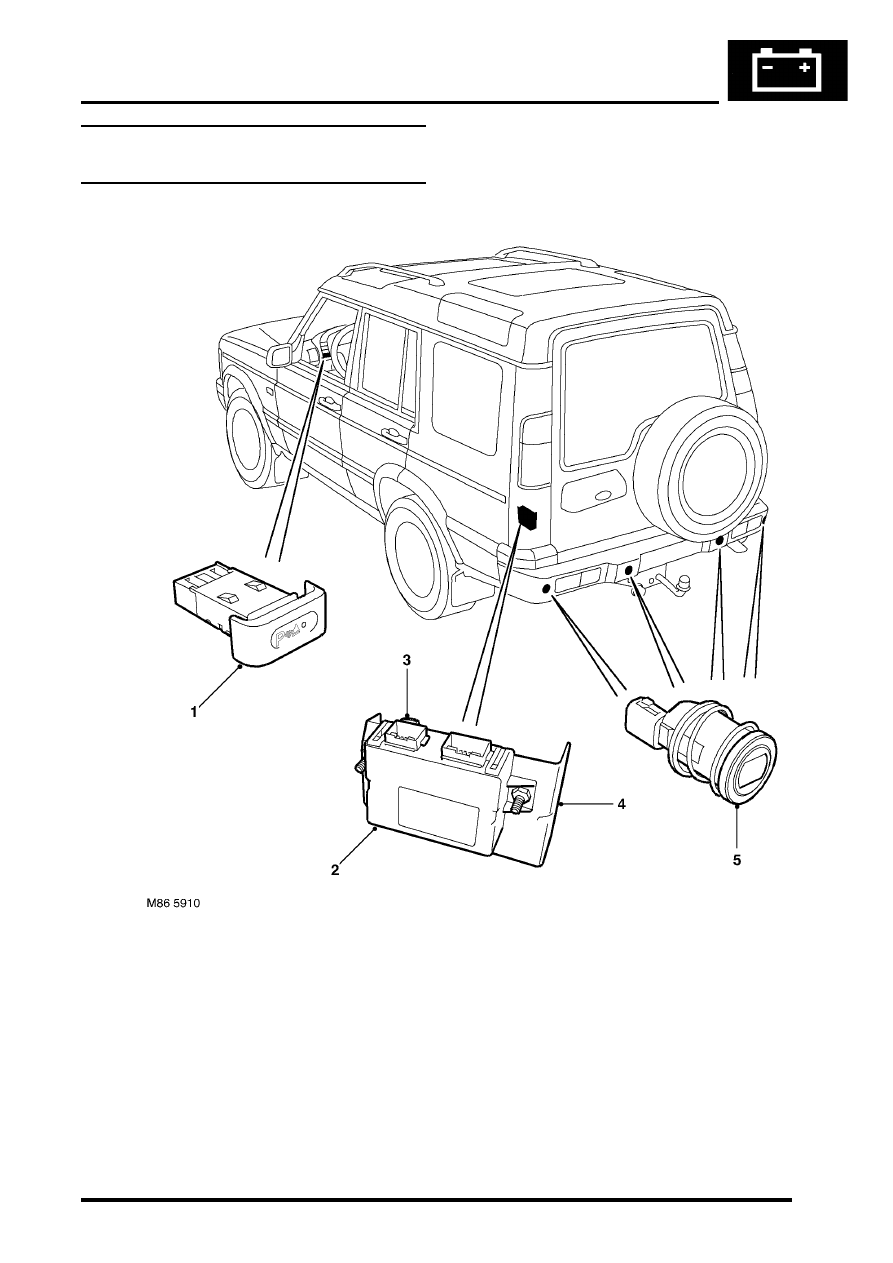
Park Distance Control – Component
Location
1 Park Distance Control (PDC) Switch
2 PDC ECU
3 PDC sounder
4 Mounting bracket
5 PDC sensor

DRIVING AIDS
86-8-2
DESCRIPTION AND OPERATION
Park Distance Control – Control Diagram
A = Hardwired
Нет комментариевНе стесняйтесь поделиться с нами вашим ценным мнением.
Текст