Discovery 2. Manual — part 268

PANEL REPAIRS
REPAIRS 77-2-33
Front valance assembly - RH
Remove
1. Disconnect battery eath lead.
2. Remove front bulkhead assembly.
3. Remove engine compartment fusebox and
related wiring.
4. Remove radiator expansion tank from
mountings and position aside.
5. Petrol models: Remove cruise control
actuator mounting bracket.
6. Diesel models: Remove EGR modulator
mounting bracket.
7. RHD models: Remove brake servo.
BRAKES, REPAIRS, Servo - brake.
8. Remove brake pipes from valance assembly.
9. Remove RH road wheel.
10. Remove RH front mud flap.
11. Remove insulation pad from engine bulkhead.
12. Remove windscreen side finisher.
Repair
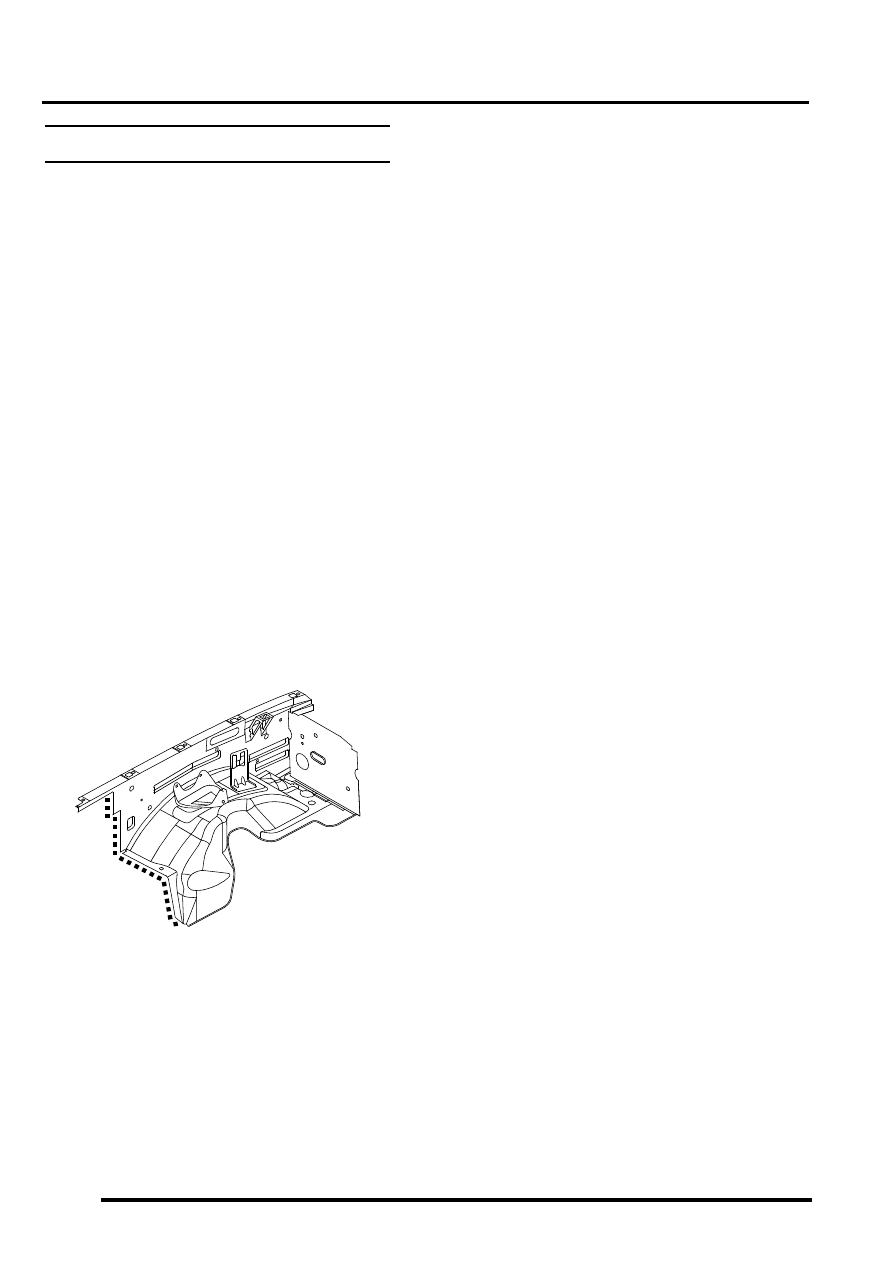
1. Remove existing panel(s), prepare panel joint
faces and install new panel(s) in accordance
with Panel Replacement Procedure. Punch or
drill holes in new panel for plug welding as
shown.
Refit
1. Fit windscreen side finisher.
2. Fit insulation pad to engine bulkhead.
3. Fit front mud flap.
4. Fit road wheel and tighten nuts to 140 Nm (103
lbf.ft).
5. Fit brake pipes to valance assembly.
6. RHD models: Fit brake servo.
7. Diesel models: Fit EGR modulator mounting
bracket.
8. Petrol models: Fit cruise control actuator
mounting bracket.
9. Fit radiator expansion tank.
10. Fit fusebox and secure wiring.
11. Fit front bulkhead assembly.
12. Connect battery leads, negative lead last.
M77 1694A
PANEL REPAIRS
77-2-34 REPAIRS
Front valance assembly - LH
Remove
1. Disconnect both battery leads, negative lead
first.
2. Disconnect leads/multiplug from alternator.
3. Remove front bulkhead assembly.
4. Remove ABS modulator unit.
BRAKES, REPAIRS, Modulator unit
5. LHD models: Remove brake servo.
BRAKES, REPAIRS, Servo - brake.
6. Remove brake pipes from valance assembly.
7. Remove PAS/ACE reservoir.
8. Models with A/C: Remove A/C pipes from
valance assembly.
9. Remove wiring harness from valance
assembly.
10. Remove LH front road wheel.
11. Remove LH front mud flap.
12. Remove insulation pad from engine bulkhead.
13. Remove windscreen side finisher.
Repair
1. Remove existing panel(s), prepare panel joint
faces and install new panel(s) in accordance
with Panel Replacement Procedure. Punch or
drill holes in new panel for plug welding as
shown.
Refit
1. Fit windscreen side finisher.
2. Fit insulation pad to engine bulkhead.
3. Fit front mud flap.
4. Fit road wheel and tighten nuts to 140 Nm (103
lbf.ft).
5. Fit wiring harness to valance assembly.
6. Models with A/C: Fit A/C pipes to valance
assembly.
7. Fit PAS/ACE reservoir.
8. Fit brake pipes to valance assembly.
9. LHD models: Fit brake servo.
BRAKES, REPAIRS, Servo - brake.
10. Fit ABS modulator unit.
BRAKES, REPAIRS, Modulator unit
11. Fit front bulkhead assembly.
12. Connect leads/multiplug to alternator.
13. Connect battery leads, negative lead last.
M77 1742
PANEL REPAIRS
REPAIRS 77-2-35
'A' post assembly
In this procedure, the front wing and the valance
outer reinforcement (rear section) are replaced in
conjunction with the 'A' post assembly. The dash side
assembly can also be replaced in this procedure if
required.
Remove
1. Disconnect both battery leads, negative lead
first.
2. Disconnect leads/multiplug from alternator.
3. Remove bonnet.
4. Remove front wing.
5. Remove RH or LH front door.
6. Remove RH or LH sill finisher.
7. Remove windscreen.
8. Diesel models: Remove ECM.
Td5, REPAIRS, Engine control module
(ECM).
9. Remove RH or LH 'A' post inner finishers and
disconnect speaker multiplug (if fitted).
10. Release sunroof drain tube and position aside.
11. Remove RH or LH front seat.
12. RH side: Remove CD autochanger.
13. Remove fascia.
14. Driver's side: Remove steering column
support bracket.
15. Remove relevant wiring from 'A' post.
16. Remove tread plate from front door aperture.
17. Release front carpet and position aside.
18. Remove front door aperture seal.
19. Remove engine bulkhead insulation.
Repair
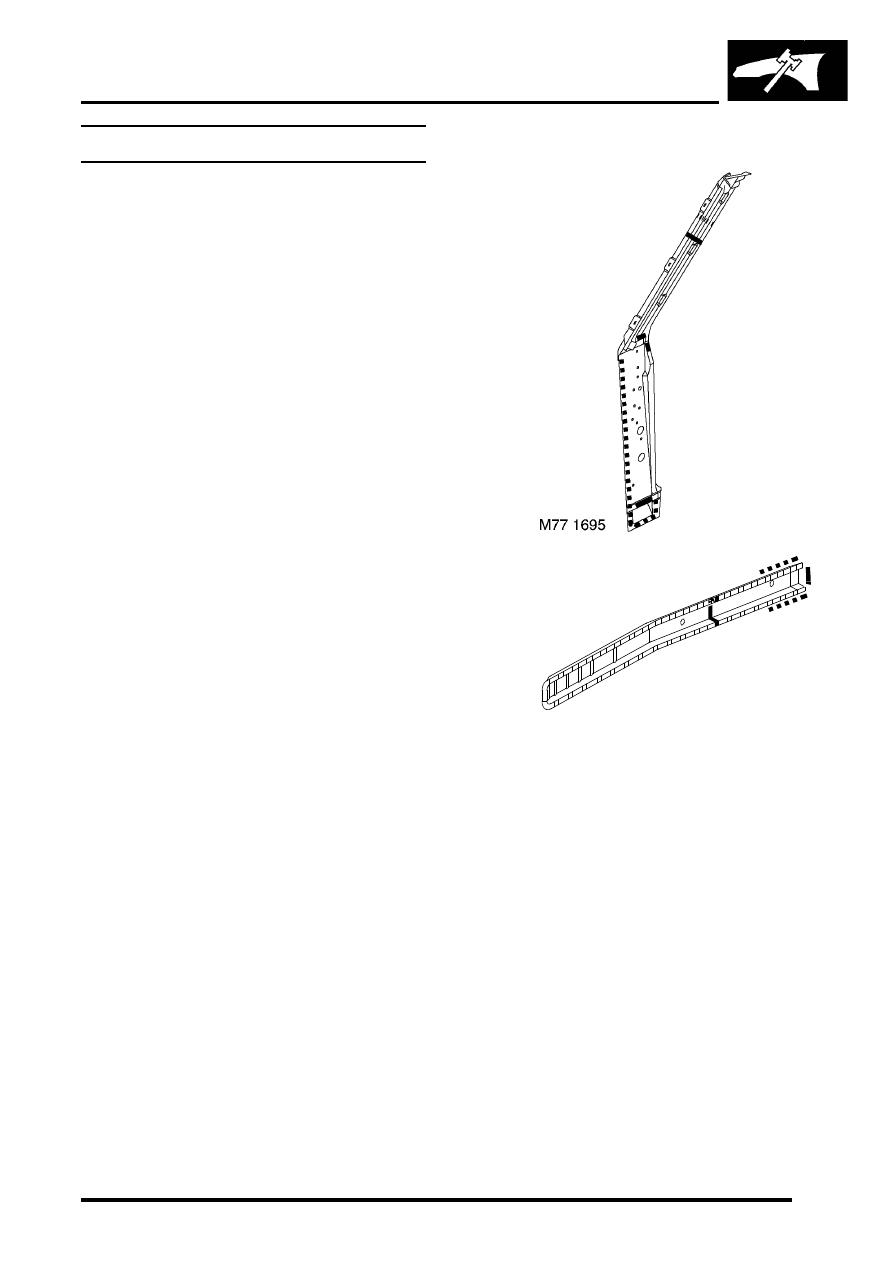
1. Remove existing panel(s), prepare panel joint
faces and install new panel(s) in accordance
with Panel Replacement Procedure. Punch or
drill holes in new panel for plug welding as
shown.
M77 1751
PANEL REPAIRS
77-2-36 REPAIRS
Refit
1. Fit insulation pad to engine bulkhead.
2. Fit front door aperture seal.
3. Position front carpet and fit tread plate to front
door aperture.
4. Fit wiring to 'A' post.
5. Driver's side: Fit steering column support
bracket.
6. Fit fascia.
7. RH side: Fit CD autochanger.
8. Fit RH or LH front seat.
9. Fit sunroof drain tube.
10. Connect multiplug to speaker (if fitted) and fit
finisher to 'A' post.
11. Diesel models: Fit ECM.
Td5, REPAIRS, Engine control module
(ECM).
12. Fit windscreen.
13. Fit sill finisher.
14. Fit front door.
15. Fit front wing.
16. Fit bonnet.
17. Connect leads/multiplug to alternator.
18. Connect battery leads, negative lead last.
Нет комментариевНе стесняйтесь поделиться с нами вашим ценным мнением.
Текст