Range Rover BORG WARNER 44-62 TRANSFER BOX. Manual — part 7

TRANSFER BOX
14
OVERHAUL
REAR OUTPUT SHAFT DRIVE FLANGE
Service repair no - 41.20.14/01
Remove
1. Remove screw securing brake drum to flange.
2. Loosen park brake drum adjusting screw.
3. Remove brake drum.
4. Using LRT-51-003 to restrain drive flange,
remove nut securing drive flange to rear output
shaft.
5. Collect washer and seal.
6. Using LRT-99-500 if necessary, remove flange
from output shaft.
Refit
1. Clean running surface of drive flange. Ensure
all traces of rubber are removed.
CAUTION: Do not use a metal scraper as
this may damage sealing surface.
2. Fit drive flange to rear output shaft.
3. Fit seal, washer and new nut to rear output
shaft.
4. Using LRT-51-003 to restrain drive flange,
tighten nut to 220 Nm. (162 lbf.ft)
5. Fit brake drum to drive flange and secure with
screw.
6. Adjust park brake drum screw.
See New
Range Rover Workshop Manual.

TRANSFER BOX
OVERHAUL
15
REAR OUTPUT SHAFT OIL SEAL
Service repair no - 41.20.54/01
Remove
1. Remove rear output shaft drive flange.
See
this section.
2. Remove dust shroud from transfer box rear
casing.
3. Using a flat bladed screwdriver free of rough
edges, ease oil seal from rear casing.
CAUTION: Do not mark sealing surface on
rear casing.
4. Remove rear output shaft oil seal.
Refit
1. Clean sealing area of rear casing and running
surface of drive flange. Ensure all traces of
rubber are removed.
CAUTION: Do not use a metal scraper as
this may damage sealing surfaces.
2. Lubricate sealing surfaces of seal with clean
gearbox oil.
3. Using LRT-41-013 fit oil seal to transfer box
rear casing.
4. Fit dust shroud to transfer box rear casing.
5. Fit rear output shaft drive flange.
See this
section.
TRANSFER BOX
16
OVERHAUL
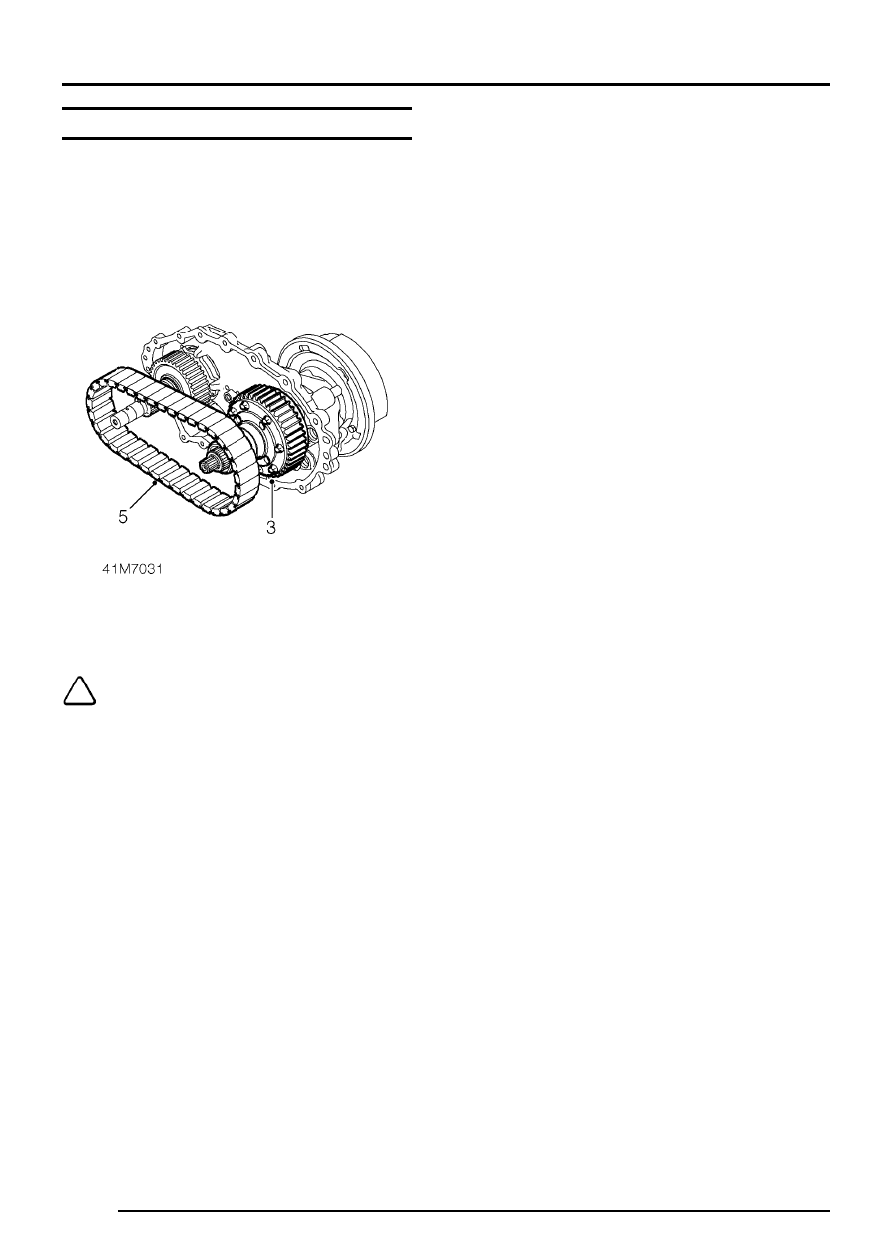
DRIVE CHAIN
Service repair no - 41.20.67/01
Remove
1. Remove rear output shaft drive flange.
See
this section.
2. Remove interlock spool.
See this section.
3. Release differential assembly from rear casing
until differential rear bearing is clear of casing.
NOTE: Ensure rear output drive shaft
moves with differential.
4. Tilt differential assembly towards drive
sprocket, take care not to bruise casing.
5. Remove drive chain from gears.
6. Position differential assembly to rest in rear
casing.
Refit
1. Position differential assembly towards drive
gear and fit drive chain to both gears.
2. Engage chain to gears and align differential
rear bearing to rear casing.
3. Engage differential rear bearing to rear casing
and output shaft to output shaft bearing.
4. Fit interlock spool.
See this section.
5. Fit rear output shaft drive flange.
See this
section.
TRANSFER BOX
OVERHAUL
17
DIFFERENTIAL UNIT
Service repair no - 41.20.13/01
Remove
1. Remove drive chain.
See this section.
2. Remove differential unit from rear output shaft.
Refit
1. Fit differential unit to rear output shaft.
2. Fit drive chain.
See this section.
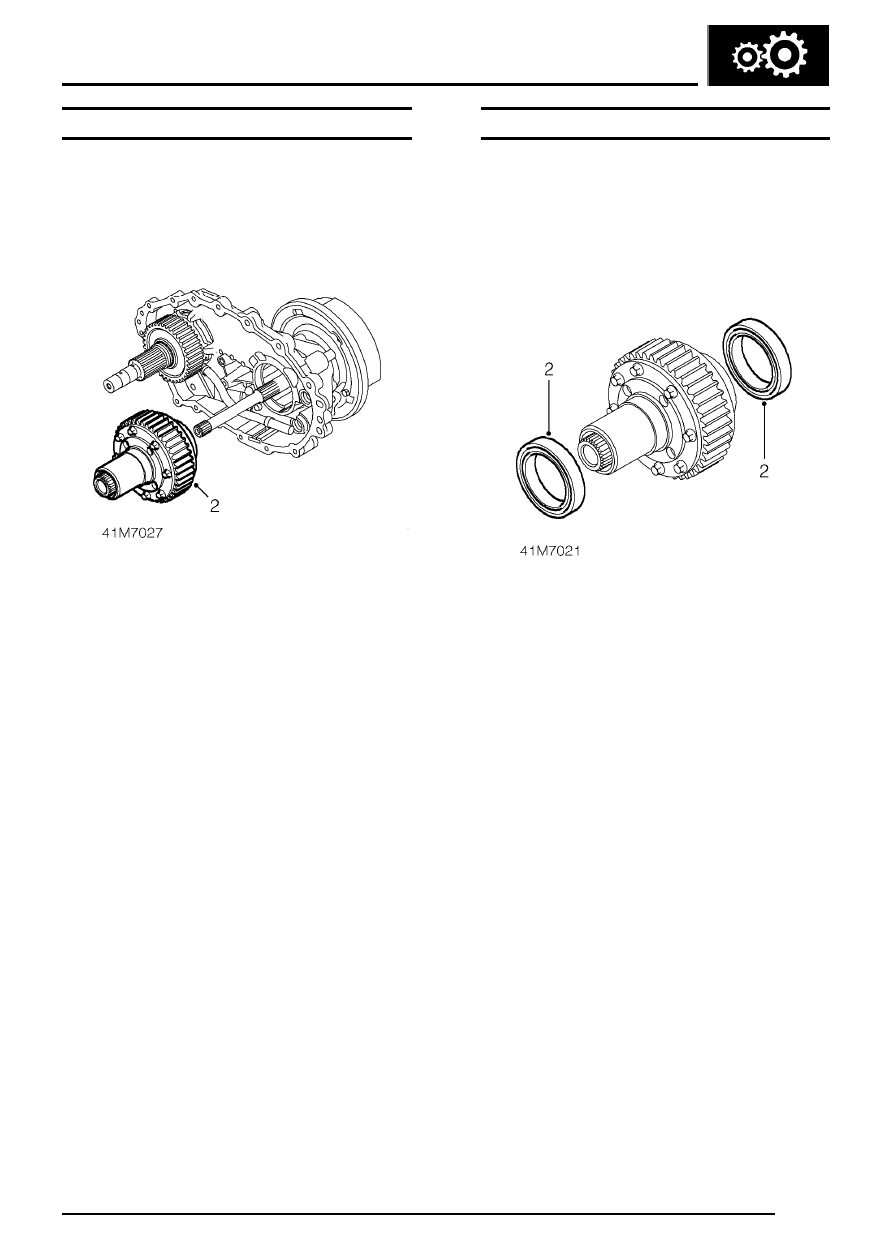
DIFFERENTIAL BEARINGS
Service repair no - 41.20.17/01
Remove
1. Remove differential unit from transfer box.
See
this section.
2. Using a suitable puller, remove 2 bearings from
differential unit.
Refit
1. Ensure bearing and differential mating faces
are clean.
2. Press bearings onto differential unit.
3. Fit differential unit to transfer box.
See this
section.
Нет комментариевНе стесняйтесь поделиться с нами вашим ценным мнением.
Текст