Ford Ranger (2022 year). Manual in english — page 6
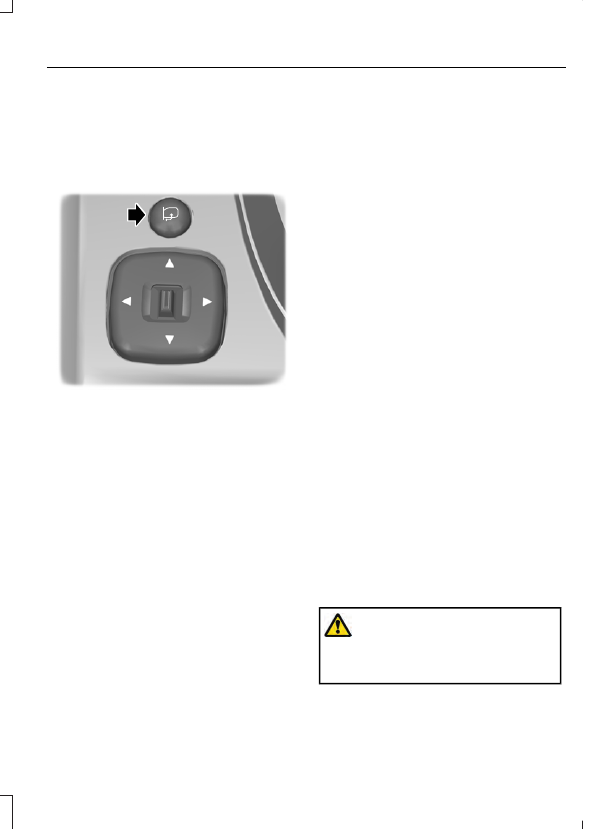
Power-Folding Mirrors
(If Equipped)
The power folding mirrors operate with the
ignition on.
Note:
The mirrors no longer operate if you
switch the ignition off.
E131482
Press the button to fold the mirrors inward.
Release the button to stop and reverse the
direction of movement, or to fold the
mirrors outward.
Loose Mirror
If you manually fold your power-folding
mirrors, they may not work properly even
after you re-position them. You need to
reset them if:
•
The mirrors vibrate when you drive.
•
The mirrors feel loose.
•
The mirrors do not stay in the folded or
unfolded position.
•
One of the mirrors is not in its normal
driving position.
To reset the power-fold feature:
1.
Push the mirrors fully forward.
2. Press the mirror folding switch and
guide the mirror to detent point, you
will hear a click at this point.
3. Let the mirror fold toward your vehicle
on its own.
4. Verify by pressing the mirror folding
switch to fold mirrors inward and back
out 2 or 3 times.
Note:
You may hear a loud noise as you
reset the power-folding mirrors. This sound
is normal. Repeat this process as needed
each time you manually fold the mirrors.
Heated Exterior Mirrors
(If Equipped)
The heated exterior mirrors will remove
ice, mist and fog. See
Signal Indicator Mirrors
(If Equipped)
The outer portion of the appropriate mirror
housing blinks when you switch on the
direction indicator.
Puddle Lamps
(If Equipped)
The lamps on the bottom part of the mirror
housing light when you use your
transmitter to unlock the doors or when
you open a door.
Blind Spot Information System
(If
Equipped)
INTERIOR MIRROR
Manual Dimming Mirror
WARNING:
Do not adjust the
mirrors when your vehicle is moving. This
could result in the loss of control of your
vehicle, serious personal injury or death.
87
Windows and Mirrors
Pull the tab below the mirror toward you
to reduce the effect of bright light from
behind.
Automatic Dimming Mirror
(If Equipped)
WARNING:
Do not adjust the
mirrors when your vehicle is moving. This
could result in the loss of control of your
vehicle, serious personal injury or death.
The mirror dims to reduce the effect of
bright light from behind. It returns to
normal when the bright light from behind
is no longer present or if you shift into
reverse (R).
Do not block the sensors on the front and
back of the mirror.
Note:
A rear center passenger or raised rear
center head restraint could prevent light
from reaching the sensor.
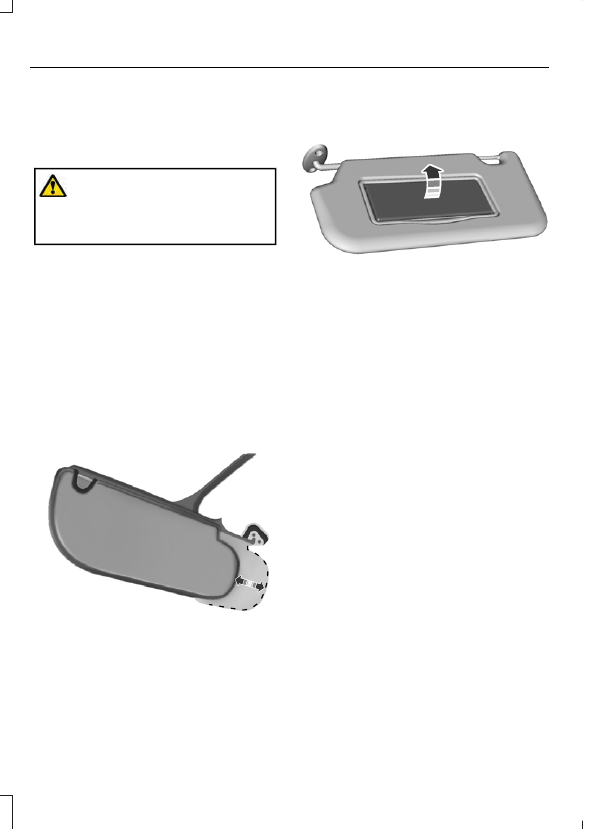
SUN VISORS
E138666
Rotate the sun visor toward the side
window and extend it rearward for extra
shade.
Illuminated Vanity Mirror
(If Equipped)
E162197
Lift the cover to switch the lamp on.
88
Windows and Mirrors
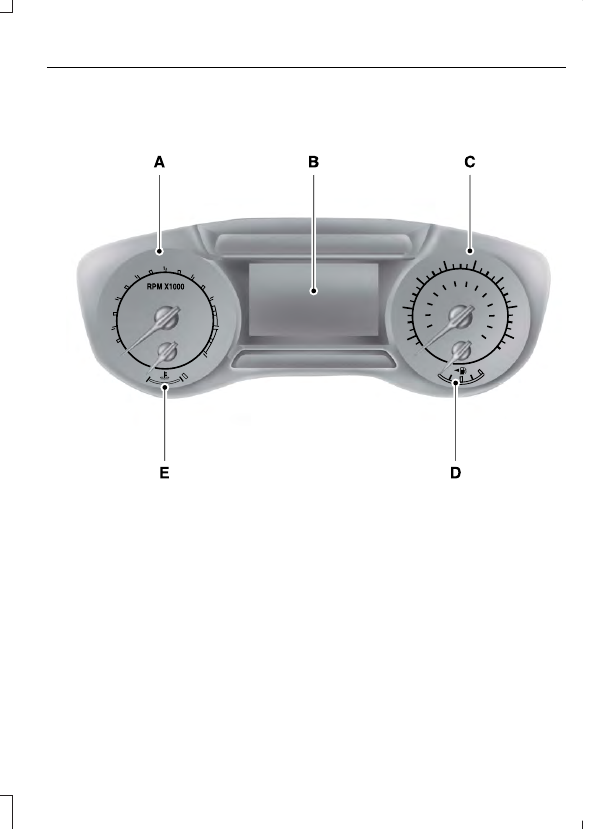
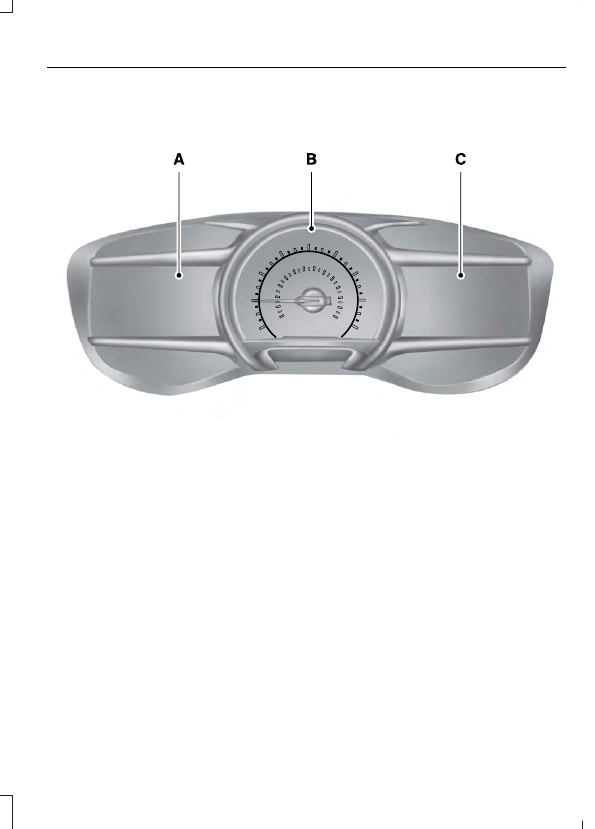
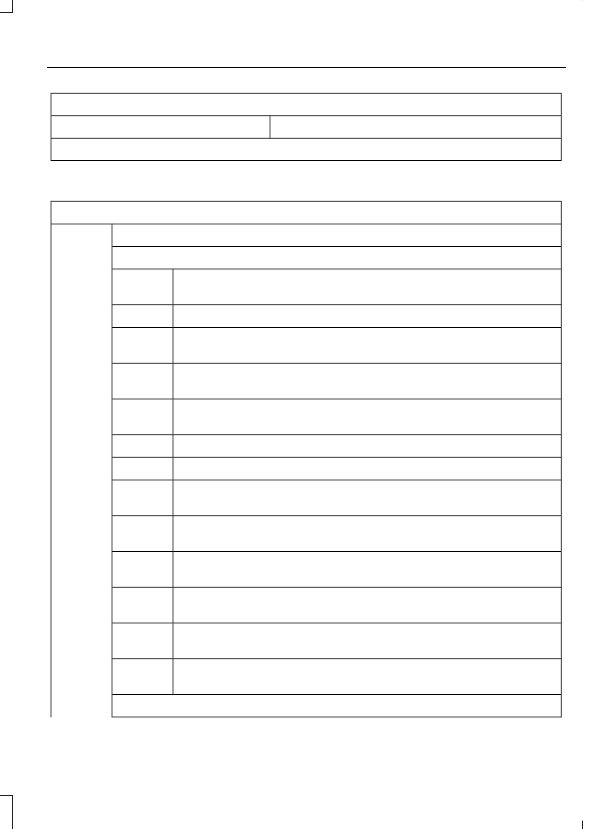
GAUGES
Type 1 and 2
E271817
Tachometer
A
Information Display (Type 2 shown Type 1 similar)
B
Speedometer
C
Fuel Gauge
D
Engine Coolant Temperature Gauge
E
Information Display
Odometer
Located in the bottom of the information
display. Registers the accumulated
distance your vehicle has traveled.
Compass
Displays the vehicle’s heading direction.
Trip Computer
89
Instrument Cluster
Vehicle Settings and Personalization
Engine Coolant Temperature
Gauge
WARNING:
Do not remove the
coolant reservoir cap when the engine is
on or the cooling system is hot. Wait 10
minutes for the cooling system to cool
down. Cover the coolant reservoir cap
with a thick cloth to prevent the
possibility of scalding and slowly remove
the cap. Failure to follow this instruction
could result in personal injury.
Indicates engine coolant temperature. At
normal operating temperature, the level
indicator will be in the normal range. If the
engine coolant temperature exceeds the
normal range, stop your vehicle as soon as
safely possible, switch off the engine and
let the engine cool.
Note:
Do not restart the engine until the
cause of overheating has been resolved.
Fuel Gauge
The fuel gauge indicates about how much
fuel is in the fuel tank.
The arrow adjacent to the fuel pump
symbol indicates on which side of your
vehicle the fuel filler door is located.
Note:
The fuel gauge may vary slightly
when your vehicle is moving or on a slope.
Low Fuel Reminder
A low fuel level reminder displays and
sounds when the distance to empty
reaches 75 mi (120 km) to empty for
MyKey, and at 50 mi (80 km), 25 mi
(40 km), 10 mi (20 km) and 0 mi (0 km)
for all vehicle keys.
Note:
The low fuel reminder can appear at
different fuel gauge positions depending on
fuel economy conditions. This variation is
normal.
90
Instrument Cluster
Type 3
E272460
Left Information Display
A
Speedometer
B
Right Information Display. See
C
Left Information Display
Odometer
Located in the bottom of the information
display. Registers the accumulated
distance your vehicle has traveled.
Trip Computer
Vehicle Settings and Personalization
91
Instrument Cluster
WARNING LAMPS AND
INDICATORS
The following warning lamps and
indicators alert you to a vehicle condition
that may become serious. Some lamps
illuminate when you start your vehicle to
make sure they work. If any lamps remain
on after starting your vehicle, refer to the
respective system warning lamp for further
information.
Note:
Some warning indicators appear in
the information display and operate the
same as a warning lamp but do not
illuminate when you start your vehicle.
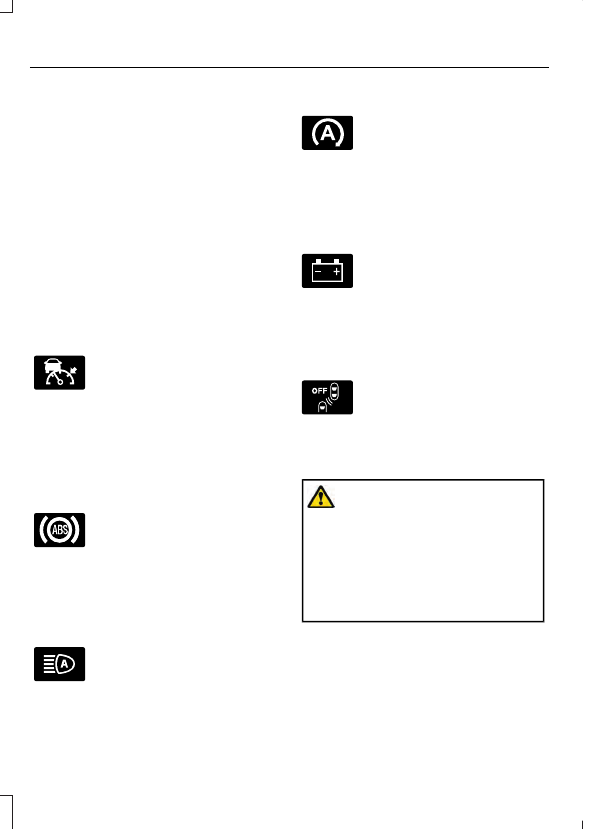
Adaptive Cruise Control Indicator
(If Equipped)
E144524
It illuminates when you switch
the system on.
It illuminates white when the
system is in standby mode. It illuminates
green when you set the adaptive cruise
speed.
Anti-Lock Braking System
If it illuminates when you are
driving, this indicates a
malfunction. Your vehicle
continues to have normal braking without
the anti-lock brake system function. Have
your vehicle checked as soon as possible.
Automatic Headlamp High Beam
Indicator
(If Equipped)
It illuminates when the system
turns the headlamp high beam
on.
Auto-Start-Stop Indicator
It illuminates when the engine
has automatically stopped. It
flashes to inform you when the
engine needs to restart. The indicator is
shown with a strikethrough if the system
is not available.
Battery
It illuminates when you switch
the ignition on.
If it illuminates when the engine
is running this indicates a malfunction.
Have your vehicle checked as soon as
possible.
Blind Spot Monitor
(If Equipped)
E151262
It illuminates when you switch
the system off.
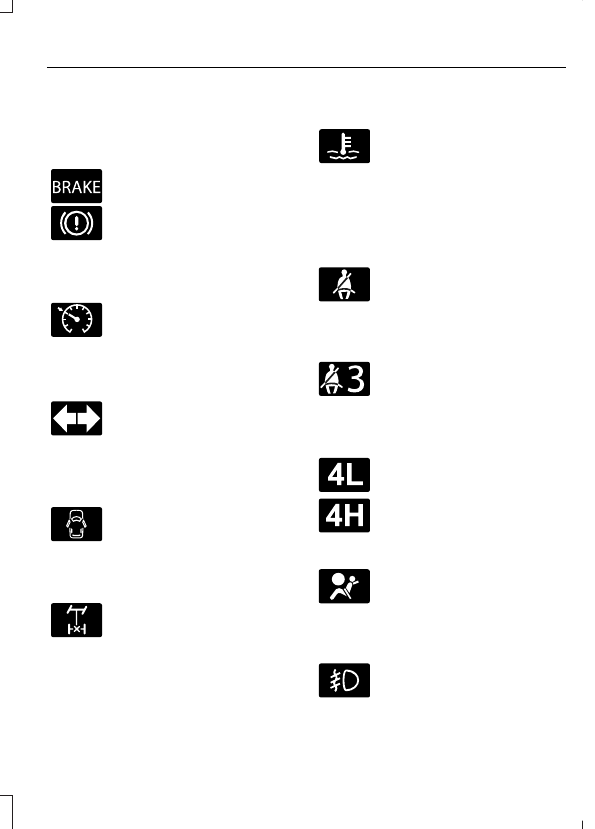
Brake System Warning Lamp
WARNING:
Driving your vehicle
with the warning lamp on is dangerous.
A significant decrease in braking
performance may occur. It may take you
longer to stop your vehicle. Have your
vehicle checked as soon as possible.
Driving extended distances with the
parking brake engaged can cause brake
failure and the risk of personal injury.
Note:
Indicators vary depending on region.
This lamp is a dual function lamp and
illuminates when:
92
Instrument Cluster
•
You apply the parking brake with the
ignition on.
•
Your vehicle has a brake fault or low
brake fluid level, regardless of parking
brake position.
E270480
If the lamp illuminates when you
are moving, you may have the
parking brake applied. Make sure
that the parking brake is off.
Have your vehicle checked as
soon as possible if the lamp
continues to illuminate.
Cruise Control Indicator
(If Equipped)
E71340
It illuminates when you switch
the system on.
Direction Indicator
Flashes when the left or right
direction indicator or the hazard
flasher turns on. An increase in
the rate of flashing warns of a failed
indicator bulb.
Door Ajar Warning Lamp
It illuminates when you switch
the ignition on and remains on if
any door is open.
Electronic Locking Differential
(If
Equipped)
E163170
Illuminates when using the
electronic locking differential.
Engine Coolant Temperature
Warning Lamp
If it illuminates when your vehicle
is moving, this indicates that the
engine is overheating. Stop your
vehicle as soon as it is safe to do so and
switch the engine off. Have your vehicle
checked as soon as possible.
Fasten Seatbelt Warning Lamp
E71880
It illuminates and a chime
sounds until you fasten the
seatbelts.
Fasten Rear Seatbelt Warning
Lamp
(If Equipped)
E206718
It illuminates and a chime
sounds until you fasten the rear
seatbelts.
Four-Wheel Drive Indicators
(If
Equipped)
E181780
Illuminates when four-wheel
drive low is engaged.
E181779
Illuminates when four-wheel
drive high is engaged.
Front Airbag
E67017
If it fails to illuminate when you
start your vehicle, continues to
flash or remains on, it indicates
a malfunction. Have the system checked.
Front Fog Lamp Indicator
(If Equipped)
It illuminates when you switch
the front fog lamps on.
93
Instrument Cluster
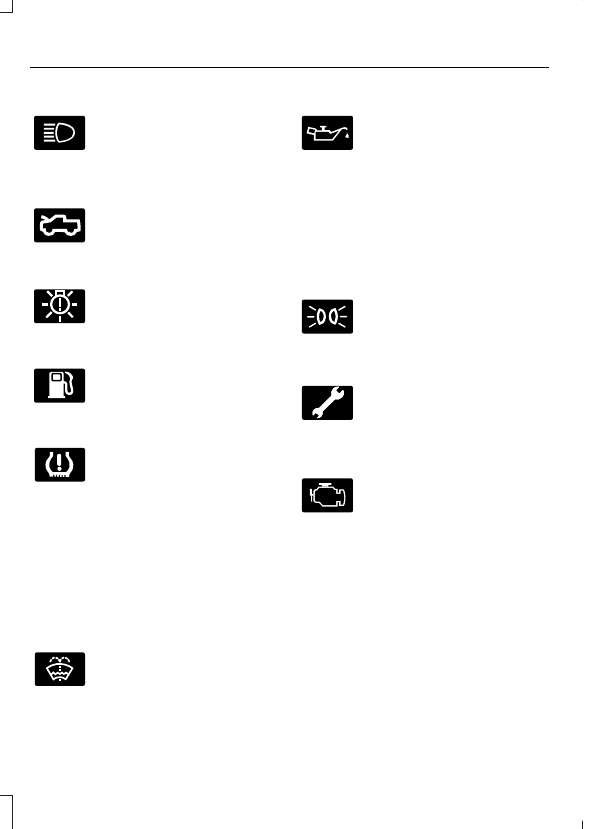
Headlamp High Beam Indicator
It illuminates when you switch
the headlamp high beam on. It
flashes when you use the
headlamp flasher.
Hood Ajar Warning Lamp
E296055
Illuminates when the ignition is
on and the hood is not
completely closed.
Low Beam Malfunction
(If Equipped)
E181350
Lights when there is a
malfunction with the low beam
headlamp.
Low Fuel Level Warning Lamp
If it illuminates when you are
driving, refuel as soon as
possible.
Low Tire Pressure Warning Lamp
It illuminates when your tire
pressure is low. If the lamp
remains on with the engine
running or when driving, check the tire
pressure as soon as possible.
It also momentarily illuminates when you
switch the ignition on to confirm the lamp
is functional. If it does not illuminate when
you switch the ignition on, or begins to
flash at any time, have the system checked
by your authorized dealer.
Low Washer Fluid Level Warning
Lamp
E132353
It illuminates when the washer
fluid is low.
Oil Pressure Warning Lamp
It illuminates when you switch
the ignition on.
If it illuminates when the engine
is running this indicates a malfunction.
Stop your vehicle as soon as it is safe to
do so and switch the engine off. Check the
engine oil level. If the oil level is sufficient,
this indicates a system malfunction. Have
your vehicle checked as soon as possible.
Parking Lamps
It illuminates when you switch
the parking lamps on.
Powertrain Malfunction/Reduced
Power/Electronic Throttle Control
Illuminates when the system has
detected a powertrain or a
four-wheel drive fault. Contact
an authorized dealer as soon as possible.
Service Engine Soon
If it illuminates when the engine
is running this indicates a
malfunction. The On Board
Diagnostics system has detected a
malfunction of the vehicle emission control
system.
If it flashes, engine misfire may be
occurring. Increased exhaust gas
temperatures could damage the catalytic
converter or other vehicle components.
Drive in a moderate fashion, avoid heavy
acceleration and deceleration and have
your vehicle immediately serviced.
It illuminates when you switch the ignition
on prior to engine start to check the bulb
and to indicate whether your vehicle is
ready for Inspection and Maintenance
(I/M) testing.
94
Instrument Cluster
Normally, it illuminates until the engine is
cranked and automatically turns off if no
malfunctions are present. However, if after
15 seconds it flashes eight times, this
indicates that your vehicle is not ready for
Inspection and Maintenance (I/M) testing.
See
Stability Control and Traction
Control Indicator
E138639
Flashes during operation.
If it does not illuminate when you
switch the ignition on, or remains
on when the engine is running, this
indicates a malfunction. Have your vehicle
checked as soon as possible.
Stability Control and Traction
Control Off Warning Lamp
E130458
It illuminates when you switch
the system off.
Tow Haul Indicator
(If Equipped)
E271981
It illuminates when you switch
the system on.
Trail Control
(If Equipped)
E272858
It illuminates when you switch
the system on.
AUDIBLE WARNINGS AND
INDICATORS
Key in Ignition Warning Chime
(If
Equipped)
Sounds when you open the driver's door
and you have left the key in the ignition.
Keyless Warning Alert
(If Equipped)
Sounds the horn twice when you exit your
vehicle with the intelligent access key, after
the last door is closed and your keyless
vehicle is in RUN, indicating your vehicle is
still on.
Headlamps On Warning Chime
Sounds when you remove the key from the
ignition and open the driver's door and you
have left the headlamps or parking lamps
on.
Parking Brake On Warning Chime
Sounds when you have left the parking
brake on and drive your vehicle. If the
warning chime remains on after you have
released the parking brake, have the
system checked by an authorized dealer
immediately.
95
Instrument Cluster
GENERAL INFORMATION
WARNING:
Driving while distracted
can result in loss of vehicle control, crash
and injury. We strongly recommend that
you use extreme caution when using any
device that may take your focus off the
road. Your primary responsibility is the
safe operation of your vehicle. We
recommend against the use of any
hand-held device while driving and
encourage the use of voice-operated
systems when possible. Make sure you
are aware of all applicable local laws
that may affect the use of electronic
devices while driving.
Note:
Your vehicle may or may not be
equipped with all the messages listed in this
chapter. Your vehicle will not display
messages of systems it is not equipped with.
Various systems on your vehicle can be
controlled using the information display
controls on the steering wheel.
Corresponding information is displayed in
the information display.
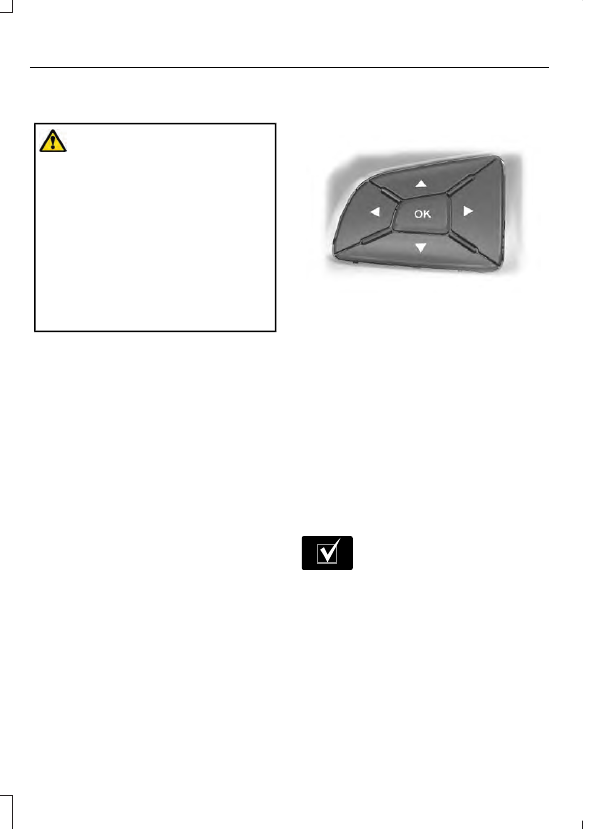
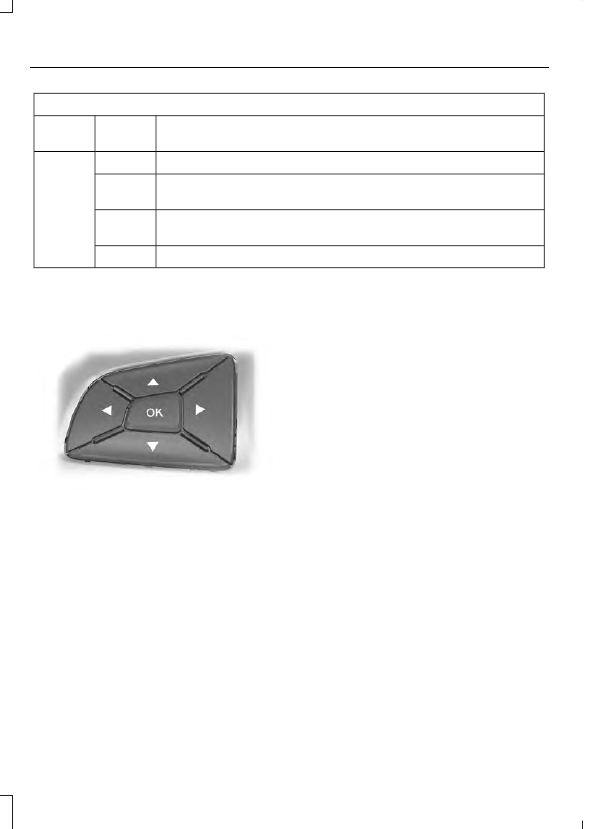
Information Display Controls
(Type 1 and Type 2)
E205893
•
Press the up or down arrow buttons to
scroll through the list.
•
Press the right arrow button to enter a
sub-menu.
•
Press the left arrow button to exit a
menu.
•
Press and hold the left arrow button at
any time to return to the main menu
display (escape button).
•
Press the
OK
button to choose and
confirm settings or messages.
Menu
You can access the menu using the
information display control.
E204495
This icon gives you the ability to
switch a feature on or off. A
check in the box indicates the
feature is enabled, and unchecked
indicates the feature is disabled.
Note:
Some options may appear slightly
different or not at all if the items are
optional.
96
Information Displays
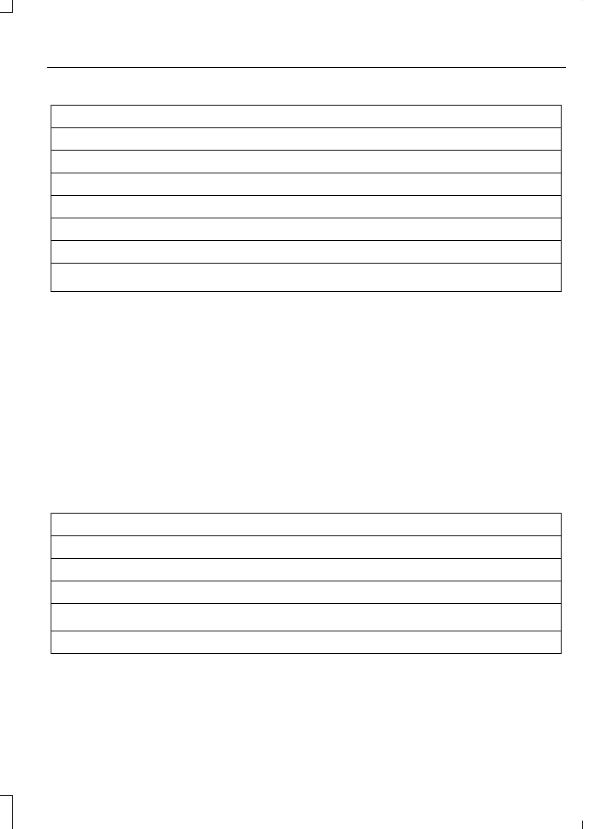
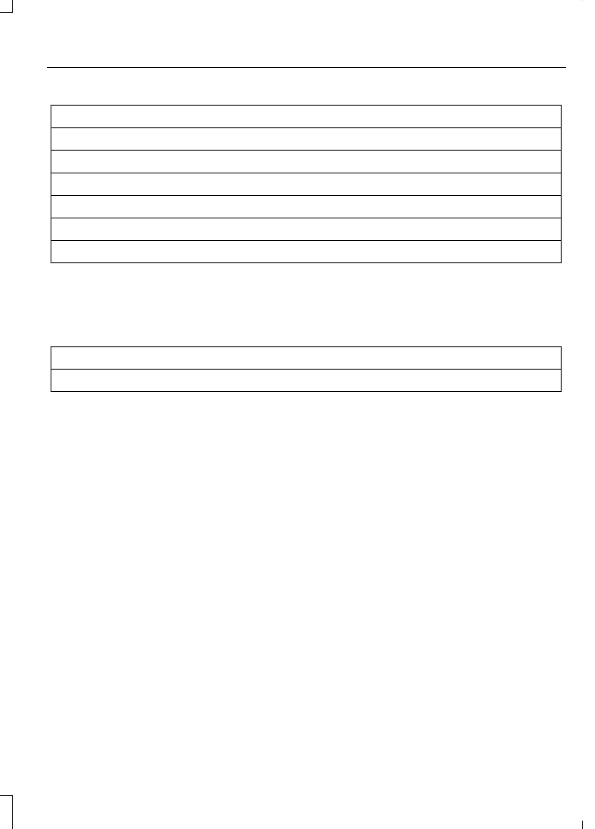
Trip 1 and 2
Digital Speedo
Distance to E
Trip Odometer
Trip Timer
Average Fuel
Outside Temp.
All Values
1
1
Type 2
•
Digital Speedometer - Shows the speed your vehicle is traveling.
•
Distance to E - Shows the approximate distance your vehicle can travel before running
out of fuel.
•
Trip Odometer — Registers the distance of individual journeys.
•
Trip Timer — The timer stops when you turn your vehicle off and restarts when you
restart your vehicle.
•
Average Fuel — Shows the average fuel economy for a given trip.
•
Outside Temperature — Shows the outside air temperature.
•
All Values — Shows the Distance to E, Trip Odometer, Trip Timer and Average Fuel.
Note:
Press and hold
OK
on the current screen to reset the respective trip, distance, time
and fuel information.
Fuel Economy
Distance to E
Inst Fuel Econ
Average Fuel
Fuel History
1
Average Speed
97
Information Displays
Fuel Economy
All Values
1
Auto StartStop
1
Type 2
•
Distance to Empty - Shows the approximate distance your vehicle can travel before
running out of fuel.
•
Inst Fuel Economy - Shows a visual graph of your instantaneous fuel economy along
with your Avg MPG since the function was last reset.
•
Average Fuel — Shows the average fuel economy for a given trip.
•
Fuel History - Shows a bar chart of your fuel history.
•
Average Speed — Shows your average speed for a given trip.
•
All Values — Shows all fuel economy values (DTE, Inst Fuel Econ, Avg Fuel).
•
Auto StartStop - Available Auto Start-Stop messaging will provide details about what
is happening with your system. See
Note:
You can reset your average fuel economy by pressing and holding the
OK
button on
the left hand steering wheel controls.
Driver Assist
Traction control
Cross Traffic
1
Enter the submenu and select your setting
Cruise Control
1
Enter the submenu and select your setting
Driver Alert
1
Hill Start Assist
Enter the submenu and
select your setting
Lane Keeping System
1
Enter the submenu and
select your setting
Pre-Collision
Rear Park Aid
Enter the submenu and select your setting
Speed Limiter
1
Tire Monitor
98
Information Displays
Driver Assist
Tire Pressure
Trailer Sway
1
Type 2
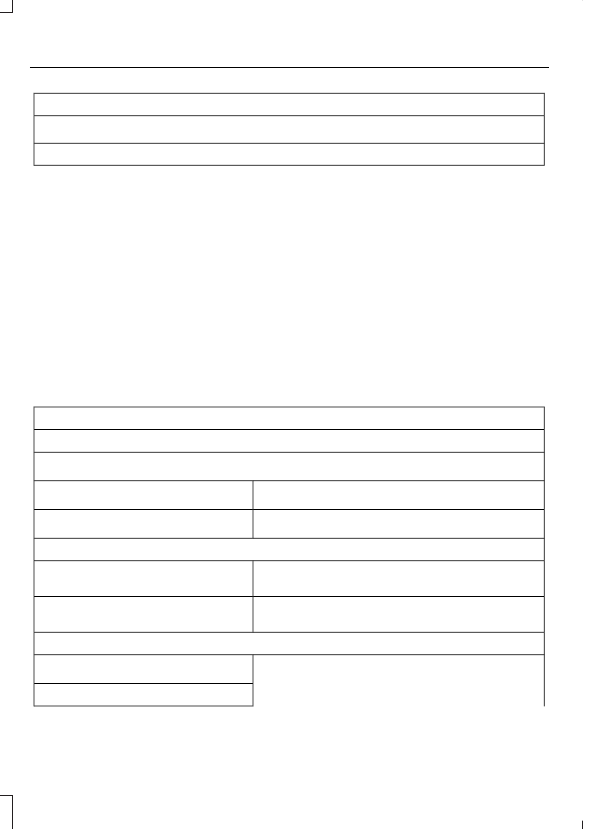
Settings
Auto Engine Off
Vehicle
Easy Entry/Exit
Enter the submenu and
select your setting
Lighting
Enter the submenu and select your setting
Locks
Hold OK to Initialize Neutral Tow
Neutral
Tow
oil Life XXX% - Hold
OK
to Reset
Oil Life
Reset
Enter the submenu and
select your setting
Remote
Start
Enter the submenu and select your setting
Windows
Enter the submenu and select your setting
Wipers
Hold
OK
to Create MyKey
Create
MyKey
MyKey
Enter the submenu and select your setting
911
Assist
Enter the submenu and select your setting
Do Not
Disturb
Enter the submenu and select your setting
Traction
Control
Enter the submenu and select your setting
Max
Speed
Enter the submenu and select your setting
Speed
Minder
Volume Limiter
99
Information Displays
Settings
Hold
OK
to Clear All MyKeys
Clear
MyKeys
Enter the submenu and select your setting
Distance
Display
Setup
Enter the submenu and select your setting
Temper-
ature
Enter the submenu and select your setting
Tire Pres-
sure
Enter the submenu and select your setting
Language
Information Display Controls
(Type 3)
E205893
•
Press the up or down arrow buttons to
scroll through the list.
•
Press the right arrow button to enter a
sub-menu.
•
Press the left arrow button to exit a
menu.
•
Press and hold the left arrow button at
any time to return to the main menu
display (escape button).
•
Press the
OK
button to choose and
confirm settings or messages.
Main menu
From the main menu bar on the left side
of the information display, you can choose
from the following categories:
•
Display Mode
•
Trip 1 & 2
•
Fuel Economy
•
Driver Assist
•
Settings
Scroll up or down to highlight one of the
categories, then press the right arrow key
or
OK
to enter into that category. Press the
left arrow key as needed to exit back to the
main menu.
Display Mode
Use the up/down arrow buttons to choose
between the following display options.
100
Information Displays
Display Mode
Distance to Empty
Tach and Gauges
Off Road
Digital Speedometer
Tire Pressure
Average Speed
Trip 1 & 2
You can access the menu using the
information display control.
Note:
Some options may appear slightly
different or not at all if the items are
optional.
Trip 1 & 2
All Values
All Values — shows all trip values (Trip Timer, Odometer and Average Fuel).
•
Trip Odometer — Shows your accumulated trip distance.
•
Trip Timer— The timer stops when you turn your vehicle off and restarts when you
restart your vehicle.
•
Average Fuel — Shows your average fuel economy for a given trip.
Note:
You can reset your trip information by pressing and holding the
OK
button on the left
hand steering wheel controls.
Fuel Economy
Use the left and right arrow buttons to
choose the desired fuel economy display.
101
Information Displays

Fuel Economy
Fuel Economy
Fuel History
Auto StartStop
•
Fuel Economy - Shows a visual graph of your instantaneous fuel economy, average
fuel economy and distance to empty.
•
Fuel History - Shows a bar chart of your fuel history from the past 30 min, average
fuel economy and distance to empty.
•
Auto StartStop - Available Auto Start-Stop messaging will provide details about what
is happening with your system. See
Note:
You can reset your average fuel economy by pressing and holding the
OK
button on
the left hand steering wheel controls.
Driver Assist
In this mode, you can configure different
driver setting choices.
Note:
Some items are optional and may
not appear.
Driver Assist
Blind spot
Blind Spot
Enter the submenu and select your
setting
Trailer
Enter the submenu and select your
setting
Trailer Length
Cross Traffic
Alert
Hill Start Assist
Rear Park Aid
Trailer Sway
Enter the submenu and select your setting
Chimes
Enter the submenu and select your setting
Cruise Control
Enter the submenu and select your setting
Driver Alert
102
Information Displays
Нет комментариевНе стесняйтесь поделиться с нами вашим ценным мнением.
Текст