Ford F-150 Heritage (2004 year). Manual — part 52
The transmission fluid should be in
this range if at ambient temperature
(10°C-35°C [50°F-95°F]).
High fluid level
Fluid levels above the safe range
may result in transmission failure.
An overfill condition of transmission
fluid may cause shift and/or
engagement concerns and/or
possible damage.
High fluid levels can be caused by
an overheating condition.
Adjusting automatic transmission fluid levels
Before adding any fluid, make sure the correct type is used. The type of
fluid used is normally indicated on the dipstick and also in the
Lubricant specifications section in this chapter.
Use of a non-approved automatic transmission fluid may cause
internal transmission component damage.
If necessary, add fluid in 250 ml (1/2 pint) increments through the filler
tube until the level is correct.
If an overfill occurs, excess fluid
should be removed by a qualified
technician.
An overfill condition of
transmission fluid may cause
shift and/or engagement
concerns and/or possible
damage.
Do not use supplemental transmission fluid additives, treatments or
cleaning agents. The use of these materials may affect transmission
operation and result in damage to internal transmission components.
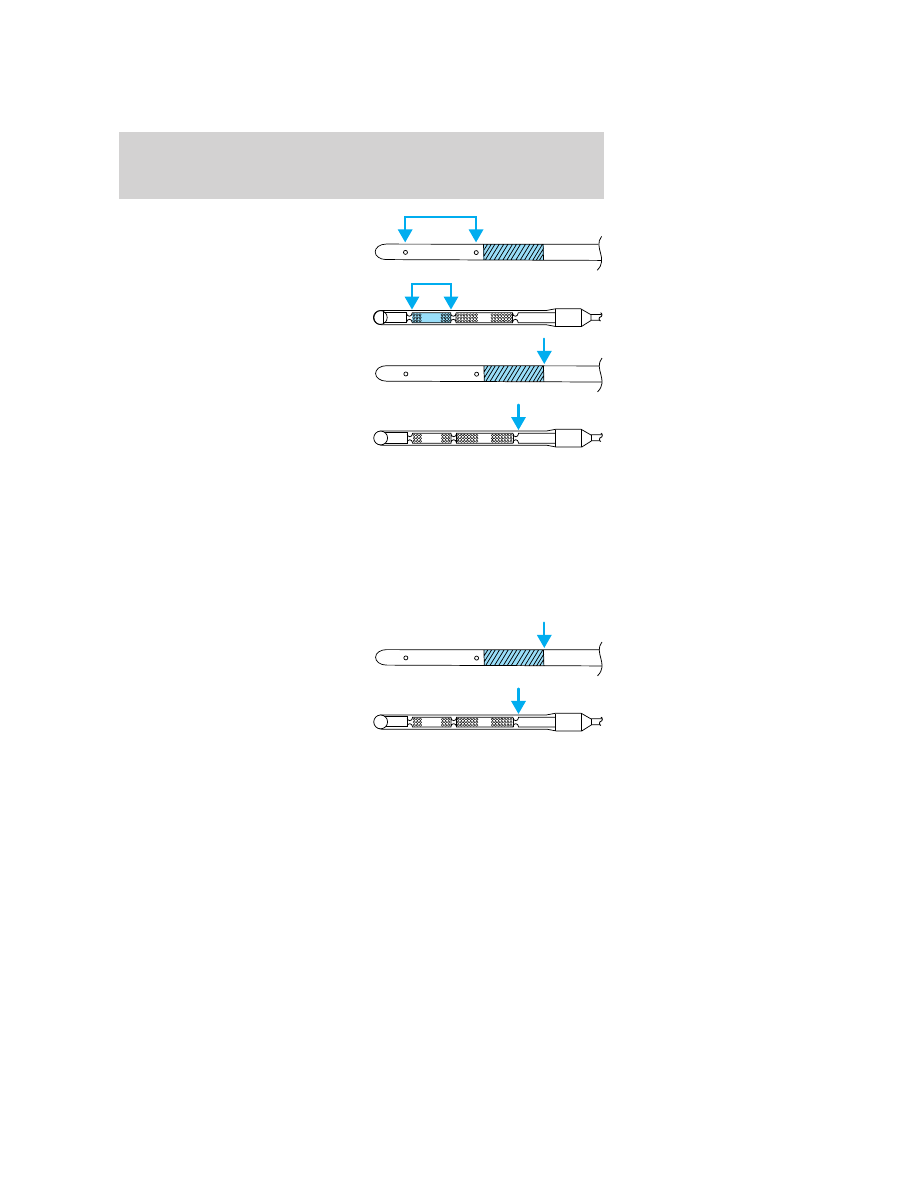
DON’T ADD
ADD
COLD
HOT
DO NOT ADD
DON’T ADD
ADD
COLD
HOT
DO NOT ADD
DON’T ADD
ADD
COLD
HOT
DO NOT ADD
Maintenance and Specifications
210
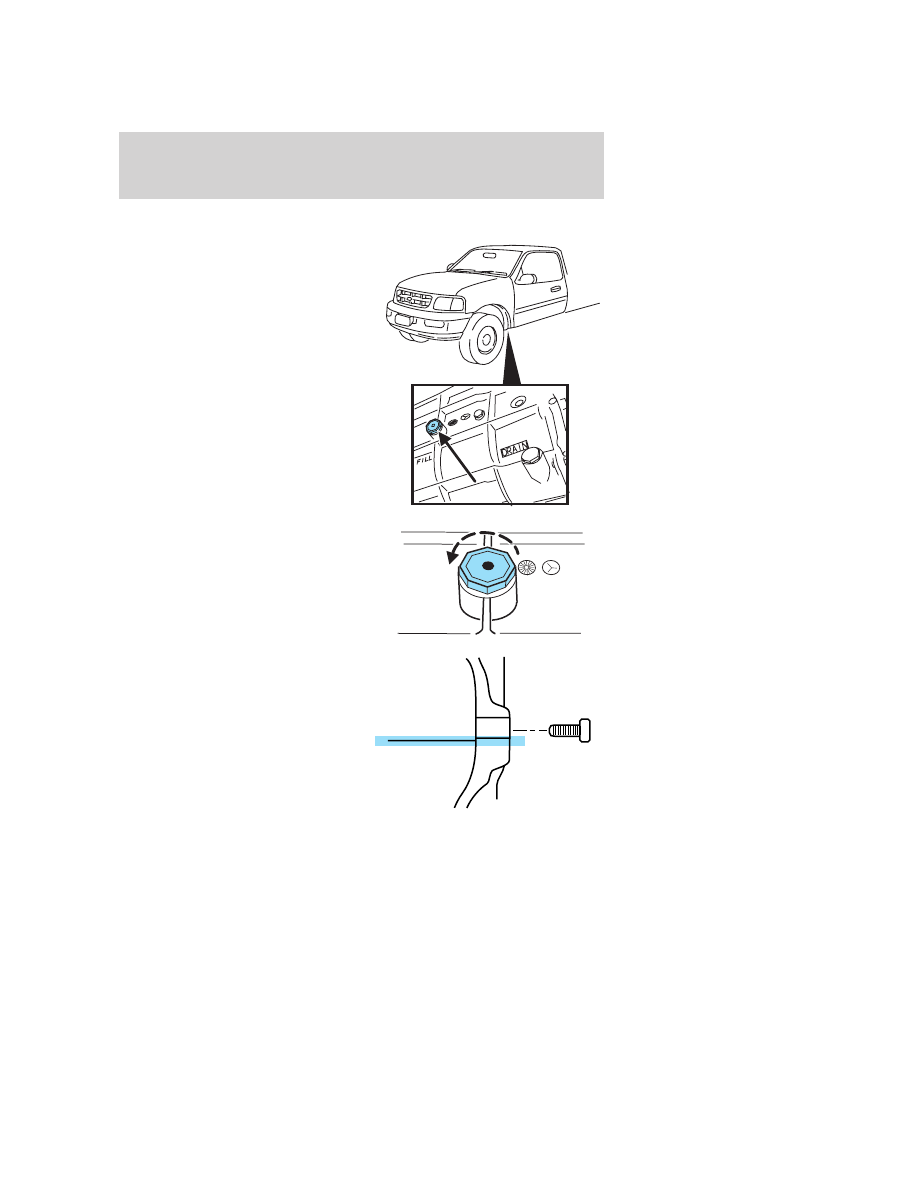
Checking and adding manual transmission fluid (if equipped)
1. Clean the filler plug.
2. Remove the filler plug and
inspect the fluid level.
3. Fluid level should be at bottom of
the opening.
4. Add enough fluid through the
filler opening so that the fluid level
is at the bottom of the opening.
5. Install and tighten the fill plug
securely.
Use only fluid that meets Ford specifications. Refer to Lubricant
specifications in this chapter.
Maintenance and Specifications
211
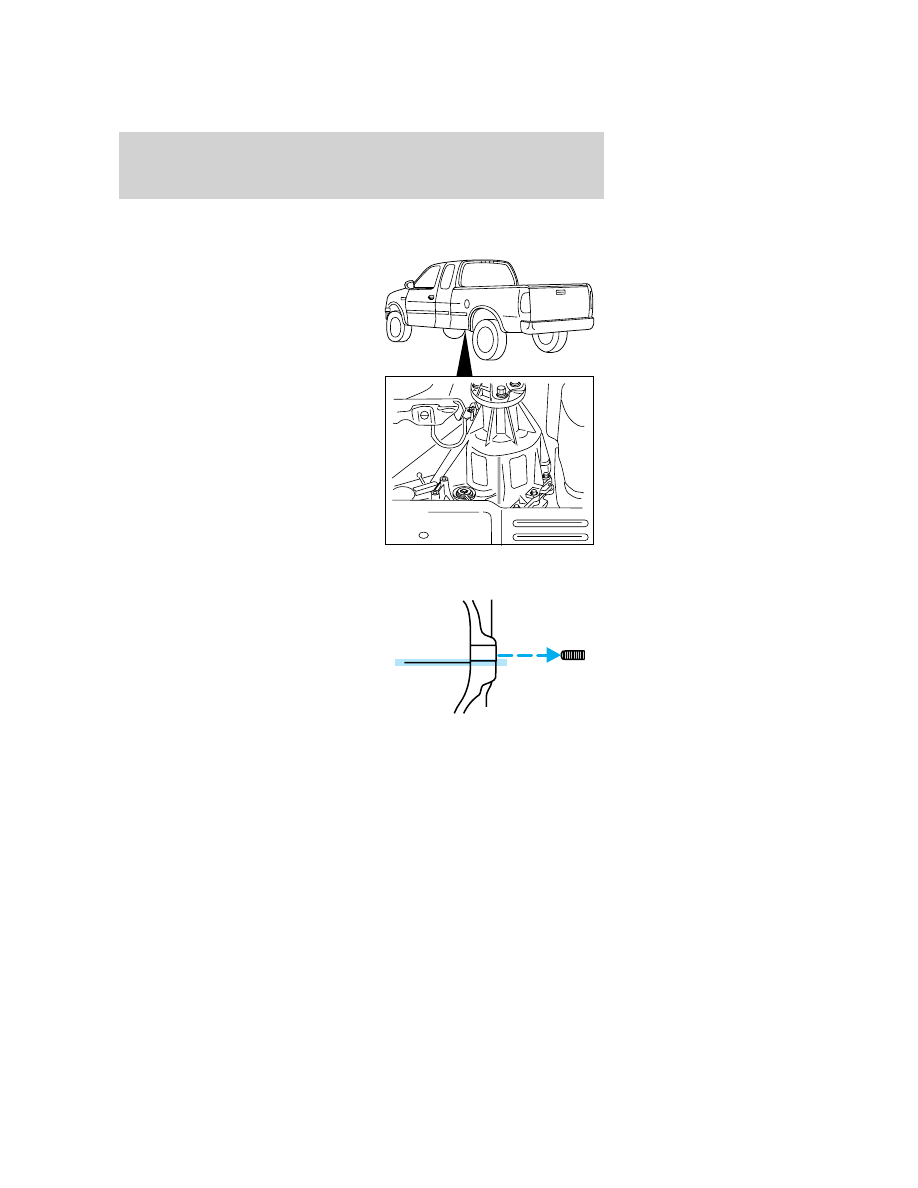
Checking and adding transfer case fluid (if equipped)
1. Clean the filler plug.
2. Remove the filler plug and
inspect the fluid level.
3. Add only enough fluid through
the filler opening so that the fluid
level is at the bottom of the
opening.
Maintenance and Specifications
212
AIR FILTER MAINTENANCE
Refer to the scheduled maintenance guide for the appropriate intervals
for changing the air filter element.
When changing the air filter element, use only the Motorcraft air filter
element listed. Refer to Motorcraft part numbers in this chapter.
Note: Do not start your engine with the air cleaner removed and do not
remove it while the engine is running.
Changing the air filter element
1. Loosen the clamp that secures
the air filter element in place.
2. Carefully separate the two halves
of the air filter housing.
3. Remove the air filter element
from the open end of the air filter
housing.
4. Install a new air filter element.
5. Reassemble the two halves of the air filter housing, aligning the notch
and slot found on the top of each half. Secure the clamp, making sure
not to crimp the air filter edges between the two halves of the air filter
housing. This could cause filter damage and allow unmetered air to enter
the engine if not properly seated.
Maintenance and Specifications
213
Нет комментариевНе стесняйтесь поделиться с нами вашим ценным мнением.
Текст