Ford F-150 Heritage (2004 year). Manual — part 28

• Selecting 2 (Second) at higher speeds will cause the transmission to
downshift to second gear at the appropriate vehicle speed.
1 (First)
• Provides maximum engine braking.
• Allows upshifts by moving gearshift lever.
• Will not downshift into 1 (First) at high speeds; allows for 1 (First)
when vehicle reaches slower speeds.
Forced downshifts
• Allowed in
(Overdrive) or Drive.
• Depress the accelerator to the floor.
• Allows transmission to select an appropriate gear.
If your vehicle gets stuck in mud or snow
If your vehicle gets stuck in mud or snow, it may be rocked out by
shifting between forward and reverse gears, stopping between shifts in a
steady pattern. Press lightly on the accelerator in each gear.
Do not rock the vehicle if the engine is not at normal operating
temperature or damage to the transmission may occur.
Do not rock the vehicle for more than a minute or damage to the
transmission and tires may occur, or the engine may overheat.
MANUAL TRANSMISSION OPERATION (IF EQUIPPED)
Using the clutch
The manual transmission has a starter interlock that prevents cranking
the engine unless the clutch pedal is fully depressed.
To start the vehicle:
1. Make sure the parking brake is fully set.
2. Press the clutch pedal to the floor, then put the gearshift lever in the
neutral position.
Driving
114

3. Start the engine, then press the brake pedal and release the parking
brake.
4. Move the gearshift lever to the desired gear, then slowly release the
clutch pedal while slowly pressing on the accelerator.
During each shift, the clutch pedal must be fully depressed to the floor.
Failure to fully depress the clutch pedal to the floor may cause increased
shift efforts, prematurely wear transmission components or damage the
transmission. Make sure the floor mat is properly positioned so it doesn’t
interfere with the full extension of the clutch pedal.
Do not drive with your foot resting on the clutch pedal or use the clutch
pedal to hold your vehicle at a standstill while waiting on a hill. These
actions will reduce the life of the clutch.
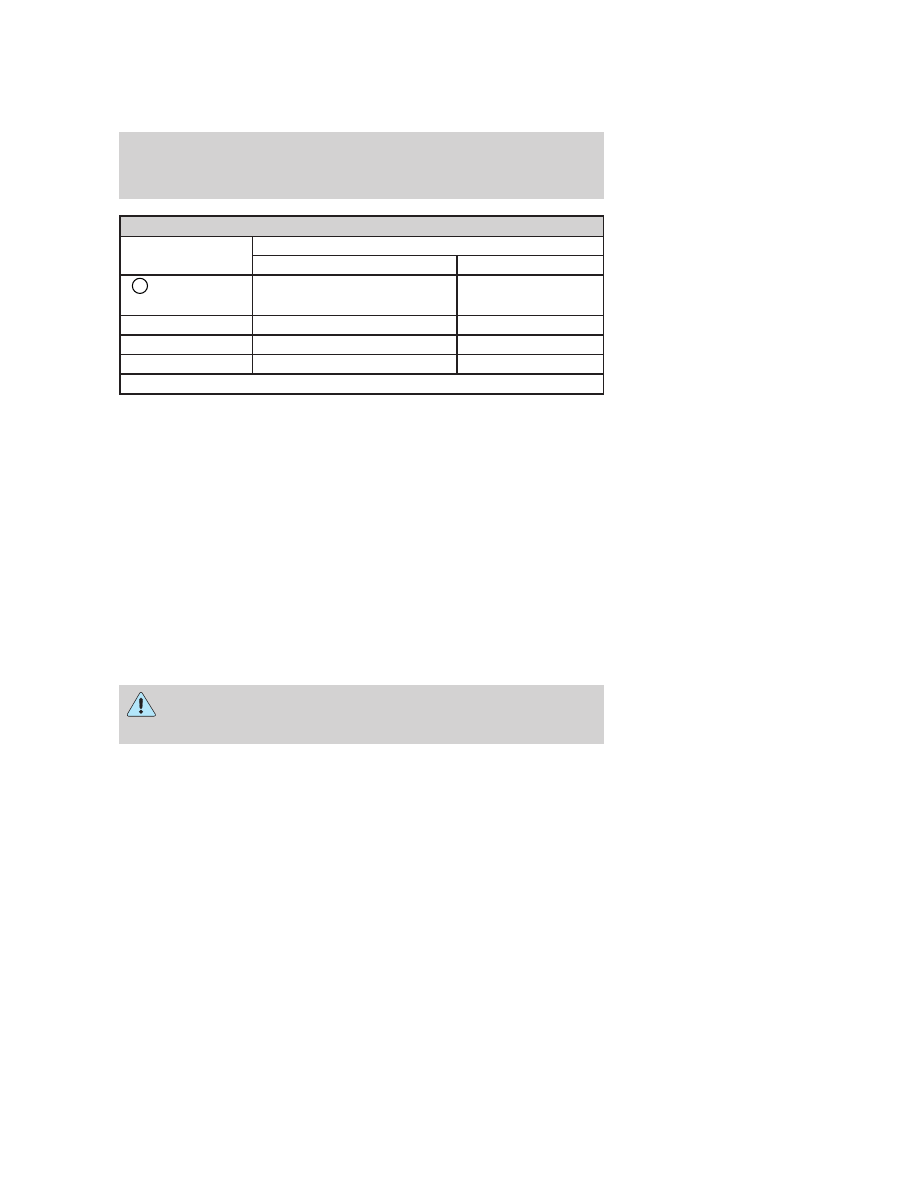
Recommended shift speeds
Upshift and downshift according to the following charts for your specific
engine/drivetrain combination:
Upshifts when accelerating (recommended for best fuel
economy)
Shift from:
Transfer case position (if equipped)
2H or 4H
4L
1 - 2
15 mph (24 km/h)
9 mph (14 km/h)
2 - 3
25 mph (40 km/h)
12 mph (19 km/h)
3 - 4
37 mph (60 km/h)
15 mph (24 km/h)
4
-
D
(Overdrive)
45 mph (72 km/h)
18 mph (29 km/h)
Upshifts when cruising (recommended for best fuel economy)
Shift from:
Transfer case position (if equipped)
2H or 4H
4L
1 - 2
11 mph (18 km/h)
5 mph (8 km/h)
2 - 3
21 mph (34 km/h)
11 mph (18 km/h)
3 - 4
31 mph (50 km/h)
14 mph (23 km/h)
4
-
D
(Overdrive)
43 mph (69 km/h)
17 mph (27 km/h)
Driving
115
Maximum downshift speeds
1
Shift from:
Transfer case position (if equipped)
2H or 4H
4L
D
(Overdrive) -
4
55 mph (89 km/h)
21 mph (34 km/h)
4 - 3
45 mph (72 km/h)
17 mph (27 km/h)
3 - 2
35 mph (56 km/h)
13 mph (21 km/h)
2 - 1
20 mph (32 km/h)
7 mph (11 km/h)
1
Downshift at lower speeds when driving on slippery surfaces.
Reverse
1. Make sure that your vehicle is at a complete stop before you shift into
R (Reverse). Failure to do so may damage the transmission.
2. Move the gearshift lever into the neutral position and wait at least
three seconds before shifting into R (Reverse).
• The gearshift lever can only be moved into R (Reverse) by moving it
from left of 3 (Third) and 4 (Fourth) before shifting into R (Reverse).
This is a lockout feature that protects the transmission from
accidentally being shifted into R (Reverse) from 5 (Overdrive).
Parking your vehicle
1. Apply the brake and shift into the neutral position.
2. Fully apply the parking brake, then shift into 1 (First).
3. Turn the ignition off.
Do not park your vehicle in Neutral, it may move unexpectedly
and injure someone. Use 1 (First) gear and set the parking brake
fully.
Driving
116
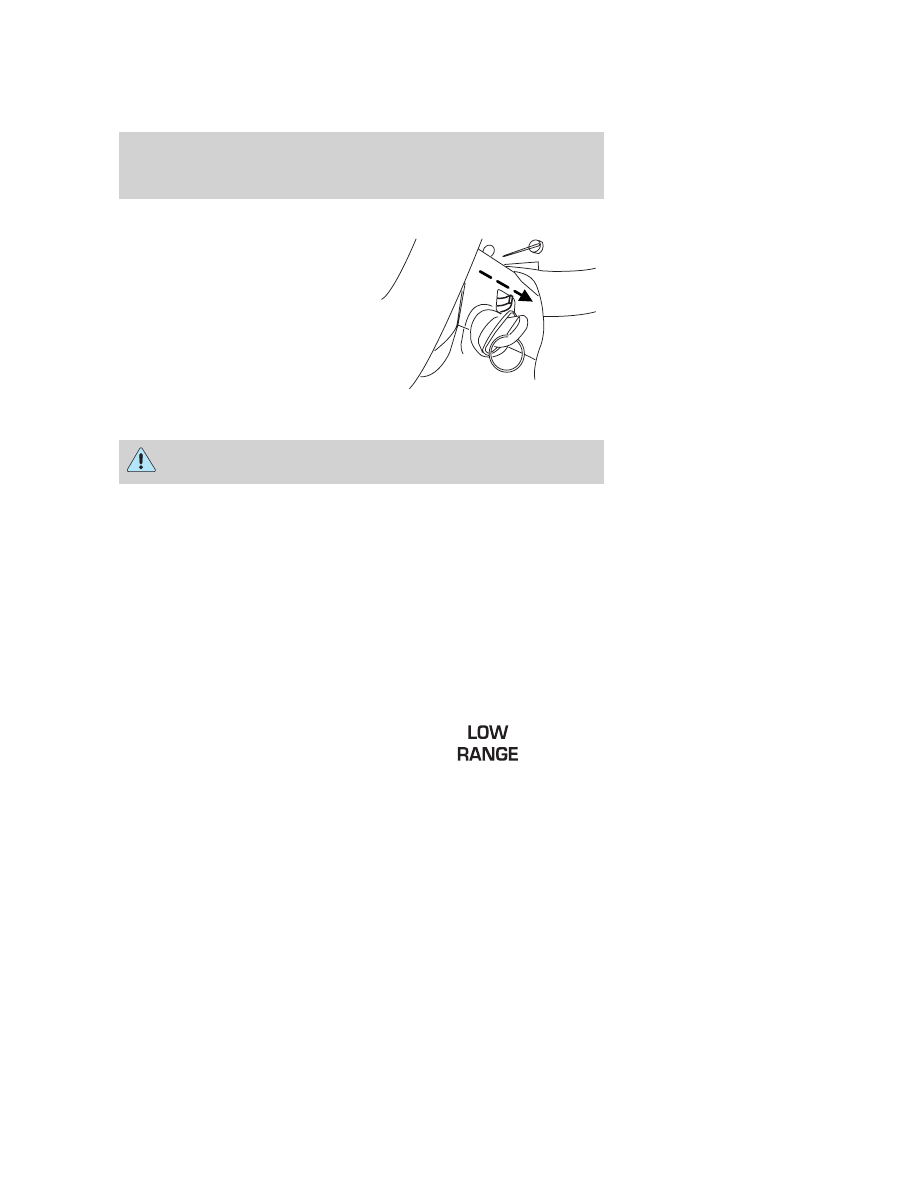
Removing the key
Turn the ignition off, push the
release lever (located above the
ignition), then turn the key toward
you and remove the key.
FOUR-WHEEL DRIVE (4WD) OPERATION (IF EQUIPPED)
For important information regarding safe operation of this type
of vehicle, see Preparing to drive your vehicle in this chapter.
Four–wheel drive (4WD) supplies power to all four wheels. 4WD should
not be operated on dry pavement; driveline damage may occur.
If equipped with the Electronic Shift 4WD System, and 4WD Low
is selected while the vehicle is moving, the 4WD system will not
engage. This is normal and should be no reason for concern. Refer
to Shifting to/from 4WD Low for proper operation.
4WD system indicator lights
• 4X4 - Momentarily illuminates
when the vehicle is started.
Illuminates when 4WD Low or
4WD High is selected.
• LOW RANGE - Momentarily
illuminates when the vehicle is
started. Illuminates when 4WD
Low is selected.
PUSH
4x4
Driving
117
Нет комментариевНе стесняйтесь поделиться с нами вашим ценным мнением.
Текст