Ford Bronco (2022 year). Manual in english — page 24
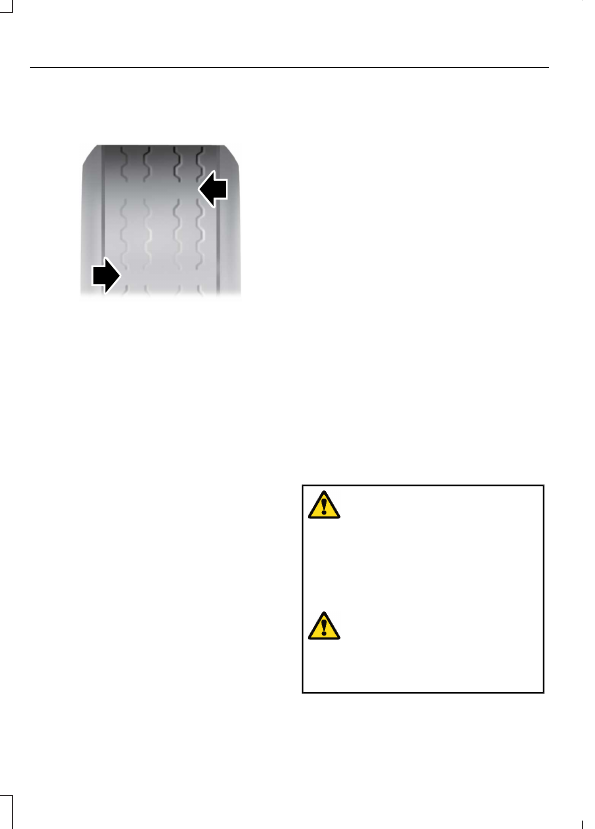
INSPECTING THE TIRE FOR
WEAR
E142546
When the tread is worn down to
one sixteenth of an inch (2 mm),
tires must be replaced to help
prevent your vehicle from skidding
and hydroplaning. Built-in
treadwear indicators, or wear bars,
which look like narrow strips of
smooth rubber across the tread
will appear on the tire when the
tread is worn down to one
sixteenth of an inch (2 mm).
When the tire tread wears down
to the same height as these wear
bars, the tire is worn out and must
be replaced.
The tires should also be balanced
periodically. An unbalanced tire
and wheel assembly may result in
irregular tire wear.
Periodically inspect the tire treads
for uneven or excessive wear and
remove objects such as stones,
nails or glass that may be wedged
in the tread grooves.
INSPECTING THE TIRE FOR
DAMAGE
Inspect the tire sidewalls for
cracking, cuts, bruises and other
signs of damage or excessive
wear. If internal damage to the tire
is suspected, have the tire
dismounted and inspected in case
it needs to be repaired or replaced.
For your safety, tires that are
damaged or show signs of
excessive wear should not be used
because they are more likely to
blow out or fail.
Periodically inspect the tire treads
and sidewalls for damage, such
as bulges in the tread or sidewalls,
cracks in the tread groove and
separation in the tread or sidewall.
If damage is observed or
suspected, have the tire inspected
by a tire professional.
Safety Practices
WARNING:
If your vehicle
is stuck in snow, mud or sand, do
not rapidly spin the tires;
spinning the tires can tear the
tire and cause an explosion. A
tire can explode in as little as
three to five seconds.
WARNING:
Do not spin the
wheels at over 34 mph
(55 km/h). The tires may fail and
injure a passenger or bystander.
388
Tire Care
Highway Hazards
No matter how carefully you drive,
there is always the possibility that
you could eventually have a flat
tire on the highway. Drive slowly
to the closest safe area out of
traffic. This could further damage
the flat tire, but your safety is
more important.
If you feel a sudden vibration or
ride disturbance while driving, or
you suspect your tire or vehicle
has been damaged, immediately
reduce your speed. Drive with
caution until you can safely pull
off the road. Stop and inspect the
tires for damage. If a tire is
under-inflated or damaged,
deflate it, remove the wheel and
replace it with your spare tire and
wheel. If you cannot detect a
cause, have the vehicle towed to
the nearest repair facility or tire
dealer to have the vehicle
inspected.
Tire and Wheel Alignment
A bad jolt from hitting a curb or
pothole can cause the front end
of your vehicle to become
misaligned or cause damage to
your tires. If your vehicle seems to
pull to one side when you are
driving, the wheels could be out of
alignment. Have an authorized
dealer check the wheel alignment
periodically.
Wheel misalignment in the front
or the rear can cause uneven and
rapid treadwear of your tires and
should be corrected by an
authorized dealer.
INSPECTING THE WHEEL
VALVE STEMS
Check the valve stems for holes,
cracks, or cuts that could permit
air leakage.
TIRE ROTATION
WARNING:
If the tire label
shows different tire pressures for
the front and rear tires and the
vehicle has a tire pressure
monitoring system, then you
need to update the settings for
the system sensors. Always
perform the system reset
procedure after tire rotation. If
you do not reset the system, it
may not provide a low tire
pressure warning when
necessary.
Note:
If your tires show uneven
wear ask an authorized dealer to
check for and correct any wheel
misalignment, tire imbalance or
mechanical problem involved
before tire rotation.
Note:
After having your tires
rotated, inflation pressure must be
checked and adjusted to the
vehicle requirements.
389
Tire Care
Rotating your tires at the
recommended interval, as
indicated in the scheduled
maintenance chapter, will help
your tires wear more evenly,
providing better tire performance
and longer tire life.
For the best tire life, a five tire
rotation is recommended that
includes the matching spare tire
mounted on the back of the
vehicle. This rotation requires a
forced re-learning of your tire
pressure monitor system sensors
by your vehicle, and should be
performed by an authorized dealer
or a service center to ensure the
tire pressure monitor system will
provide proper warning at all
times. When performing the tire
rotation yourself, a four tire
rotation is recommended, without
using the spare tire in the rotation,
so that no tire pressure monitor
system sensor re-learn is required.
If a five tire rotation is performed
without a tire pressure monitor
system sensor re-learn, the
system may not provide a low tire
pressure warning when necessary.
Keep in mind that a spare tire that
is not used in the tire rotation
should only be used temporarily
in the event of a flat tire, not as a
permanent replacement. The
spare tire should always be
replaced if it exceeds 6 years of
age, regardless of whether it is
part of the tire rotation.
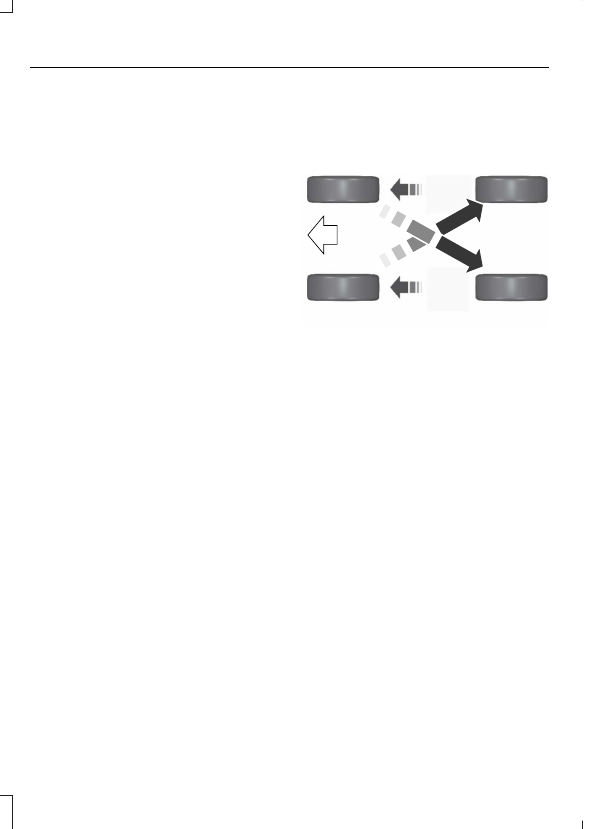
Rear-wheel drive vehicles and
four-wheel drive vehicles with four
tire rotation, front tires at left of
diagram.
E142548
Sometimes irregular tire wear can
be corrected by rotating the tires.
390
Tire Care
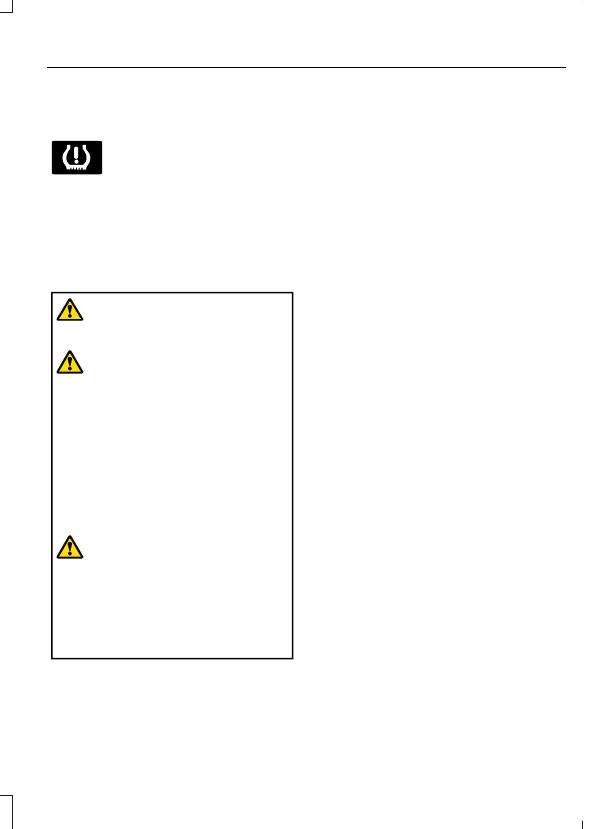
WHAT IS THE TIRE PRESSURE
MONITORING SYSTEM
The tire pressure monitoring
system measures the vehicle's
tire pressures. A warning lamp
illuminates if one or more tires are
significantly underinflated or if there is a
system malfunction.
TIRE PRESSURE MONITORING
SYSTEM OVERVIEW
WARNING:
If the tire pressure
monitor sensor becomes damaged it
may not function.
WARNING:
Under-inflation is the
most common cause of tire failures and
may result in severe tire cracking, tread
separation or blowout, with unexpected
loss of vehicle control and increased risk
of injury. Under-inflation increases
sidewall flexing and rolling resistance,
resulting in heat buildup and internal
damage to the tire. It also may result in
unnecessary tire stress, irregular wear,
loss of vehicle control and accidents. A
tire can lose up to half of its air pressure
and not appear to be flat!
WARNING:
To determine the
required pressure(s) for your vehicle, see
the Safety Compliance Certification
Label (on the door hinge pillar,
door-latch post or the door edge that
meets the door-latch post, next to the
driver seat) or the Tire Label on the
B-Pillar or the edge of the driver door.
Each tire, including the spare (if provided),
should be checked monthly when cold and
inflated to the inflation pressure
recommended by the vehicle manufacturer
on the vehicle placard or tire inflation
pressure label. (If your vehicle has tires of
a different size than the size indicated on
the vehicle placard or tire inflation pressure
label, you should determine the proper tire
inflation pressure for those tires).
As an added safety feature, your vehicle
has been equipped with a Tire Pressure
Monitoring System (TPMS) that
illuminates a low tire pressure telltale
when one or more of your tires is
significantly under-inflated. Accordingly,
when the low tire pressure telltale
illuminates, you should stop and check
your tires as soon as possible, and inflate
them to the proper pressure. Driving on a
significantly under-inflated tire causes the
tire to overheat and can lead to tire failure.
Under-inflation also reduces fuel efficiency
and tire tread life, and may affect the
vehicle’s handling and stopping ability.
Please note that the TPMS is not a
substitute for proper tire maintenance, and
it is the driver’s responsibility to maintain
correct tire pressure, even if under-inflation
has not reached the level to trigger
illumination of the TPMS low tire pressure
telltale.
Your vehicle has also been equipped with
a TPMS malfunction indicator to indicate
when the system is not operating properly.
The TPMS malfunction indicator is
combined with the low tire pressure
telltale. When the system detects a
malfunction, the telltale will flash for
approximately one minute and then remain
continuously illuminated. This sequence
will continue upon subsequent vehicle
start-ups as long as the malfunction exists.
391
Tire Pressure Monitoring System
When the malfunction indicator is
illuminated, the system may not be able
to detect or signal low tire pressure as
intended. TPMS malfunctions may occur
for a variety of reasons, including the
installation of replacement or alternate
tires or wheels on the vehicle that prevent
the TPMS from functioning properly.
Always check the TPMS malfunction
telltale after replacing one or more tires or
wheels on your vehicle to ensure that the
replacement or alternate tires and wheels
allow the TPMS to continue to function
properly.
WARNING:
Changes or
modifications not expressively approved
by the party responsible for compliance
could void the user's authority to operate
the equipment. The term "IC:" before the
radio certification number only signifies
that Industry Canada technical
specifications were met.
This device complies with Part 15 of the
FCC Rules and with License exempt RSS
Standards of Industry Canada. Operation
is subject to the following two conditions:
1.
This device may not cause harmful
interference, and
2. This device must accept any
interference received, including
interference that may cause undesired
operation.
TIRE PRESSURE MONITORING
SYSTEM PRECAUTIONS
WARNING:
The tire pressure
monitoring system is not a substitute for
manually checking tire pressures. You
should periodically check tire pressures
using a pressure gauge. Failure to
correctly maintain tire pressures could
increase the risk of tire failure, loss of
control, vehicle rollover and personal
injury.
WARNING:
Do not use the tire
pressure displayed in the information
display as a tire pressure gauge. Failure
to follow this instruction could result in
personal injury or death.
Note:
The use of tire sealants can damage
the tire pressure monitoring system.
TIRE PRESSURE MONITORING
SYSTEM LIMITATIONS
When the outside temperature drops
significantly, the tire pressure could
decrease and activate the low tire pressure
warning lamp.
The warning lamp could also illuminate
when you use a spare wheel, or tire sealant
from the inflator kit.
Note:
Regularly checking the vehicle tire
pressures can reduce the possibility for the
warning lamp to illuminate due to outside
air temperature changes.
Note:
After you inflate the tires to the
recommended pressure it could take up to
two minutes of driving over 20 mph
(32 km/h) for the warning indicator to turn
off.
392
Tire Pressure Monitoring System
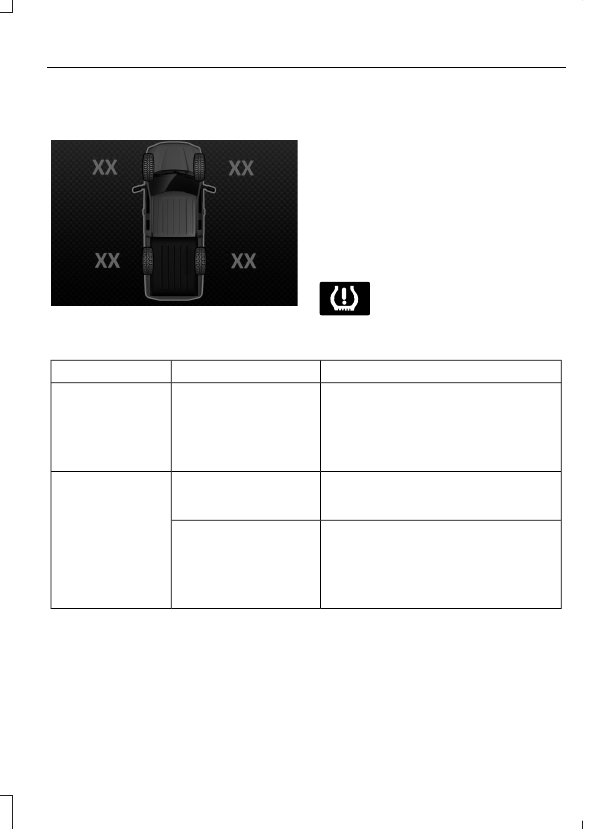
VIEWING THE TIRE
PRESSURES
E224333
Using the information display
arrow keys navigate to the truck
info section where you can view
the tire pressures.
TIRE PRESSURE MONITORING
SYSTEM –
TROUBLESHOOTING
TIRE PRESSURE MONITORING
SYSTEM – WARNING LAMPS
The low tire pressure warning
lamp has combined functions,
as it warns you when your tires
need air, and when the system is no longer
capable of functioning as intended.
Action Required
Possible Cause
Warning Lamp
After inflating your tires to the manufac-
turer’s recommended pressure as shown
on the tire label, on the edge of driver
door or the B-pillar, drive your vehicle for
at least two minutes over 20 mph
(32 km/h) before the light turns off.
One or more tires are
significantly under
inflated
Solid warning lamp
Repair the damaged road wheel and tire
and refit it to your vehicle to restore
operation of the system.
Temporary spare wheel
in use
Solid warning lamp
or flashing warning
lamp
If the tires are inflated to the recom-
mended tire pressures and the temporary
spare wheel is not in use, the system
detected a fault that requires service.
Have your vehicle checked as soon as
possible.
Tire pressure monitoring
system malfunction
393
Tire Pressure Monitoring System
TIRE PRESSURE MONITORING SYSTEM – INFORMATION MESSAGES
Action
Message
After inflating your tires to the manufacturer’s recommended
pressure as shown on the tire label, on the edge of the driver
door or the B-pillar, drive your vehicle for at least two minutes
over 20 mph (32 km/h) before the light turns off.
Tire Pressure Low
The system has detected a fault that requires service. Have
your vehicle checked as soon as possible.
Tire Pressure Monitor
Fault
The system has detected a fault that requires service or a
spare tire is in use. Have your vehicle checked as soon as
possible.
Tire Pressure Sensor
Fault
394
Tire Pressure Monitoring System
CHANGING A FLAT TIRE
Note:
You should only use tire sealants in
roadside emergencies as they may cause
damage to the tire pressure monitoring
system sensor.
Note:
The tire pressure monitoring system
indicator light illuminates when the spare
tire is in use. To restore the full function of
the monitoring system, all road wheels
equipped with tire pressure monitoring
sensors must be mounted on the vehicle.
If you get a flat tire when driving, do not
apply the brake heavily. Instead, gradually
decrease your speed, hold the steering
wheel firmly, and slowly move to a safe
place on the side of the road.
Have your flat serviced by an authorized
dealer in order to prevent damage to the
tire pressure monitoring system sensors.
Replace the spare tire with a road tire as
soon as possible. During repairing or
replacing of the flat tire, have the
authorized dealer inspect the tire pressure
monitoring system sensor for damage.
Tire Change Procedure
WARNING:
Failure to follow these
guidelines could result in an increased
risk of loss of vehicle control, injury or
death.
WARNING:
Do not get under a
vehicle that is supported by a jack.
WARNING:
The jack supplied with
this vehicle is only intended for changing
a flat tire in an emergency. Do not
attempt to do any other work on your
vehicle when it is supported by the jack,
as your vehicle could slip off the jack.
Failure to follow this instruction could
result in personal injury or death.
WARNING:
To help prevent your
vehicle from moving when changing a
wheel, shift the transmission into park
(P), set the parking brake and use an
appropriate block or wheel chock to
secure the wheel diagonally opposite to
the wheel being changed. For example,
when changing the front left wheel,
place an appropriate block or wheel
chock on the right rear wheel.
WARNING:
Only use the jack
provided as original equipment with your
vehicle.
WARNING:
Only use the specified
jacking points. If you use any other
locations you could damage vehicle
components, such as brake lines.
WARNING:
Never place anything
between the vehicle jack and your
vehicle.
WARNING:
Never place anything
between the vehicle jack and the ground.
WARNING:
Do not attempt to
change a tire on the side of the vehicle
close to moving traffic. Pull far enough
off the road to not obstruct the flow of
traffic and avoid the danger of being hit
when operating the jack or changing the
wheel.
WARNING:
Do not attempt to
change a tire on the side of the vehicle
close to moving traffic. Pull far enough
off the road to not obstruct the flow of
traffic and avoid the danger of being hit
when operating the jack or changing the
wheel.
395
Changing a Road Wheel
WARNING:
Always fully apply the
parking brake. Failure to follow this
instruction could result in personal injury
or death.
WARNING:
The jack should be
used on level firm ground wherever
possible.
Note:
Make sure all passengers are out of
your vehicle.
Note:
Jack at the specified locations to
avoid damage to the vehicle.
Note:
No maintenance or additional
lubrication of your jack is required over the
service life of your vehicle.
E166722
1.
Park the vehicle on a level, firm surface
and activate the hazard flashers.
2. Apply the parking brake, and place the
transmission in park (P) for an
automatic transmission or reverse (R)
for a manual transmission and turn the
engine off.
3. Block the wheel diagonally opposite of
the flat tire. For example, if the left
front is flat, block the right rear wheel.
E142551
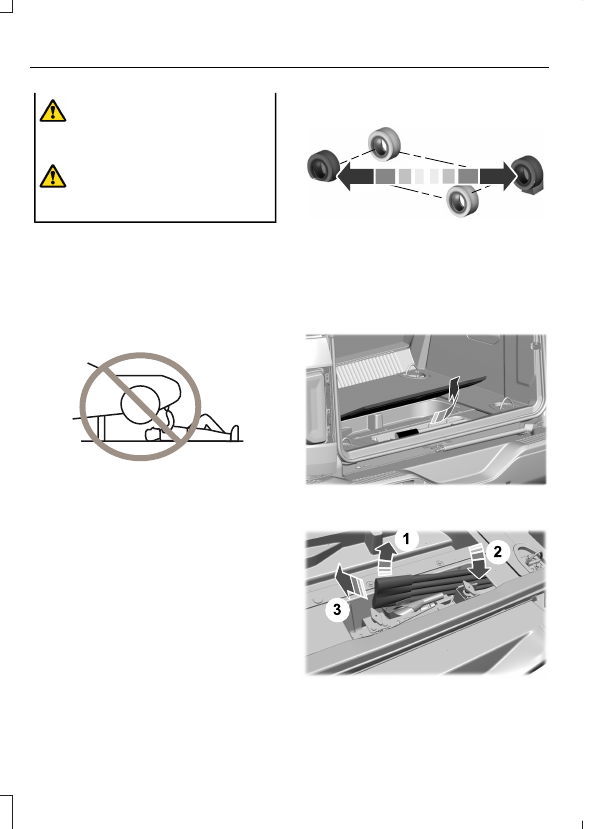
4. Find the jack and tool kit in the rear
trunk of the vehicle. Turn the jack
retainer counterclockwise to remove
the jack and jack extension block.
E324358
5. Remove the tool bag.
E343390
396
Changing a Road Wheel
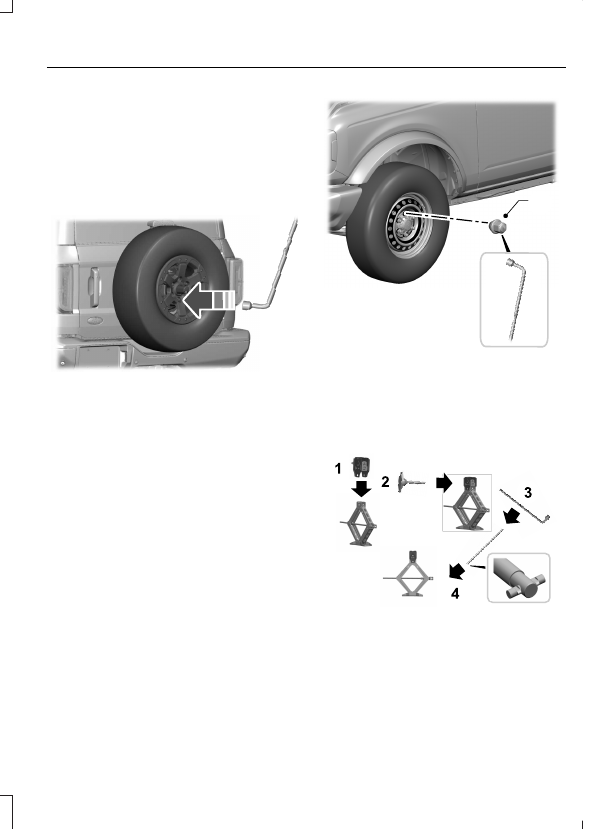
6. Remove the lug wrench from the tool
bag. Turn the spare tire fasteners
counterclockwise starting with the
lowest first, and remove the spare tire
from the rear of the vehicle.
Note:
Insert the wheel lock key into the
wheel lock nut before using the lug wrench
to loosen the lock nut.
E328591
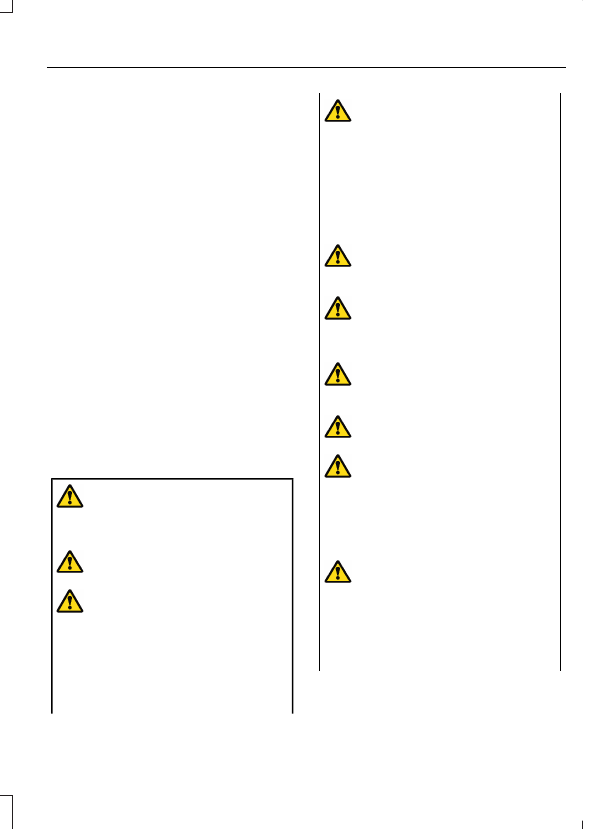
Note:
Do not lay the wheel face down on
the ground, as there is a risk of scratching
or marring the wheel if laid down on an
uneven surface.
7.
Loosen each road wheel nut a half a
turn counterclockwise, do not remove
them until the flat tire is raised off the
ground.
E328732
1
2
8. When you are changing a flat front tire,
connect the extension block to the jack
loadrest using the wing bolt as shown.
Connect the jack handle to the jack,
and use the lug nut wrench to operate
the jack.
E330077
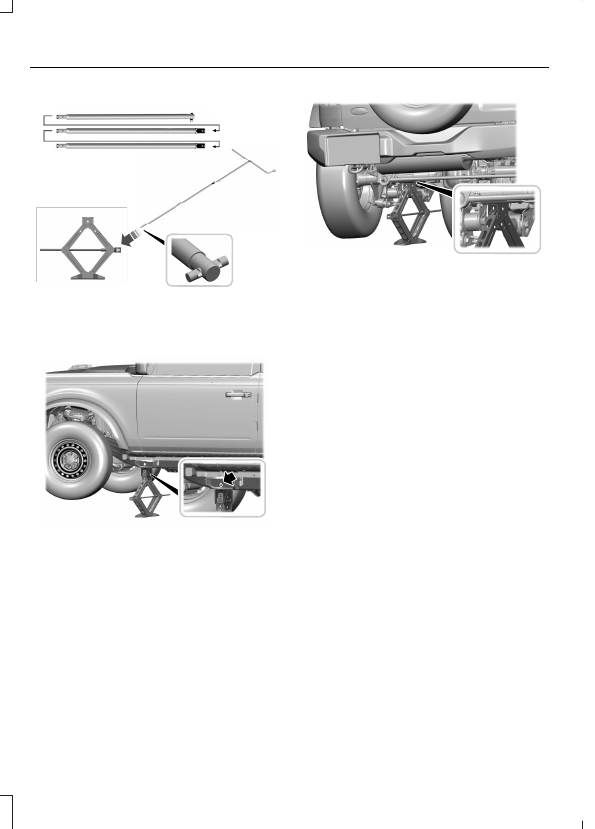
9. Do not use the extension block when
you are changing a flat tire on the rear
axle of the vehicle. Assemble the jack
handle using the extensions as shown
to operate the jack when placing under
the rear axle.
397
Changing a Road Wheel
E330076
10.
The front jacking point location is
indicated by an arrow-shaped mark
on the frame.
E343635
11.
Use the rear axle tube for the rear
jacking point.
E330074
Note:
Only use the jack on the specified
jacking points and as close to the affected
wheel as possible.
12.
Place the jack at the jacking point
closest to the flat tire you are
changing. Turn the lug wrench handle
clockwise until the flat tire is
completely off the ground.
13.
Remove the wheel nuts with the
wheel nut wrench.
14.
Replace the flat tire with the spare
wheel. Make sure the wheel is on with
the valve stem facing outward.
15.
Install the wheel nuts snug against
the hub. Do not fully tighten the
wheel nuts until the vehicle is lowered
back onto the ground.
16.
Turn the wrench handle
counterclockwise to lower the jack.
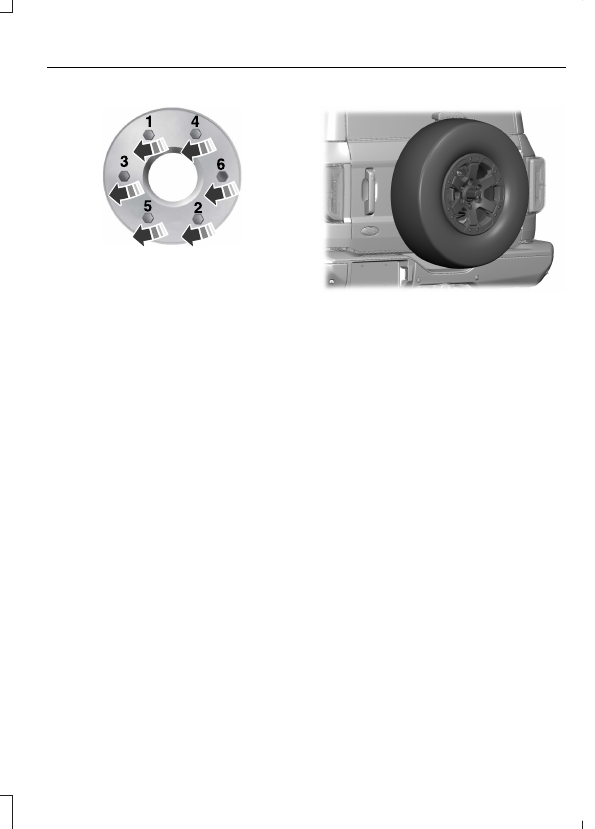
17.
Remove the jack and fully tighten the
lug nuts in the order shown below.
398
Changing a Road Wheel
E166719
18.
Stow the flat tire on the rear of the
vehicle and fully tighten the securing
nuts.
E324079
19.
Remove the wheel blocks.
20. Stow the jack and tools in the original
locations shown in the removal
section and tighten the retaining
screws by turning clockwise.
399
Changing a Road Wheel
WHEEL NUTS
Wheel Nut Torque Specifications
WARNING:
When you install a wheel, always remove any corrosion, dirt or foreign
materials present on the mounting surfaces of the wheel or the surface of the wheel
hub, brake drum or brake disc that contacts the wheel. Make sure to secure any fasteners
that attach the rotor to the hub so they do not interfere with the mounting surfaces of
the wheel. Installing wheels without correct metal-to-metal contact at the wheel
mounting surfaces can cause the wheel nuts to loosen and the wheel to come off while
your vehicle is in motion, resulting in loss of vehicle control, personal injury or death.
WARNING:
If the tire pressure monitor sensor becomes damaged it may not
function.
lb.ft (Nm)
*
Bolt size
100 lb.ft (135 Nm)
M12 X 1.5
*
Torque specifications are for nut and bolt threads free of dirt and rust. Use only our
recommended replacement fasteners.
Retighten the lug nuts to the specified torque within 100 mi (160 km) after any wheel
disturbance (such as tire rotation, changing a flat tire, wheel removal).
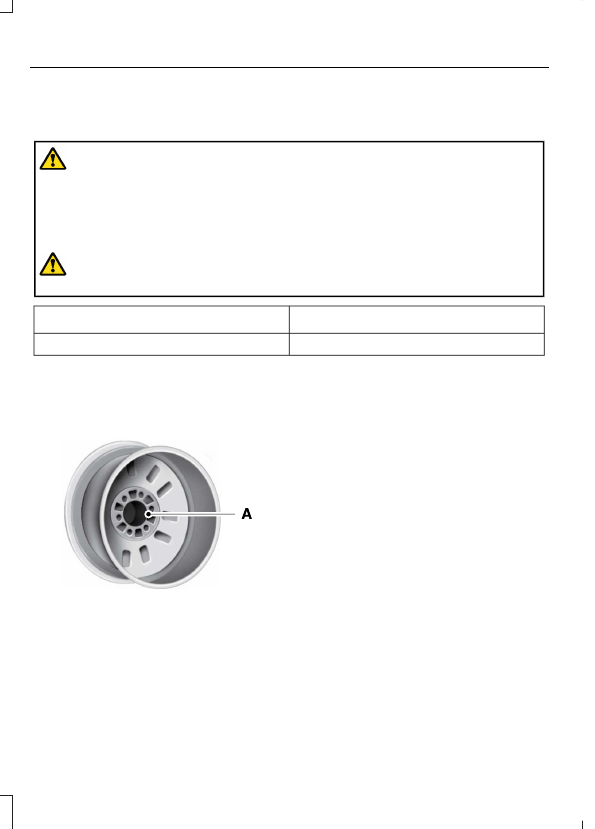
E145950
Wheel pilot bore
A
Inspect the wheel pilot bore and
mounting surface prior to installation.
Remove any visible corrosion or loose
particles.
400
Changing a Road Wheel

ENGINE SPECIFICATIONS - 2.3L ECOBOOST™
Specification
Engine
10.0:1
Compression ratio.
138 in³ (2,261 cm³)
Displacement.
1-3-4-2
Firing order.
Coil on plug
Ignition system.
0.028 in (0.7 mm) - 0.031 in (0.8 mm)
Spark plug gap.
401
Capacities and Specifications

ENGINE SPECIFICATIONS - 2.7L ECOBOOST™
Specification
Engine
10.0:1
Compression ratio.
165 in³ (2,700 cm³)
Displacement.
1-4-2-5-3-6
Firing order.
Coil on plug
Ignition system.
0.028 in (0.7 mm) - 0.031 in (0.8 mm)
Spark plug gap.
402
Capacities and Specifications

MOTORCRAFT PARTS - 2.3L ECOBOOST™
Motorcraft Part Number
Component
FA-2022
Air filter element.
BAGM-94RH7-800
Battery.
FP-93
Cabin air filter.
FL-910-S
Engine oil filter.
1
SP-594
Spark plug.
FT-215
Transmission fluid filter.
WW-1703
Windshield wiper blade-front.
WW-801
Windshield wiper blade-rear.
1
If a Motorcraft oil filter is not available, use an oil filter that meets industry performance
specification SAE/USCAR-36.
We recommend Motorcraft parts that are available at your authorized dealer or at
www.parts.ford.com. We engineer these parts for your vehicle to meet or exceed our
specifications. Use of other parts could impact vehicle performance, emissions and
durability. Your warranty could be void for any damage related to use of other parts.
403
Capacities and Specifications
Нет комментариевНе стесняйтесь поделиться с нами вашим ценным мнением.
Текст