Ford Bronco (2022 year). Manual in english — page 6
Push the lever away from you again to
switch the high beams off.
Push the lever away from you for a third
time to switch automatic high beam
control back on.
AUTOMATIC HIGH BEAM CONTROL – TROUBLESHOOTING
AUTOMATIC HIGH BEAM CONTROL – INFORMATION MESSAGES
Description
Message
The camera has reduced visibility. Clean the windshield. If
the message continues to appear, have your vehicle checked
as soon as possible.
Front Camera Low Visib-
ility Clean Screen
The camera has malfunctioned. Wait a short period of time
for the camera to cool down. If the message continues to
appear, have your vehicle checked as soon as possible.
Front Camera Tempor-
arily Not Available
The camera has malfunctioned. Have your vehicle checked
as soon as possible.
Front Camera Malfunc-
tion Service Required
100
Exterior Lighting
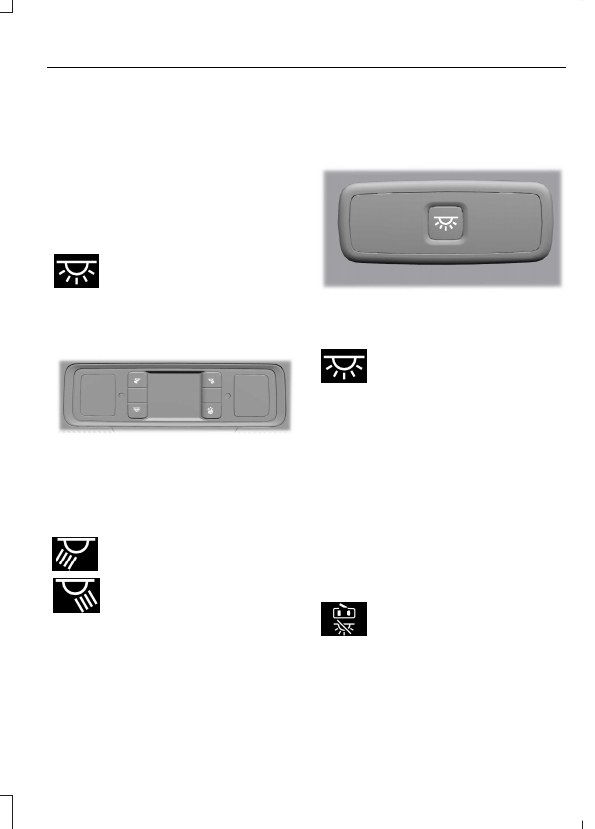
SWITCHING ALL OF THE
INTERIOR LAMPS ON AND OFF
The lamps turn on under the following
conditions:
•
You open any door.
•
You press a button on the remote
control.
•
You press the all lamps on button on
the overhead console.
Press to switch all interior lamps
on or off.
SWITCHING THE FRONT
INTERIOR LAMPS ON AND OFF
E281230
The front interior lamp switches are on the
overhead console.
Note:
The position of each button on the
overhead console depends on your vehicle.
Individual Map Lamps
E262193
Press to switch the left-hand
individual dome lamp on and off.
Press to switch the right-hand
individual dome lamp on and off.
SWITCHING THE REAR
INTERIOR LAMPS ON AND OFF
E281231
The rear interior lamps may be above the
rear seat or above the rear windows.
Press to switch the lamps on or
off.
Note:
If you switch the rear lamps on
through the overhead console, you cannot
switch them off with the rear lamp switch.
INTERIOR LAMP FUNCTION
WHAT IS THE INTERIOR LAMP
FUNCTION
The interior lamp function switches the
courtesy and door lamps on or off.
SWITCHING THE INTERIOR LAMP
FUNCTION ON AND OFF
Press to switch the interior lamp
function on and off.
Note:
The indicator lamp illuminates amber
when the door function is off.
101
Interior Lighting
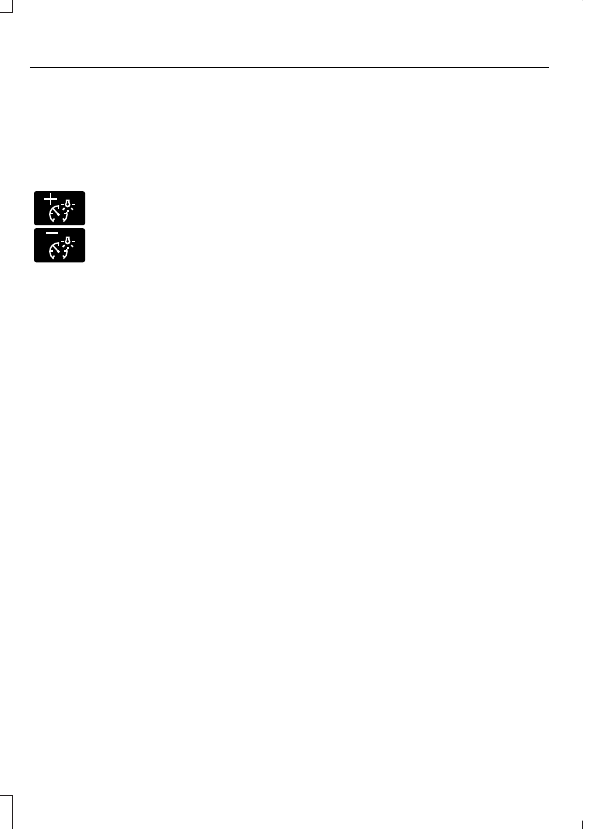
ADJUSTING THE INSTRUMENT
PANEL LIGHTING
BRIGHTNESS
The instrument lighting dimmer buttons
are on the lighting control.
E291299
E296433
Repeatedly press one of the
buttons to adjust the brightness.
AMBIENT LIGHTING
(IF EQUIPPED)
SWITCHING AMBIENT LIGHTING
ON AND OFF
1.
Press
Settings
on the touchscreen.
2. Press
Vehicle Settings
.
3. Press
Ambient Light
.
4. Switch
Ambient Light
on or off.
ADJUSTING AMBIENT LIGHTING
Drag the slider left or right.
INTERIOR LIGHTING –
TROUBLESHOOTING
INTERIOR LIGHTING –
FREQUENTLY ASKED QUESTIONS
Why do my courtesy lamps or interior
lamps turn off when I have them
switched on when I switch my vehicle
off?
The battery saver turns the courtesy
lamps and interior lamps off after a
short period of time after you switch
your vehicle off.
102
Interior Lighting
OPENING AND CLOSING THE
WINDOWS
WARNING:
Do not leave children
unattended in your vehicle and do not
let them play with the power windows.
Failure to follow this instruction could
result in personal injury.
WARNING:
When closing the
power windows, verify they are free of
obstruction and make sure that children
and pets are not in the proximity of the
window openings.
Press the control to open the
window. Lift the control to close
the window.
Note:
The power windows operate with the
ignition on, and for several minutes after you
switch the ignition off or until you open a
front door.
To reduce wind noise or pulsing noise when
one window is open, slightly open the
opposite window.
Tailgate Window
To open the window, do the following:
1.
Open the tailgate. See
Tailgate From Outside Your Vehicle
2. Lift the window.
To close the window, do the following:
1.
Push the window down.
2. Close the tailgate. See
Tailgate From Outside Your Vehicle
GLOBAL OPENING
WHAT IS GLOBAL OPENING
You can use the remote control to open
the windows with the ignition off.
USING GLOBAL OPENING
1.
Press and release the unlock button on
the remote control.
2. Press and hold the unlock button on
the remote control.
3. Release the button when the windows
start to open.
Press the lock or the unlock button on the
remote control to stop global opening.
Note:
You can use global opening for a
short period of time when you unlock your
vehicle using the remote control.
SWITCHING GLOBAL OPENING ON
AND OFF
1.
Press
Settings
on the touchscreen.
2. Press
Vehicle Settings
.
3. Press
Windows
.
4. Switch
Remote Open
on or off.
WINDOW BOUNCE-BACK
WHAT IS WINDOW BOUNCE-BACK
The window stops and reverses if it detects
an obstruction when closing.
103
Windows
OVERRIDING WINDOW BOUNCE-
BACK
WARNING:
If you override
bounce-back, the window does not
reverse if it detects an obstacle. Take
care when closing the windows to avoid
personal injury or damage to your
vehicle.
1.
Close the window until it reaches the
point of resistance and let it reverse.
2. Lift and hold the window control switch
within two seconds to override
bounce-back and close the window.
Bounce-back is now disabled and you
can close the window manually.
Note:
The window goes past the point of
resistance and you can fully close it.
Note:
If the window does not close, have
your vehicle checked as soon as possible.
LOCKING THE REAR WINDOW
CONTROLS
Press the window control switch
to lock or unlock the rear window
controls. It illuminates when you
lock the rear window controls.
104
Windows

INTERIOR MIRROR
PRECAUTIONS
WARNING:
Do not adjust the
mirrors when your vehicle is moving. This
could result in the loss of control of your
vehicle, serious personal injury or death.
Note:
Do not clean the mirror housing or
glass with harsh abrasives, fuel or other
petroleum-based cleaning products.
MANUALLY DIMMING THE
INTERIOR MIRROR
Pull the tab below the mirror toward you
to reduce glare at night.
AUTO-DIMMING INTERIOR
MIRROR
(IF EQUIPPED)
WHAT IS THE AUTO-DIMMING
INTERIOR MIRROR
The mirror dims to reduce the effect of
bright light from behind. It returns to
normal when the bright light from behind
is no longer present or if you shift into
reverse (R), to make sure you have a clear
view when backing up.
AUTO-DIMMING INTERIOR
MIRROR LIMITATIONS
Do not block the sensors on the front and
back of the mirror.
Note:
A rear center passenger or raised rear
center head restraint could prevent light
from reaching the sensor.
105
Interior Mirror
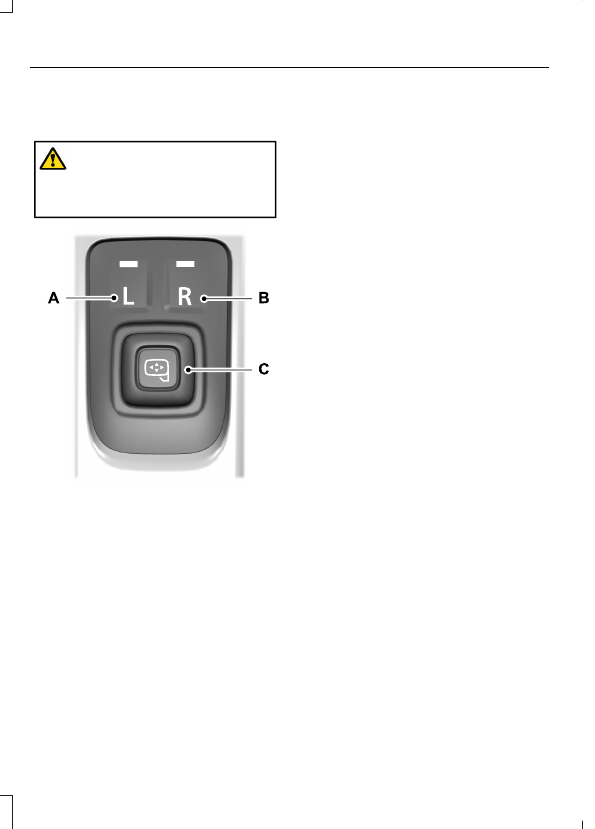
ADJUSTING THE EXTERIOR
MIRRORS
WARNING:
Do not adjust the
mirrors when your vehicle is moving. This
could result in the loss of control of your
vehicle, serious personal injury or death.
E328042
Left-hand mirror.
A
Right-hand mirror.
B
Adjustment control.
C
To adjust your mirrors, switch your vehicle
on, with the ignition in accessory mode or
the engine running.
1.
Select the mirror you want to adjust.
The control light turns on.
2. Use the adjustment control to adjust
the position of the mirror.
3. Press the mirror control again. The
control light turns off.
FOLDING THE EXTERIOR
MIRRORS
Push the mirror toward the door window
glass. Make sure that you fully engage the
mirror in its support when returning it to its
original position.
106
Exterior Mirrors
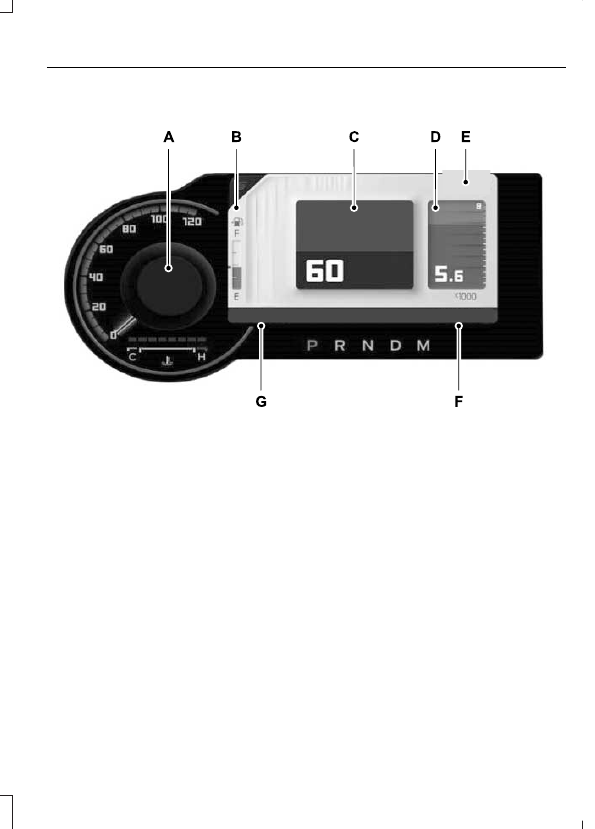
INSTRUMENT CLUSTER OVERVIEW
E328319
Speedometer.
A
Fuel gauge.
B
Digital speedometer.
C
Tachometer.
D
Compass and ambient temperature.
E
Odometer.
F
Distance to empty.
G
TACHOMETER
Indicates the engine speed.
SPEEDOMETER
Indicates the vehicle speed.
FUEL GAUGE
WHAT IS THE FUEL GAUGE
Indicates approximately how much fuel is
in the fuel tank.
107
Instrument Cluster
FUEL GAUGE LIMITATIONS
The fuel gauge may not provide an
accurate reading when your vehicle is on
an incline.
LOCATING THE FUEL FILLER
DOOR
The arrow adjacent to the fuel pump
symbol indicates on which side of your
vehicle the fuel filler door is located.
WHAT IS THE LOW FUEL
REMINDER
A low fuel level reminder displays and
sounds when the distance to empty
reaches 75 mi (120 km) to empty for
MyKey, and at 50 mi (80 km), 25 mi
(40 km), 12 mi (20 km) and 0 mi (0 km)
for all vehicle keys.
Note:
The low fuel reminder can appear at
different fuel gauge positions depending on
fuel economy conditions. This variation is
normal.
WHAT IS DISTANCE TO EMPTY
Indicates the approximate distance your
vehicle can travel on the fuel remaining in
the tank. Changes in driving pattern can
cause the value to not only decrease but
also increase or stay constant for periods
of time.
ENGINE COOLANT
TEMPERATURE GAUGE
Indicates the engine coolant temperature.
TRANSMISSION FLUID
TEMPERATURE GAUGE
Indicates the transmission fluid
temperature.
Special operating conditions can cause
higher than normal operating
temperatures. See
Conditions Scheduled Maintenance
Note:
This is a configurable gauge.
TURBO BOOST GAUGE - 2.3L
ECOBOOST™
Indicates the amount of manifold air
pressure in the engine.
Note:
This is a configurable gauge.
WHAT IS THE INFORMATION
BAR
Displays information for navigation, outside
air temperature, odometer and distance
to empty.
WHAT ARE THE INSTRUMENT
CLUSTER WARNING LAMPS
Warning lamps alert you to a vehicle
condition that could become serious.
Some lamps illuminate when you start
your vehicle to make sure they work. If any
lamps remain on after starting your vehicle,
refer to the respective system warning
lamp for further information.
108
Instrument Cluster
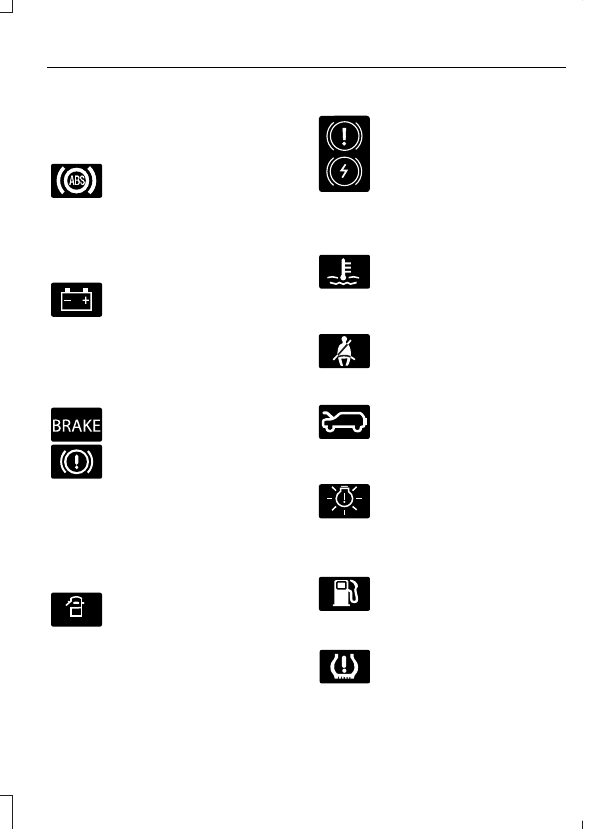
INSTRUMENT CLUSTER
WARNING LAMPS
Anti-Lock Brake System
If it illuminates when you are
driving, this indicates a
malfunction. Your vehicle
continues to have normal braking without
the anti-lock brake system function. Have
your vehicle checked as soon as possible.
Battery
It illuminates when you switch
the ignition on.
If it illuminates when the engine
is running this indicates a malfunction.
Have your vehicle checked as soon as
possible.
Brake System Warning Lamp
E270480
It illuminates when you apply the
parking brake and the ignition is
on. If it illuminates when your
vehicle is moving, make sure the
parking brake is released. If the
parking brake is released, this
indicates low brake fluid level or the brake
system requires service. Have your vehicle
checked as soon as possible.
Note:
Indicators may vary depending on
region.
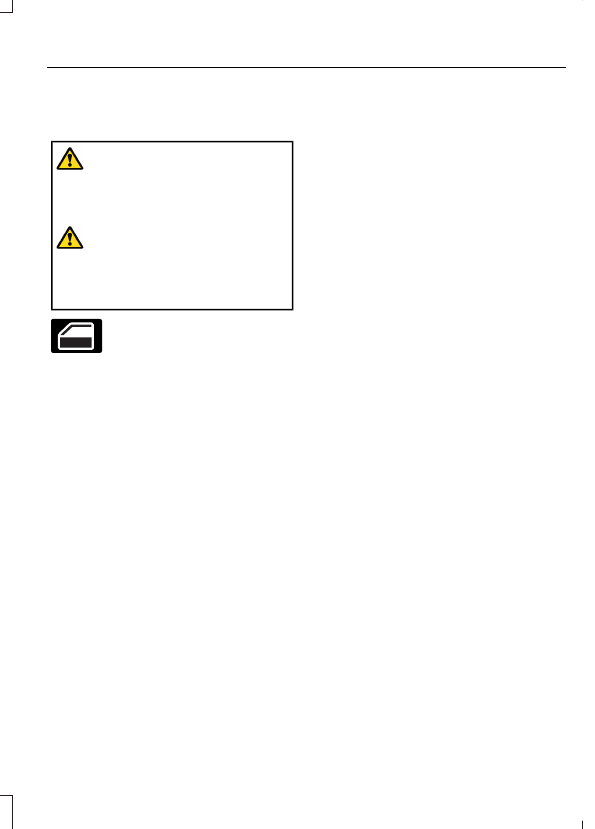
Door Ajar
E340898
It illuminates when you switch
the ignition on and remains on if
any door is open.
Electric Park Brake
E325775
It illuminates or flashes when the
electric parking brake requires
service.
Note:
Indicators may vary depending on
region.
Engine Coolant Temperature
If it illuminates, safely stop your
vehicle and switch your vehicle
off.
Fasten Seatbelt
E71880
It illuminates and a tone sounds
until you fasten the seatbelts.
Hood Ajar
E324249
It illuminates when the ignition
is on and the hood is not
completely closed.
Low Beam Warning
E325579
Illuminates when the low beam
headlamp bulb requires service.
Have the system checked as
soon as possible.
Low Fuel Level
It illuminates when the fuel level
is low.
Low Tire Pressure
It illuminates when your tire
pressure is low. If illuminated,
check your tire pressure as soon
as possible. If it begins to flash at anytime,
have the system checked as soon as
possible.
109
Instrument Cluster
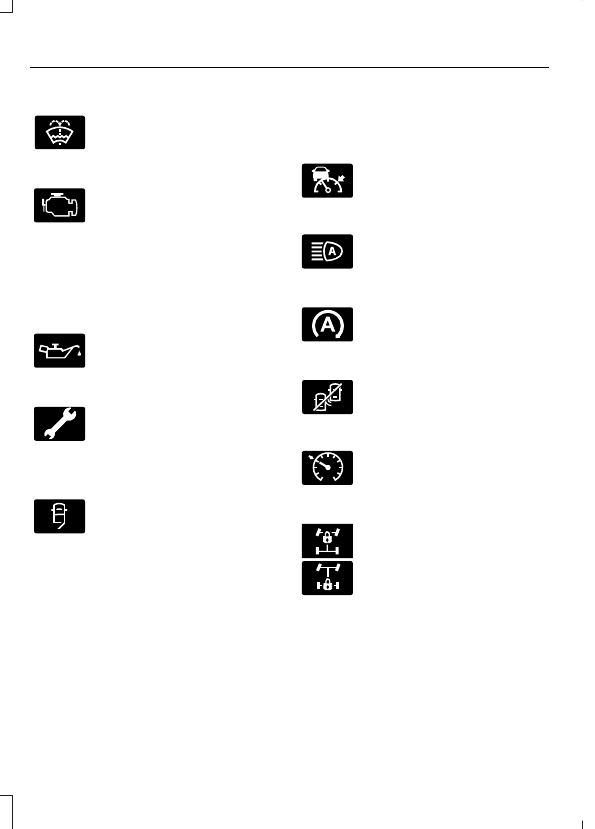
Low Washer Fluid Level
E132353
It illuminates when the washer
fluid is low.
Malfunction Indicator Lamp
It illuminates when the ignition
is on and the engine is off, this is
normal operation. If it illuminates
when the engine is on this indicates that
the emission control system requires
service. If it flashes, have your vehicle
checked immediately. See
Oil Pressure
It illuminates when the engine
oil pressure is low.
Powertrain Malfunction
Illuminates when the powertrain
requires service. Have the
system checked as soon as
possible.
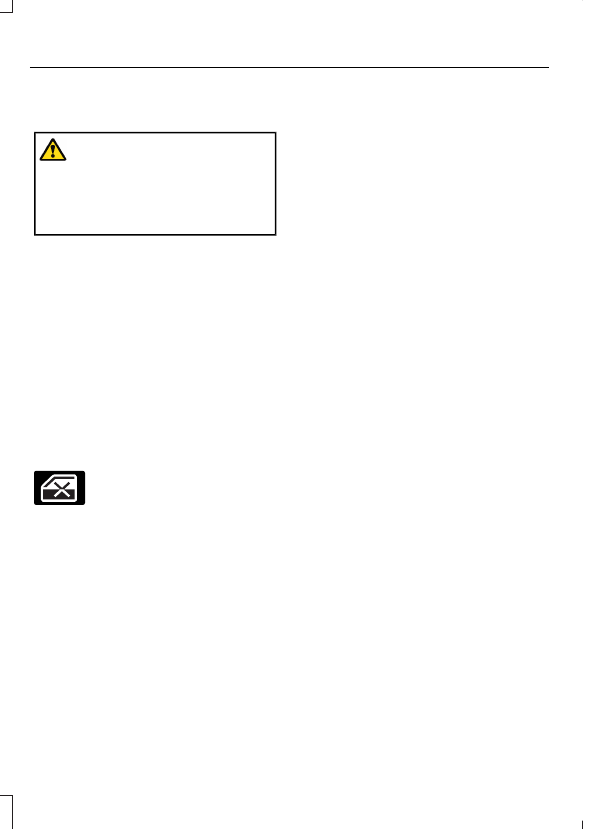
Tailgate Ajar
E340897
It illuminates when the ignition
is on and the tailgate is not
completely closed.
WHAT ARE THE INSTRUMENT
CLUSTER INDICATORS
Indicators notify you of various features
that are active on your vehicle.
INSTRUMENT CLUSTER
INDICATORS
Adaptive Cruise Control
E144524
Automatic Headlamp High Beam
Auto-Start-Stop
Blind Spot Monitor
E323542
Cruise Control
E71340
Differential Lock
E328595
E325779
110
Instrument Cluster
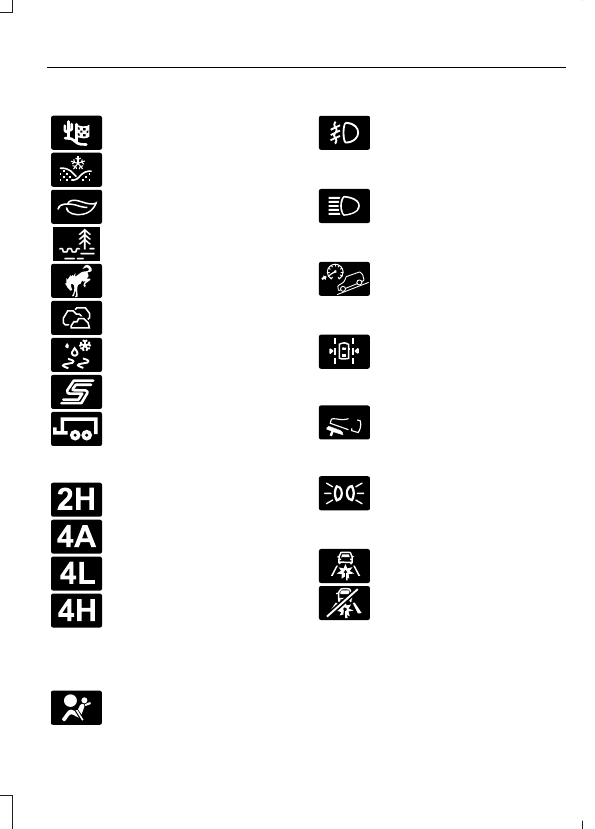
Drive Modes
E225314
E295420
E295413
E296606
E317283
E322413
E295414
E246593
E246592
Four-Wheel Drive
E181778
E181781
E181780
E181779
Note:
Some indicators will appear different
depending on vehicle options.
Front Airbag
E67017
Front Fog Lamp
Headlamp High Beam
Hill Descent
Lane Keeping System
E308131
One Pedal Drive
E328584
1
Parking Lamps
Pre-Collision Assist
E329466
E329467
111
Instrument Cluster
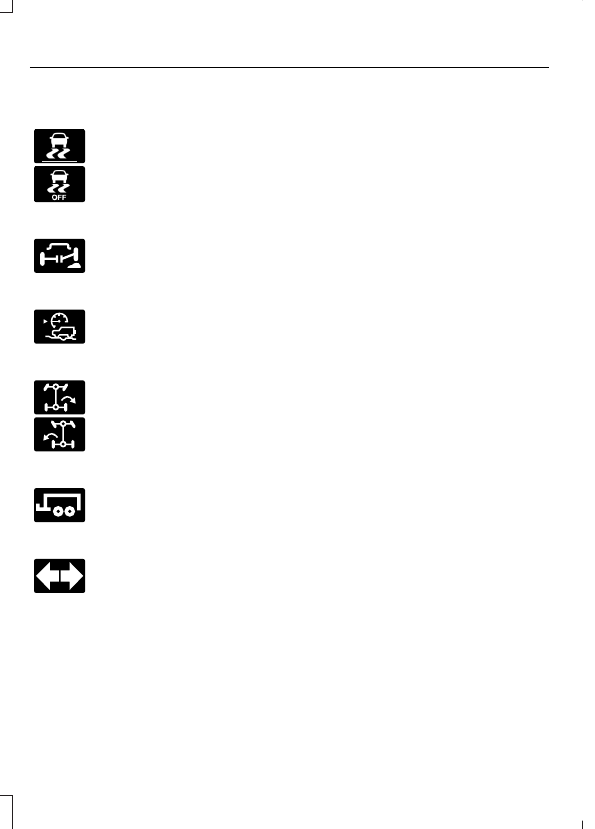
Stability Control and Traction
Control
E138639
E130458
Stabilizer Bar Disconnect
E329476
Trail Control
E318506
Trail Turn Assist
E329474
E329475
Tow Haul
E246592
Turn Signal Lamps
112
Instrument Cluster
USING THE INSTRUMENT
CLUSTER DISPLAY CONTROLS
WARNING:
Driving while distracted
can result in loss of vehicle control, crash
and injury. We strongly recommend that
you use extreme caution when using any
device that may take your focus off the
road. Your primary responsibility is the
safe operation of your vehicle. We
recommend against the use of any
hand-held device while driving and
encourage the use of voice-operated
systems when possible. Make sure you
are aware of all applicable local laws
that may affect the use of electronic
devices while driving.
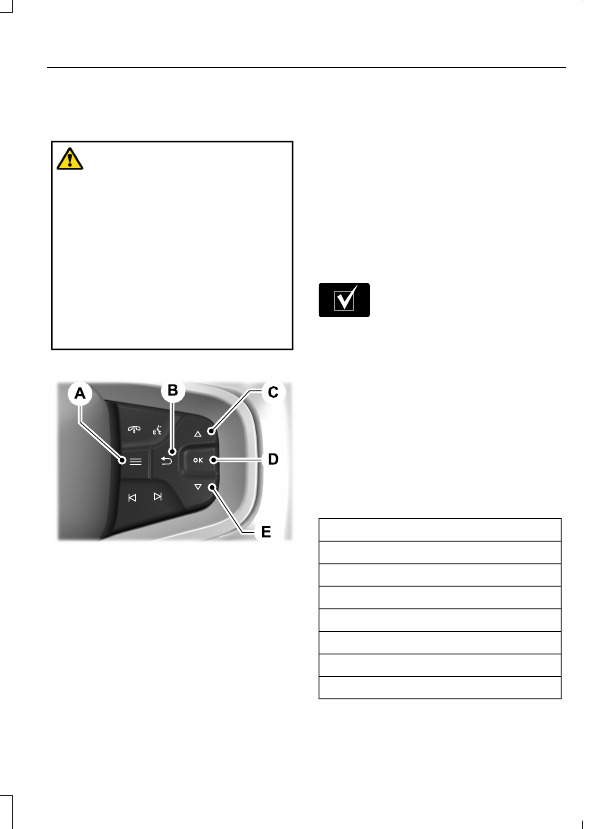
The controls are on the steering wheel.
E326969
Menu button.
A
Return button.
B
Up button.
C
OK toggle button.
D
Down toggle button
E
Return Button
Press to go back or to exit a menu.
OK
Button
Press to make a selection. Press the toggle
button up or down to scroll through menu
items.
Menu Button
Press to display the submenus.
Toggle Buttons
Used to navigate the menus.
Status Indicator
E204495
Menu items with a check box
indicates a feature's status. A
check in the box indicates the
feature is on, and unchecked indicates the
feature is off.
INSTRUMENT CLUSTER
DISPLAY MAIN MENU
Depending on your vehicle options, some
menu items may appear different or not
at all.
Note:
For your safety, some features are
speed-dependent and could be unavailable
when your vehicle is above a certain speed.
Menu Item
MyView
Trip/Fuel
Off-Road
Navigation
Phone
Audio
Settings
113
Instrument Cluster Display
TRIP COMPUTER
ACCESSING THE TRIP COMPUTER
1.
Select
Trip/Fuel
.
2. Select
Fuel Economy
,
Trip 1
or
Trip 2
.
RESETTING THE TRIP COMPUTER
1.
Select
Trip/Fuel
.
2. Press and hold the
OK
button for a few
seconds.
RESETTING THE INDIVIDUAL TRIP
VALUES
1.
Select
Trip/Fuel
.
2. Select
Trip 1
or
Trip 2
.
3. Press and hold the
OK
button for a few
seconds.
PERSONALIZED SETTINGS
CHANGING THE INSTRUMENT
CLUSTER DISPLAY LANGUAGE
Note:
Available languages vary by region.
1.
Press
Settings
on the touchscreen.
2. Press
General
.
3. Press
Language
.
4. Select a language.
CHANGING THE MEASUREMENT
UNIT
1.
Press
Settings
on the touchscreen.
2. Press
General
.
3. Press
Measure Units
.
4. Select a measurement unit.
CHANGING THE TEMPERATURE
UNIT
1.
Press
Settings
on the touchscreen.
2. Press
General
.
3. Press
Temperature Units
.
4. Select
Fahrenheit
or
Celsius
.
CHANGING THE TIRE PRESSURE
UNIT
1.
Press
Settings
on the touchscreen.
2. Press
General
.
3. Press
Tire Pressure Units
.
4. Select a pressure unit.
114
Instrument Cluster Display
WHAT IS REMOTE START
The system allows you to remotely start
your vehicle and to adjust the interior
temperature according to the settings that
you chose.
REMOTE START
PRECAUTIONS
WARNING:
Do not start the engine
in a closed garage or in other enclosed
areas. Exhaust fumes are toxic. Always
open the garage door before you start
the engine. Failure to follow this
instruction could result in personal injury
or death.
REMOTE START LIMITATIONS
Remote start does not work under the
following conditions:
•
The perimeter alarm is sounding.
•
The hood is open.
•
The transmission is not in park (P).
•
The ignition is on.
•
The check engine light is on.
•
The battery voltage is below the
minimum operating voltage.
Note:
Do not use remote start if your fuel
level is low.
Note:
To use remote start with the Ford
Pass or Phone as a Key, enable the modem.
See
Connecting the Vehicle to a Wi-Fi
ENABLING REMOTE START
1.
Press
Settings
on the touchscreen.
2. Press
Vehicle Settings
.
3. Press
Remote Start Setup
.
4. Switch
Remote Start
on or off.
Note:
To remote start with FordPass, make
sure that the modem is enabled. See
Connecting FordPass to the Modem
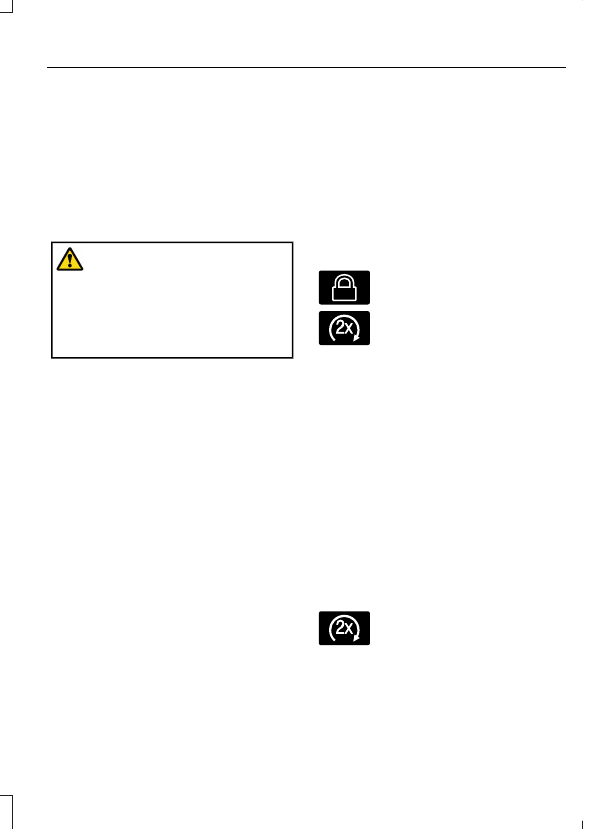
REMOTELY STARTING AND
STOPPING THE VEHICLE
Remotely Starting the Vehicle
E138623
Press the button on the remote
control.
E138625
Within three seconds, press the
button on the remote control.
Within three seconds, press the
button again.
Note:
You can also use FordPass to start
the vehicle.
Note:
The turn signal lamps flash twice.
Note:
The parking lamps turn on when the
vehicle is running.
Note:
The horn sounds if the system fails
to start.
Note:
All other vehicle systems remain off
when you have remotely started the vehicle.
Note:
The vehicle remains secured when
you have remotely started the vehicle. A
valid key must be inside your vehicle to
switch the ignition on and drive your vehicle.
Remotely Stopping the Vehicle
E138625
Within three seconds, press the
button on the remote control.
Within three seconds, press the
button again.
115
Remote Start
(If Equipped)
Нет комментариевНе стесняйтесь поделиться с нами вашим ценным мнением.
Текст