Toyota Camry (2018 year). Manual — part 127
518
7-2. Steps to take in an emergency
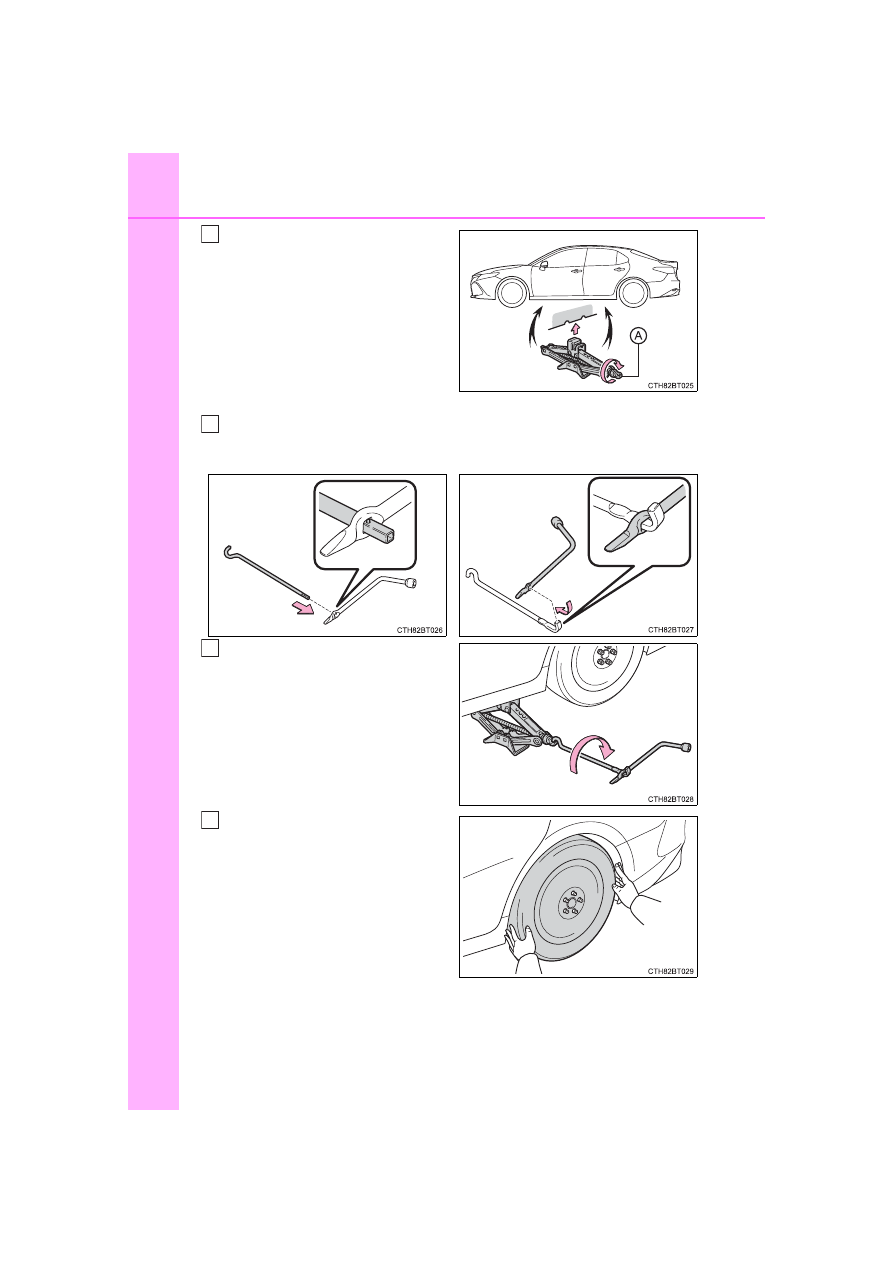
To prevent damage to the vehicle
when using the jack, position the
jack in the correct location.
(
→
The jack point guides are located
under the rocker panel. They
indicate the jack point positions.
Assemble the jack handle.
Raise the vehicle until the tire is
slightly raised off the ground.
Remove all the wheel nuts and
the tire.
When resting the tire on the
ground, place the tire so that the
wheel design faces up to avoid
scratching the wheel surface.
4
5
Type A
Type B
6
7
519
7-2. Steps to take in an emergency
Wh
en tro
uble
a
ris
es
WARNING
■
Replacing a flat tire
●
Do not touch the disc wheels or the area around the brakes immedi-
ately after the vehicle has been driven.
After the vehicle has been driven the disc wheels and the area around
the brakes will be extremely hot. Touching these areas with hands, feet
or other body parts while changing a tire, etc. may result in burns.
●
Failure to follow these precautions could cause the wheel nuts to
loosen and the tire to fall off, resulting in death or serious injury.
• Have the wheel nuts tightened with a torque wrench to 76 ft•lbf (103
N•m, 10.5 kgf•m) as soon as possible after changing wheels.
• Do not attach a heavily damaged wheel ornament, as it may fly off
the wheel while the vehicle is moving.
• When installing a tire, only use wheel nuts that have been specifi-
cally designed for that wheel.
• If there are any cracks or deformations in the bolt screws, nut
threads or bolt holes of the wheel, have the vehicle inspected by
your Toyota dealer.
• When installing the wheel nuts, be sure to install them with the
tapered ends facing inward. (
520
7-2. Steps to take in an emergency
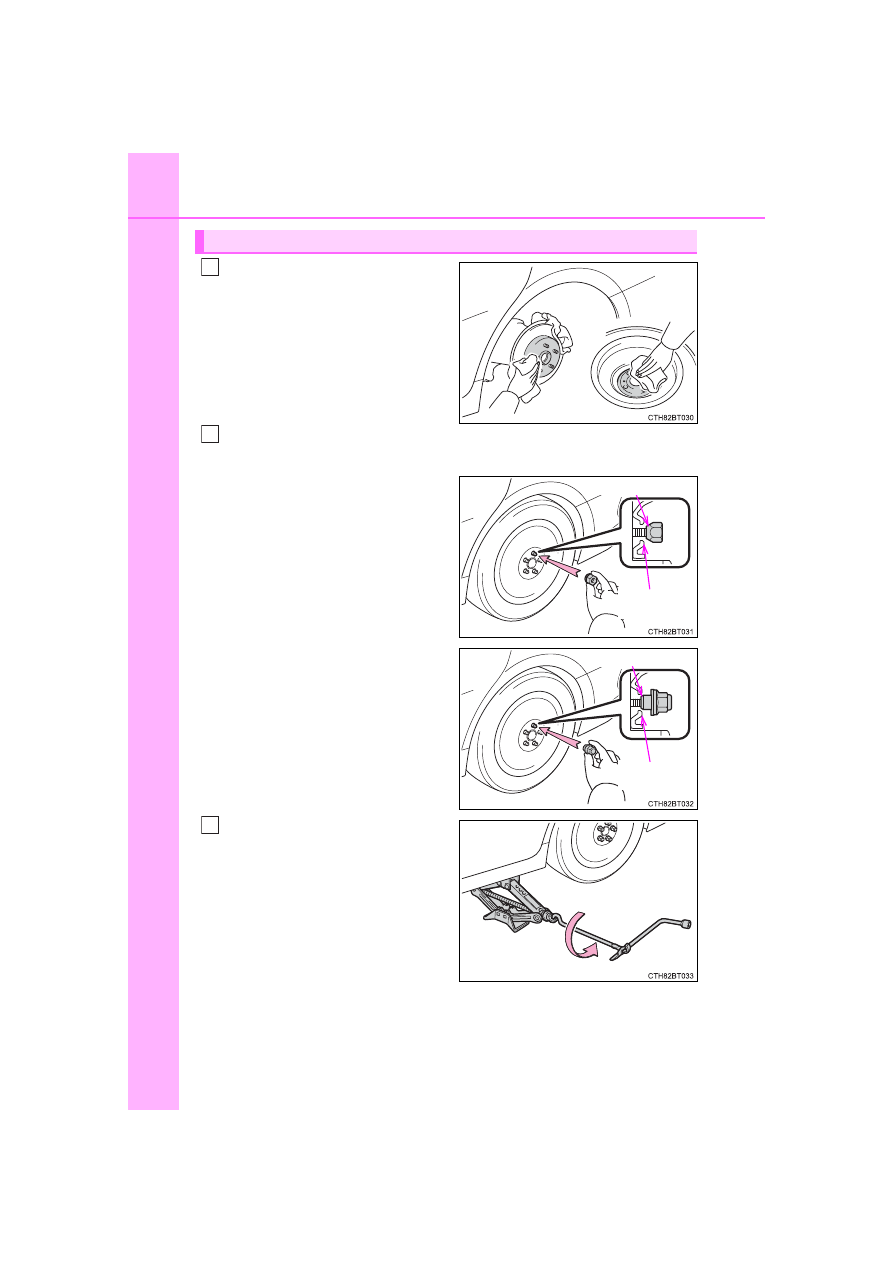
If foreign matter is on the wheel
contact surface, the wheel nuts
may loosen while the vehicle is in
motion, causing the tire to come
off.
Install the tire and loosely tighten each wheel nut by hand by
approximately the same amount.
When replacing a steel wheel
with a steel wheel, tighten the
wheel nuts until the tapered
portion comes into loose con-
tact with the disc wheel seat.
When replacing an aluminum
wheel with a steel wheel,
tighten the wheel nuts until the
tapered portion comes into
loose contact with the disc
wheel seat.
Lower the vehicle.
Installing the spare tire
1
2
Tapered portion
Disc wheel
seat
Tapered portion
Disc wheel
seat
3
521
7-2. Steps to take in an emergency
Wh
en tro
uble
a
ris
es
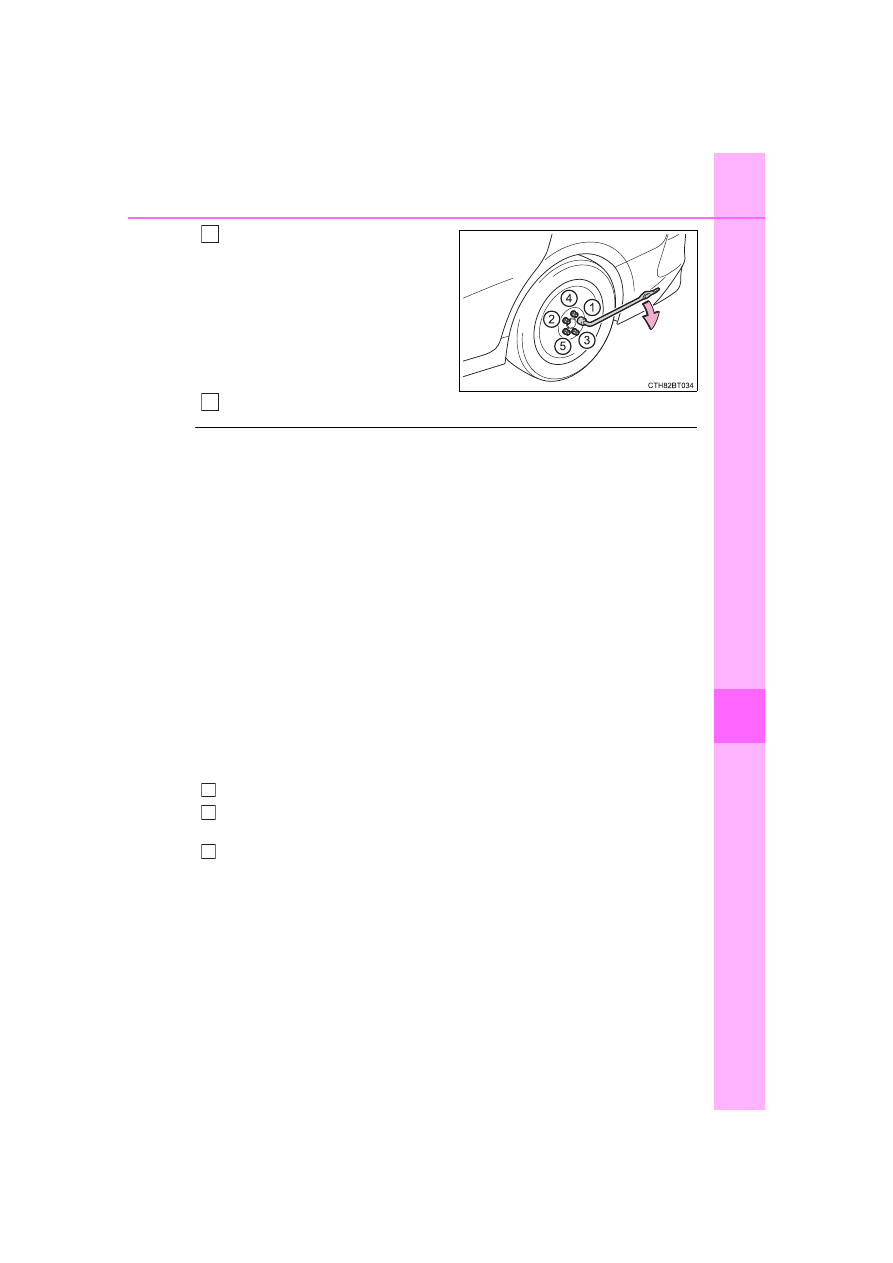
Firmly tighten each wheel nut
two or three times in the order
shown in the illustration.
Tightening torque:
76 ft•lbf (103 N•m, 10.5 kgf•m)
Stow the flat tire, tire jack and all tools.
■
The compact spare tire
●
The compact spare tire is identified by the label “TEMPORARY USE
ONLY” on the tire sidewall.
Use the compact spare tire temporarily, and only in an emergency.
●
Make sure to check the tire inflation pressure of the compact spare tire.
(
■
When using the compact spare tire
As the compact spare tire is not equipped with a tire pressure warning
valve and transmitter, low inflation pressure of the spare tire will not be
indicated by the tire pressure warning system. Also, if you replace the
compact spare tire after the tire pressure warning light comes on, the light
remains on.
■
When the compact spare tire is equipped
When driving with the compact spare tire installed, the vehicle height will
be different than when driving with standard tires.
■
If you have a flat front tire on a road covered with snow or ice (vehi-
cles with 16 or 17-inch wheels)
Install the compact spare tire on one of the rear wheels of the vehicle.
Perform the following steps and fit tire chains to the front tires:
Replace a rear tire with the compact spare tire.
Replace the flat front tire with the tire removed from the rear of the vehi-
cle.
Fit tire chains to the front tires.
4
5
1
2
3
Нет комментариевНе стесняйтесь поделиться с нами вашим ценным мнением.
Текст