Toyota Sequoia (2005). Manual — part 800
BR10H–05
BR3753
BR–22
–
BRAKE
BRAKE BOOSTER ASSEMBLY
3189
REMOVAL
1.
REMOVE MASTER CYLINDER (See page
2.
DISCONNECT VACUUM HOSE FROM BRAKE
BOOSTER
3.
DISCONNECT 2 VACUUM SWITCH CONNECTORS
FROM BRAKE BOOSTER
4.
REMOVE FRONT DOOR SCUFF PLATE, COWL SIDE
TRIM BOARD, SIDE PANEL, LOWER FINISH PANEL
AND NO. 2 HEATER TO REGISTER DUCT (See page
)
5.
REMOVE PEDAL RETURN SPRING
6.
REMOVE CLIP AND CLEVIS PIN
7.
REMOVE BRAKE BOOSTER
(a)
Remove the 4 nuts, pull out the brake booster.
Torque: 13 N·m (130 kgf·cm, 9 ft·lbf)
(b)
Remove the gasket from the brake booster bracket.
(c)
Loosen the lock nut then remove the clevis.
Torque: 25 N·m (250 kgf·cm, 18 ft·lbf)
(d)
Remove the check valve.
(e)
Remove the 4 nuts, brake booster bracket and gasket
from the brake booster.
Torque: 25 N·m (250 kgf·cm, 18 ft·lbf)
BR1NE–03
–
BRAKE
BRAKE BOOSTER ASSEMBLY
BR–23
3190
INSTALLATION
Installation is in the reverse order of removal (See page
HINT:
Fill the brake reservoir with brake fluid and bleed brake system (See page
Check the brake pedal hight (See page
).
Do the operational check (See page
BR10J–04
F07750
Clip
Inner Pad
Anti–rattle
Spring
Outer Pad
Anti–squeal Shim
Pin
Inner Anti–squeal
Shim
Disc brake grease
BR–24
–
BRAKE
FRONT BRAKE PAD
3191
FRONT BRAKE PAD
COMPONENTS
BR10K–04
F07748
F07749
R13537
–
BRAKE
FRONT BRAKE PAD
BR–25
3192
REPLACEMENT
1.
REMOVE FRONT WHEEL
2.
INSPECT PAD LINING THICKNESS
Check the pad thickness and replace pads if not within specifi-
cation.
Minimum thickness: 1.0 mm (0.039 in.)
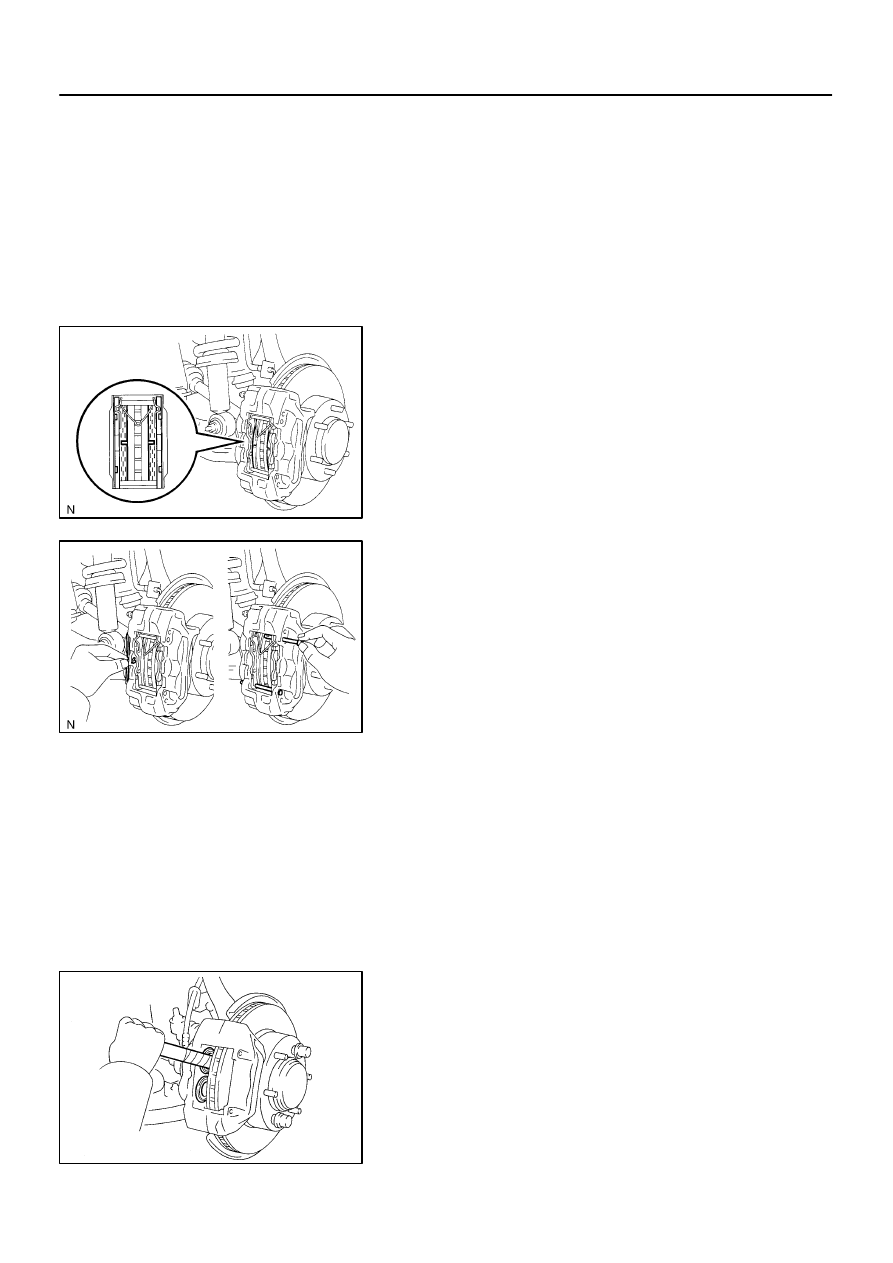
3.
REMOVE CLIP, 2 PINS AND ANTI–RATTLE SPRING
4.
REMOVE 2 PADS WITH 4 ANTI–SQUEAL SHIMS
NOTICE:
The anti–rattle spring and clip can be used again provided
that they have sufficient rebound, no deformation, cracks
or wear, and have had all rust, dirt and foreign particles
cleaned off.
5.
CHECK DISC THICKNESS AND RUNOUT
(See page
6.
INSTALL NEW PADS
NOTICE:
When replacing worn pads, the anti–squeal shims must be
replaced together with the pads.
(a)
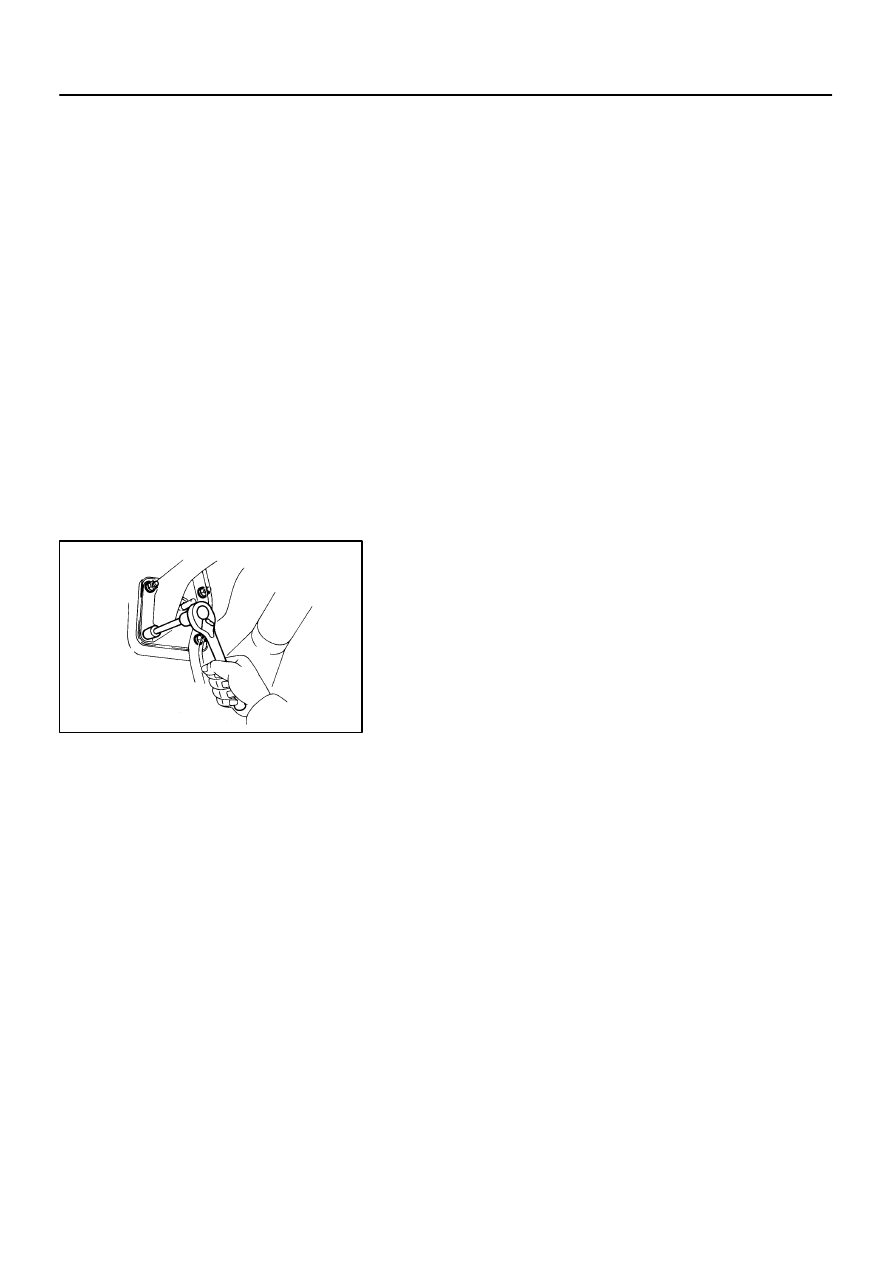
Draw out a small amount of brake fluid from the reservoir.
(b)
Press in the pistons with a monkey wrench handle or
equivalent.
HINT:
Tape the monkey wrench handle before use.
Always change the pad on one wheel at a time as there
is a possibility of the opposite piston flying out.
If the piston is difficult to push in, loosen the bleeder plug
and push in the piston while letting some brake fluid es-
cape.
(c)
Install the 4 anti–squeal shims to new pads.
Нет комментариевНе стесняйтесь поделиться с нами вашим ценным мнением.
Текст