Toyota Sequoia (2005). Manual — part 944
AC3H8–02
I21376
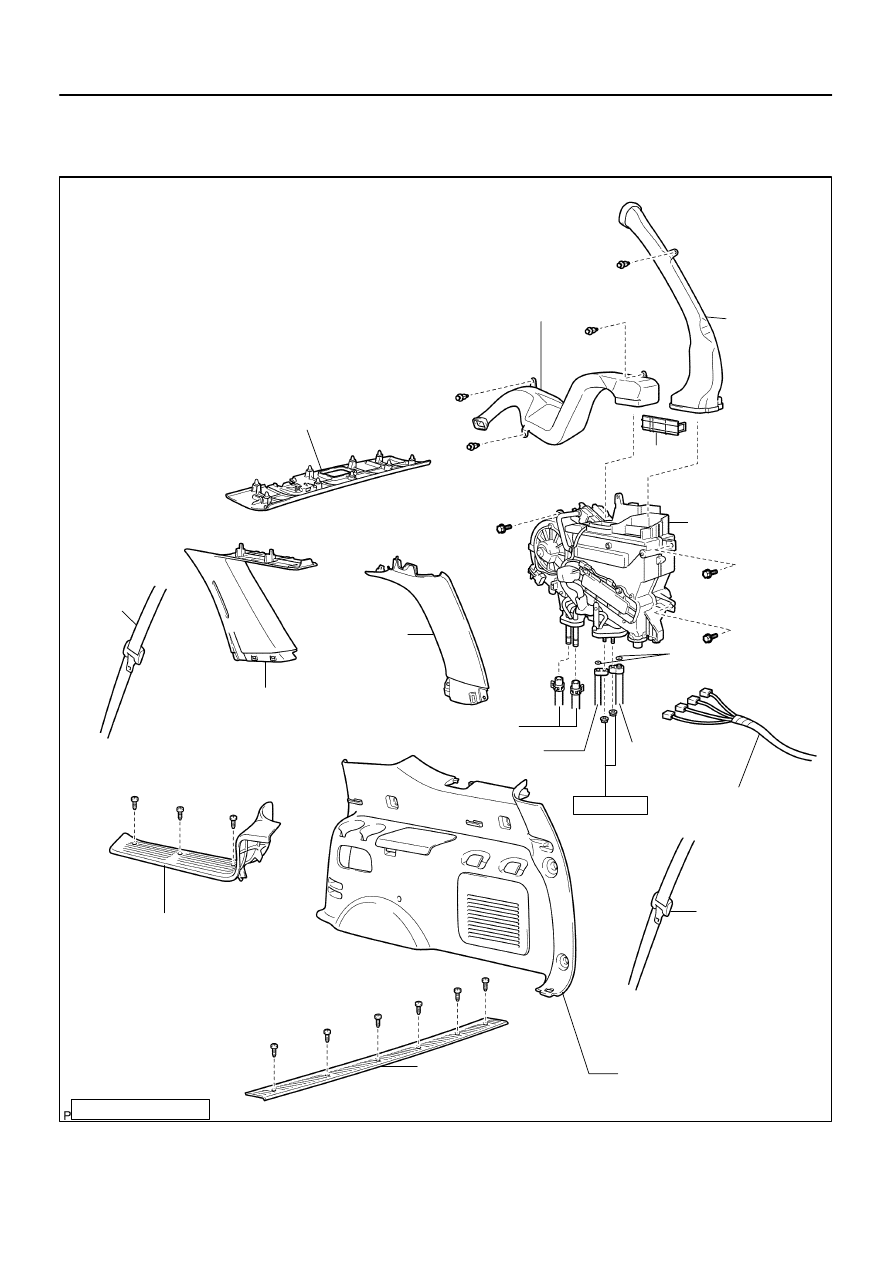
Rear Cooler
Duct
Rear Heater Duct
Plate
Rear A/C Unit
Upper Back Door Garnish
Quarter
Pillar
Garnish RH
Rear Seat
Outer Belt
Rear Window
Side Garnish RH
Water Hose
Wire Harness
Suction Tube
Rear Seat
Outer Belt
Rear Quarter Trim
Panel RH
Back Door
Scuff Plate
Rear Door Scuff Plate RH
Liquid Tube
O–Ring
N·m (kgf·cm, in·lbf) :Specified torque
Non–reusable part
5.4 (55, 48)
AC–38
–
AIR CONDITIONING
REAR A/C UNIT
3765
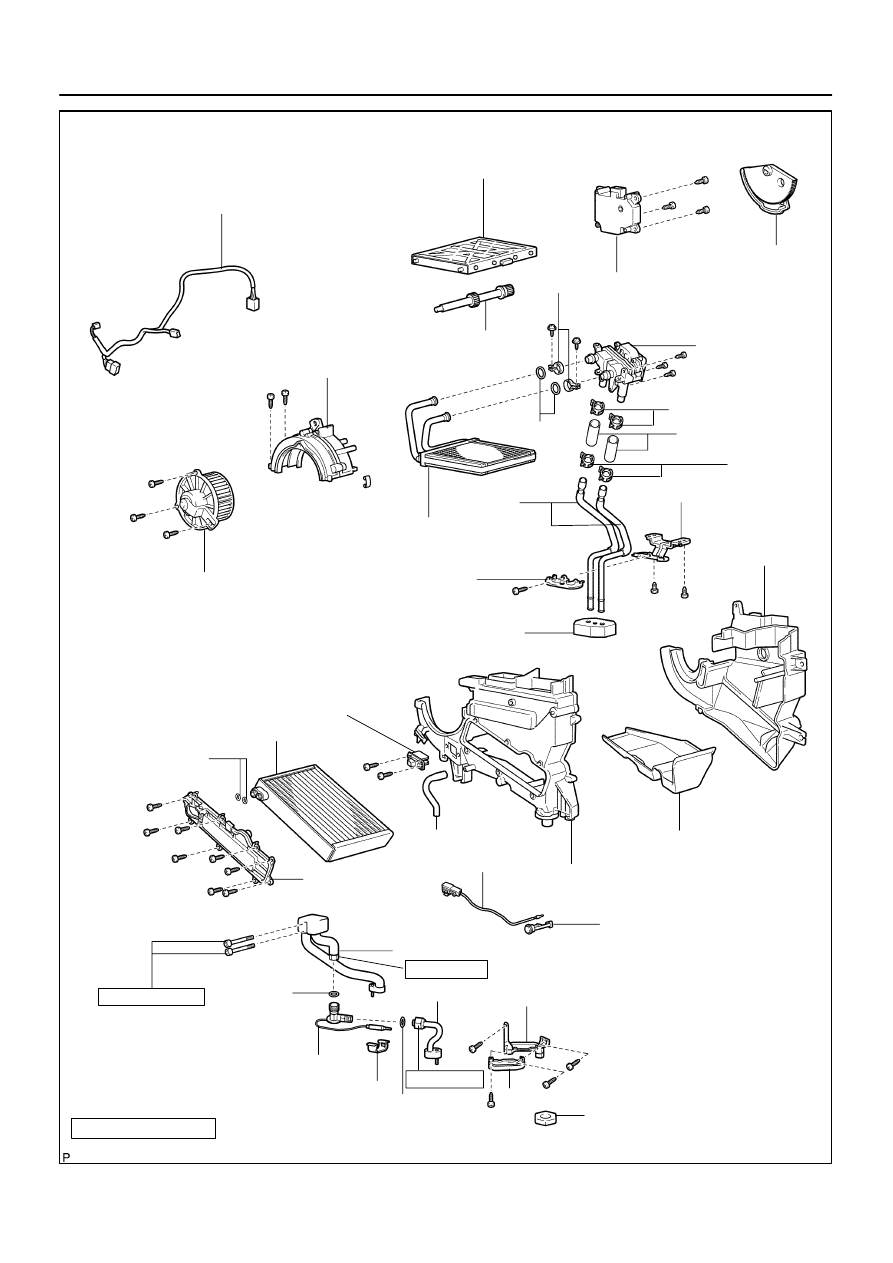
REAR A/C UNIT
COMPONENTS
I21394
Wire Harness
Sliding Door
Air Outlet Servomotor
Plate
Water Valve
Hose Clip
Water Hose
Bracket
Packing
Heater Radiator
Water Hose
Blower Motor
Blower Case
Shaft
Clamp
Bracket
A/C Unite Case RH
O–Ring
Hose Clip
Power Transistor
Evaporator
O–Ring
Evaporator Cover
Thermistor
Plate
Tube and Accessory
O–Ring
Expansion Valve
Clamp
O–Ring
Liquid Tube
Bracket
Bracket
N·m (kgf·cm, ft·lbf)
:Specified torque
Non–reusable part
Insulator
Drain Hose
A/C Unite Case LH
5.4 (55, 48 in.·lbf)
Packing
22 (235, 16)
13 (135, 10)
–
AIR CONDITIONING
REAR A/C UNIT
AC–39
3766
AC3H9–02
I21380
I21381
AC–40
–
AIR CONDITIONING
REAR A/C UNIT
3767
REMOVAL
1.
DISCHARGE REFRIGERANT FROM REFRIGERATION
SYSTEM
HINT:
At the time of installation, refer to the following item:
Evacuate air from the refrigeration system.
Charge the system with refrigerant and inspect for leak-
age of refrigerant.
Specified amount:
Dual A/C: 1050
±
50 g (37.03
±
1.76 oz.)
2.
DRAIN ENGINE COOLANT FROM RADIATOR
HINT:
It is not necessary to drain out all coolant.
3.
REMOVE REAR SEAT OUTER BELT FLOOR AN-
CHORS
4.
REMOVE BACK DOOR SCUFF PLATE
5.
REMOVE REAR DOOR SCUFF PLATE RH
6.
REMOVE UPPER BACK DOOR GARNISH
7.
REMOVE REAR WINDOW SIDE GARNISH RH
8.
REMOVE REAR QUARTER TRIM PANEL RH
9.
REMOVE QUARTER PILLAR GARNISH RH
10.
DISCONNECT LIQUID AND SUCTION TUBES
Remove the 2 bolts and disconnect both tubes.
Torque: 5.4 N·m (55 kgf·cm, 48 in.·lbf)
NOTICE:
Cap the openings immediately to keep moisture or dirt out
of the system.
HINT:
At the time of installation, refer to the following:
Lubricate 2 new O–rings with compressor oil and install them
to the tubes.
11.
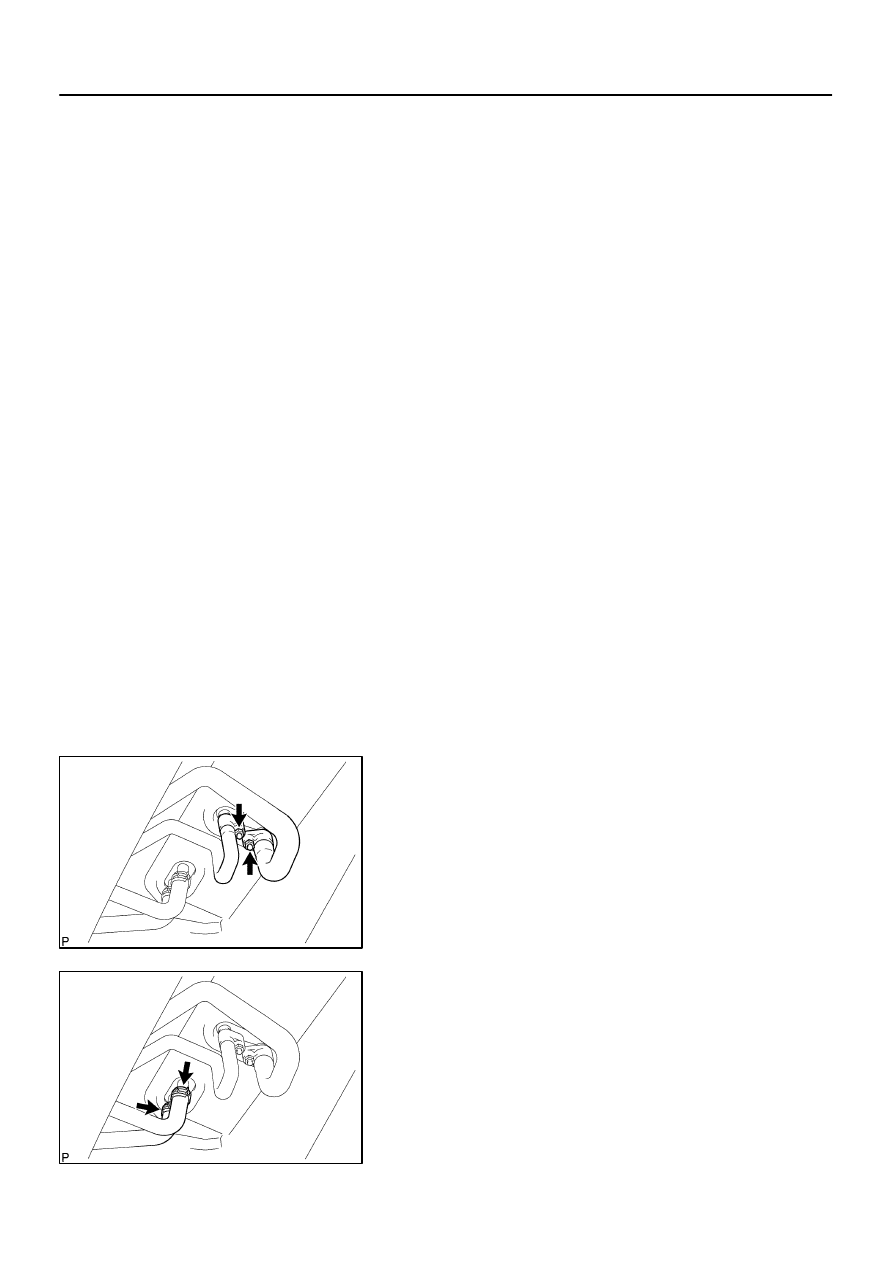
DISCONNECT WATER HOSES FROM HEATER PIPES
(a)
Grip the claws of the hose clip and slide the hose clip
along the hose.
(b)
Disconnect the water hoses.
I21382
Water
Hose
View A
FR
RH
LH
RR
View A
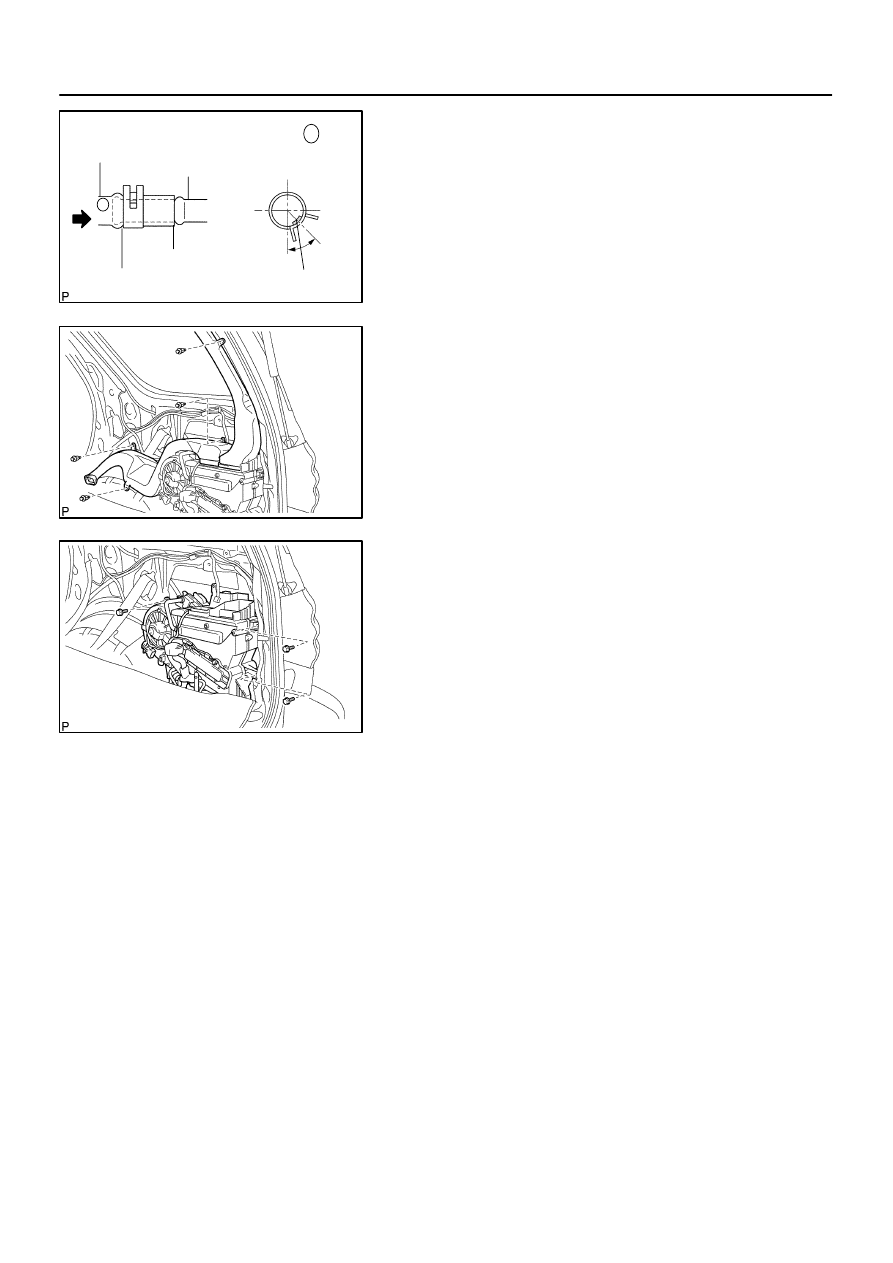
Marking
Heater
Radiator Pipe
Second Ridge
Hose Clip
45
°
I21383
I21384
–
AIR CONDITIONING
REAR A/C UNIT
AC–41
3768
HINT:
At the time of installation, please refer to the following items.
Push the water hose onto the heater radiator pipe up to
the second ridge on the pipe.
Install a hose clip to the position shown in the illustration.
12.
REMOVE REAR A/C UNIT
(a)
Remove the 3 clips and cover.
(b)
Remove the 2 air ducts.
(c)
Disconnect the connectors and wire harness clamps.
(d)
Remove the 3 bolts and rear A/C unit.
Нет комментариевНе стесняйтесь поделиться с нами вашим ценным мнением.
Текст