Toyota Sequoia (2005). Manual — part 470
Limit
Switch
No. 1
Sliding
Roof
Status
Fully
Opened
Sliding
Fully
Closed
Tilting
Limit
Switch
No. 2
250 mm point from fully
opened position
About 10 mm
–
DIAGNOSTICS
SLIDING ROOF SYSTEM
DI–1675
1869
Sliding Roof Pulse Plate Circuit
WIRING DIAGRAM
See page
INSPECTION PROCEDURE
HINT:
If not using the hand–held tester, start from STEP 3.
1
Check sliding roof pulse plate operation.
PREPARATION:
(a)
Connect the hand–held tester to the DLC3.
(b)
Turn ignition switch ON and hand–held tester main switch ON.
(c)
Select the DATA LIST mode on the hand–held tester.
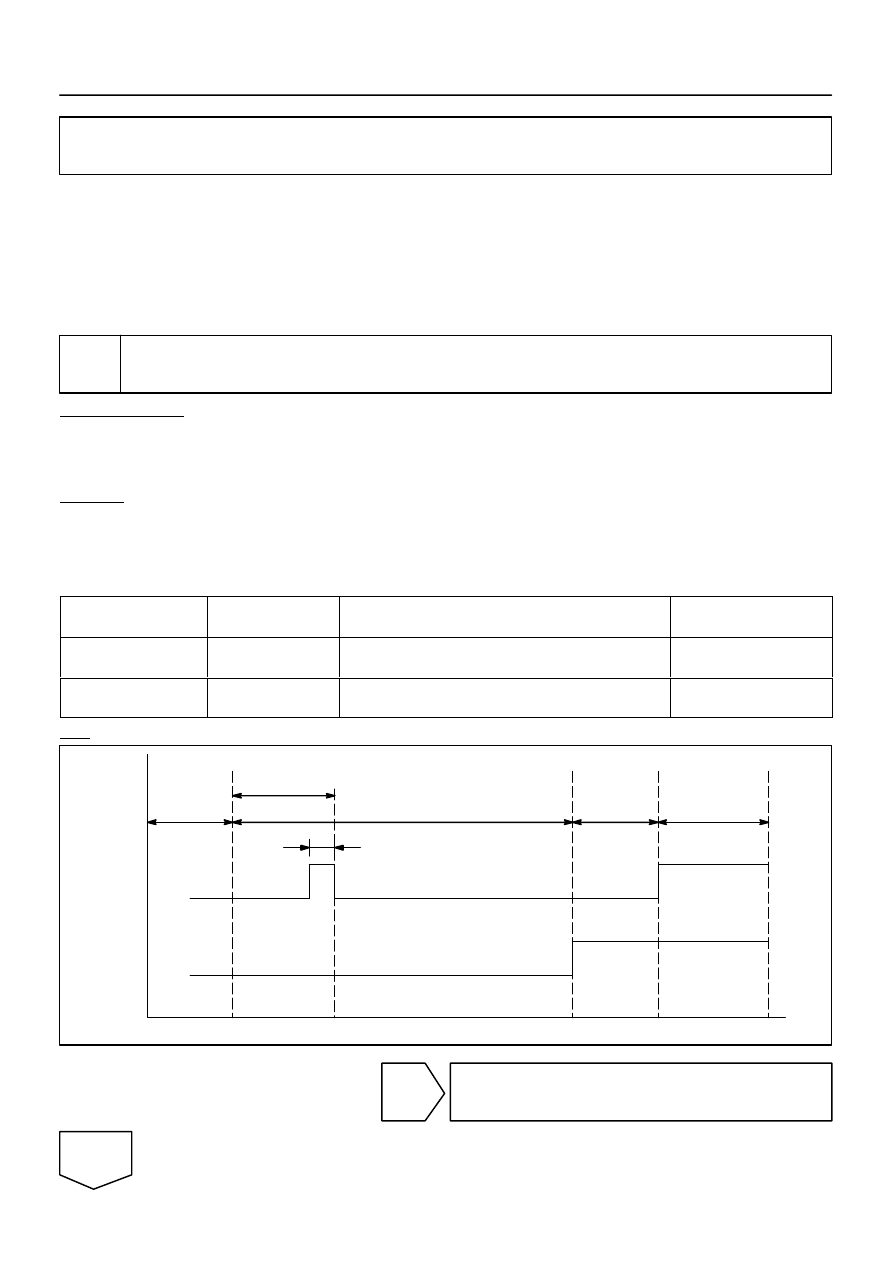
CHECK:
(a)
Operate the sliding roof.
(b)
At this time, check that status (ON/OFF) of limit switch 1 and limit switch 2 changes on the hand–held
tester screen as shown in the chart below.
SLIDE ROOF:
Item
Measurement Item/
Display (Range)
Normal condition
Diagnostic Note
LIMIT SW 1
Position SW NO.1/
ON or OFF
ON: 250 mm point from fully opened position
OFF: Sliding roof fully closed position
–
LIMIT SW 2
Position SW NO.2/
ON or OFF
ON: Sliding roof fully closed position
OFF: Sliding roof except fully closed position
–
OK:
NG
Replace sliding roof gear assembly.
OK
DI279–11
DI–1676
–
DIAGNOSTICS
SLIDING ROOF SYSTEM
1870
2
Check sliding roof motor status.
PREPARATION:
Connect the hand–held tester to the DLC3.
(a)
Enter into ACTIVE TEST mode of hand–held tester.
CHECK:
(a)
Check that ”Sliding roof motor” operates as the hand–held tester directs.
(b)
At this time, check that motor status changes on the screen of the hand–held tester as the sliding roof
switch of the vehicle is turned.
SLIDE ROOF:
Item
Test Details
Diagnostic Note
SLIDE ROOF
Sliding roof CLOS/UP – OPN/DWN
During this ACTIVE TEST, jam protection caught
detection can be monitored.
NOTICE:
Caution is necessary for a part of body not to be caught in as the jam protection system does not
operate during conducting ACTIVE TEST.
OK:
The motor operates normally.
NG
Replace sliding roof gear assembly.
OK
Go to step NO TAG.
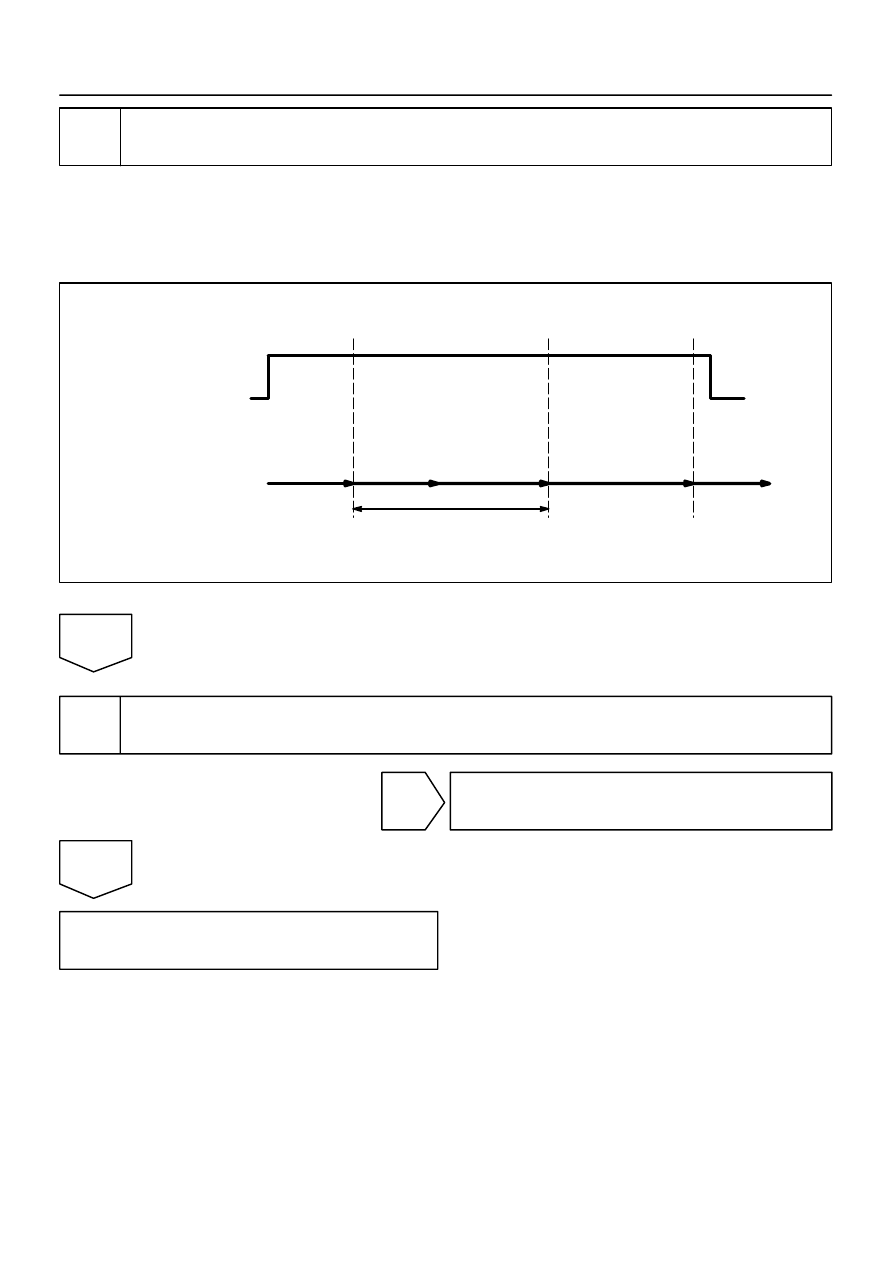
CLOSE/UP
(OPEN/DOWN)
SWITCH
ON
OFF
Close
(Down)
Roof Operation
Stop
Forced Operation
Reverse
Stop
Close (Down)
Close Position
Approx. 10 sec.
–
DIAGNOSTICS
SLIDING ROOF SYSTEM
DI–1677
1871
3
Perform forced operation.
Operate the sliding roof control switch in the CLOSE/UP direction. The jam protection function starts to oper-
ate and reverses. Keeping the CLOSE/UP direction further some 10 seconds restricts the jam protection
function forcibly and begins manual operation.
HINT:
To conduct the sliding roof alignment, restricting the jam protection function is required.
NEXT
4
Check sliding roof glass alignment (Mechanical malfunction)
(See page
).
NG
Adjust sliding roof (See page
OK
Replace sliding roof gear assembly.
DID97–01
DI–1678
–
DIAGNOSTICS
BODY CONTROL SYSTEM
1872
BODY CONTROL SYSTEM
PRECAUTION
NOTICE:
When disconnecting the battery terminal, initialize the following system after the terminal is recon-
nected.
System Name
See Page
Back Door Power Window Control System
Нет комментариевНе стесняйтесь поделиться с нами вашим ценным мнением.
Текст