Toyota Sequoia (2005). Manual — part 169
A23501
ON
Within 15 minutes
2/5
0.02 inch Orifice High–flow
Vent Valve Stuck closed
OK
0.02 inch Orifice Clogged
60
sec
3/5
4 sec
Vacuum Pump Stuck OFF
ON
ON
Purge VSV
Vent Valve
Vacuum Pump
EVAP Pressure
Positive
Negative
Steps
(Reference)
Time
ON: Open
OFF: Closed
OFF: Vent
ON: Closed
Leak Pressure
First 0.02 inch
Standard
–
DIAGNOSTICS
ENGINE
DI–471
665
6
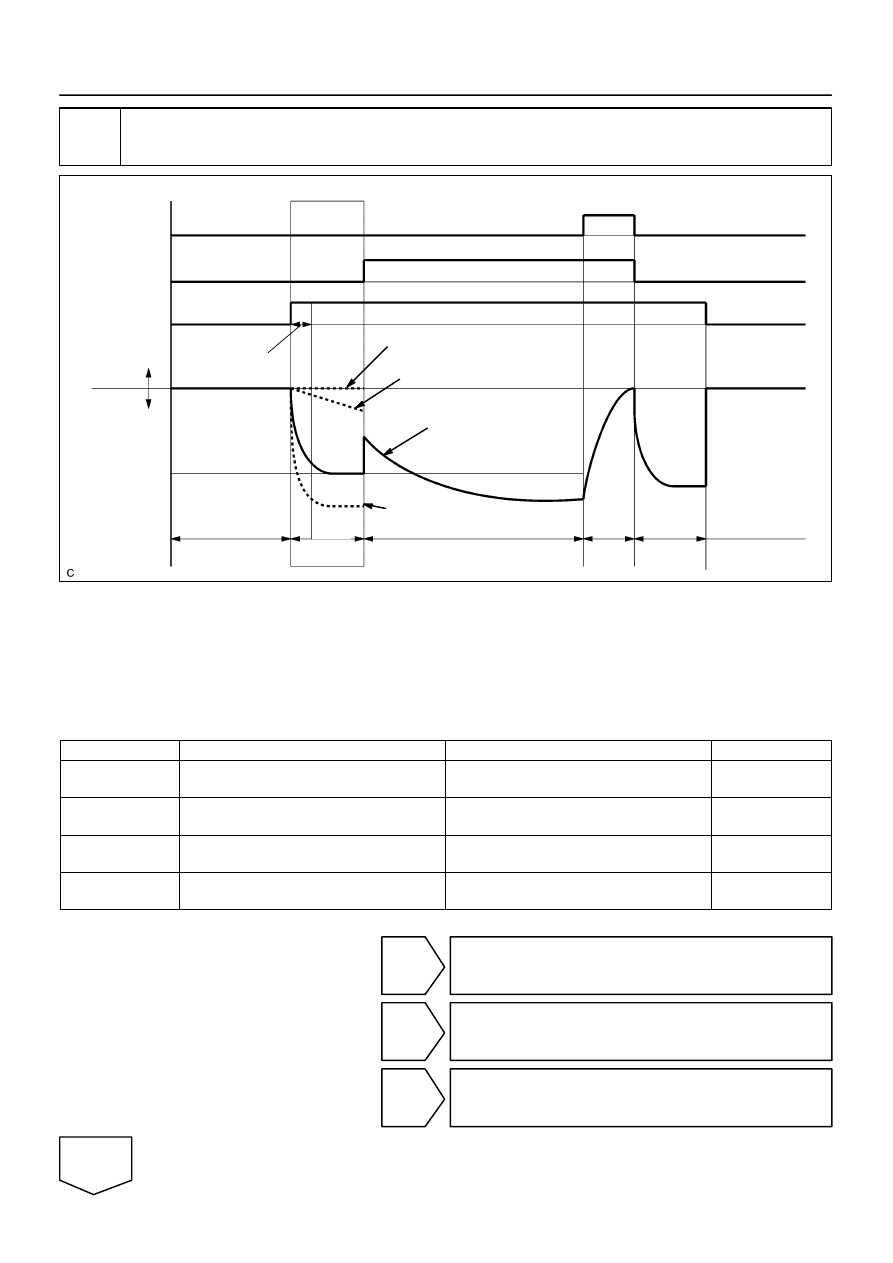
Perform EVAP system step 2/5 check.
HINT:
Make a note of the pressures checked in steps (a) and (b) below.
(a)
Check the EVAP pressure 4 seconds after the vacuum pump is activated*.
(b)
Check the EVAP pressure again when it has stabilized. This pressure is the 0.02 inch leak pressure
standard.
*: The vacuum pump begins to operate as step 1/5 is proceeded to step 2/5.
Result:
DTCs*
Test Results
Suspected Trouble Areas
Proceed To
EVAP pressure in step (b) between –4.85 kPa
and –1.06 kPa (–36.38 mmHg and –7.95 mmHg)
Not yet determined
A
P043F and P2401
EVAP pressure in step (b) –1.06 kPa (–7.95
mmHg) or more
0.02 inch orifice high–flow
Vacuum pump stuck OFF
B
P043E
EVAP pressure in step (b) below –4.85 kPa
(–36.38 mmHg)
0.02 inch orifice clogged
C
P2419
EVAP pressure in step (a) more than –1.06 kPa
(–7.95 mmHg)
Vent valve stuck closed
D
*: The DTCs relating to the EVAP system displayed on a hand–held tester when checking.
B
Go to step 11
C
Go to step 30
D
Go to step 19
A
A23502
ON
Within 15 minutes
2/5
Vent Valve Stuck open (vent)
3/5
ON
ON
Purge VSV
Vent Valve
Vacuum Pump
EVAP Pressure
Positive
Negative
Steps
(Reference)
Time
ON: Open
OFF: Closed
OFF: Vent
ON: Closed
Leak Pressure
First 0.02 inch
Standard
DI–472
–
DIAGNOSTICS
ENGINE
666
7
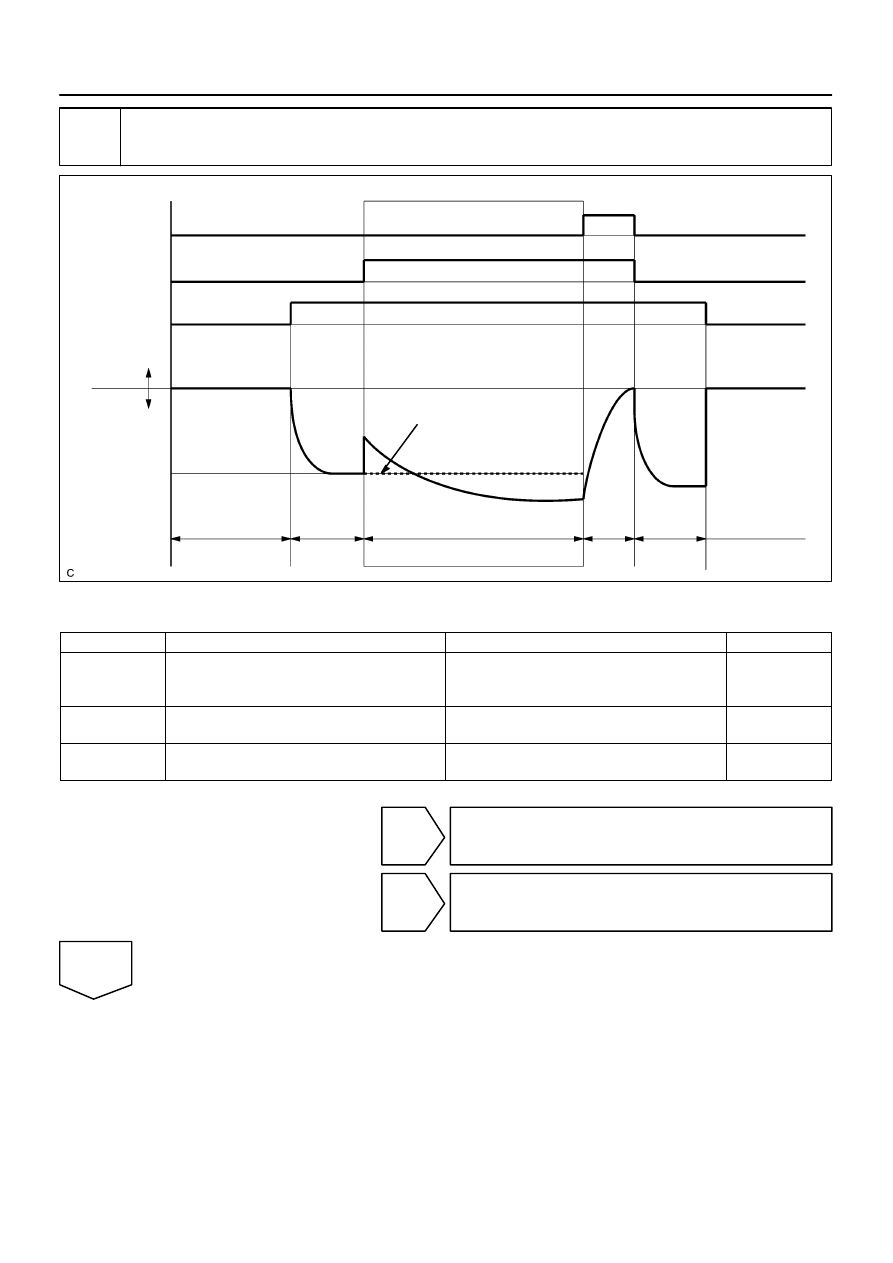
Perform EVAP system step 2/5 to 3/5 check.
(a)
Check the EVAP pressure increase in step 3/5.
Result:
DTCs*
Test Results
Suspected Trouble Areas
Proceed To
EVAP pressure increases by 0.3 kPa (2.25 mmHg)
or more within 10 seconds of proceeding from step
2/5 to step 3/5
Not yet determined
A
P2420
No variation in EVAP pressure despite proceeding
from step 2/5 to step 3/5
Vent valve stuck open (vent)
B
P0451
No variation in EVAP pressure during steps 1/5
through 3/5
Pressure sensor malfunction stuck
C
*: The DTCs relating to the EVAP system displayed on a hand–held tester when checking.
B
Go to step 19.
C
Go to step 30.
A
A23502
Purge VSV
Vent Valve
Vacuum Pump
EVAP Pressure
Positive
Leak Pressure
ON: Open
Negative
ON
ON
Steps
(Reference)
Within 15 minutes
ON
First 0.02 inch
3/5
OFF: Closed
OFF: Vent
ON: Closed
Time
Standard
–
DIAGNOSTICS
ENGINE
DI–473
667
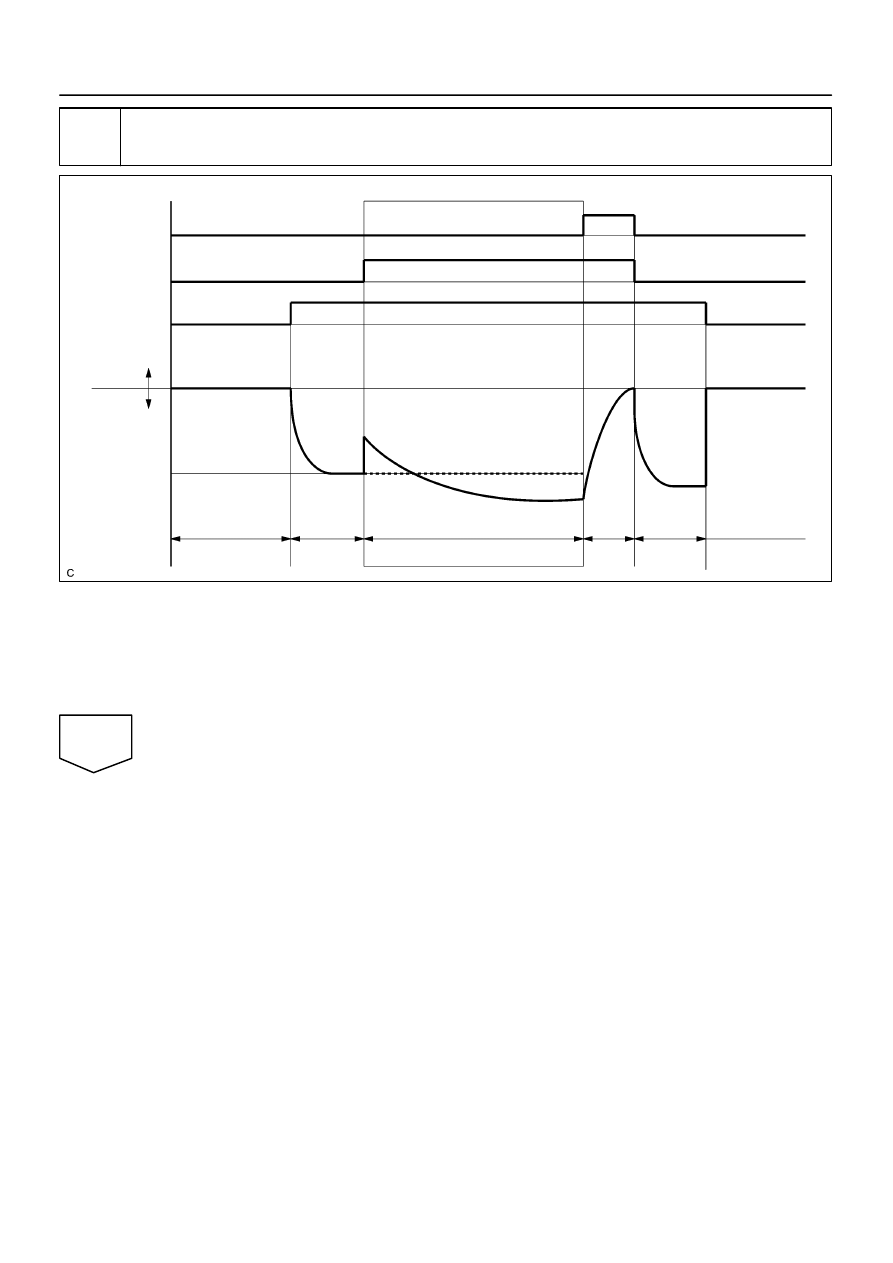
8
Perform EVAP system step 3/5 check.
(a)
Wait until the EVAP pressure change is less than 0.1 kPa (0.75 mmHg) for 30 seconds.
(b)
Measure the EVAP pressure and record it.
HINT:
A few minutes are required for the EVAP pressure to become saturated. When there is little fuel in the fuel
tank, it takes up to 12 minutes.
NEXT
A23504
ON
Purge VSV Stuck Closed
4/5
ON
ON
Purge VSV
Vent Valve
Vacuum Pump
EVAP Pressure
Positive
Negative
Steps
(Reference)
Time
ON: Open
OFF: Closed
OFF: Vent
ON: Closed
OK
10
sec
Leak Pressure
First 0.02 inch
Standard
DI–474
–
DIAGNOSTICS
ENGINE
668
9
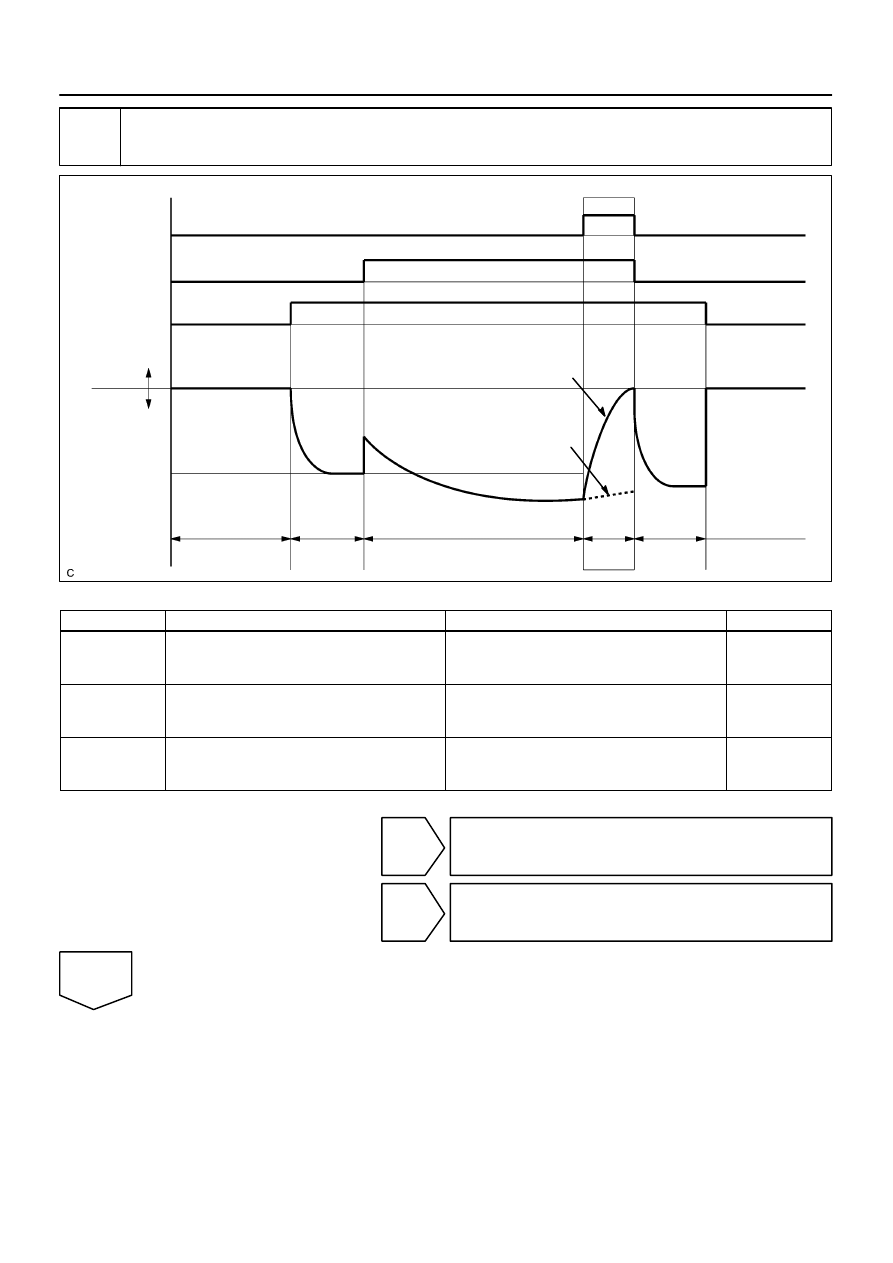
Perform EVAP system step 4/5 check.
(a)
Check the EVAP pressure in step 4/5.
DTCs*
Test Results
Suspected Trouble Areas
Proceed To
EVAP pressure increases by 0.3 kPa (2.25 mmHg)
or more within 10 seconds of proceeding from step
3/5 to step 4/5
Not yet determined
A
P0441
EVAP pressure increases by 0.3 kPa (2.25 mmHg)
or more within 10 seconds of proceeding from step
3/5 to step 4/5
Problems in EVAP hose between pure VSV and
throttle body
B
P0441
Variation in EVAP pressure is less than 0.3 kPa
(2.25 mmHg) for 10 seconds, after proceeding from
step 3/5 to step 4/5
Purge VSV stuck closed
C
*: The DTCs relating to the EVAP system displayed on a hand–held tester when checking.
B
Go to step 15.
C
Go to step 12.
A
Нет комментариевНе стесняйтесь поделиться с нами вашим ценным мнением.
Текст