Toyota Sequoia (2005). Manual — part 841

RS0N2–16
H23896
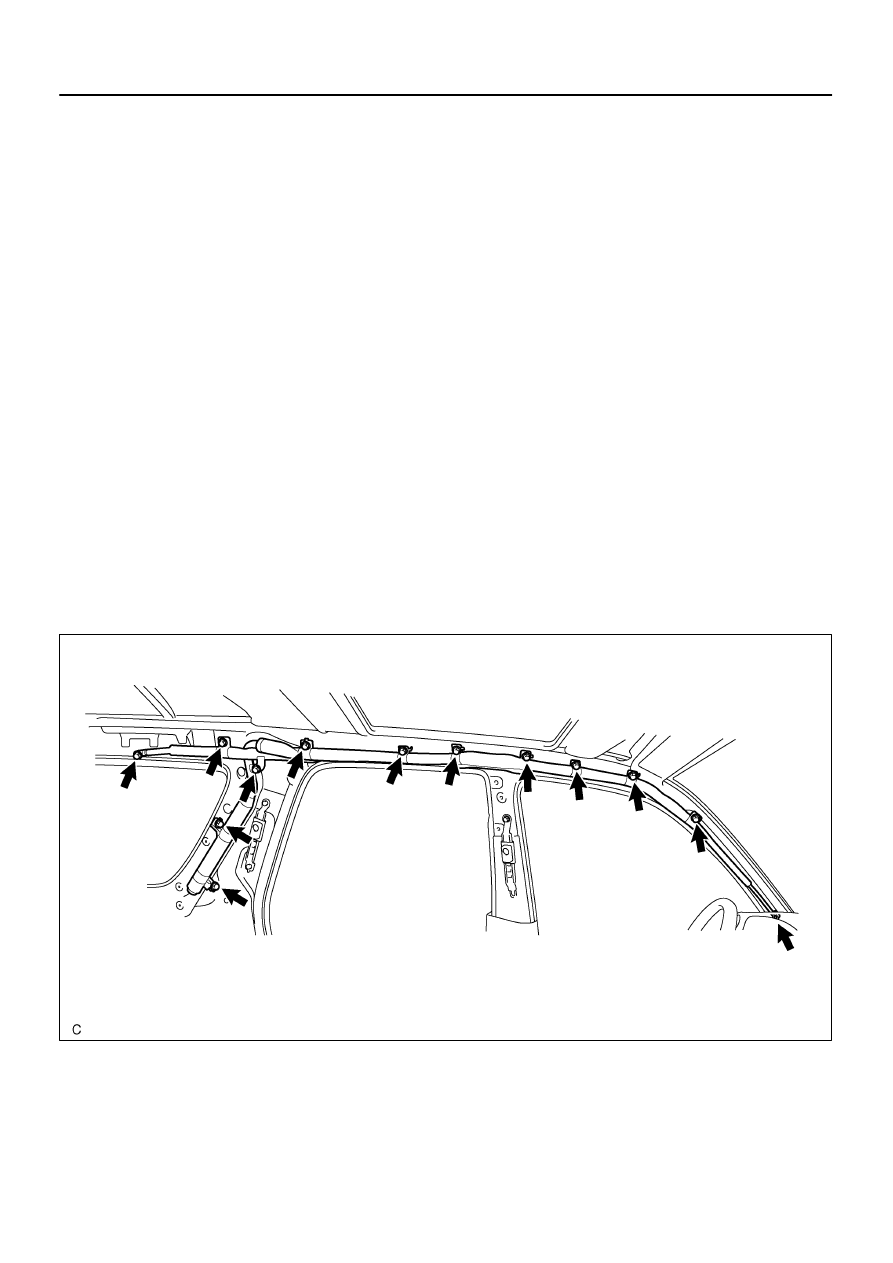
Curtain Shield
Airbag Assembly
N·m (kgf·cm, ft·lbf) : Specified torque
9.8 (100, 7)
9.8 (100, 7)
9.8 (100, 7)
RS–70
–
SUPPLEMENTAL RESTRAINT SYSTEM
CURTAIN SHIELD AIRBAG ASSEMBLY
3353
CURTAIN SHIELD AIRBAG ASSEMBLY
COMPONENTS
RS11F–01
H23897
–
SUPPLEMENTAL RESTRAINT SYSTEM
CURTAIN SHIELD AIRBAG ASSEMBLY
RS–71
3354
REMOVAL
HINT:
Use the same procedures for the RH side and LH side.
The procedures listed below are for the LH side.
NOTICE:
If the wiring connector of the SRS is disconnected
and the ignition switch is in the ACC or ON position,
DTCs will be recorded.
Never use airbag parts from another vehicle. When
replacing parts, replace them with new ones.
1.
PRECAUTION (SEE PAGE
2.
DISCONNECT CABLE FROM NEGATIVE BATTERY
TERMINAL
Wait for 90 seconds after disconnecting the cable to prevent the
airbag working.
3.
REMOVE ROOF HEADLINING (SEE PAGE
)
4.
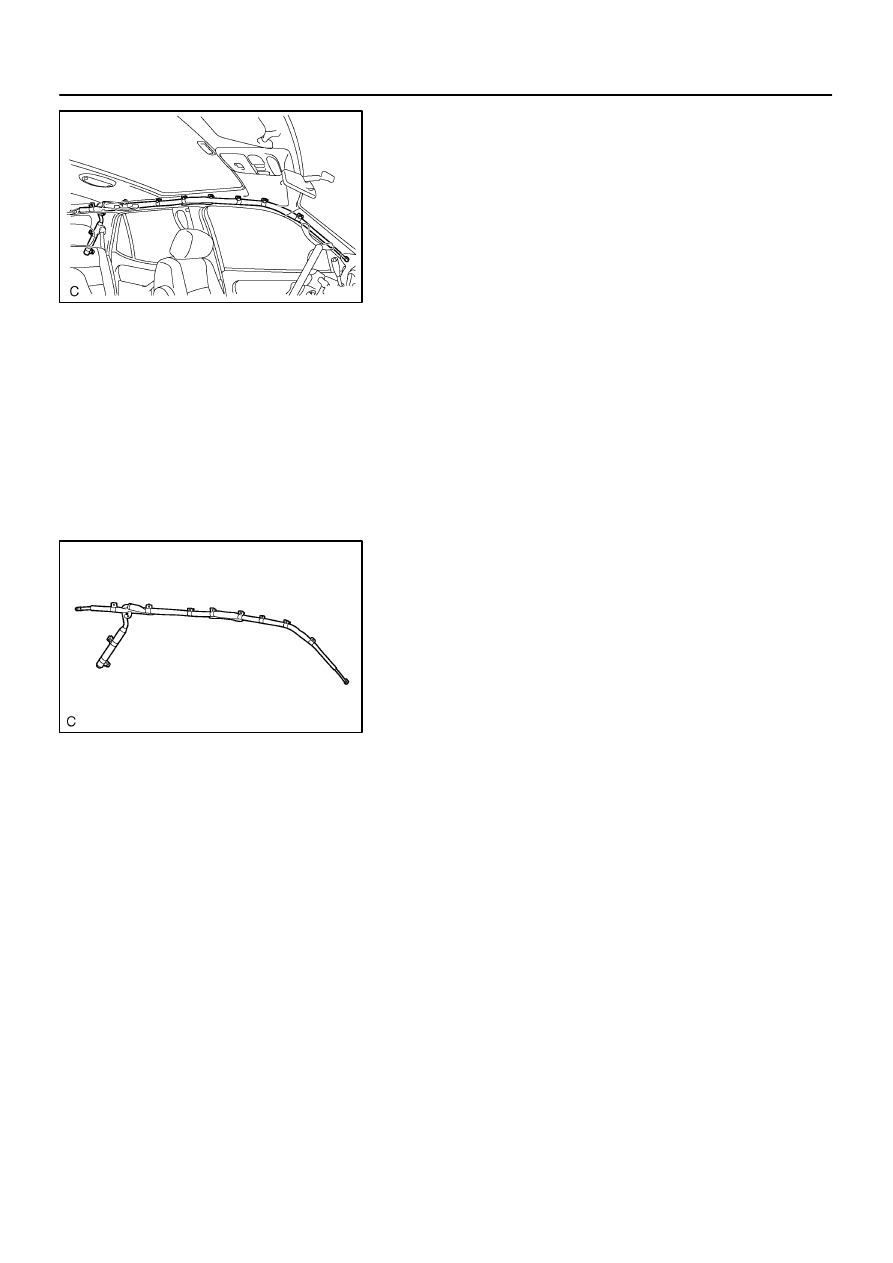
REMOVE CURTAIN SHIELD AIRBAG ASSEMBLY
(a)
Disconnect the curtain shield airbag connector.
NOTICE:
When handling the airbag connector, take care not to dam-
age the airbag wire harness.
(b)
Remove the 13 bolts and the curtain shield airbag assem-
bly.
H23919
RS0N4–12
H23898
RS–72
–
SUPPLEMENTAL RESTRAINT SYSTEM
CURTAIN SHIELD AIRBAG ASSEMBLY
3355
INSPECTION
1.
VEHICLE NOT INVOLVED IN COLLISION
(a)
Perform a diagnostic system check (see page
(b)
With the curtain shield airbag assembly installed on the
vehicle, perform a visual check. If there are any defects
as mentioned below, replace the front pillar garnish or roof
headlining assy with a new one:
Cuts, minute cracks or marked discoloration on the front
pillar garnish or roof headlining assy around the curtain
shield airbag assembly.
2.
VEHICLE INVOLVED IN A COLLISION AND AIRBAG IS
NOT DEPLOYED
(a)
Perform a diagnostic system check (see page
(b)
With the curtain shield airbag assembly removed from the
vehicle, perform a visual check. If there are any defects
as mentioned below, replace the curtain shield airbag as-
sembly with a new one:
Cuts, tears and cracks, or marked discoloration on
the curtain shield airbag assembly.
Cracks or other damage to connector.
CAUTION:
For removal and installation of the curtain shield airbag as-
sembly, see page
correct procedure.
RS11G–01
AB0152
SST
–
SUPPLEMENTAL RESTRAINT SYSTEM
CURTAIN SHIELD AIRBAG ASSEMBLY
RS–73
3356
DISPOSAL
HINT:
Use the same procedures for the RH side and LH side.
The procedures listed below are for the LH side.
When scrapping a vehicle equipped with the SRS or dis-
posing of the curtain shield airbag assembly, be sure to
deploy the airbag first in accordance with the procedure
described below. If any abnormality occurs with the airbag
deployment, contact the TOYOTA MOTOR SALES,
U.S.A., INC.
CAUTION:
Never dispose of a curtain shield airbag assembly
which has an undeployed airbag.
The airbag produces an exploding sound when it is
deployed, so perform the operation outdoors and
where it will not create a nuisance to nearby resi-
dents.
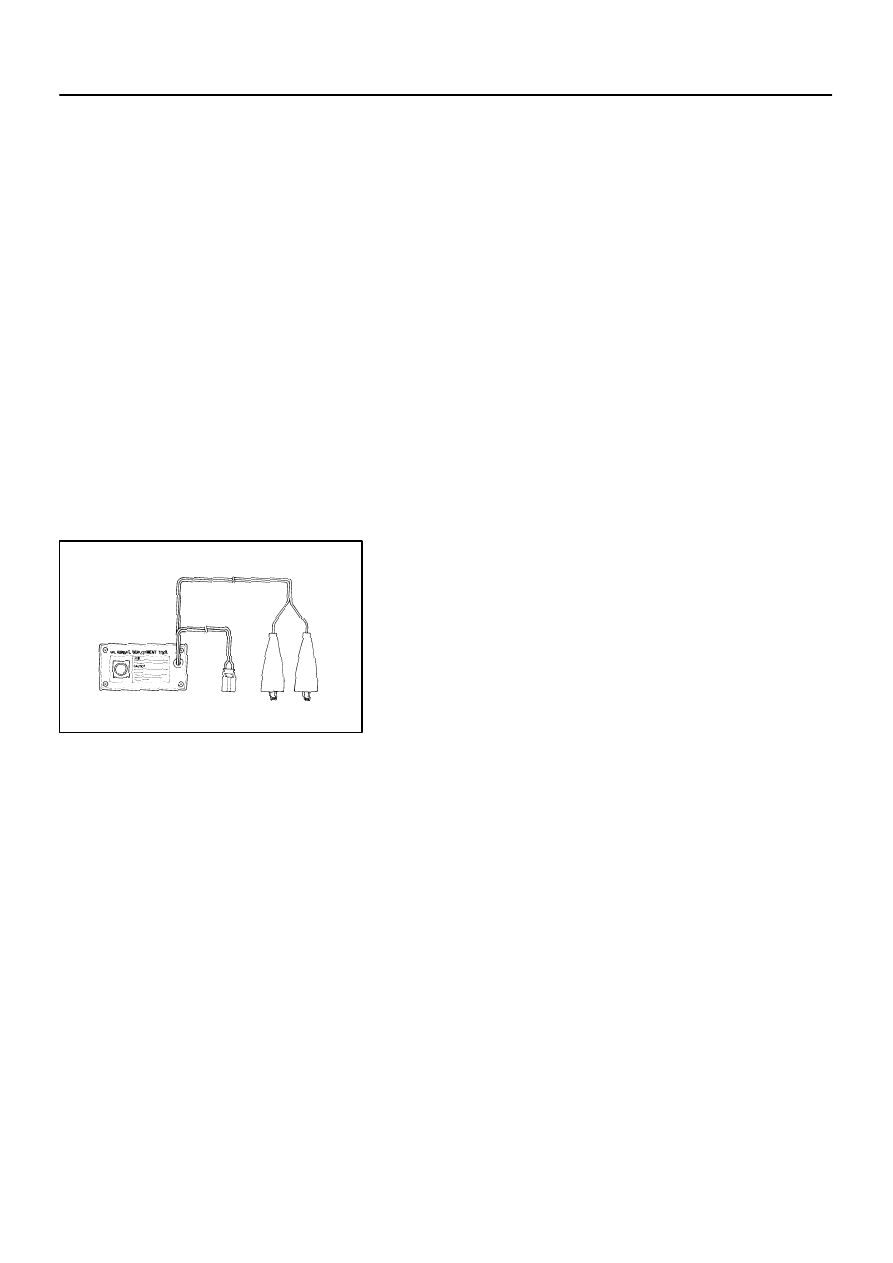
When deploying the airbag, always use the specified
SST (SRS Airbag Deployment Tool). Perform the op-
eration in a place away from electrical noise.
When deploying the airbag, perform the operation at
least 10 m (33 ft) away from the curtain shield airbag
assembly.
The curtain shield airbag assembly becomes ex-
tremely hot when the airbag is deployed, so do not
touch it for at least 30 minutes after deployment.
Use gloves and safety glasses when handling a cur-
tain shield airbag assembly with a deployed airbag.
Do not apply water, etc. to a front passenger airbag
assembly with a deployed airbag.
Always wash your hands with water after completing
the operation.
HINT:
Prepare a battery as the power source to deploy the airbag.
Нет комментариевНе стесняйтесь поделиться с нами вашим ценным мнением.
Текст