Toyota Tundra. Manual — part 2113

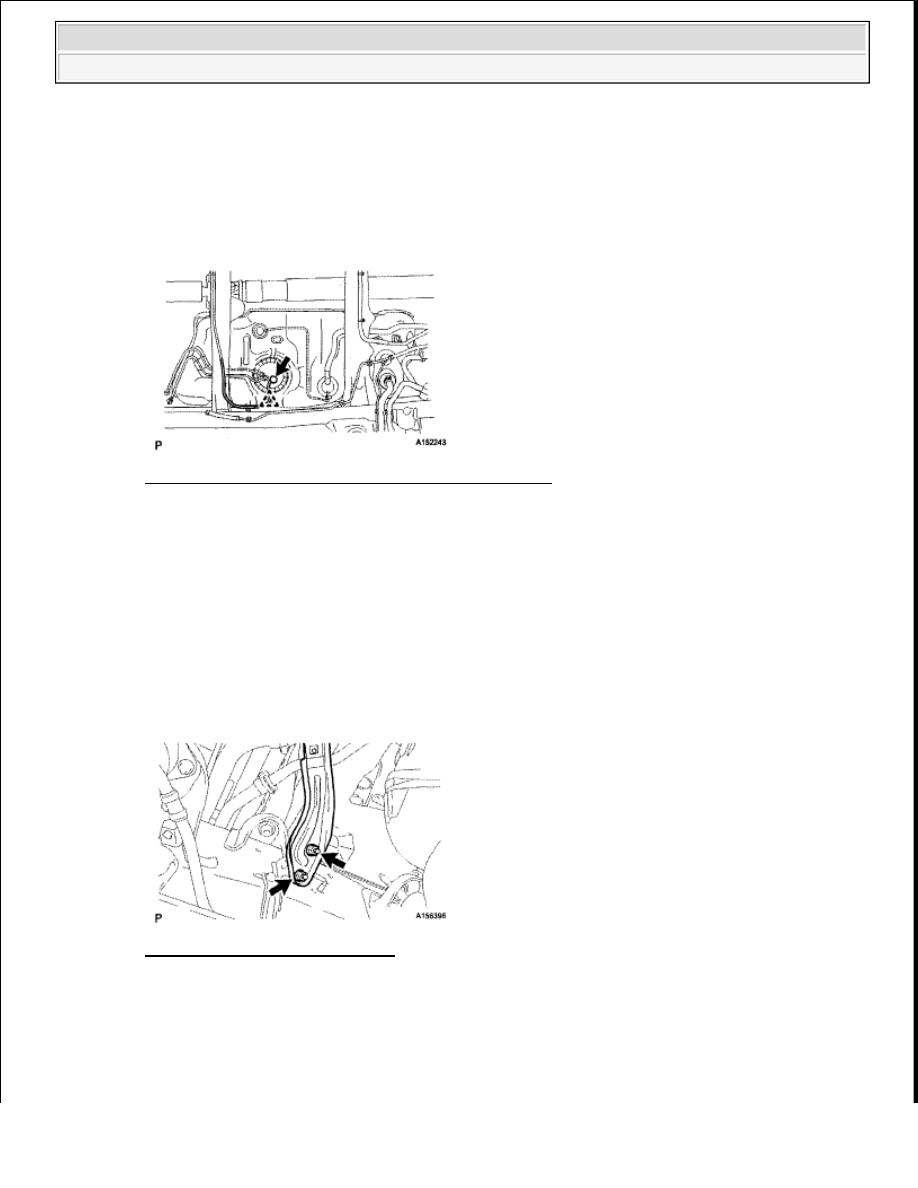
8. DISCONNECT WIRE HARNESS
a. Detach the harness clamp from the fuel tank.
Fig. 91: Identifying Fuel Tank Harness Clamp
Courtesy of TOYOTA MOTOR SALES, U.S.A., INC.
9. DISCONNECT FUEL TANK TO FILLER PIPE HOSE
a. Detach the lock claw by lifting up the cover, as shown in the illustration.
NOTE:
Do not use any tools in this procedure.
Check for any dirt and foreign matter contamination in the valve
and around the connector. Clean if necessary. Foreign matter
may damage the O-rings or cause leaks in the seal between the
valve and connector.
Fig. 90: Pulling Up Retainer And Disconnect Vent Line Hose
Courtesy of TOYOTA MOTOR SALES, U.S.A., INC.
2009 Toyota Tundra
2009 ENGINE Fuel (2UZ-FE) - Tundra

Fig. 92: Detaching Lock Claw By Lifting Up Cover
Courtesy of TOYOTA MOTOR SALES, U.S.A., INC.
b. Disconnect the fuel tank breather tube from the inlet pipe.
c. Disconnect the fuel tank to filler pipe hose from the inlet pipe.
d. Detach the filler pipe hose and breather tube from the No. 1 breather tube clamp.
10. DISCONNECT NO. 1 CANISTER OUTLET HOSE
a. Disconnect the canister outlet hose from the inlet pipe.
b. Detach the hose from the No. 1 breather tube clamp.
11. REMOVE FUEL TANK ASSEMBLY
a. Set a mission jack underneath the fuel tank.
b. Remove the 2 bolts, 2 clips, 2 pins and 2 fuel tank bands.
Fig. 93: Locating Bolts, Clips, Pins And Fuel Tank Bands
Courtesy of TOYOTA MOTOR SALES, U.S.A., INC.
2009 Toyota Tundra
2009 ENGINE Fuel (2UZ-FE) - Tundra
c. Slowly lower the mission jack slightly.
d. Detach the wire harness clamp from the fuel tank as shown in the illustration.
Fig. 94: Locating Wire Harness Clamp Of Fuel Tank
Courtesy of TOYOTA MOTOR SALES, U.S.A., INC.
e. Disconnect the fuel pump connector and lower the mission jack.
12. REMOVE FUEL TANK INLET PIPE SUB-ASSEMBLY
a. Remove the 2 nuts and inlet pipe.
Fig. 95: Locating Inlet Pipe Nuts
Courtesy of TOYOTA MOTOR SALES, U.S.A., INC.
13. REMOVE NO. 1 FUEL TANK HEAT INSULATOR
a. Remove the nut from the heat insulator.
b. Using needle-nose pliers, remove the 4 clips shown in the illustration and then remove the heat
insulator.
NOTE:
Be careful not to cut the wirings.
NOTE:
Before this procedure, check the connector for dirt, mud or
other contamination.
Do not use any tools in this procedure.
2009 Toyota Tundra
2009 ENGINE Fuel (2UZ-FE) - Tundra

Fig. 96: Locating Heat Insulator Nut And Clips
Courtesy of TOYOTA MOTOR SALES, U.S.A., INC.
14. REMOVE FUEL TANK TO FILLER PIPE HOSE
a. Remove the filler pipe hose from the fuel tank.
Fig. 97: Locating Filler Pipe Hose Of Fuel Tank
Courtesy of TOYOTA MOTOR SALES, U.S.A., INC.
15. REMOVE FUEL SUCTION WITH PUMP AND GAUGE TUBE ASSEMBLY
a. Remove the 2 tube joint clips and pull out the 2 fuel tank tubes.
NOTE:
Remove any dirt and foreign matter on the fuel tube joint before
performing this work.
Do not allow any scratches or foreign matter on the parts when
disconnecting them, as the fuel tube joint contains the O-rings
2009 Toyota Tundra
2009 ENGINE Fuel (2UZ-FE) - Tundra
Нет комментариевНе стесняйтесь поделиться с нами вашим ценным мнением.
Текст