Toyota Tundra. Manual — part 2447
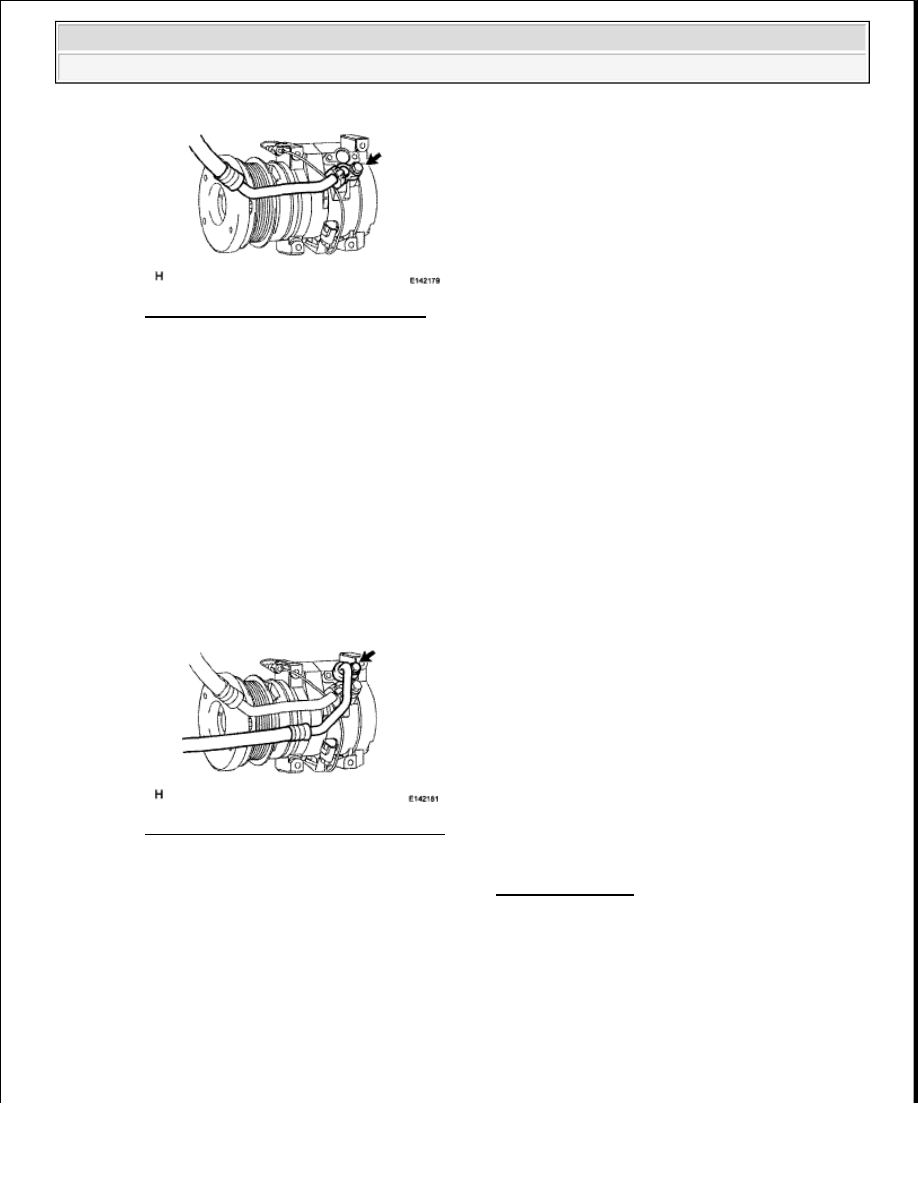
Fig. 246: Locating Suction Hose Bolt
Courtesy of TOYOTA MOTOR SALES, U.S.A., INC.
4. CONNECT DISCHARGE HOSE
a. Remove the attached vinyl tape from the hose.
b. Sufficiently apply compressor oil to a new O-ring and the fitting surface of the cooler compressor.
Compressor oil:
ND-OIL 8 or equivalent
c. Install the O-ring on the cooler refrigerant discharge hose.
d. Connect the cooler refrigerant discharge hose on the cooler compressor with the bolt.
Torque: 9.8 N*m (100 kgf*cm, 87 in.*lbf)
Fig. 247: Locating Discharge Hose Bolt
Courtesy of TOYOTA MOTOR SALES, U.S.A., INC.
5. INSTALL FAN AND GENERATOR V BELT (See INSTALLATION )
6. INSTALL FENDER APRON MUDGUARD SEAL LH
a. Install the seal with the 6 clips.
2009 Toyota Tundra
2009 HVAC Air Conditioning - Tundra

Fig. 248: Locating Fender Apron Mudguard Seal Clips
Courtesy of TOYOTA MOTOR SALES, U.S.A., INC.
7. CHARGE REFRIGERANT (See REPLACEMENT )
8. WARM UP ENGINE (See REPLACEMENT )
9. CHECK FOR REFRIGERANT GAS LEAK (See REPLACEMENT )
COMPRESSOR AND MAGNETIC CLUTCH (FOR 2UZ-FE)
COMPONENTS
2009 Toyota Tundra
2009 HVAC Air Conditioning - Tundra
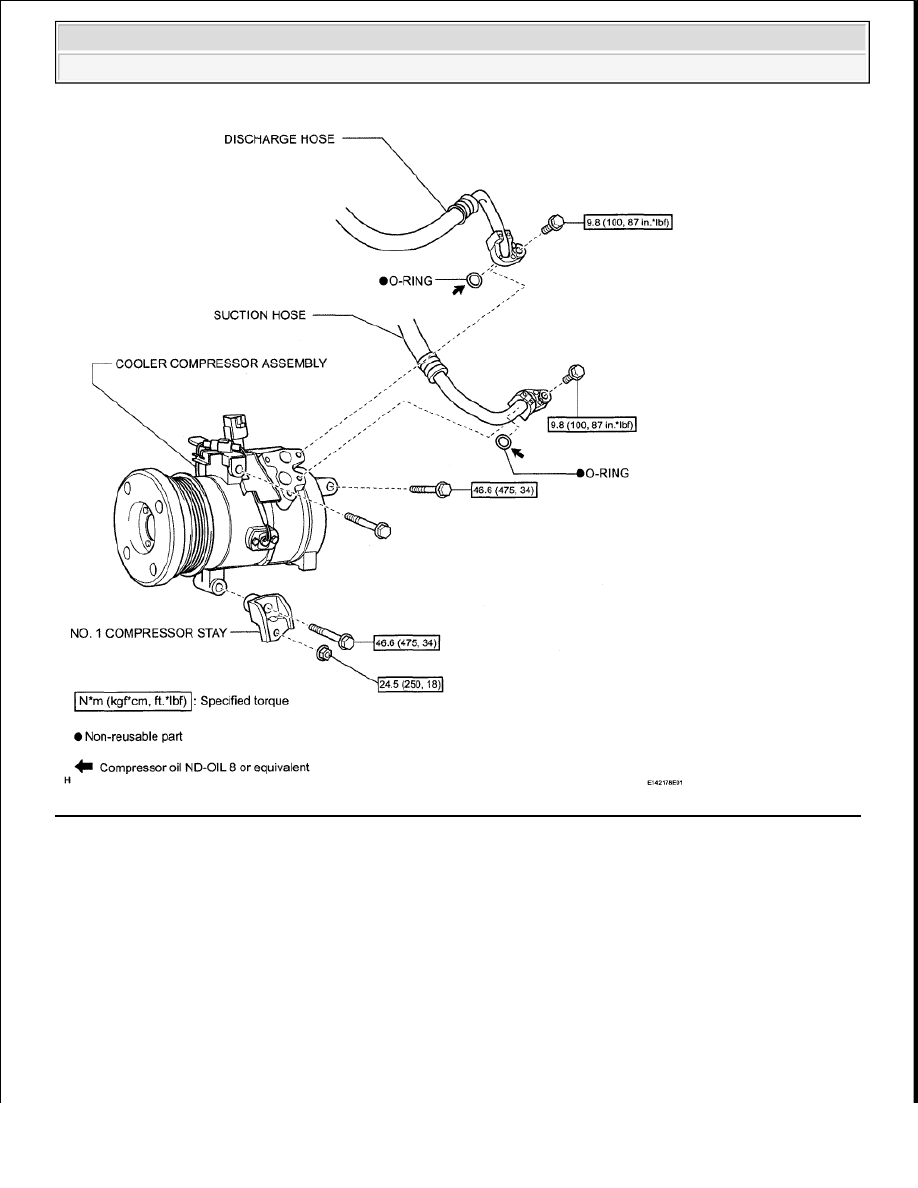
Fig. 249: Identifying Compressor And Magnetic Clutch Components With Torque Specifications (1 Of 2)
Courtesy of TOYOTA MOTOR SALES, U.S.A., INC.
2009 Toyota Tundra
2009 HVAC Air Conditioning - Tundra

Fig. 250: Identifying Compressor And Magnetic Clutch Components With Torque Specification (2 Of 2)
Courtesy of TOYOTA MOTOR SALES, U.S.A., INC.
REMOVAL
1. RECOVER REFRIGERANT FROM REFRIGERATION SYSTEM (See REPLACEMENT )
2. REMOVE FENDER APRON MUDGUARD SEAL LH
a. Remove the 6 clips and seal.
Fig. 251: Locating Fender Apron Mudguard Seal Clips
Courtesy of TOYOTA MOTOR SALES, U.S.A., INC.
3. REMOVE FAN AND GENERATOR V BELT (See REMOVAL )
2009 Toyota Tundra
2009 HVAC Air Conditioning - Tundra
Нет комментариевНе стесняйтесь поделиться с нами вашим ценным мнением.
Текст