Toyota Tundra. Manual — part 2072

2
REMOVE NO. 1 ENGINE UNDER COVER (See REPLACEMENT )
3
DRAIN ENGINE COOLANT (See REPLACEMENT )
4
REMOVE V-BANK COVER SUB-ASSEMBLY (See REMOVAL )
5
REMOVE AIR CLEANER HOSE ASSEMBLY (See REMOVAL )
6
REMOVE AIR CLEANER ASSEMBLY (See REMOVAL )
7
DISCONNECT INLET RADIATOR HOSE
8
DISCONNECT OUTLET RADIATOR HOSE
9
REMOVE FAN AND GENERATOR V-BELT (See DRIVE BELT )
10
REMOVE FAN SHROUD (See REMOVAL )
11
REMOVE FRONT FENDER APRON SEAL RH
a
Remove the 6 clips and fender apron seal
12
REMOVE FRONT FENDER APRON SEAL REAR RH
a
Remove the 5 clips and fender apron seal
13
REMOVE FRONT FENDER APRON SEAL LH
a
Remove the 6 clips and fender apron seal
14
REMOVE FRONT FENDER APRON SEAL REAR LH
a
Remove the 5 clips and fender apron seal
15
REMOVE ENGINE OIL LEVEL DIPSTICK GUIDE (See REMOVAL )
16
DISCONNECT VANE PUMP ASSEMBLY (See REMOVAL )
17
REMOVE GENERATOR ASSEMBLY (See REMOVAL )
18
DISCONNECT COOLER COMPRESSOR ASSEMBLY (See REMOVAL )
19
REMOVE PROPELLER SHAFT HEAT INSULATOR (for 4WD)
a
Remove the 2 bolts and heat insulator
NOTE:
After the ignition switch is turned OFF, the navigation system
requires approximately 90 seconds to record various types of
memory and settings. As a result, after turning the ignition switch
OFF, wait 90 seconds or more before disconnecting the cable from
the negative (-) battery terminal.
Some systems need to be initialized after the cable is reconnected
(see INITIALIZATION ).
2009 Toyota Tundra
2009 ENG NE Exhaust (3UR-FE) - Tundra
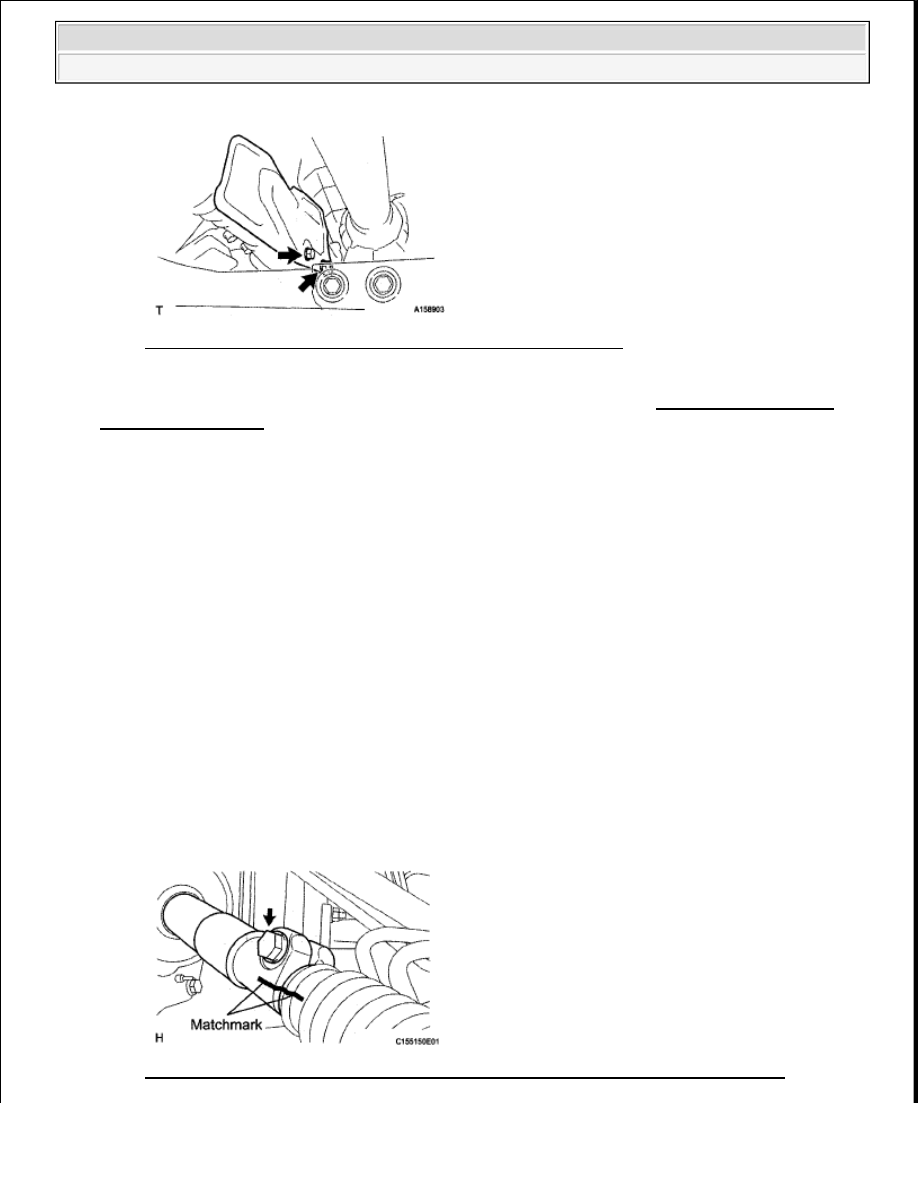
Fig. 7: Identifying Propeller Shaft Heat Insulator Bolts (4WD)
Courtesy of TOYOTA MOTOR SALES, U.S.A., INC.
20
REMOVE FRONT PROPELLER SHAFT ASSEMBLY (for 4WD) (See FRONT PROPELLER
SHAFT ASSEMBLY )
21
REMOVE FRONT NO. 2 EXHAUST PIPE ASSEMBLY (for Regular Cab Standard Deck)
a
Disconnect the air fuel ratio sensor connector
b
Disconnect the heated oxygen sensor connector
c
Remove the 2 bolts, 5 nuts, No 2 exhaust pipe and 2 gaskets
22
REMOVE FRONT NO. 2 EXHAUST PIPE ASSEMBLY (except Regular Cab Standard Deck)
a
Disconnect the air fuel ratio sensor connector
b
Disconnect the heated oxygen sensor connector
c
Remove the 2 bolts, 3 nuts, No 2 exhaust pipe and 2 gaskets
d
Disconnect the exhaust support
23
REMOVE FRONT EXHAUST PIPE ASSEMBLY
a
Disconnect the air fuel ratio sensor connector
b
Disconnect the heated oxygen sensor connector and 2 clamps
c
Remove the 2 bolts from the center exhaust pipe
d
Remove the 3 nuts, front exhaust pipe and 2 gaskets
24
REMOVE NO. 2 STEERING INTERMEDIATE SHAFT SUB-ASSEMBLY
a
Put matchmarks on the No 2 steering intermediate shaft and steering intermediate shaft
Fig. 8: Identifying Matchmarks On No. 2 Steering Intermediate Shaft And Steering
2009 Toyota Tundra
2009 ENG NE Exhaust (3UR-FE) - Tundra

Intermediate Shaft
Courtesy of TOYOTA MOTOR SALES, U.S.A., INC.
b
Remove the bolt and disconnect the No 2 steering intermediate shaft from the steering intermediate
shaft
c
Put matchmarks on the No 2 steering intermediate shaft and the power steering gear
Fig. 9: Identifying Matchmarks On No. 2 Steering Intermediate Shaft And Power Steering
Gear
Courtesy of TOYOTA MOTOR SALES, U.S.A., INC.
d
Remove the bolt and disconnect the No 2 steering intermediate shaft from the power steering gear
25
REMOVE NO. 2 EXHAUST MANIFOLD HEAT INSULATOR
a
Remove the 3 bolts and heat insulator
Fig. 10: Identifying No. 2 Exhaust Manifold Heat Insulator Bolts
Courtesy of TOYOTA MOTOR SALES, U.S.A., INC.
26
REMOVE EXHAUST MANIFOLD SUB-ASSEMBLY LH
a
Remove the 10 nuts, exhaust manifold and 2 gaskets
2009 Toyota Tundra
2009 ENG NE Exhaust (3UR-FE) - Tundra

Fig. 11: Identifying Exhaust Manifold Nuts LH
Courtesy of TOYOTA MOTOR SALES, U.S.A., INC.
27
REMOVE NO. 1 EXHAUST MANIFOLD HEAT INSULATOR
a
Remove the 3 bolts and heat insulator
Fig. 12: Identifying No. 1 Exhaust Manifold Heat Insulator Bolts
Courtesy of TOYOTA MOTOR SALES, U.S.A., INC.
28
REMOVE EXHAUST MANIFOLD SUB-ASSEMBLY RH
a
Remove the 10 nuts, exhaust manifold and 2 gaskets
Fig. 13: Identifying Exhaust Manifold Nuts RH
Courtesy of TOYOTA MOTOR SALES, U.S.A., INC.
INSTALLATION
2009 Toyota Tundra
2009 ENG NE Exhaust (3UR-FE) - Tundra
Нет комментариевНе стесняйтесь поделиться с нами вашим ценным мнением.
Текст