Kia Carnival (2007 year). Manual — part 18
The bottom side bolt(A) which can be seen after removing the under cover should be loosened for removal of
the radiator support upper member assembly.
18. Drain engine oil.
19. Remove the brake caliper.(Refer to DS group).
20. Disconnect the air conditioning compressor hoses.(Refer to HA group).
21. Remove the front wheels and tires.(Refer to DS group).
22. Remove the brake caliper hub nut.(Refer to DS group).
23. Remove the tie rod end ball joint from the knuckle.(Refer to DS group)
24. Remove the driver shaft and the stabilizer bar link(Refer to SS group).
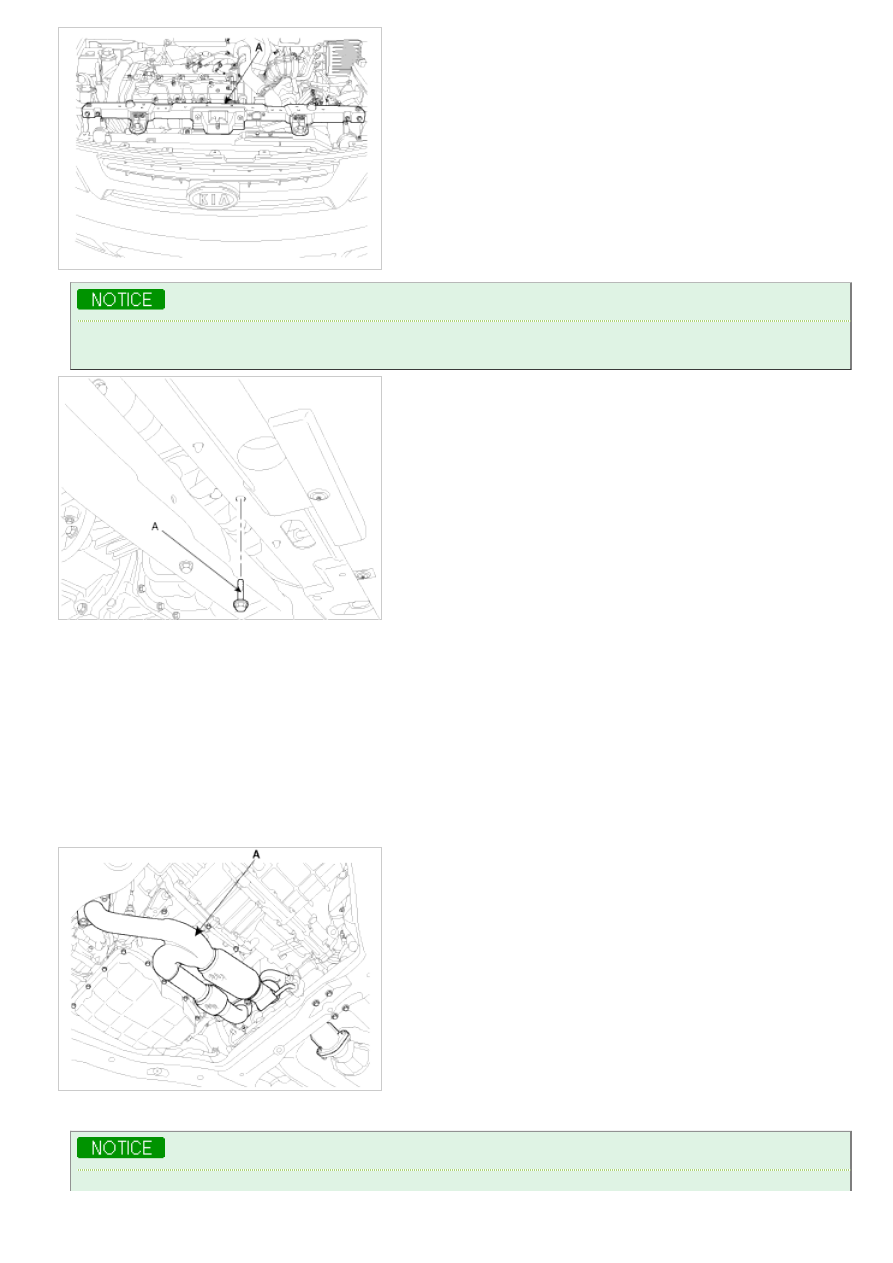
25. Remove the front muffler(A).
26. Using a floor jack, support the engine and transaxle assembly.
After removing the sub frame mounting bolt , the engine and transaxle assembly may fall downward, and so
support them securely with floor jack.
support them securely with floor jack.
Verify that the hoses and connectors are disconnected before removing the engine and transaxle assembly.
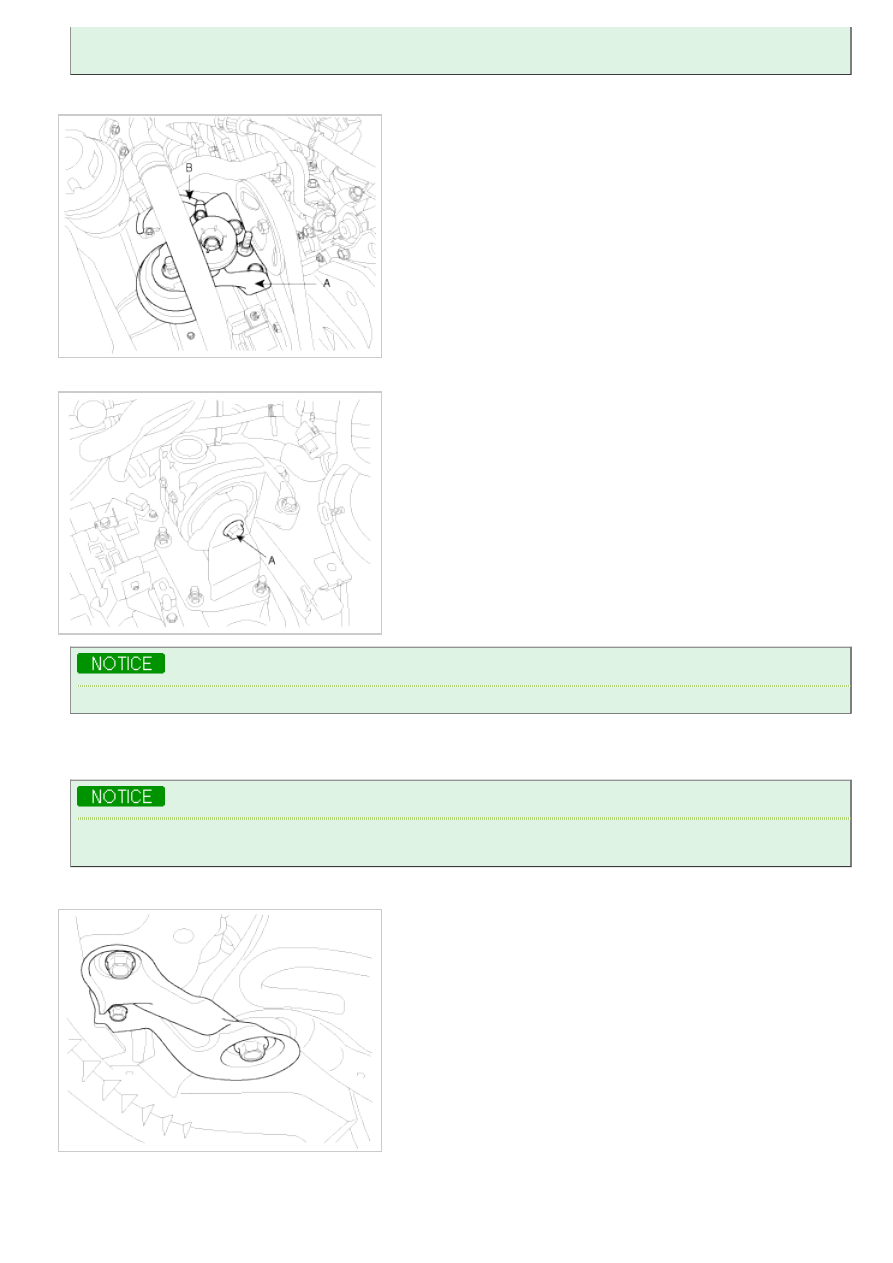
27. Remove the engine mounting bracket(A) and the ground(B).
28. Remove the transaxle insulator mounting bolt(A).
Remove the ECM(Electronic Controlled Mounting) nuts and the solenoid valve connector for A/T vehicles.
29. Supporting the engine and transaxle assembly with a jack, remove the assembly from the vehicle by loosening the
sub frame mounting bolts and lifting up the vehicle slowly.
When removing the engine and transaxle assembly, be careful not to damage any surrounding parts or body
components.
Front
Real
INSTALLATION
Installation is in the reverse order of removal.
Perform the following :
a. Adjust the shift cable.
b. Refill the engine with engine oil.
c. Refill the transaxle with fluid.
d. Refill the radiator with engine coolant.
e. Bleed air from the cooling system with the heater valve open.
f. Clean the battery posts and cable terminals with sandpaper assemble them, then apply grease to prevent
corrosion.
g. Inspect for fuel leakage.
After assembling the fuel line, turn on the ignition switch (do not operate the starter) so that the fuel pump runs for
approximately two seconds and fuel line pressurizes.
Repeat this operation two or three times, then check for fuel leakage at any point in the fuel line.
Cylinder Block
3LVWRQDQG
&RQQHFWLQJ5RG
Нет комментариевНе стесняйтесь поделиться с нами вашим ценным мнением.
Текст