Kia Carnival (2007 year). Manual — part 552
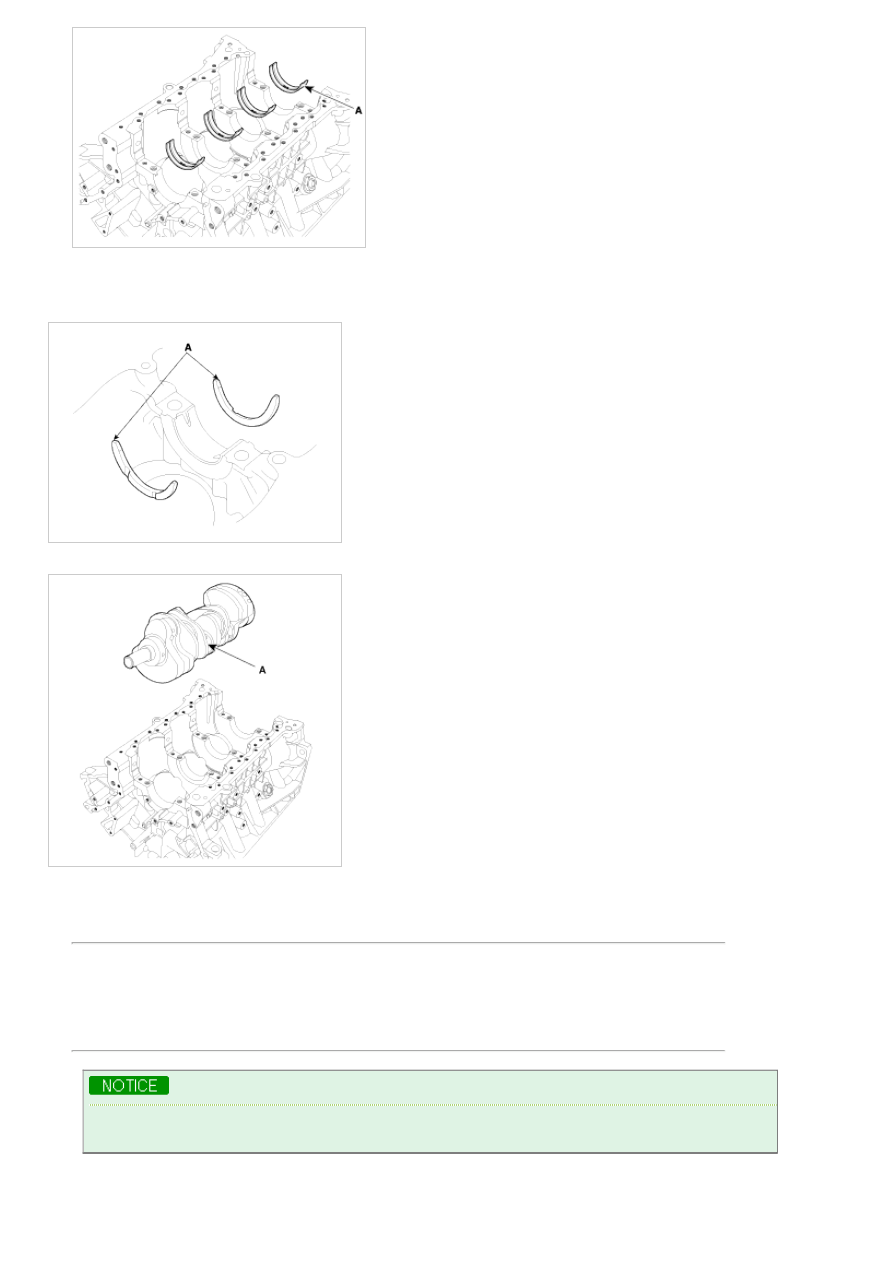
5. Install thrust bearings.
Install the 2 thrust bearings(A) under the No.3 journal position of the cylinder block with the oil grooves facing
outward.
6. Place crankshaft on the cylinder block.
7. Place main bearing caps on cylinder block.
8. Install main bearing cap bolts.
(1) Install and uniformly tighten the bearing cap bolts, in several passes, in the sequence shown.
Tightening torque
Main bearing cap bolt
49.00Nm(5.0 kgf.m, 36.16lb-ft) + 90° (1 ~ 8)
19.60 Nm(2.0 kgf.m, 14.46lb-ft)+ 120° (9 ~ 16)
29.40 ~ 31.36Nm(3.0 ~ 3.2 kgf.m, 21.70 ~ 23.14lb-ft) (17 ~ 22)
a. Always use new main bearing cap bolt.
b. If any of the bearing cap bolts in broken or deformed, replace it.
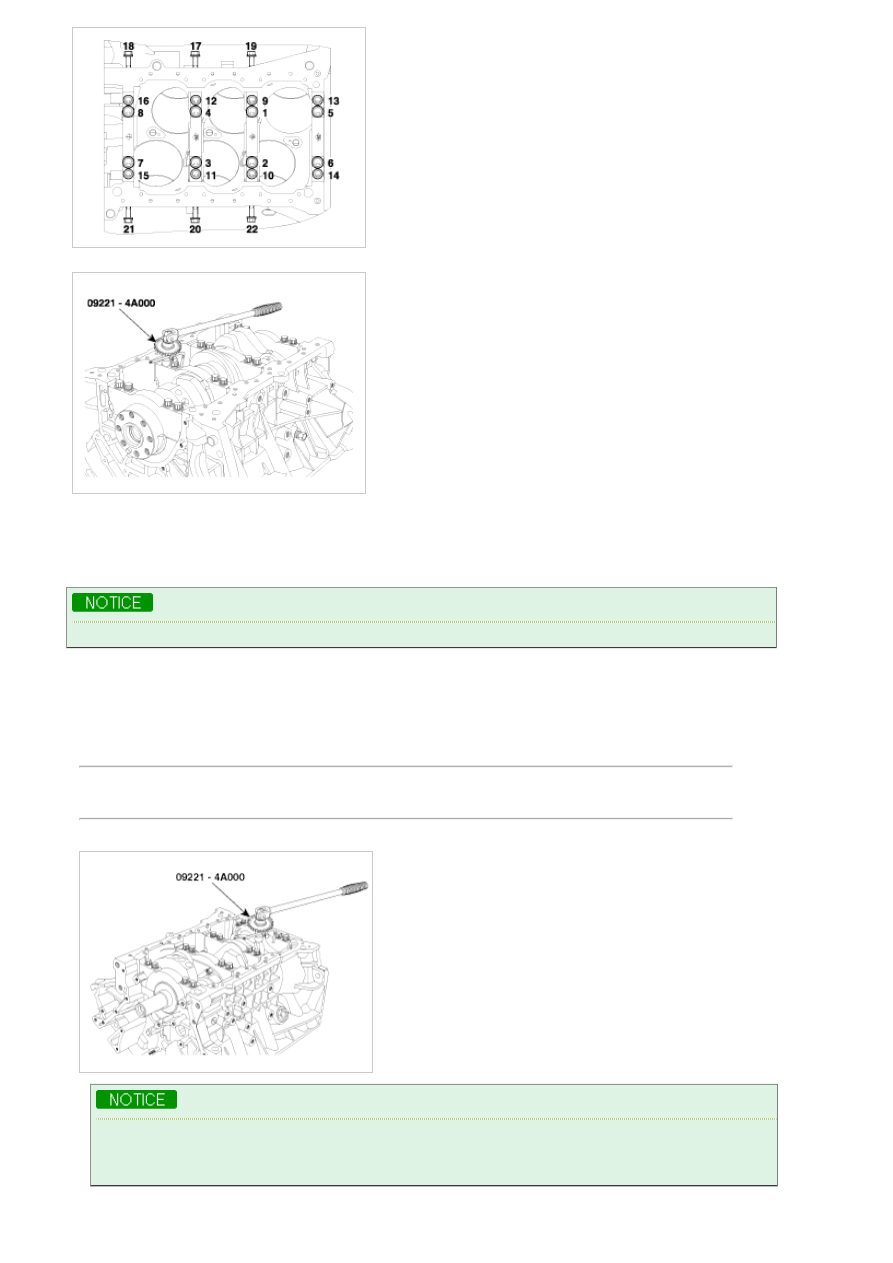
Use SST( 09221-4A000 ), install main bearing cap bolts.
(2) Check that the crankshaft turns smoothly.
9. Check crankshaft end play.
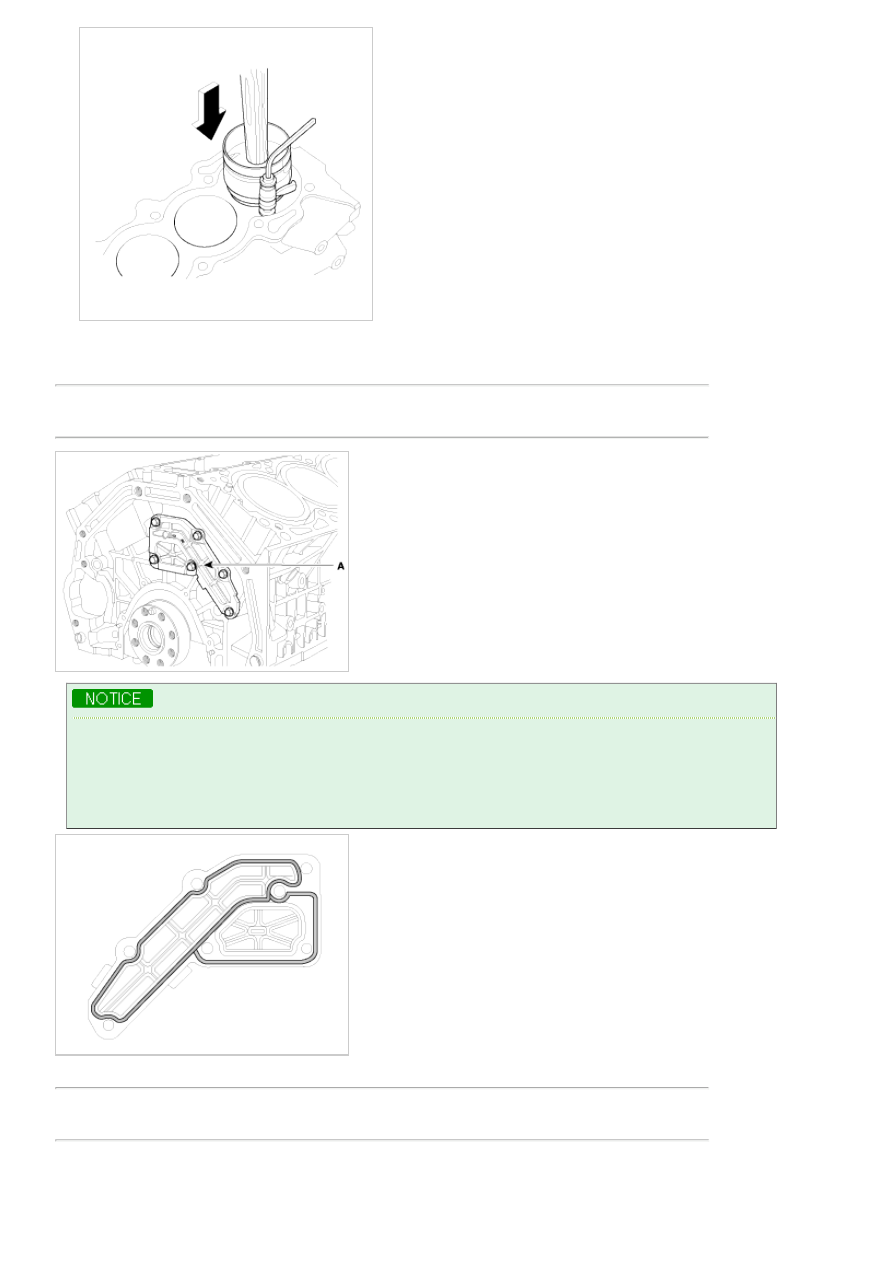
10. Install piston and connecting rod assemblies.
Before installing the pistons, apply a coat of engine oil to the ring grooves and cylinder bores.
(1) Install the ring compressor, check that the bearing is securely in place, then position the piston in the cylinder,
and tap it in using the wooden handle of a hammer.
(2) Stop after the ring compressor pops free, and check the connecting rod-to-check journal alignment before
pushing the piston into place.
(3) Apply engine oil to the bolt threads. Install the rod caps with bearings, and torque the bolts.
Tightening torque
19.6Nm (2.0kgf.m, 14.46lb-ft) + 90°
Use SST(09221-4A000), install connecting rod bearing cap bolts.
a. Always use new connecting rod bearing cap bolt.
b. Maintain downward force on the ring compressor to prevent the rings from expanding before entering
the cylinder bore.
11. Check the connecting rod end play.
12. Install oil drain cover.
Tightening torque
9.80 ~ 11.76Nm (1.0 ~ 1.2kgf.m, 7.23 ~ 8.68b-ft)
a. Ensure the sealing face is clean before assembling two parts.
b. Remove harmful foreign matters on the sealing face before applying sealant
c. Be assembling oil drain cover, the liquid sealant TB1217H should be applied oil drain cover.
d. The part must be assembled within 5 minutes after sealant was applied.
e. Apply sealant to the inner threads of the bolt holes.
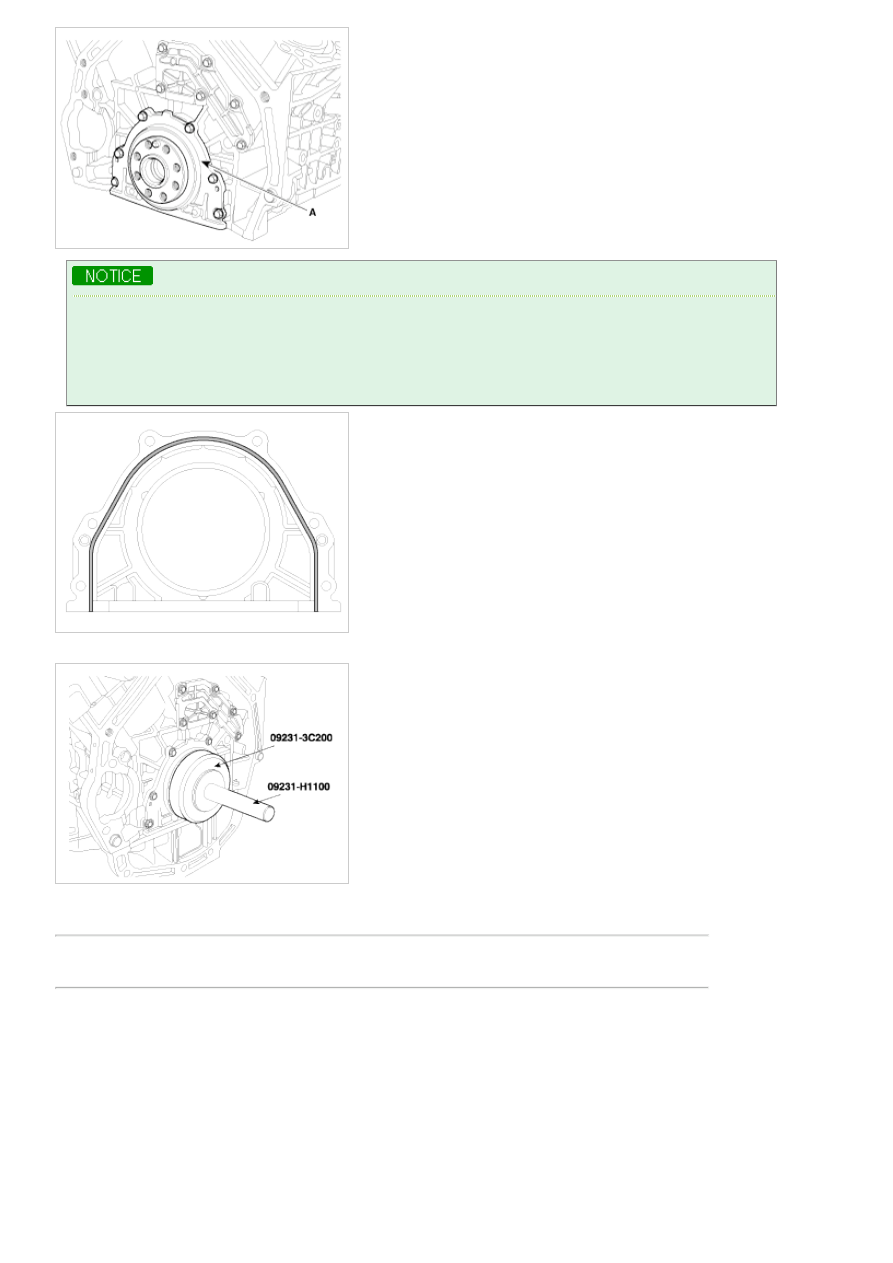
13. Install rear oil seal case.
Tightening torque
9.80 ~ 11.76Nm (1.0 ~ 1.2kgf.m, 7.23 ~ 8.67lb-ft)
a. Make clean the sealing face before assembling two parts.
b. Remove harmful foreign matters on the sealing face before applying sealant
c. Be assembling rear oil seal case, the liquid sealant TB1217H should be applied rear oil seal case.
d. The part must be assembled within 5 minutes after sealant was applied.
e. Apply sealant to the inner threads of the bolt holes.
14. Using SST(09231-3C200, 09231-H1100), install rear oil seal.
15. Install baffle plate.
Install and uniformly tighten the baffle plate bolts, in several passes, in the sequence shown.
Tightening torque
9.80 ~ 11.76Nm (1.0 ~ 1.2kgf.m, 7.23 ~ 8.68lb-ft)
Нет комментариевНе стесняйтесь поделиться с нами вашим ценным мнением.
Текст