Kia Carnival (2007 year). Manual — part 426
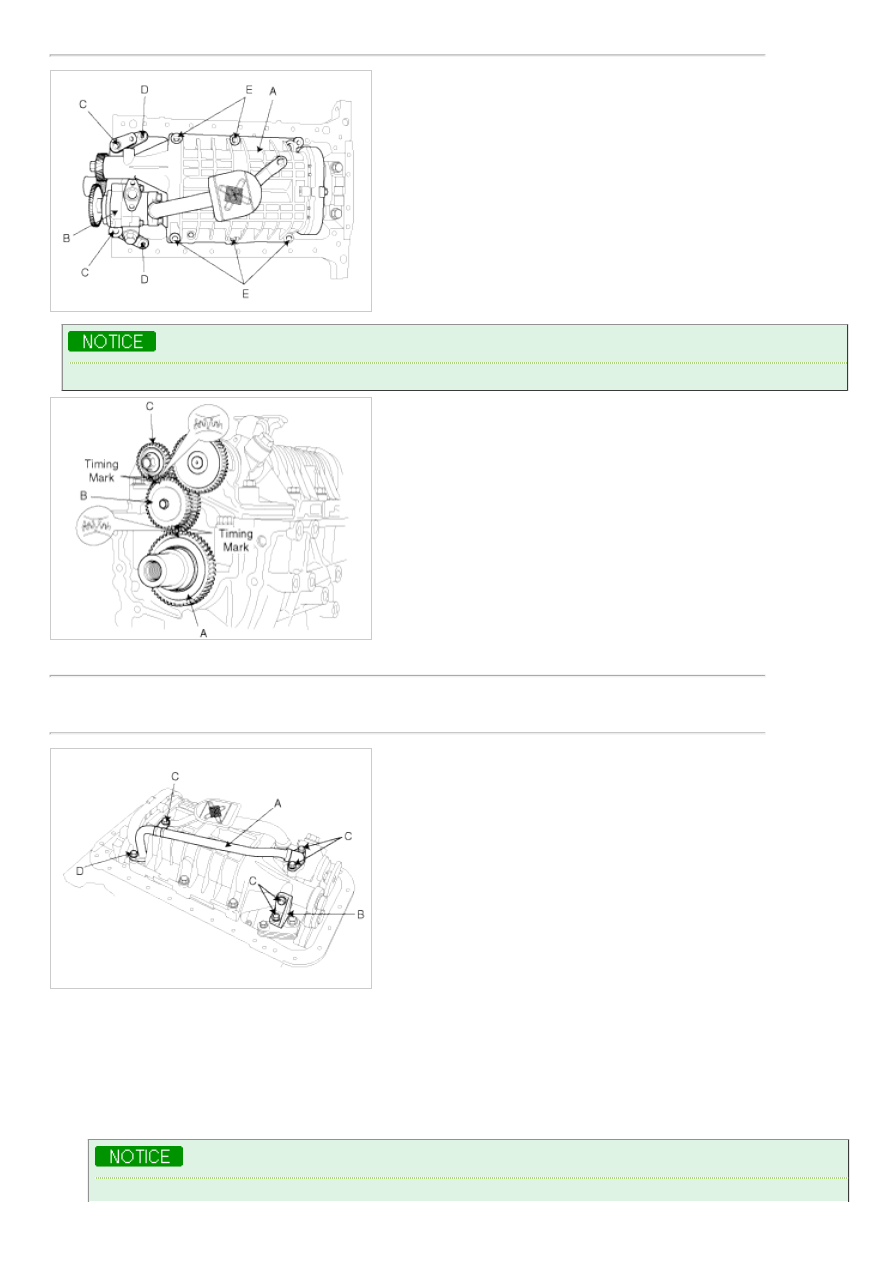
Bolts(E): 31.4~46.1Nm (3.2~4.7kgf.m, 23.1~34.0lb-ft)
Align the timing marks on the crankshaft sprocket(A), idler(B) and balancer sprocket(C).
3. Install the oil supply pipe(A), ladde frame bracket(B) with the bolts(C,D).
Tightening torque:
15.7~22.6Nm (1.6~2.3kgf.m, 11.6~16.6lb-ft)
4. Install the oil pan.
5. Fill with engine oil.
OIL PAN
1. Install the oil pan.
(1) Using a razor blade and gasket scraper, remove all the old packing material from the gasket surfaces.
Check that the mating surfaces are clean and dry before applying liquid gasket.
(2) Apply liquid gasket as an even bead, centered between the edges of the mating surface.
Liquid gasket: LOCTITE 5900 or equivalent
a. To prevent leakage of oil, apply liquid gasket to the inner threads of the bolt holes.
b. Do not install the parts if five minutes or more have elapsed since applying the liquid gasket.
Instead, reapply liquid gasket after removing the residue.
c. After assembly, wait at least 30 minutes before filling the engine with oil.
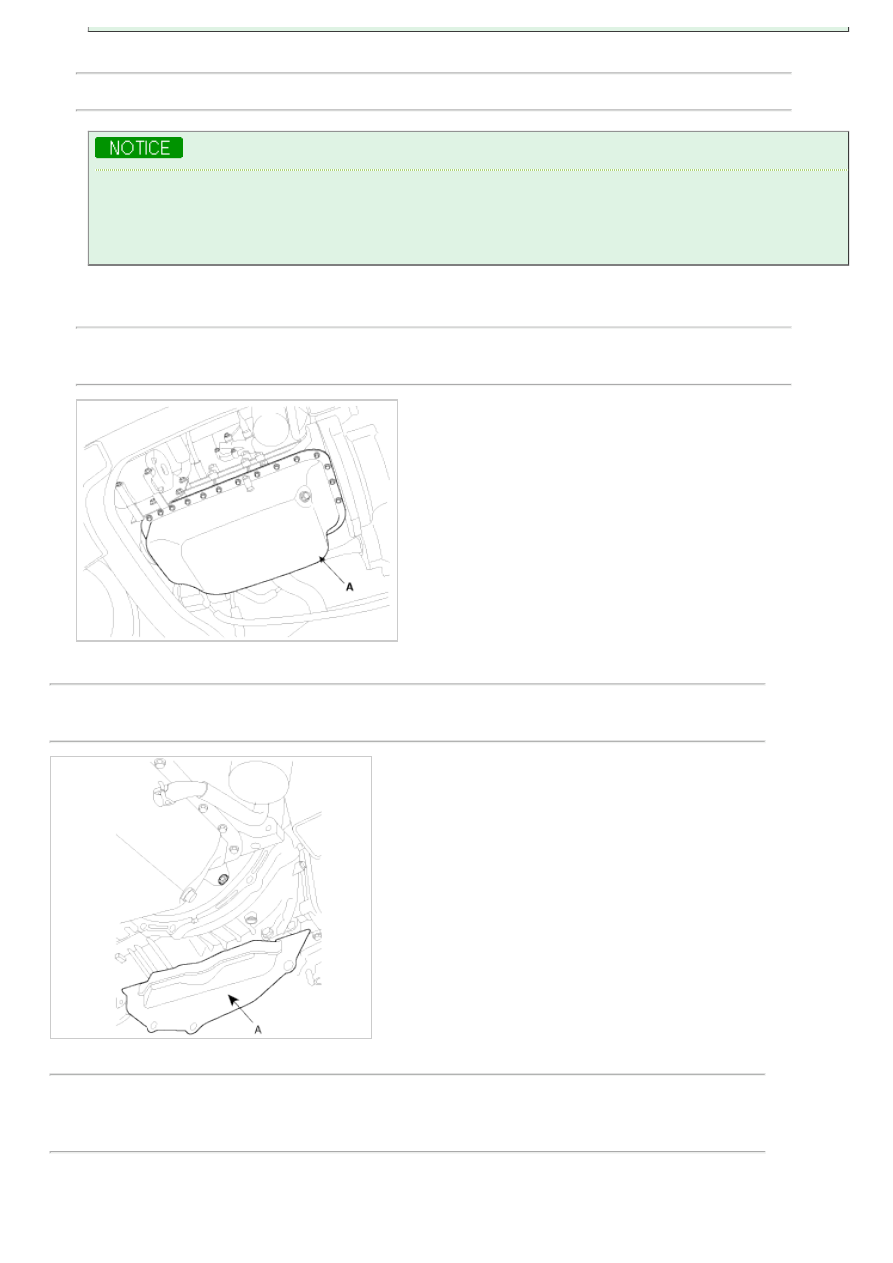
(3) Install the oil pan(A) with the bolts.
Uniformly tighten the bolts in several passes.
Tightening torque :
15.7~22.6Nm (1.6~2.3kgf.m, 11.6~16.6lb-ft)
2. Install the plate(A) between the engine and the transaxle assembly.
Tightening torque :
15.7~22.6Nm (1.6~2.3kgf.m, 11.6~16.6lb-ft)
3. Install the RH, LH sub frame mounting bolts(A,B).
Tightening torque :
156.9~176.5Nm (16.0~18.0kgf.m, 115.7~130.2lb-ft)
44.1~58.8Nm (4.5~6.0kgf.m, 32.5~43.4lb-ft)
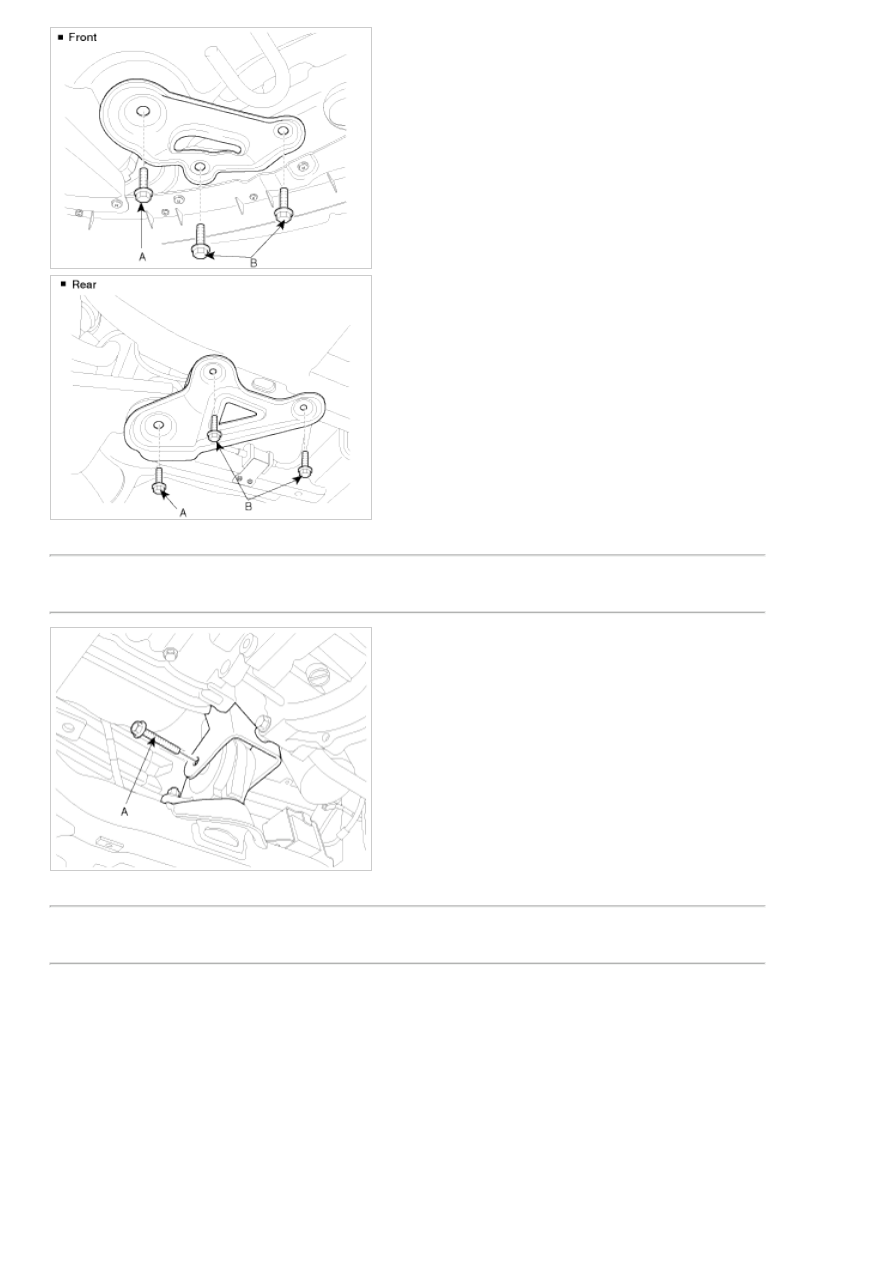
4. Install the front roll stopper insulator mounting bolt(A).
Tightening torque :
88.3~107.9Nm (9.0~11.0kgf.m, 65.1~79.6lb-ft)
5. Install the rear roll stopper insulator mounting bolt(A).
Tightening torque :
88.3~107.9Nm (9.0~11.0kgf.m, 65.1~79.6lb-ft)
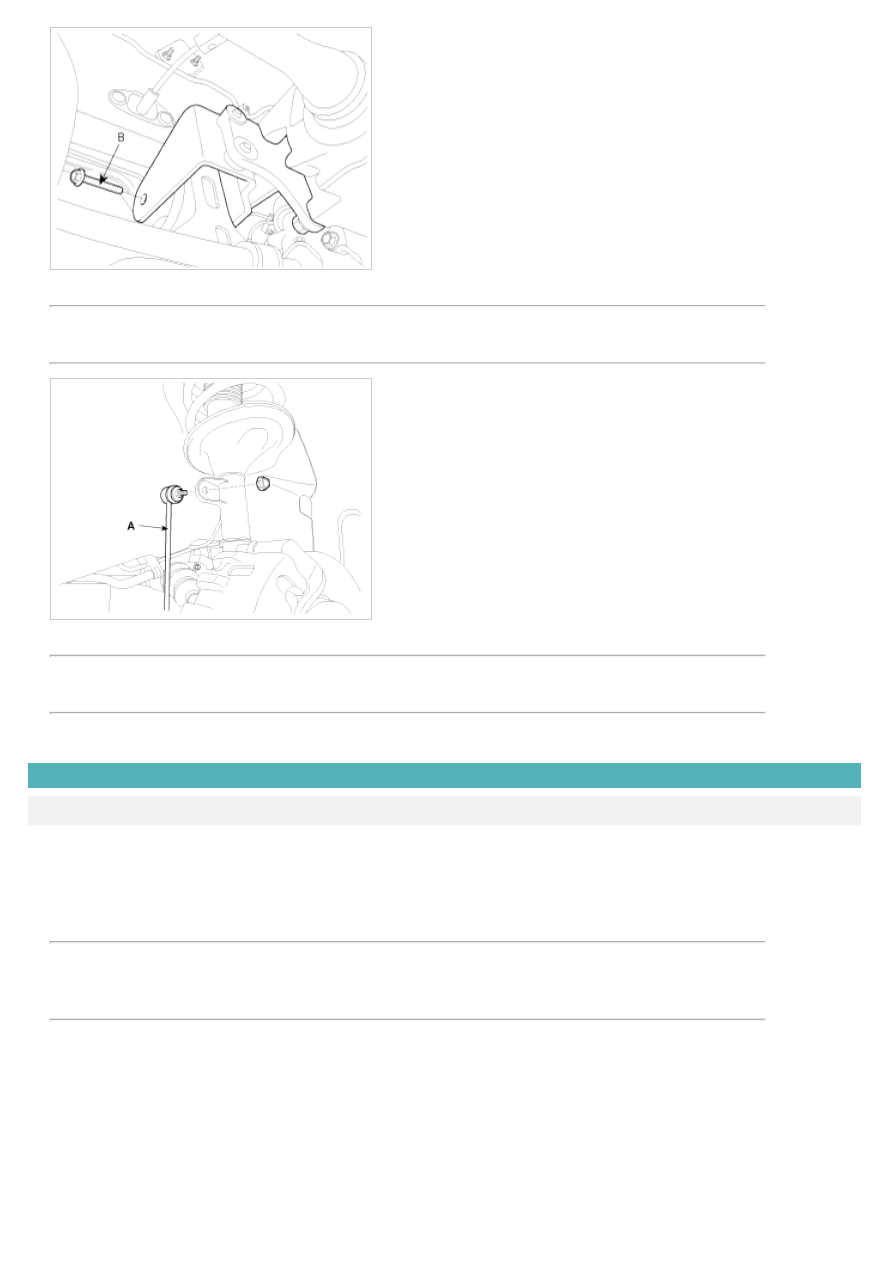
6. Install the RH stabilizer bar link(A).
Tightening torque:
98.1~117.7Nm (10.0~12.0kgf.m, 72.3~86.8lb-ft)
7. Remove the RH tires.
Tightening torque :
88.3~107.9Nm (9.0~11.0kgf.m, 65.1~79.6lb-ft)
8. Fill with engine oil
INSPECTION
RELIEF PLUNGER
1. Inspect the relief plunger.
Coat the plunger with engine oil and check that it falls smoothly into the plunger hole by its own weight.
If it does not, replace the relief plunger. If necessary, replace the front case.
2. Inspect the relief valve spring.
Inspect for distorted or broken relief valve spring.
Standard value
Free height : 46.3mm (1.8228in)
Load : 6.13±5% kgf/38.05mm (13.5±1.1% lb/1.4980in)
ENGINE OIL
1. Check the engine oil quality.
Check the oil deterioration, entry of water, discoloring of thinning.
If the quality is visibly poor, replace the oil.
2. Check the engine oil level.
After warning up the engine and then 5 minutes after the engine stop, oil level should be between the “L” and “F”
marks in the dipstick.
Нет комментариевНе стесняйтесь поделиться с нами вашим ценным мнением.
Текст