Nissan Primera P12. Manual — part 416
EM-10
[YD]
PREPARATION
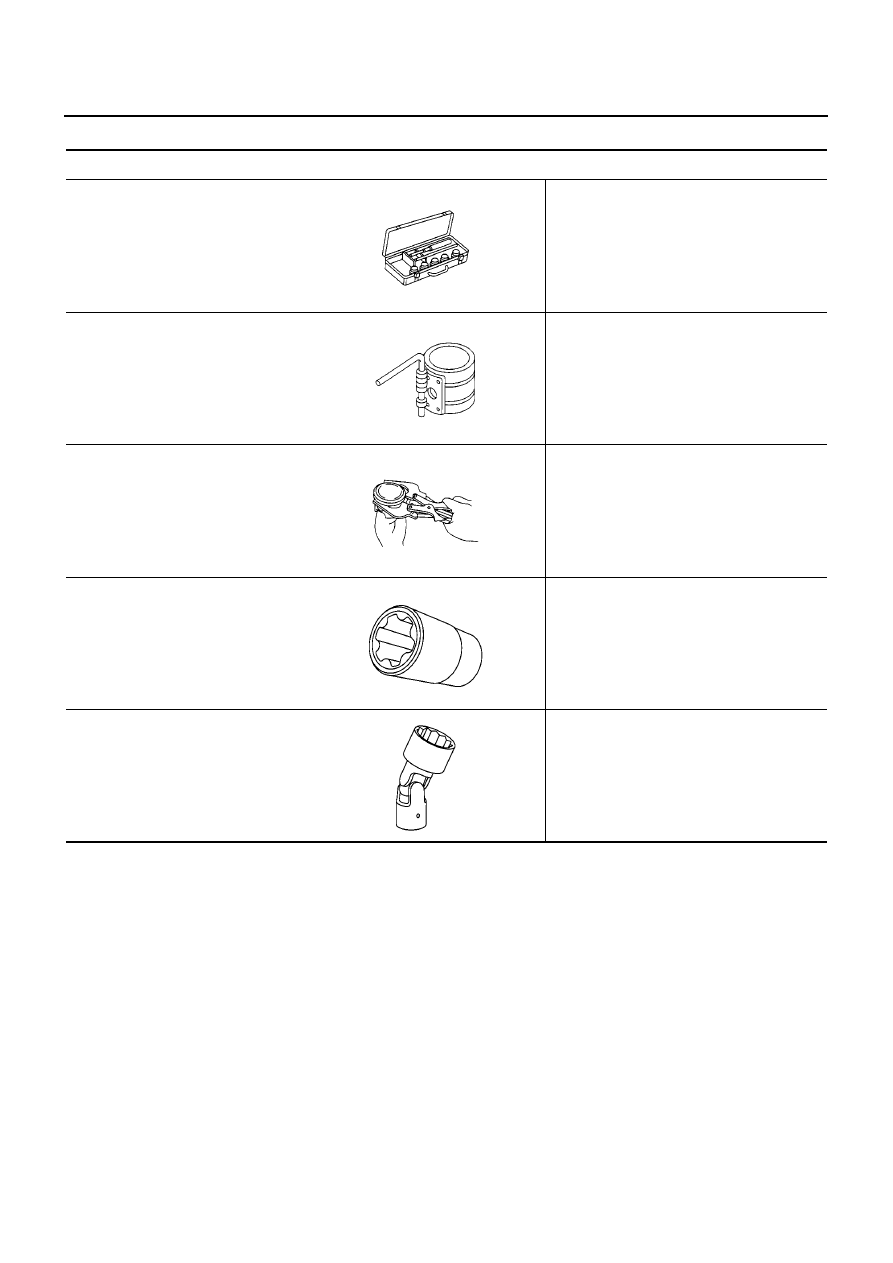
Commercial Service Tools
EBS00SNC
Tool name
Description
Valve seat cutter set
Finishing valve seat dimensions
Piston ring compressor
Installing piston assembly into cylinder bore
Piston ring expander
Removing and installing piston ring
TORX socket
Standard Universal
NT048
NT044
NT030
NT807
NT808
NOISE, VIBRATION AND HARSHNESS (NVH) TROUBLESHOOTING
EM-11
[YD]
C
D
E
F
G
H
I
J
K
L
M
A
EM
NOISE, VIBRATION AND HARSHNESS (NVH) TROUBLESHOOTING
PFP:00003
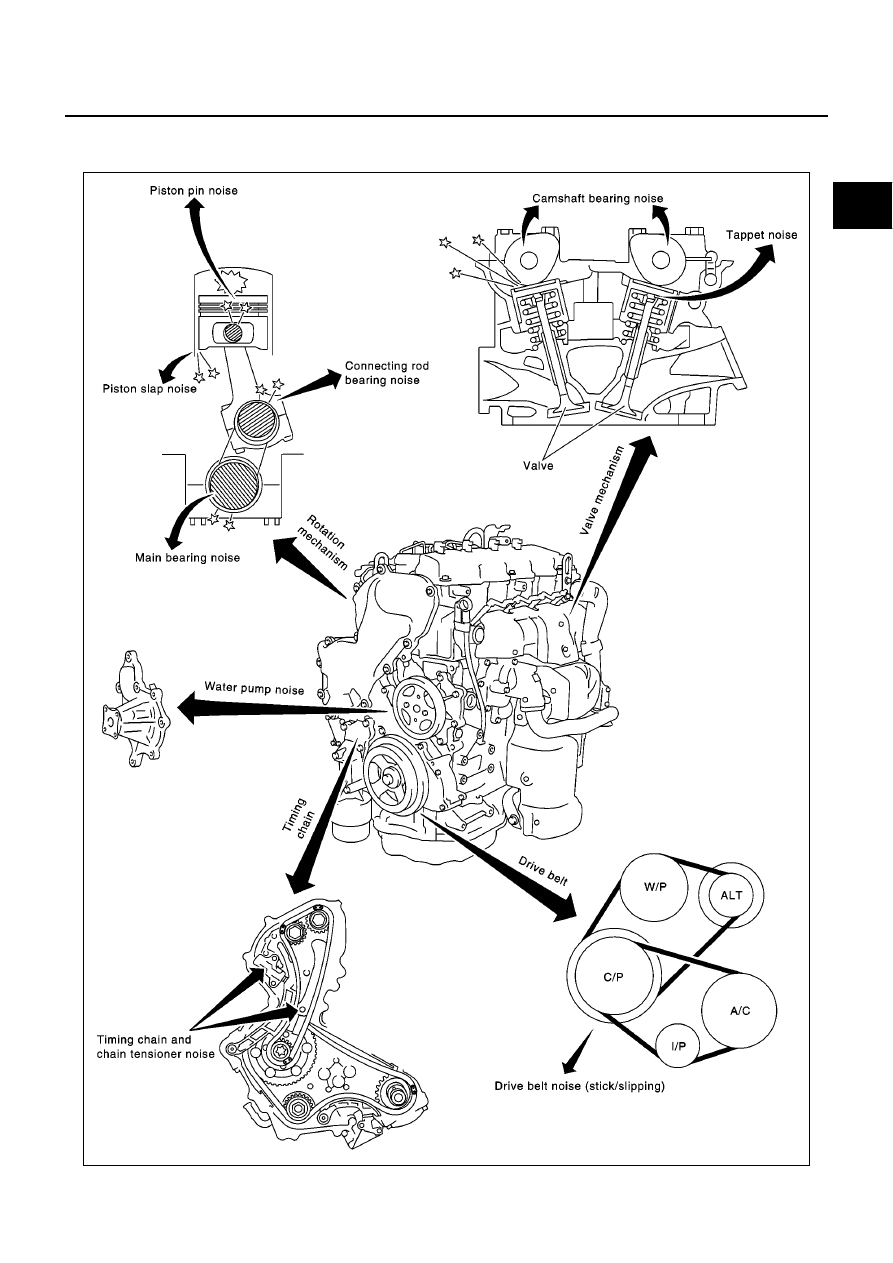
NVH Troubleshooting —Engine Noise
EBS00SND
SBIA0148E

EM-12
[YD]
NOISE, VIBRATION AND HARSHNESS (NVH) TROUBLESHOOTING
Use the Chart Below to Help You Find the Cause of the Symptom.
EBS00SNE
1.
Locate the area where noise occurs.
2.
Confirm the type of noise.
3.
Specify the operating condition of engine.
4.
Check specified noise source.
If necessary, repair or replace these parts.
A: Closely related
B: Related
C: Sometimes related
—: Not related
Location
of noise
Type of
noise
Operating condition of engine
Source of
noise
Check item
Refer-
ence page
Before
warm-
up
After
warm-
up
When
start-
ing
When
idling
When
racing
While
driving
Top of
engine
Rocker
cover
Cylinder
head
Ticking or
clicking
C
A
—
A
B
—
Tappet
noise
Valve clearance
Rattle
C
A
—
A
B
C
Camshaft
bearing
noise
Camshaft oil clearance
Camshaft runout
Crank-
shaft pul-
ley
Cylinder
block
(Side of
engine)
Oil pan
Slap or
knock
—
A
—
B
B
—
Piston pin
noise
Piston to piston pin
clearance
Connecting rod bush-
ing oil clearance (Small
end)
Slap or
rap
A
—
—
B
B
A
Piston
slap noise
Piston to cylinder bore
clearance
Piston ring side clear-
ance
Piston ring end gap
Connecting rod bend
and torsion
Knock
A
B
C
B
B
B
Connect-
ing rod
bearing
noise
Connecting rod bush-
ing oil clearance (Small
end)
Connecting rod bear-
ing oil clearance (Big
end)
Knock
A
B
—
A
B
C
Main
bearing
noise
Main bearing oil clear-
ance
Crankshaft runout
Front of
engine
Timing
chain
cover
Tapping or
ticking
A
A
—
B
B
B
Timing
chain and
chain
tensioner
noise
Timing chain cracks
and wear
Timing chain tensioner
operation
Front of
engine
Squeak-
ing or fizz-
ing
A
B
—
B
—
C
Drive belts
(Sticking
or slip-
ping)
Drive belts deflection
Creaking
A
B
A
B
A
B
Drive belts
(Slipping)
Idler pulley bearing
operation
Squall
Creak
A
B
—
B
A
B
Water
pump
noise
Water pump operation
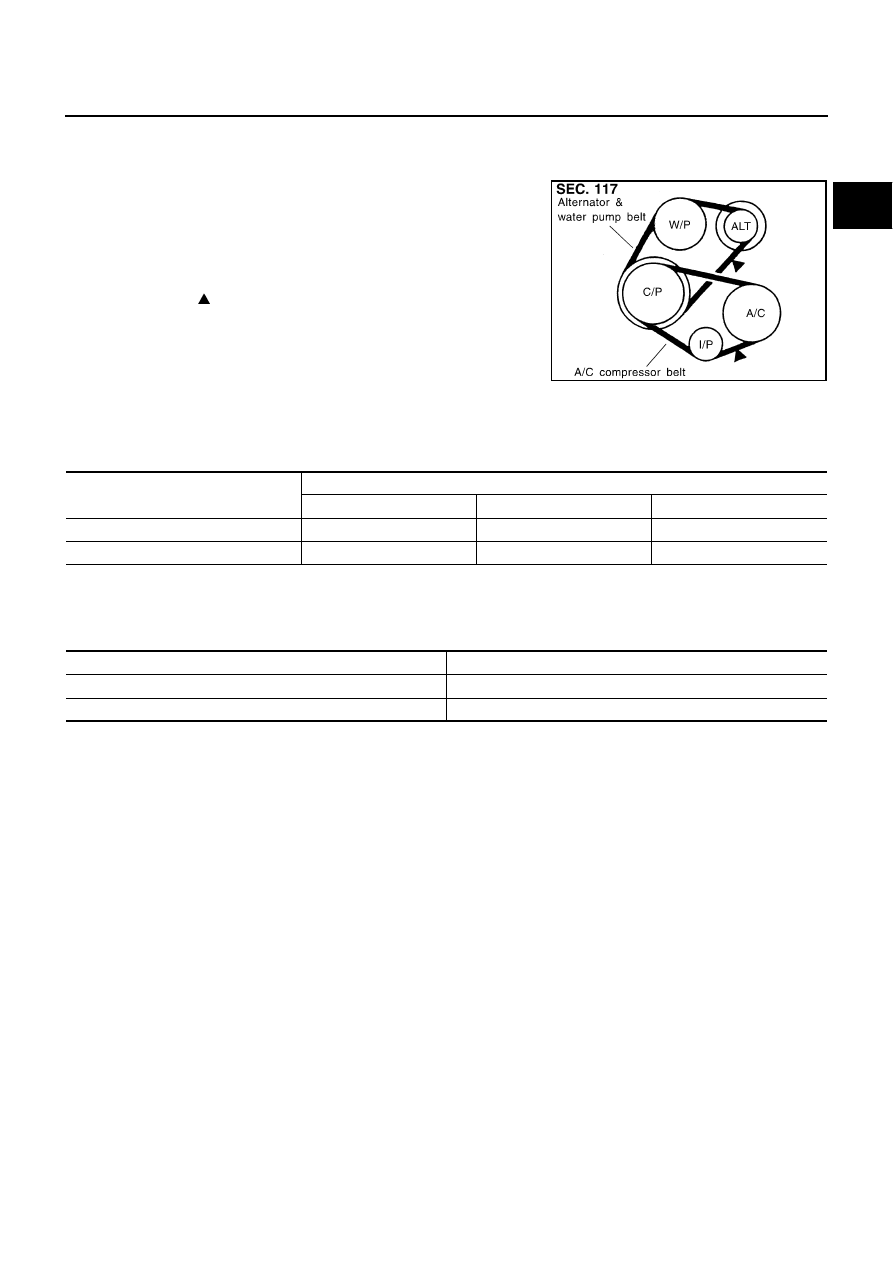
DRIVE BELTS
EM-13
[YD]
C
D
E
F
G
H
I
J
K
L
M
A
EM
DRIVE BELTS
PFP:02117
Checking Drive Belts
EBS00SNF
●
Before inspecting the engine, make sure the engine has cooled
down; wait approximately 30 minutes after the engine has been
stopped.
●
Visually inspect all belts for wear, damage or cracks on contact-
ing surfaces and edge areas.
●
When measuring deflection, apply 98 N (10 kg, 22 lb) at the
marked point ( ).
CAUTION:
●
When checking belt deflection immediately after installa-
tion, first adjust it to the specified value. Then, after turn-
ing the crankshaft two turns or more, re-adjust to the
specified value to avoid variation in deflection between
pulleys.
●
Tighten idler pulley lock nut by hand and measure deflection without looseness.
Belt Deflection:
*: When engine is cold.
Tension Adjustment
EBS00SNG
●
Adjust belts with the parts shown below.
CAUTION:
●
When a new belt is installed as a replacement, adjust it to the value specified under “New” value
because of insufficient adaptability with pulley grooves.
●
If the belt deflection of the current belt is out of the “Limit for re-adjusting”, adjust to the
“Adjusted” value.
●
When checking belt deflection immediately after installation, first adjust it to the specified value.
Then, after turning crankshaft two turns or more, re-adjust it to the specified value to avoid vari-
ation in deflection between pulleys.
●
Make sure the belts are fully fitted into the pulley grooves during installation.
●
Handle with care to avoid smearing the belts with oil or cooling water etc.
●
Do not twist or bend the belts with strong force.
JEM249G
Applied belt
Belt deflection with 98 N (10 kg, 22 lb) force applied* mm (in)
New
Adjusted
Limit for re-adjusting
Air conditioner compressor belt
4 - 5 (0.16 - 0.20)
6 - 7 (0.24 - 0.28)
8.5 (0.335)
Alternator and water pump belt
9.0 - 10.5 (0.354 - 0.413)
11.0 - 12.5 (0.433 - 0.492)
16.5 (0.650)
Applied belt
Belt adjustment method
Air conditioner compressor belt
Adjusting bolt on idler pulley
Alternator water pump belt
Adjusting bolt on alternator
Нет комментариевНе стесняйтесь поделиться с нами вашим ценным мнением.
Текст