Nissan Primera P12. Manual — part 100
REAR DOOR LOCK
BL-109
C
D
E
F
G
H
J
K
L
M
A
B
BL
REAR DOOR LOCK
PFP:82502
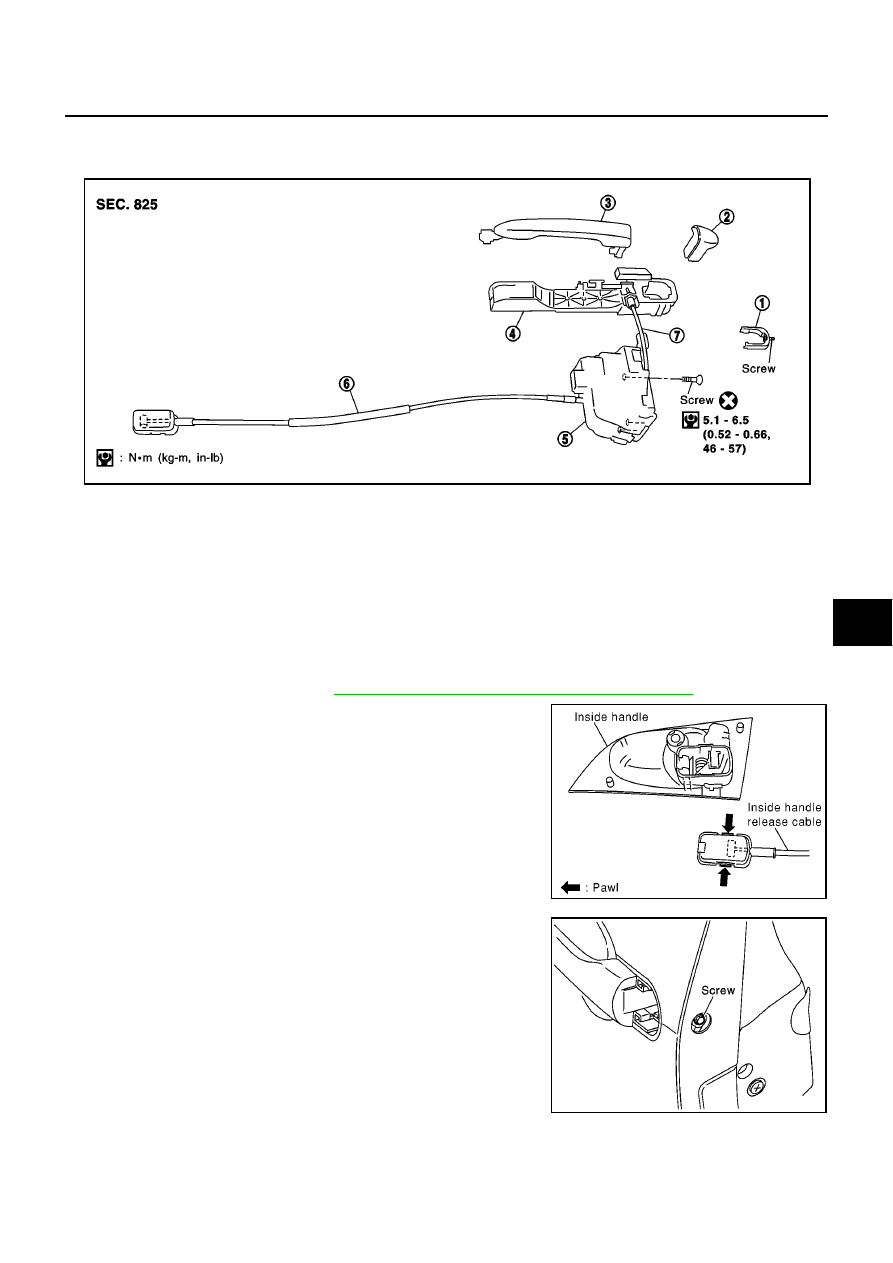
Component Parts
EIS005I7
Removal and Installation
EIS005I8
REMOVAL
1.
Remove door finisher. Refer to EI section in P12 ESM (SM2E00-1P12E0E).
2.
Remove remove sealing screen.
NOTE:
If sealing screen is reused, cut butyl tape in a way that leaves it on the sealing screen.
3.
Remove rear door glass. Refer to
GW-68, "REAR DOOR GLASS AND REGULATOR"
.
4.
Disconnect inside release cable at the joint.
5.
Remove mount screw and remove door out side handle
escutcheon.
1
: Fixing bracket
2
: Door outside handle escutcheon
3
: Door outside handle grip
4
: Door outside handle bracket
5
: Door lock actuator assembly
6
: Inside handle release cable
7
: Outside handle release cable
PIIA0827E
PIIA0825E
SIIA1642E
BL-110
REAR DOOR LOCK
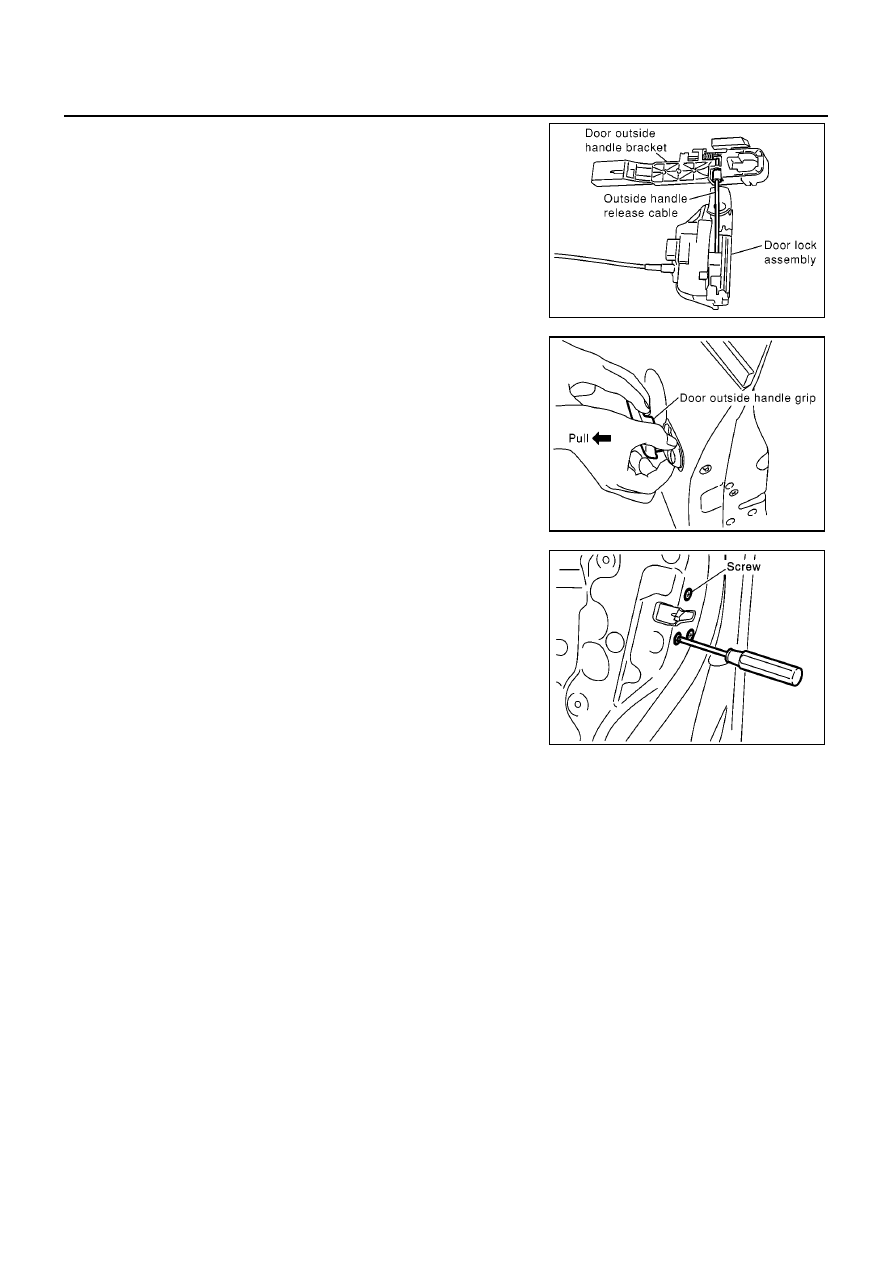
6.
Working through the access hole, disconnect out side handle
release cable (on the handle) at the joint.
7.
Remove outside handle grip.
8.
Remove out side handle bracket.
9.
Disconnect door lock actuator connector.
10. Remove mount screw and remove door lock assembly through
the access hole.
INSTALLATION
Install in the reverse order of removal.
NOTE:
●
Install the outside handle by pressing it forward and downward while tightening the bolts.
PIIA0824E
PIIA0826E
PIIA0829E
TRUNK LID
BL-111
C
D
E
F
G
H
J
K
L
M
A
B
BL
TRUNK LID
PFP:H4300
Fitting Adjustment
EIS005I9
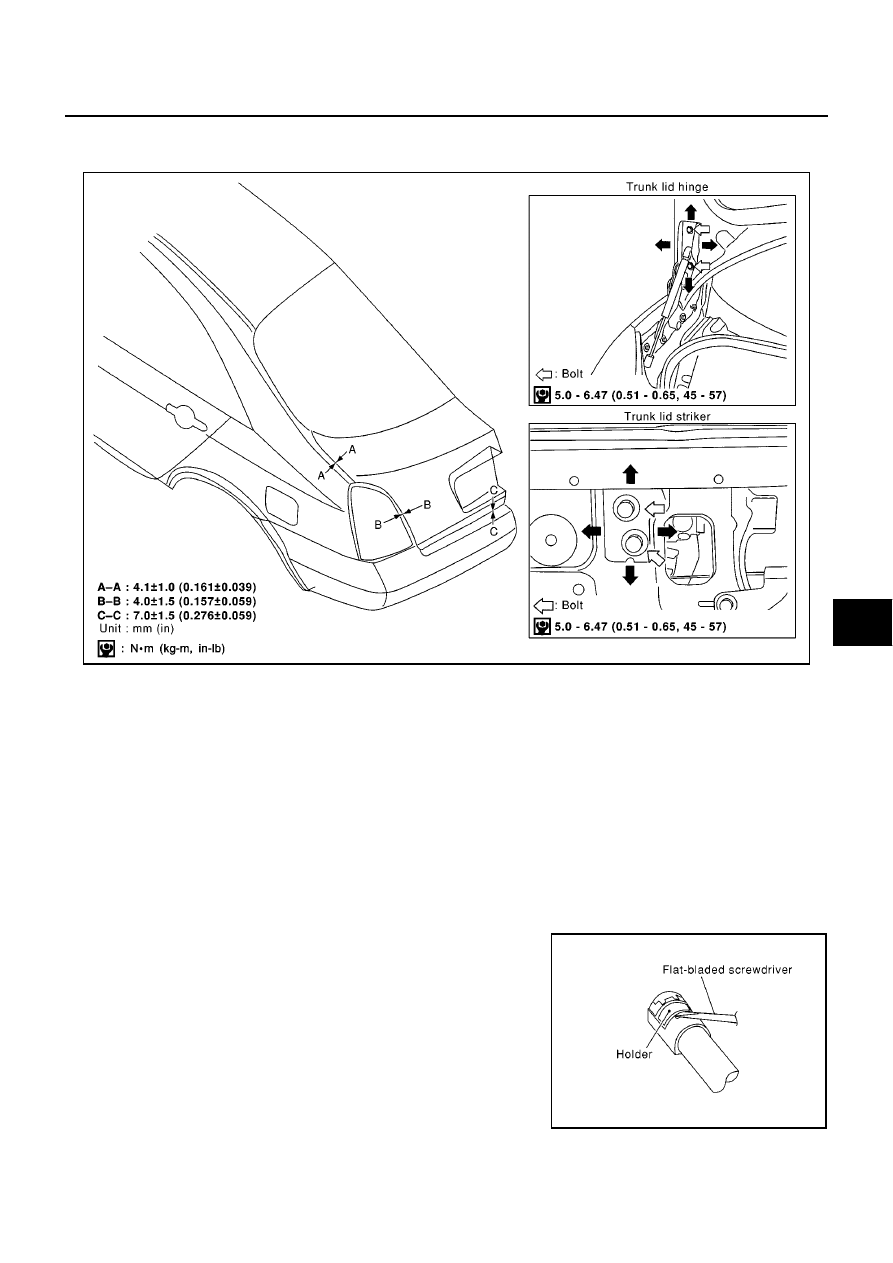
LONGITUDINAL AND LATERAL CLEARANCE ADJUSTMENT
1.
With the striker released, loosen the trunk lid hinge mounting bolts to close the trunk lid.
2.
Make the lateral clearance and the clearance to the rear window glass equal, and open the trunk lid to
tighten the mounting bolts to the specified torque.
SURFACE HEIGHT ADJUSTMENT
1.
Loosen the striker mounting bolts. Raise the striker to the top position, and temporarily tighten the upper
mounting bolt at the position.
2.
Close the trunk lid lightly and adjust the surface height, then open the trunk lid to finally tighten the striker
mounting bolts to the specified torque.
Removal and Installation of Trunk Lid Assembly
EIS005IA
1.
Disconnect the connectors in the trunk lid, and remove the harness clamps to pull the harness out of the
trunk lid.
2.
Insert flat-bladed screw driver into the gap and remove holder.
SIIA0703E
SIIA1561E
BL-112
TRUNK LID
3.
Remove trunk lid stay (gas stay).
4.
Remove the mounting bolts, and remove the trunk lid assembly.
NOTE:
After installing, apply touch-up paint (the body color) onto the
head of the hinge mounting bolts.
Install in the reverse order of removal.
Removal and Installation of Trunk Lid Lock
EIS005IB
TRUNK RELEASE SWITCH (EXTERNAL) REMOVAL
1.
Remove license plate finisher. Refer to EI section in P12 ESM (SM2E00-1P12E0E).
2.
Remove trunk release switch.
STRIKER REMOVAL
1.
Remove trunk room rear plate. Refer to EI section in P12 ESM (SM2E00-1P12E0E).
2.
Remove striker mounting bolts.
LOCK REMOVAL
1.
Remove the trunk lid trim. Refer to EI section in P12 ESM (SM2E00-1P12E0E).
2.
Remove trunk lid lock cover.
3.
Separate the key cylinder rod.
4.
After removing the harness connector, remove the mounting
bolts, and remove the trunk lid lock.
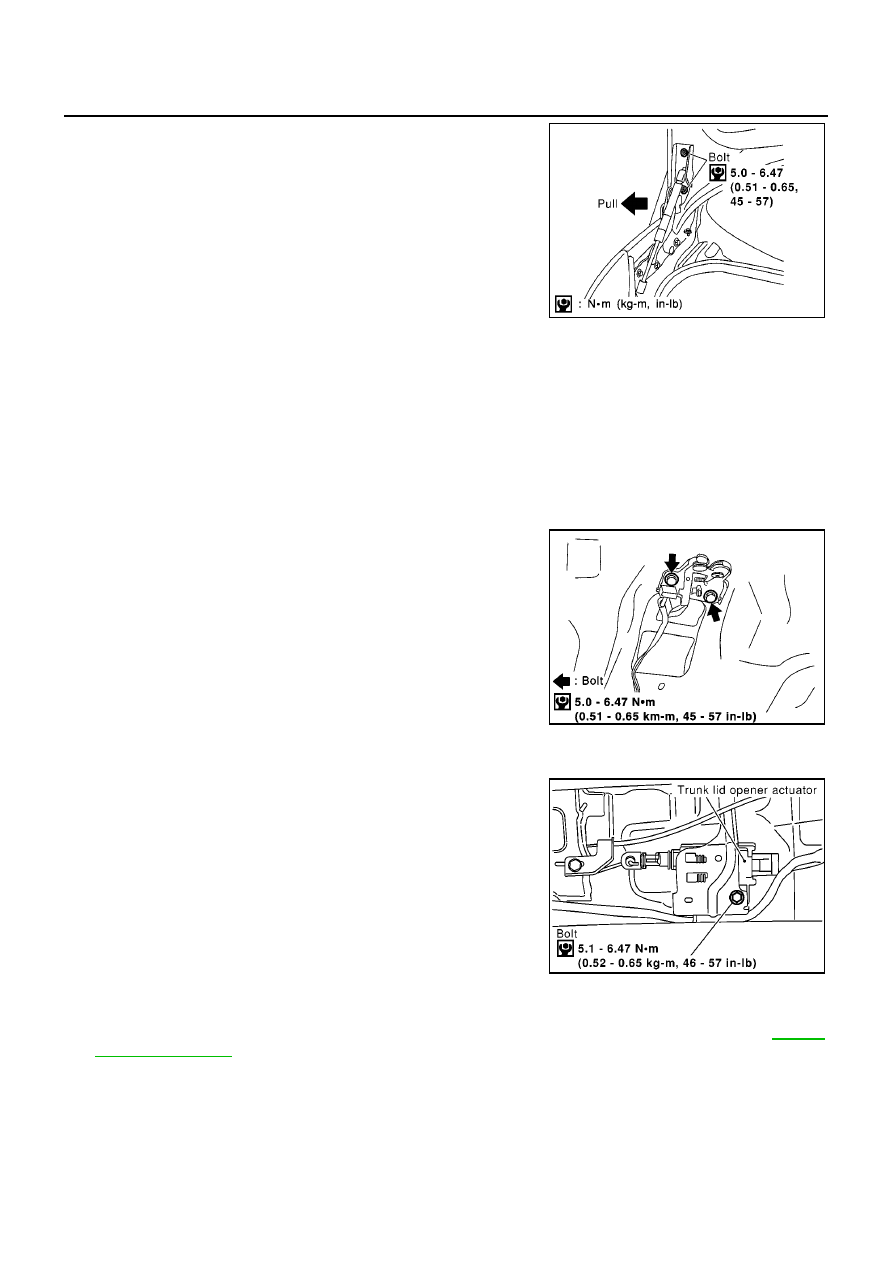
ACTUATOR REMOVAL
1.
Remove trunk room rear plate. Refer to EI section in P12 ESM (SM2E00-1P12E0E).
2.
Disconnect trunk release actuator harness connector.
3.
Remove the mounting bolts, and remove the trunk release actu-
ator.
INSTALLATION
1.
Install in the reverse order of removal.
2.
After installing, close the trunk lid lightly. Preform the lock and surface height adjustment. Refer to
.
3.
After installing, check the operation.
SIIA0761E
SIIA0705E
SIIA1562E
Нет комментариевНе стесняйтесь поделиться с нами вашим ценным мнением.
Текст