Nissan Primera P12. Manual — part 31
SUNLOAD SENSOR
ATC-117
C
D
E
F
G
H
I
K
L
M
A
B
ATC
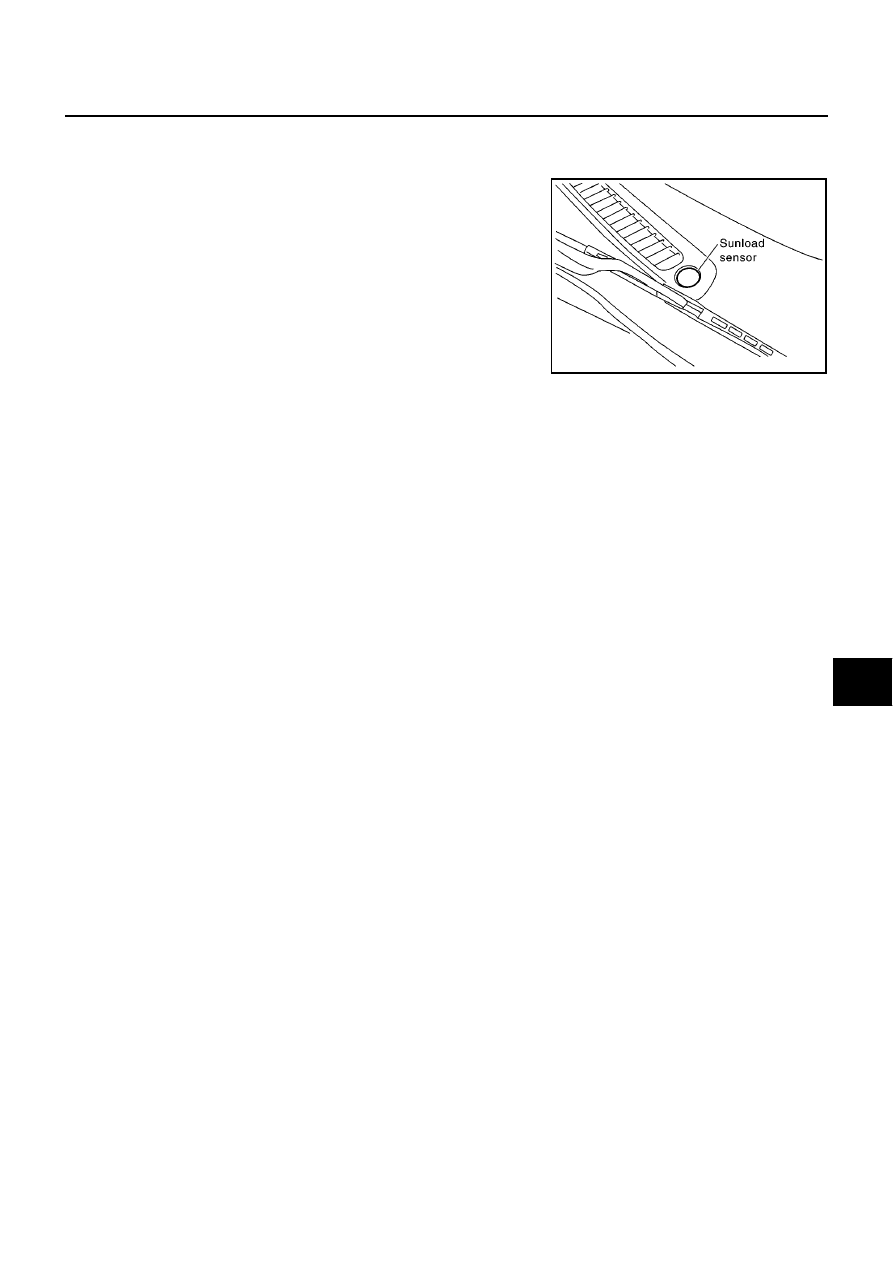
SUNLOAD SENSOR
PFP:27721
Removal and Installation
EJS002YI
1.
Remove the instrument panel.
2.
Remove the sunload sensor.
RJIA0165E
ATC-118
INTAKE SENSOR CIRCUIT
INTAKE SENSOR CIRCUIT
PFP:27723
Removal and Installation
EJS002YJ
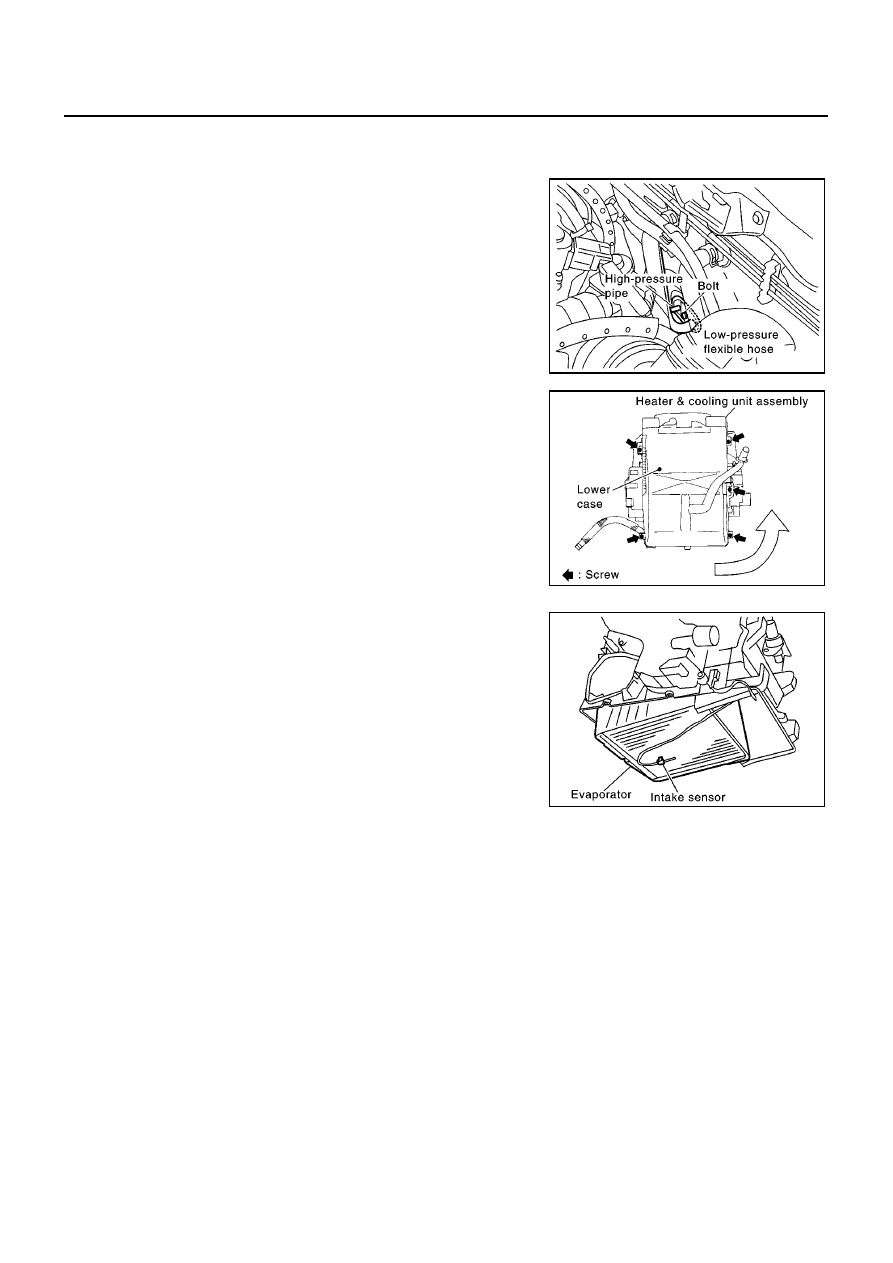
1.
Use the refrigerant collecting equipment (for HFC-134a), to dis-
charge the refrigerant from A/C system.
2.
Remove the cowl top panel.
3.
Disconnect low-pressure flexible hose and high-pressure pipe
from the evaporator.
CAUTION:
Cap or wrap the joint of the low-pressure flexible hose and
the high-pressure pipe with a suitable tool such as a vinyl
tape to avoid the entry of air.
4.
Hold expansion valve and move it slightly upward. Push evapo-
rator toward rear of vehicle.
5.
Remove the drain hose and lower case mounting screw.
6.
Swivel rear of lower case toward passenger seat to remove
lower case.
7.
Remove the intake sensor from evaporator.
RJIA0185E
RJIA0189E
RJIA0166E
BLOWER UNIT
ATC-119
C
D
E
F
G
H
I
K
L
M
A
B
ATC
BLOWER UNIT
PFP:27200
Removal and Installation
EJS002YK
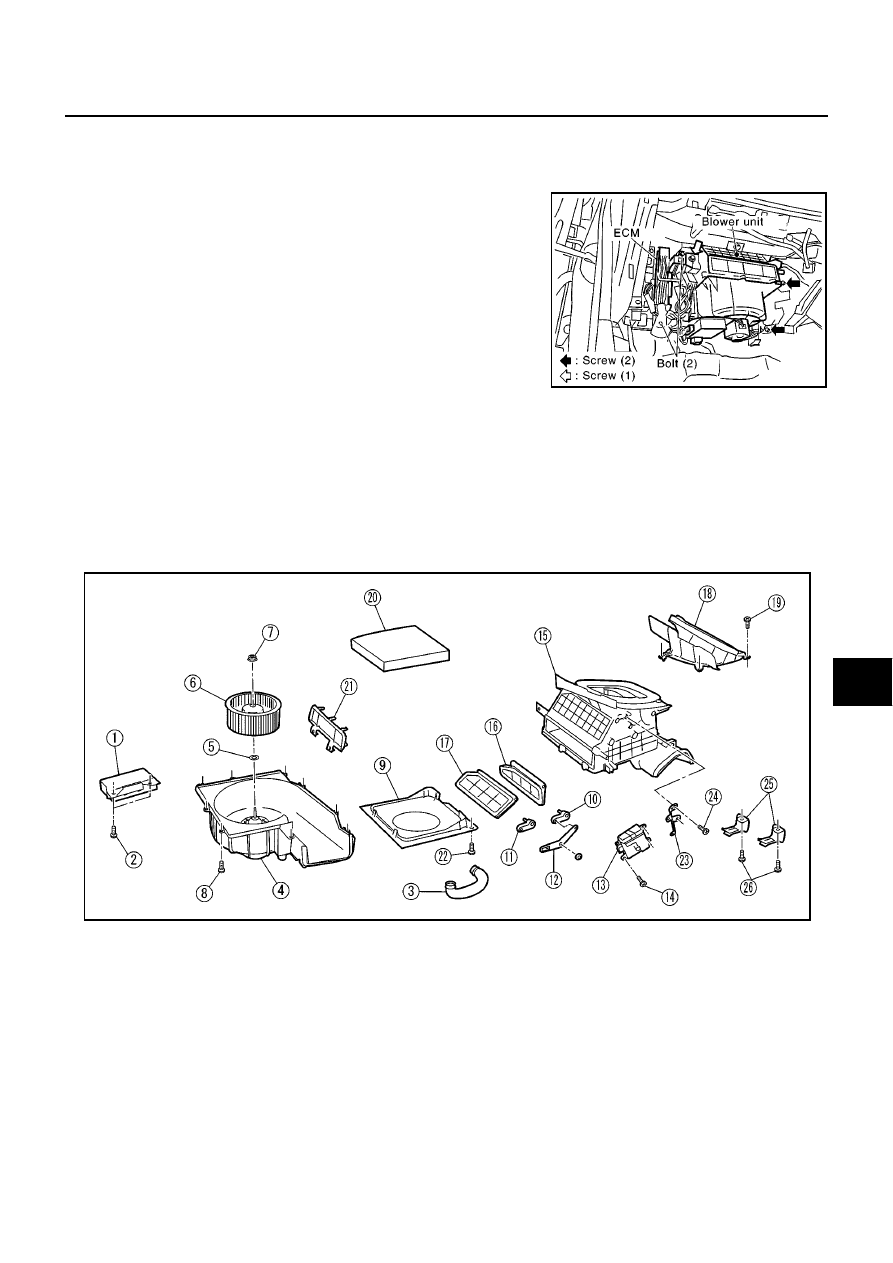
REMOVAL
1.
Remove the glove box assembly.
2.
Remove the glove box cover and instrument lower assist panel.
3.
Remove the ECM with ECM bracket.
4.
Remove the blower unit fixing bolt and screw.
5.
Disconnect the blower motor connector and auto amp. connec-
tor.
6.
Move the blower unit downwards, then disconnect the intake
door motor connector.
CAUTION:
Slide the blower unit toward the passenger side, remove loca-
tion pins (2 pieces), then move it downwards.
7.
Remove the blower unit.
INSTALLATION
CAUTION:
●
Make sure the location pins (2 pieces) are securely installed.
Disassembly and Assembly
EJS002YL
NOTE:
This illustration is for RHD models. The layout for LHD models is symmetrically opposite.
RJIA0167E
1.
Auto amplifier
2.
Screw
3.
Cooling hose
4.
Blower fan motor assembly
5.
Washer
6.
Blower fan
7.
Nut
8.
Screw
9.
Intake bellmouth
10. Intake door lever 2
11. Intake door lever 1
12. Intake door link
13. Intake door motor
14. Screw
15. Upper case
16. Intake door 2
17. Intake door 1
18. Adapter assembly
19. Screw
20. Ventilation air filter
21. Filter cover
22. Screw
23. Bracket
24. Screw
25. Under cover clip
26. Screw
RJIA0168J
ATC-120
BLOWER MOTOR
BLOWER MOTOR
PFP:27226
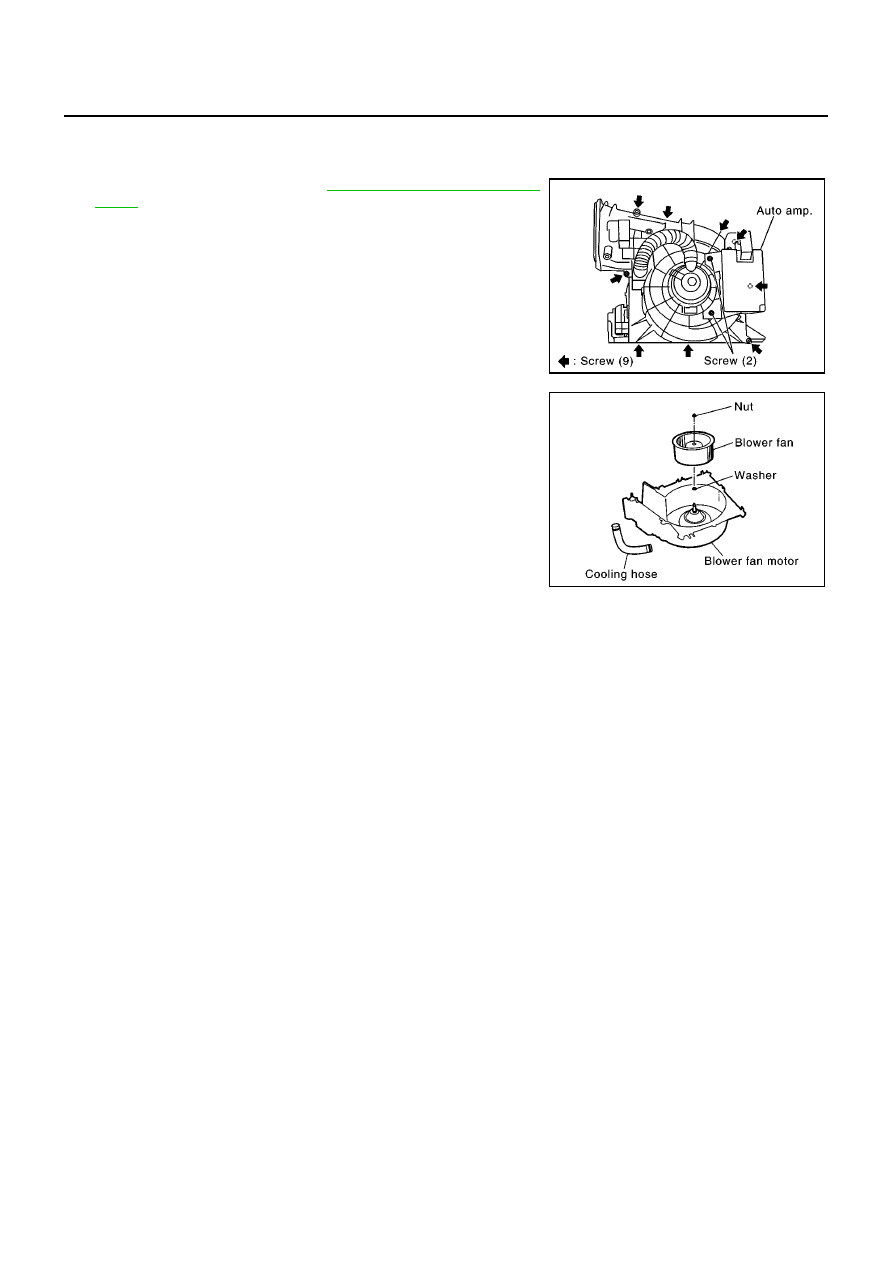
Removal and Installation
EJS002YM
1.
Remove the blower unit. Refer to
.
2.
Remove the auto amp.
3.
Remove the blower unit fixing screw, then separate the blower
unit.
4.
Remove the cooling hose and blower fan.
RJIA0169E
RJIA0356E
Нет комментариевНе стесняйтесь поделиться с нами вашим ценным мнением.
Текст