Nissan Primera P12. Manual — part 518
GW-68
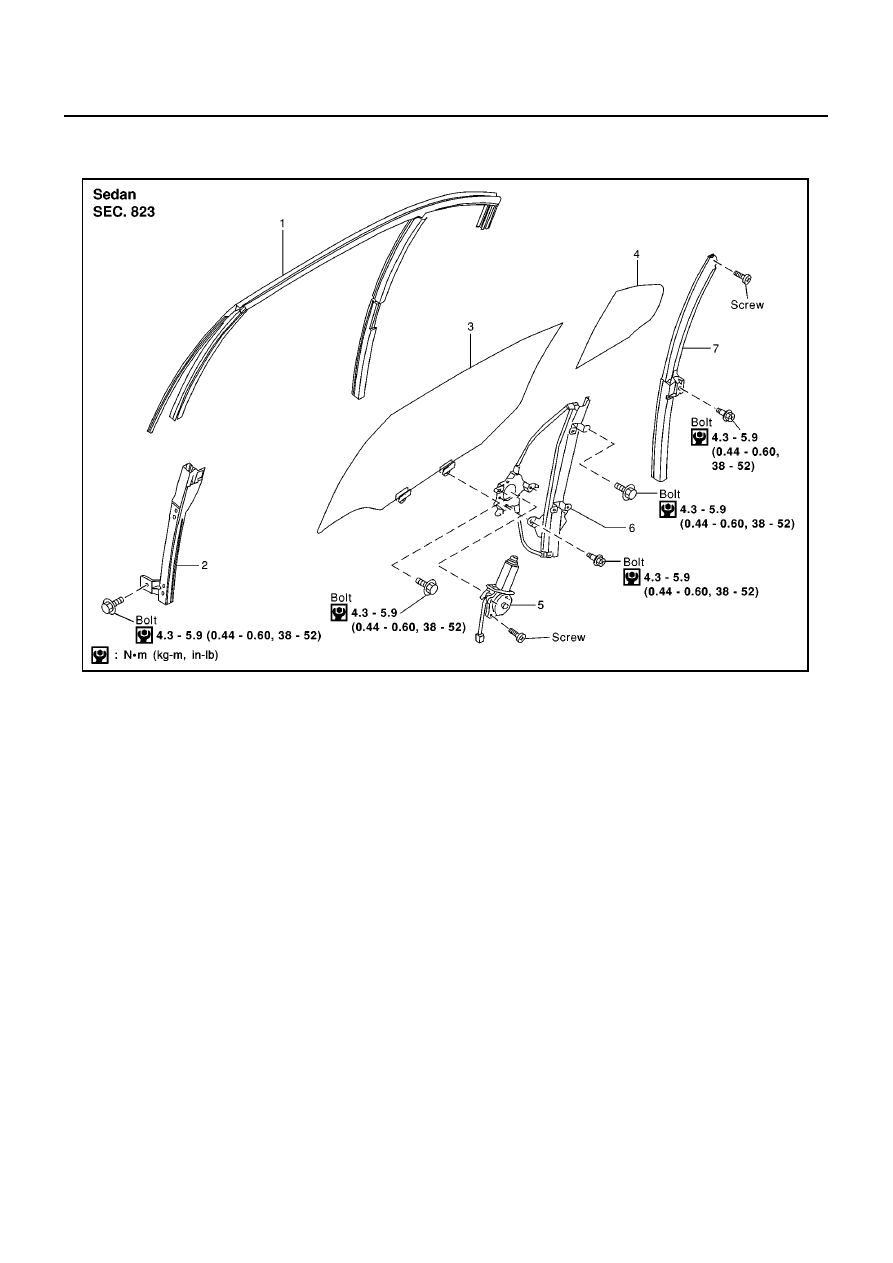
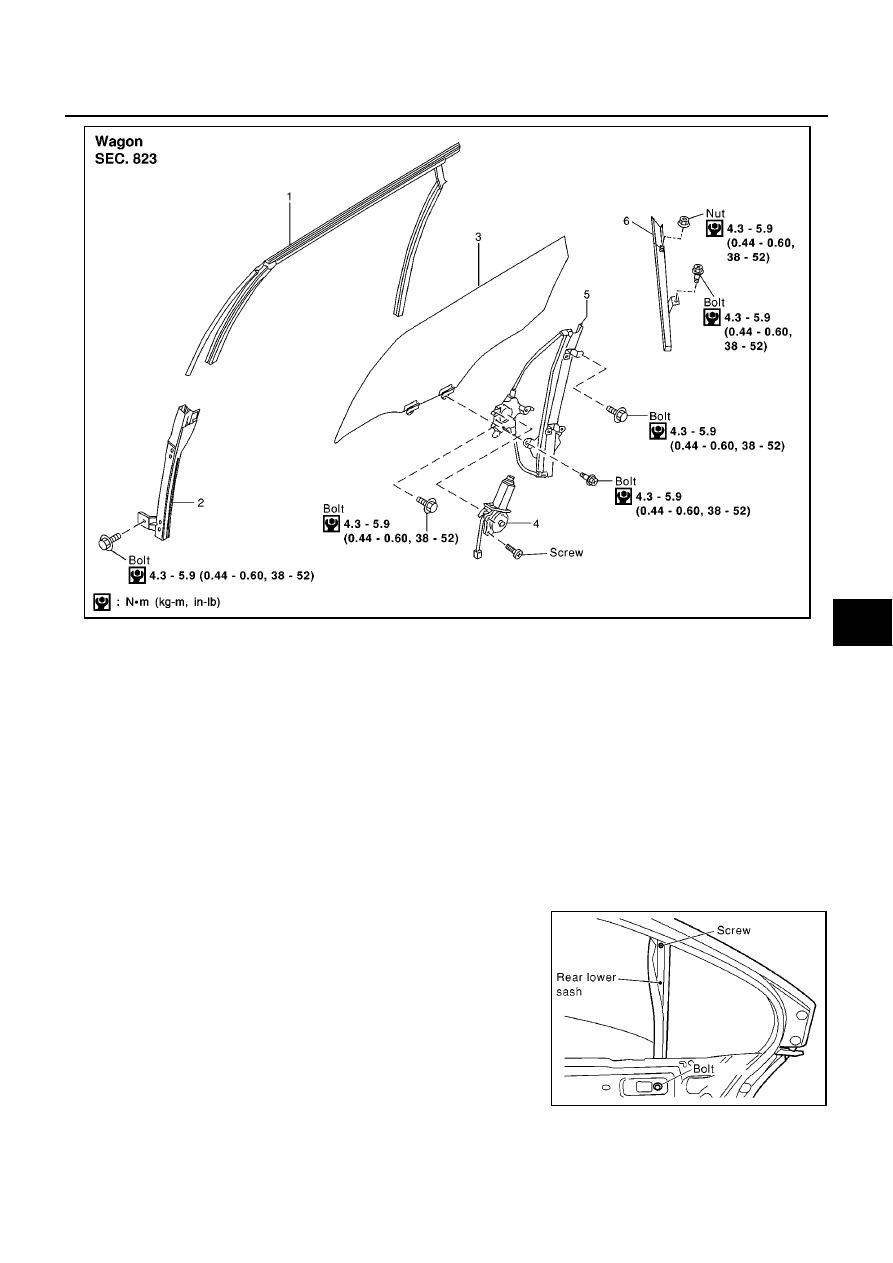
REAR DOOR GLASS AND REGULATOR
REAR DOOR GLASS AND REGULATOR
PFP:82300
Removal and Installation
EIS005KH
1.
Door glass run (Rear door)
2.
Front lower sash
3.
Rear door glass
4.
Partition glass
5.
Power window motor
6.
Regulator assembly
7.
Rear lower sash
MIIA0073E
REAR DOOR GLASS AND REGULATOR
GW-69
C
D
E
F
G
H
J
K
L
M
A
B
GW
1.
Remove door outside molding. (For wagon models). Refer to EI section in P12 ESM (SM2E00-1P12E0E).
2.
Remove rear door finisher. Refer to EI section in P12 ESM (SM2E00-1P12E0E).
3.
Remove sealing screen.
NOTE:
If sealing screen is reused, cut the butyl-tape so that a part of butyl-tape remains on the sealing screen.
4.
Operating power window switch, raise or lower the door window until the carrier plate mounting bolts
appear.
5.
Remove carrier plate mounting bolts, and place glass on the door inner.
Following removal procedures are as follows:
●
Sedan: after following 6 to 8 procedures, do the 12 and later.
●
Wagon: after following 9 to 11 procedures, do the12 and later.
6.
Remove rear lower sash mounting bolt and screw, and lower
glass to the bottom dead center.
7.
Pull out the rear lower sash toward the lower side.
1.
Door glass run (Rear door)
2.
Front lower sash
3.
Rear door glass
4.
Power window motor
5.
Regulator assembly
6.
Rear lower sash
MIIA0074E
MIIA0075E
GW-70
REAR DOOR GLASS AND REGULATOR
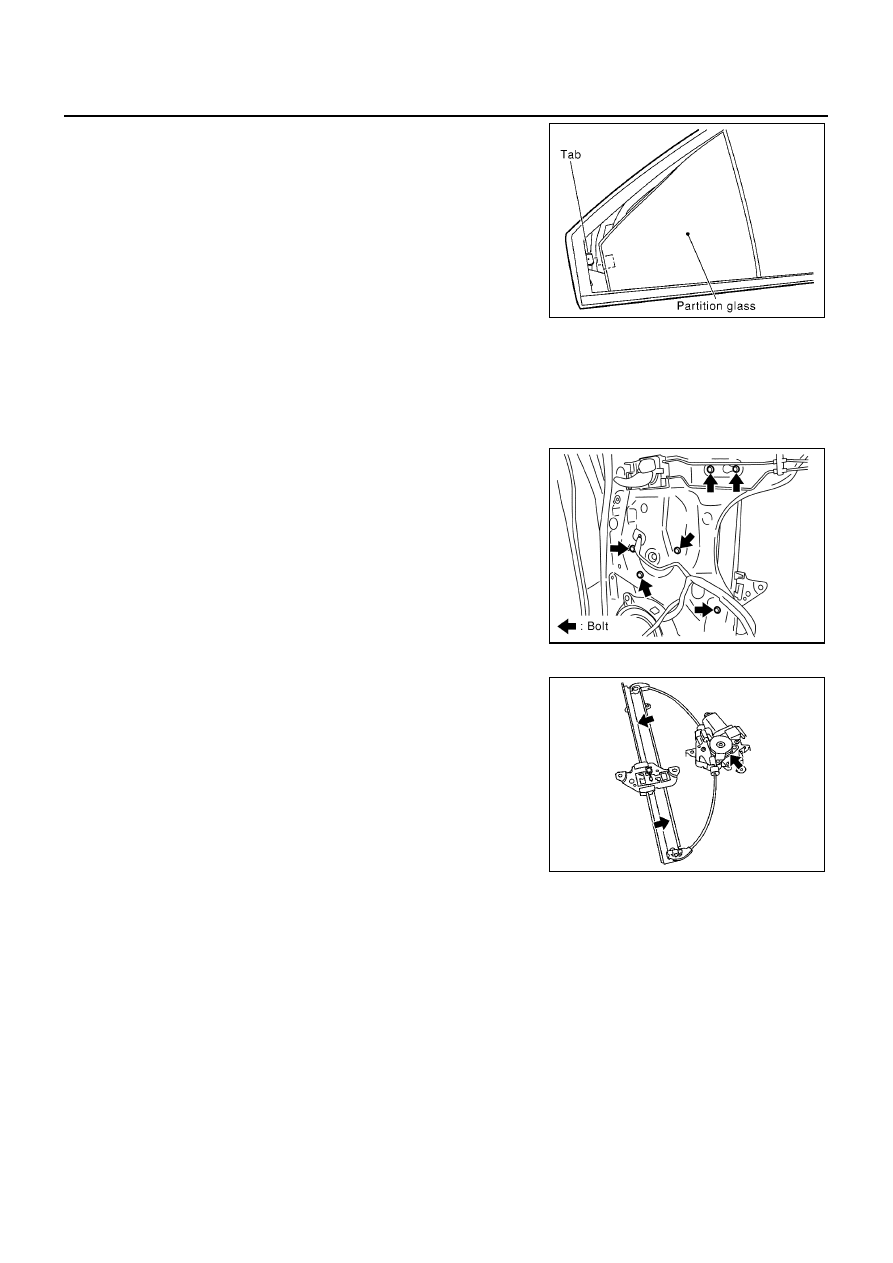
8.
Remove partition glass.
9.
Remove corner cover.
10. Remove rear lower sash mounting bolt and nut.
11. Move rear lower sash forward, and pull out stud bolt, and pull out the rear lower sash toward the lower
side.
12. Pull out the door window toward the outside of the door to remove.
13. Disconnect regulator assembly connector.
14. Remove regulator assembly mounting bolts through the access
hole.
Install in the reverse order of removal.
INSPECTION AFTER REMOVAL
●
Check regulator assembly for the following items. If a malfunc-
tion is detected, replace or grease it.
Gear wear
Regulator deformation
Spring damage
Grease condition for each sliding part
●
The arrows in the figure show body grease application points.
FITTING INSPECTION
●
Check that glass is securely fit into glass run groove.
●
While raising and lowering the window, check for unusual operation.
MIIA0076E
MIIA0077E
SIIA0753J
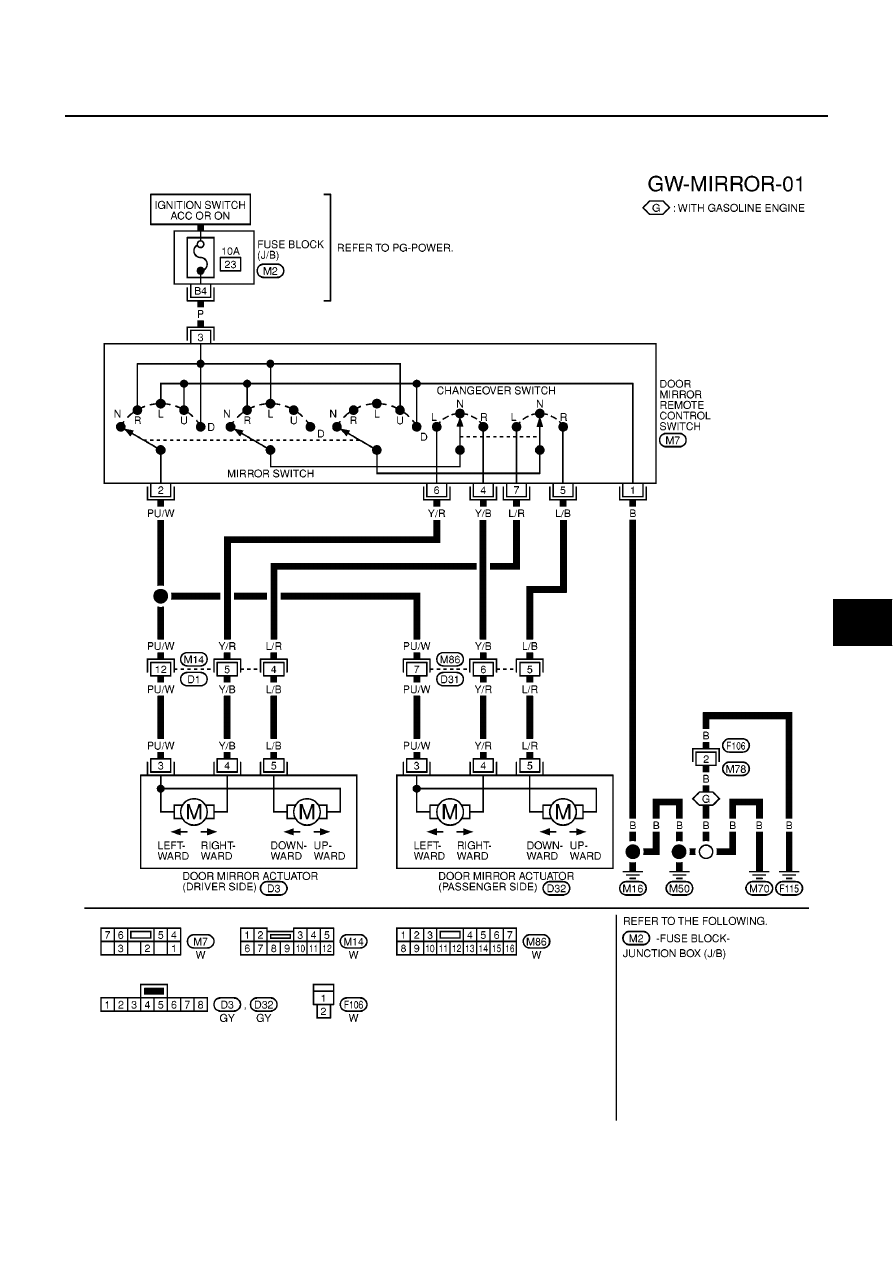
DOOR MIRROR
GW-71
C
D
E
F
G
H
J
K
L
M
A
B
GW
DOOR MIRROR
PFP:96301
Wiring Diagram –MIRROR– LHD Models
EIS005KI
MKWA0665E
Нет комментариевНе стесняйтесь поделиться с нами вашим ценным мнением.
Текст