Nissan Primera P12. Manual — part 151
YAW RATE/SIDE G SENSOR
BRC-109
[ESP/TCS/ABS]
C
D
E
G
H
I
J
K
L
M
A
B
BRC
YAW RATE/SIDE G SENSOR
PFP:47931
Removal and Installation
EFS002XZ
REMOVAL
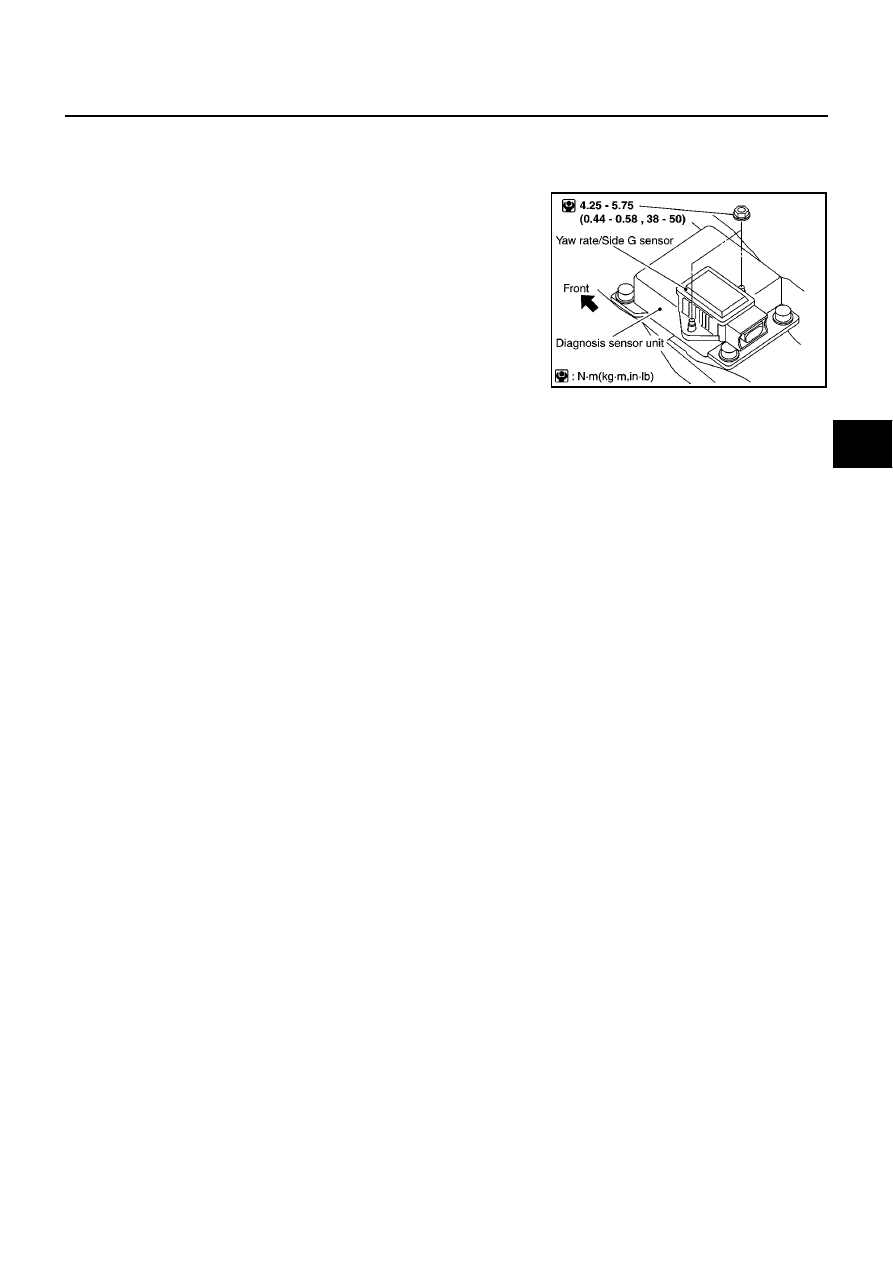
1.
Remove the diagnosis sensor unit. Refer to SRS section in P12
ESM (SM2E00-1P12E0E) .
2.
Disconnect the harness connector.
3.
Remove the mounting bolts, and remove the yaw rate / side G
sensor.
CAUTION:
Do not drop or strike the yaw rate / side G sensor, because it
has little endurance against impact.
INSTALLATION
●
Installation is the reverse order of removal.
CAUTION:
Do not drop or strike the yaw rate / side G sensor, because it has little endurance against impact.
SFIA0331E
BRC-110
[ESP/TCS/ABS]
ESP OFF SWITCH
ESP OFF SWITCH
PFP:25145
Removal and Installation
EFS002Y0
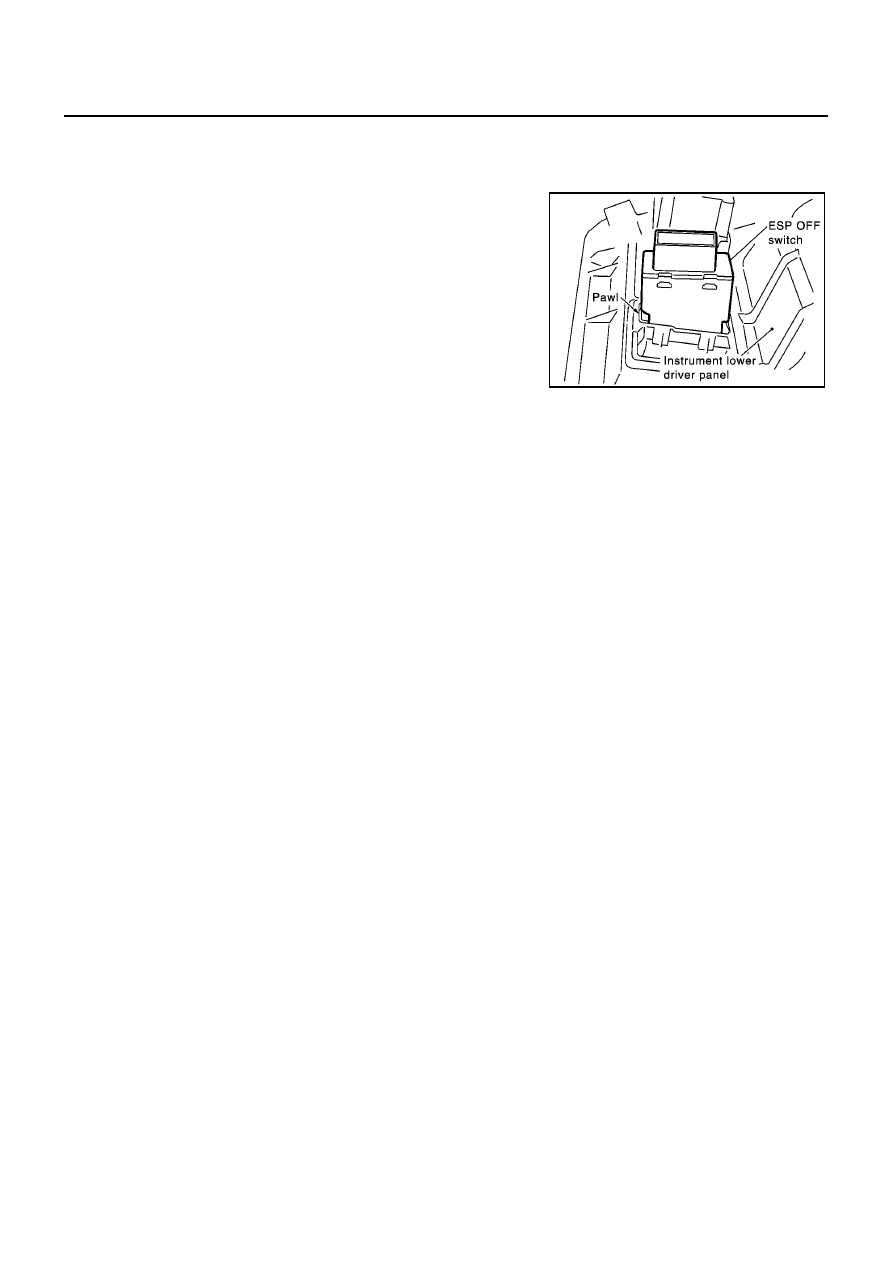
REMOVAL
1.
Remove the instrument lower driver panel. Refer to IP section in
P12 ESM (SM2E00-1P12E0E) .
2.
Push the ESP OFF switch's pawls and remove the switch from
the instrument lower driver panel.
INSTALLATION
Installation is the reverse order of removal.
SFIA0453E

CL-1
CLUTCH
C TRANSMISSION/TRANSAXLE
CONTENTS
D
E
F
G
H
I
J
K
L
M
SECTION
A
B
CL
CLUTCH
YD
PRECAUTIONS . . . . . . . . . . . . . . .. 2
Caution . . . . . . . . . . . . . . . . . . 2
PREPARATION . . . . . . . . . . . . . . ... 3
Special Service Tools . . . . . . . . . . . ... 3
Commercial Service Tool . . . . . . . . . . . 3
NOISE, VIBRATION AND HARSHNESS (NVH)
TROUBLESHOOTING . . . . . . . . . . . . 4
NVH Troubleshooting Chart . . . . . . . . . . 4
CLUTCH PEDAL . . . . . . . . . . . . . . 5
On-Vehicle Inspection and Adjustment . . . . . 5
HEIGHT ADJUSTMENT . . . . . . . . . ... 5
CLUTCH SWITCH POSITION ADJUSTMENT . . 5
FREE PLAY INSPECTION . . . . . . . . . 6
CLEARANCE CHECK . . . . . . . . . . ... 6
Removal and Installation . . . . . . . . . . .. 6
INSPECTION AFTER REMOVAL . . . . . . . 7
CLUTCH FLUID . . . . . . . . . . . . . . .. 8
Air Bleeding Procedure . . . . . . . . . . . 8
CLUTCH MASTER CYLINDER . . . . . . . . .. 9
Removal and Installation . . . . . . . . . . .. 9
REMOVAL . . . . . . . . . . . . . . . . 9
INSTALLATION . . . . . . . . . . . . ... 10
Disassembly and Assembly . . . . . . . . ... 10
OPERATING CYLINDER . . . . . . . . . . .. 11
Removal and Installation . . . . . . . . . . 11
REMOVAL . . . . . . . . . . . . . . ... 11
INSTALLATION . . . . . . . . . . . . ... 11
Disassembly and Assembly . . . . . . . . . 11
CLUTCH PIPING . . . . . . . . . . . . . ... 12
Removal and Installation . . . . . . . . . . 12
CLUTCH RELEASE MECHANISM . . . . . . ... 13
Removal and Installation (RS6F51A) . . . . . . 13
CLUTCH DISC, CLUTCH COVER AND FLYWHEEL... 15
Removal and Installation . . . . . . . . . . 15
REMOVAL . . . . . . . . . . . . . . ... 15
INSPECTION AND ADJUSTMENT AFTER
REMOVAL . . . . . . . . . . . . . . ... 15
INSTALLATION . . . . . . . . . . . . ... 16
CL-2
[YD]
PRECAUTIONS
[YD]
PRECAUTIONS
PFP:00001
Caution
ECS009XD
●
Recommended fluid is brake fluid “DOT 3” or “DOT 4”.
●
Never reuse drained brake fluid.
●
Be careful not to splash brake fluid on painted areas.
●
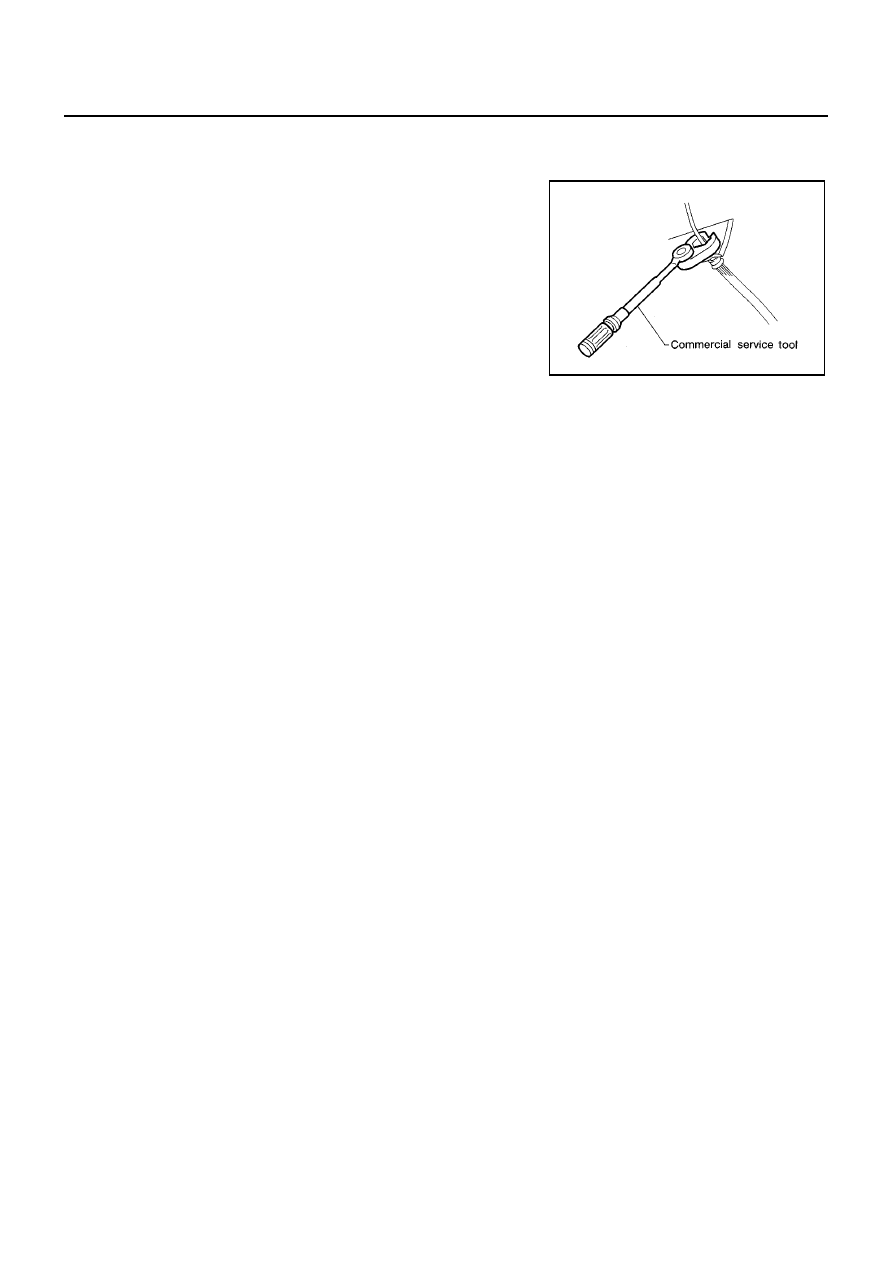
When removing and installing clutch piping, use Tool.
●
Use new brake fluid to clean or wash all parts of master cyl-
inder and operating cylinder.
●
Never use mineral oils such as gasoline or kerosene. It will
ruin the rubber parts of the hydraulic system.
WARNING:
After cleaning clutch disc, wipe it with a dust collector. Do not
use compressed air.
SBR686C
Нет комментариевНе стесняйтесь поделиться с нами вашим ценным мнением.
Текст