Nissan Frontier D40. Manual — part 1041
TM-62
< ON-VEHICLE MAINTENANCE >
[6MT: FS6R31A]
M/T OIL
ON-VEHICLE MAINTENANCE
M/T OIL
Changing
INFOID:0000000005273963
DRAINING
1.
Start the engine and let it run to warm up the transmission.
2.
Stop the engine. Remove the transmission drain plug and drain the oil.
3.
Set a gasket on the drain plug and install it to the transmission. Tighten the drain plug to the specified
torque. Refer to
.
CAUTION:
Do not reuse gasket.
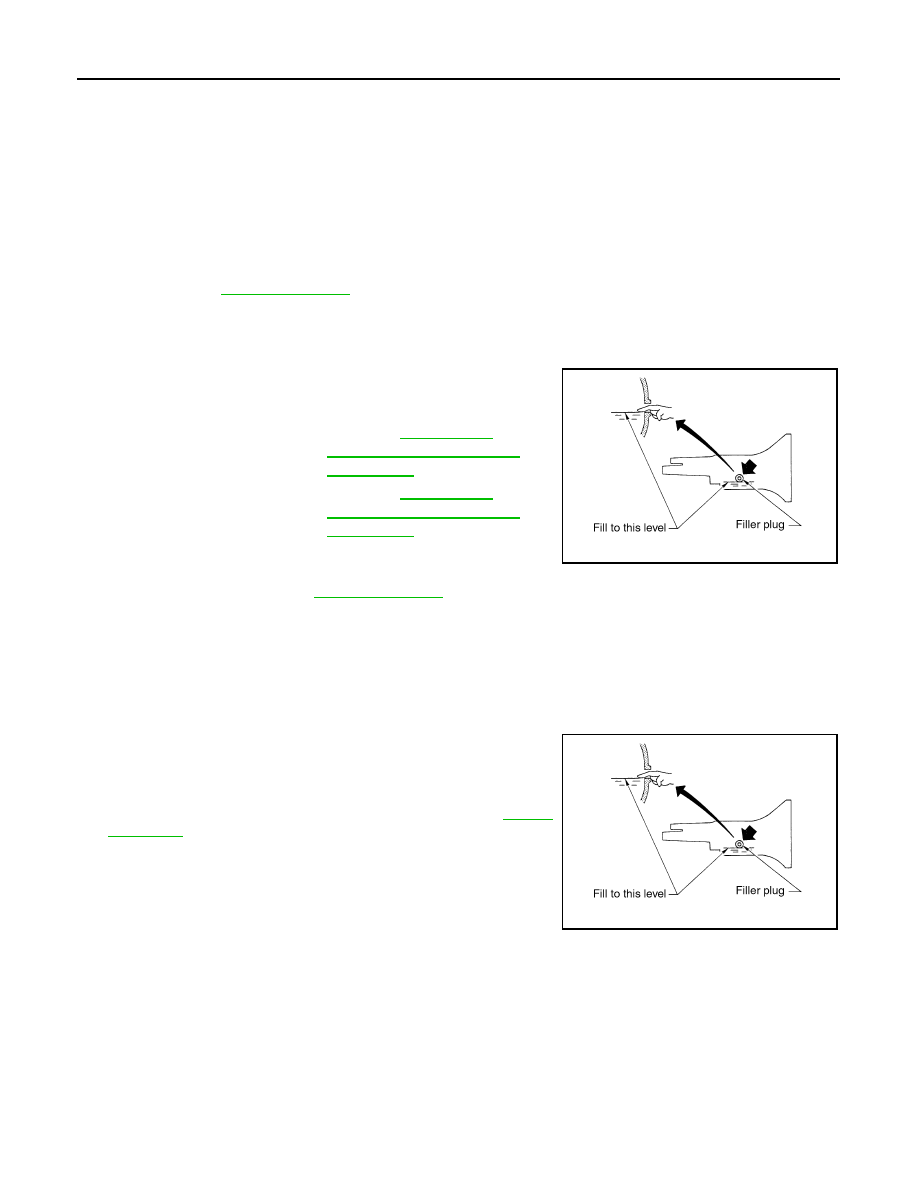
FILLING
1.
Remove the filler plug. Fill with new oil until oil level reaches the
specified limit near the filler plug hole as shown.
2.
After refilling the oil, check oil level. Set a gasket to the filler
plug, then install it to the transmission. Tighten the filler plug to
the specified torque. Refer to
CAUTION:
Do not reuse gasket.
Checking
INFOID:0000000005273964
OIL LEAKAGE AND OIL LEVEL
1.
Make sure that oil is not leaking from the transmission or around it.
2.
Check oil level from the filler plug hole as shown.
CAUTION:
Do not start engine while checking oil level.
3.
Set a gasket on the filler plug and install it to the transmission.
Tighten the filler plug to the specified torque. Refer to
CAUTION:
Do not reuse gasket.
Oil grade and viscosity
: Refer to
North America: Fluids and
Lubricants"
Oil capacity
: Refer to
North America: Fluids and
Lubricants"
PCIB0268E
PCIB0268E

REAR OIL SEAL
TM-63
< ON-VEHICLE REPAIR >
[6MT: FS6R31A]
C
E
F
G
H
I
J
K
L
M
A
B
TM
N
O
P
ON-VEHICLE REPAIR
REAR OIL SEAL
Removal and Installation
INFOID:0000000005273965
REMOVAL
For 2WD Models
1.
Remove rear propeller shaft. Refer to
.
2.
Remove dust seal and rear oil seal using suitable tool.
CAUTION:
Do not damage rear extension.
For 4WD Models
1.
Remove front and rear propeller shafts. Refer to
DLN-135, "Removal and Installation"
144, "Removal and Installation"
DLN-173, "Removal and Installation"
(3S1330-2BJ100) (rear).
2.
Remove transfer assembly. Refer to
DLN-103, "Removal and Installation"
3.
Remove rear oil seal using Tool.
CAUTION:
Do not damage OD gear case.
INSTALLATION
Installation is the reverse order of removal.
For 2WD Models
LCIA0383E
Tool number
: KV381054S0 (J-34286)
PCIB1218E

TM-64
< ON-VEHICLE REPAIR >
[6MT: FS6R31A]
REAR OIL SEAL
• Drive the new rear oil seal (1) and new dust seal (2) using Tools.
CAUTION:
Do not incline the dust seal and rear oil seal during installa-
tion.
(A): Seal lip
For 4WD Models
• Drive the rear oil seal using Tool.
CAUTION:
Do not incline the rear oil seal during installation.
• Check the transmission oil level after installation. Refer to
.
Tool number
: ST33200000 (J-26082)
: KV38100500 (
—
)
Dimension "H1"
: 1.2 - 2.2 mm (0.047 - 0.087 in)
Dimension "H2"
: 0.5 - 1.5 mm (0.020 - 0.059 in)
PCIB1660E
Tool number
: ST33200000 (J-26082)
Dimension "A"
: -0.5 - 0.5 mm (-0.020 - 0.020 in
PCIB1632E

POSITION SWITCH
TM-65
< ON-VEHICLE REPAIR >
[6MT: FS6R31A]
C
E
F
G
H
I
J
K
L
M
A
B
TM
N
O
P
POSITION SWITCH
Checking
INFOID:0000000005273966
BACK-UP LAMP SWITCH
• Check continuity.
PARK/NEUTRAL POSITION SWITCH
• Check continuity.
Gear position
Continuity
Reverse
Yes
Except reverse
No
PCIB1633E
Gear position
Continuity
Neutral
Yes
Except neutral
No
Нет комментариевНе стесняйтесь поделиться с нами вашим ценным мнением.
Текст