Nissan March K13. Manual — part 655
TRANSAXLE ASSEMBLY
TM-37
< UNIT DISASSEMBLY AND ASSEMBLY >
[5MT: RS5F91R]
C
E
F
G
H
I
J
K
L
M
A
B
TM
N
O
P
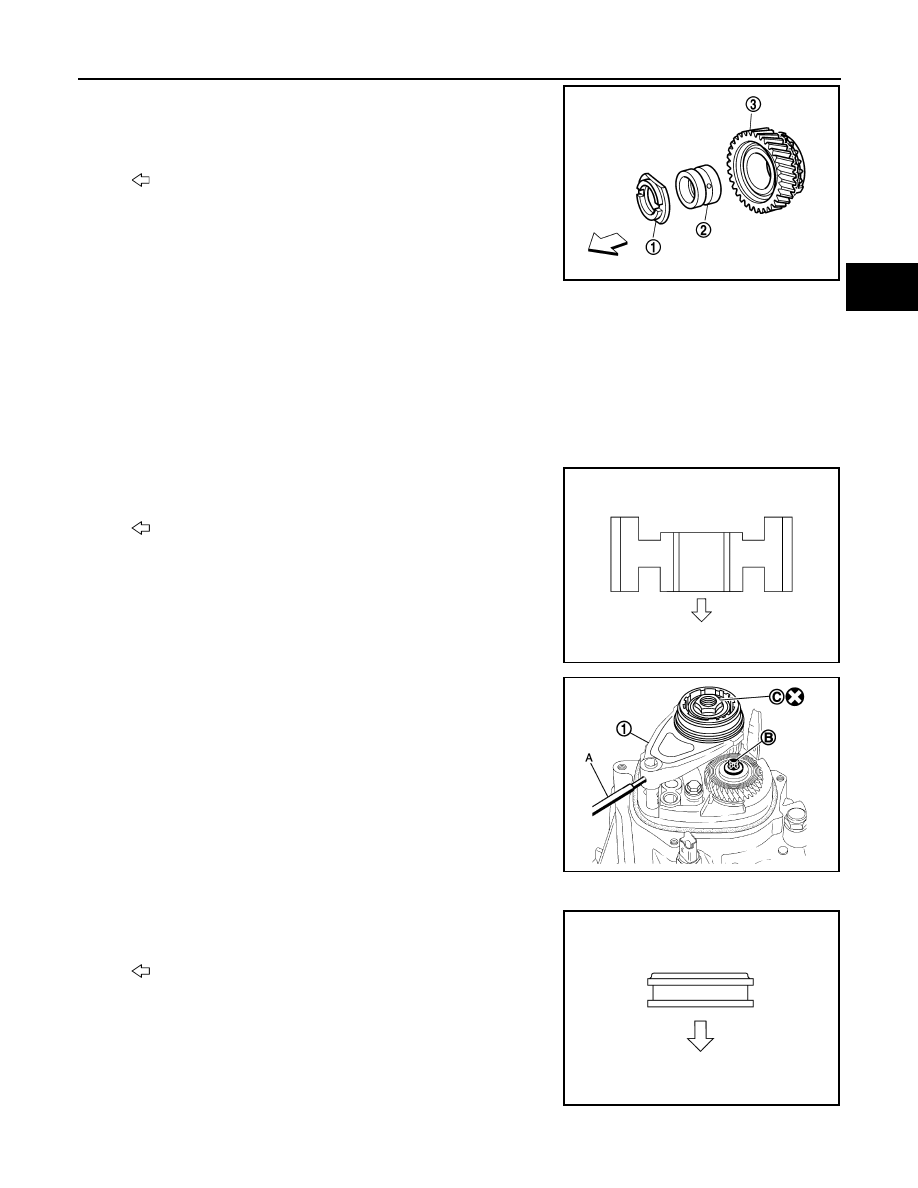
37. Install adapter plate (1), bushing (2), and 5th input gear (3) to
input shaft.
CAUTION:
Be careful with the orientation of adapter plate.
38. Install 5th-reverse synchronizer hub, 5th-reverse coupling sleeve, and 5th-reverse shift fork according to
the following steps.
a.
Apply gear oil to 5th baulk ring.
b.
Install 5th baulk ring to 5th input gear.
c.
Install spread springs to 5th-reverse synchronizer hub.
CAUTION:
Replace 5th-reverse synchronizer hub and 5th-reverse coupling sleeve as a set.
d.
Install 5th-reverse synchronizer hub assembly and washer to input shaft.
CAUTION:
Be careful with the orientation of 5th-reverse synchronizer
hub.
e.
Set 5th-reverse shift fork (1) to 5th-reverse coupling sleeve, and
then install them to 5th-reverse fork rod and input shaft.
CAUTION:
• Be careful with the orientation of 5th-reverse coupling
sleeve.
• Replace 5th-reverse synchronizer hub and 5th-reverse
coupling sleeve as a set.
• Replace 5th-reverse shift fork and 5th-reverse fork rod as
a set.
f.
Check that the gear position is in the 3rd position. Press 5th-
reverse shift fork and shift to 5th gear.
g.
Tighten mounting bolt to the specified torque.
h.
Tighten mounting nut to the specified torque.
: Transaxle case side
PCIB1555E
: 5th input gear side
PCIB1556E
A
: Pin punch
B
: Mounting bolt
C
: Mounting nut
JPDIC0532ZZ
: 5th input gear side
JPDIC0409ZZ

TM-38
< UNIT DISASSEMBLY AND ASSEMBLY >
[5MT: RS5F91R]
TRANSAXLE ASSEMBLY
CAUTION:
Never reuse mounting nut.
i.
Install retaining pin to 5th-reverse shift fork, using a pin punch.
CAUTION:
Never reuse retaining pin.
39. Shift the shifter lever A (1) to the neutral position.
40. Install O-ring to rear housing.
41. Install rear housing to transaxle case, and tighten bolts (
) to
the specified torque.
CAUTION:
Never pinch O-ring when installing rear housing.
42. Install drain plug according to the following steps.
a.
Install gasket to drain plug.
CAUTION:
Never reuse gasket.
b.
Install drain plug to clutch housing, using a socket [Commercial
service tool].
c.
Tighten drain plug to the specified torque.
43. Install filler plug according to the following steps.
a.
Install gasket to filler plug, and then install them to transaxle case.
CAUTION:
Never reuse gasket.
b.
Tighten filler plug to the specified torque.
CAUTION:
Fill with gear oil before tightening filler plug to the specified torque.
Inspection
INFOID:0000000006056582
INSPECTION AFTER DISASSEMBLY
SCIA7130E
PCIB1558E
TRANSAXLE ASSEMBLY
TM-39
< UNIT DISASSEMBLY AND ASSEMBLY >
[5MT: RS5F91R]
C
E
F
G
H
I
J
K
L
M
A
B
TM
N
O
P
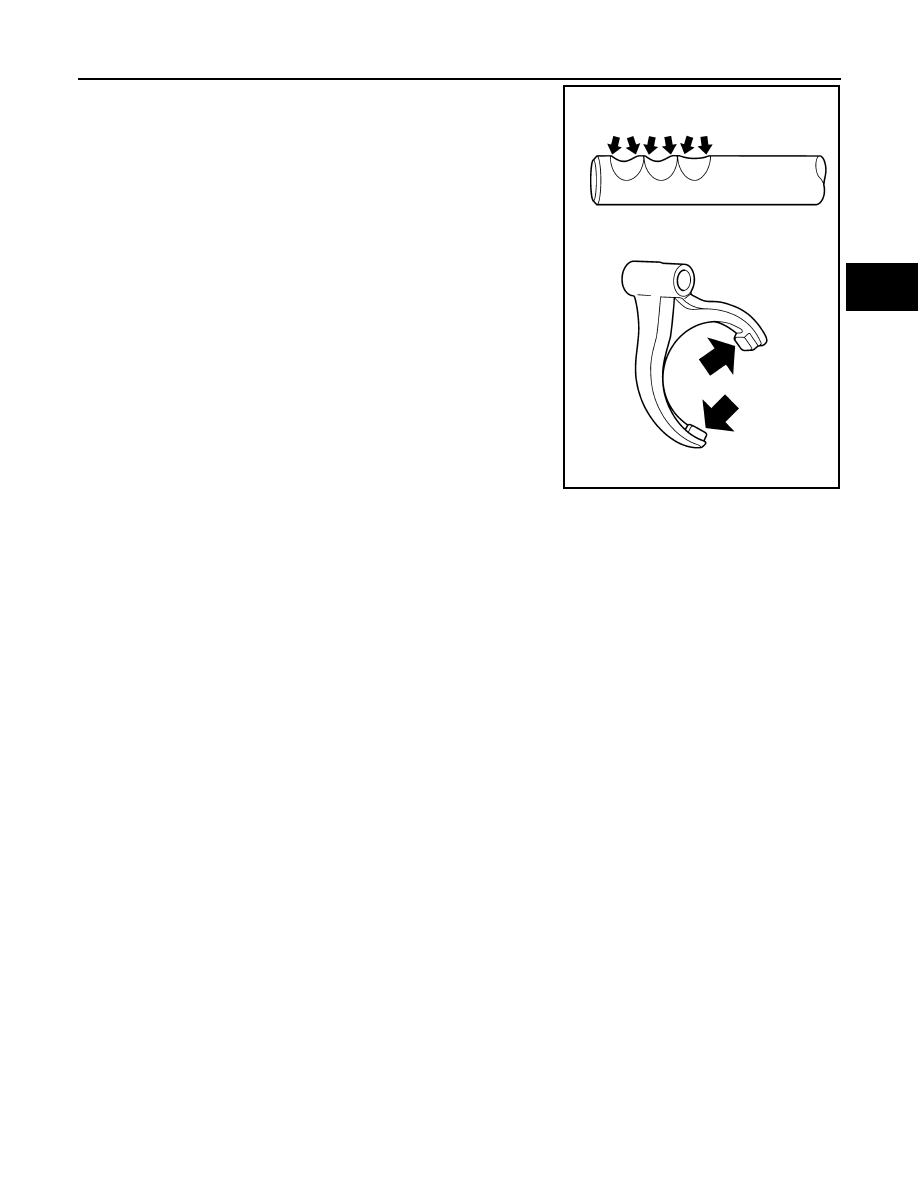
Check contact surface and sliding surface of fork rod and shift fork
for excessive wear, uneven wear, bend, and damage. Replace if
necessary.
PCIB1571E
TM-40
< UNIT DISASSEMBLY AND ASSEMBLY >
[5MT: RS5F91R]
INPUT SHAFT AND GEAR
INPUT SHAFT AND GEAR
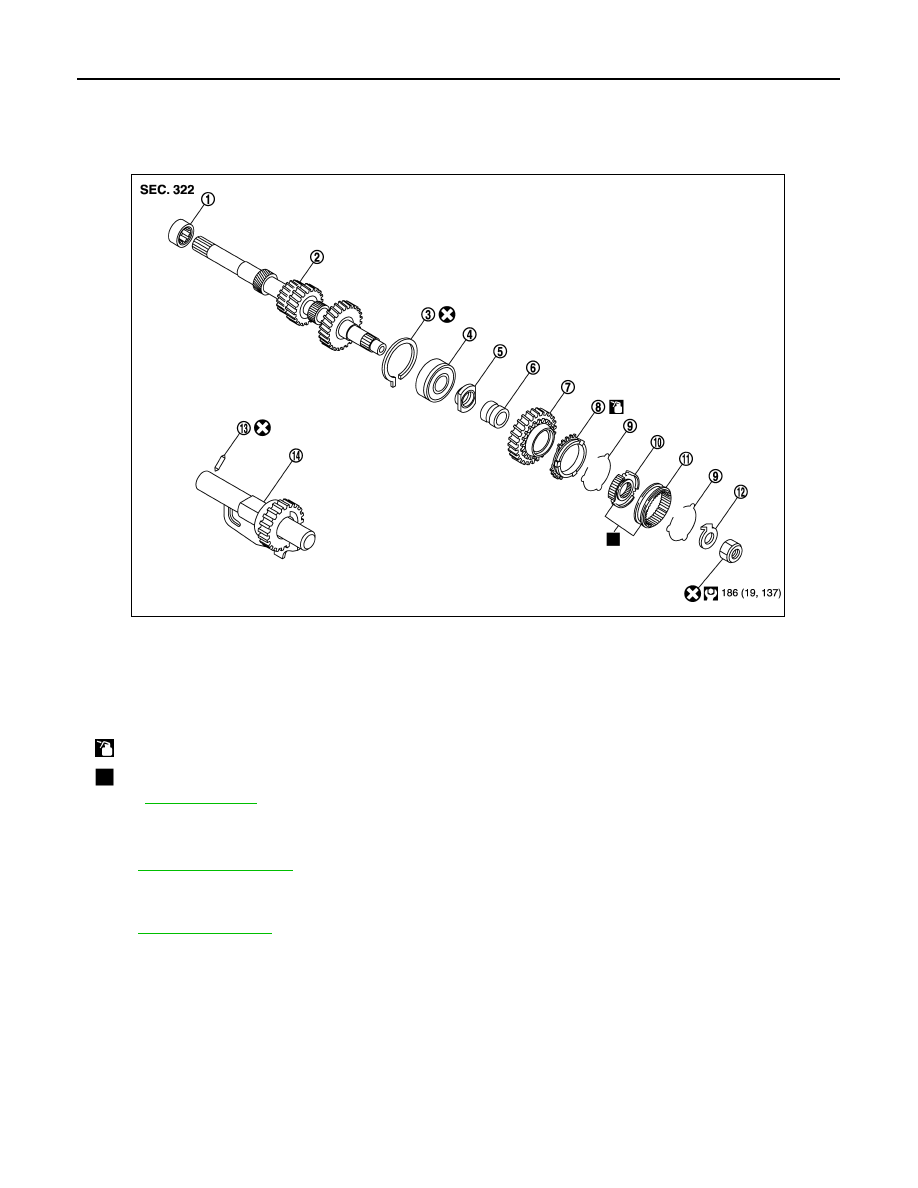
Exploded View
INFOID:0000000006056583
Disassembly
INFOID:0000000006056584
for disassembly procedure.
Assembly
INFOID:0000000006056585
for assembly procedure.
Inspection
INFOID:0000000006056586
INSPECTION AFTER DISASSEMBLY
Input Shaft and Gears
1.
Input shaft front bearing
2.
Input shaft
3.
Snap ring
4.
Input shaft rear bearing
5.
Adapter plate
6.
Bushing
7.
5th input gear
8.
5th baulk ring
9.
Spread spring
10. 5th-reverse synchronizer hub
11. 5th-reverse coupling sleeve
12. Retaining pin
13. Reverse gear assembly
: Apply gear oil.
: Replace the parts as a set.
Refer to
for symbols not described on the above.
JPDIC0791GB
Нет комментариевНе стесняйтесь поделиться с нами вашим ценным мнением.
Текст