Nissan March K13. Manual — part 57
CL-12
< REMOVAL AND INSTALLATION >
CLUTCH MASTER CYLINDER
CLUTCH MASTER CYLINDER
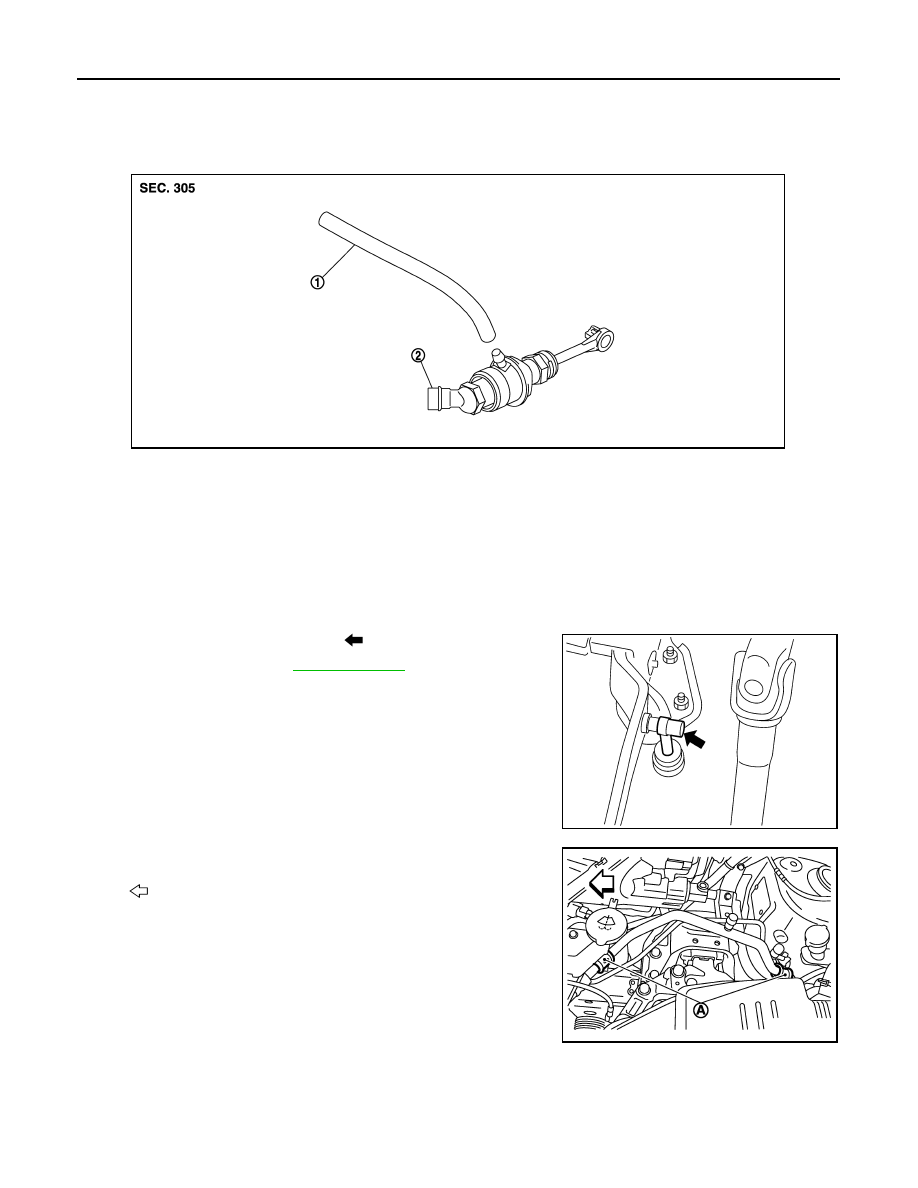
Exploded View
INFOID:0000000006056608
Removal and Installation
INFOID:0000000006056609
REMOVAL
CAUTION:
• Keep painted surface on the body or other parts free of clutch fluid. If it spills, wipe up immediately
and wash the affected area with water.
• Never disassemble clutch master cylinder.
1.
Remove master cylinder rod end (
) from clutch pedal.
2.
Drain clutch fluid. Refer to
.
3.
Remove reservoir hose from reservoir tank and master cylinder.
4.
Remove clips (A) for cooler pipe (low-pressure pipe).
1.
Reservoir hose
2.
Master cylinder
JPDIB0222ZZ
PCIB1491E
: Vehicle front
JPDIB0226ZZ
CLUTCH MASTER CYLINDER
CL-13
< REMOVAL AND INSTALLATION >
C
E
F
G
H
I
J
K
L
M
A
B
CL
N
O
P
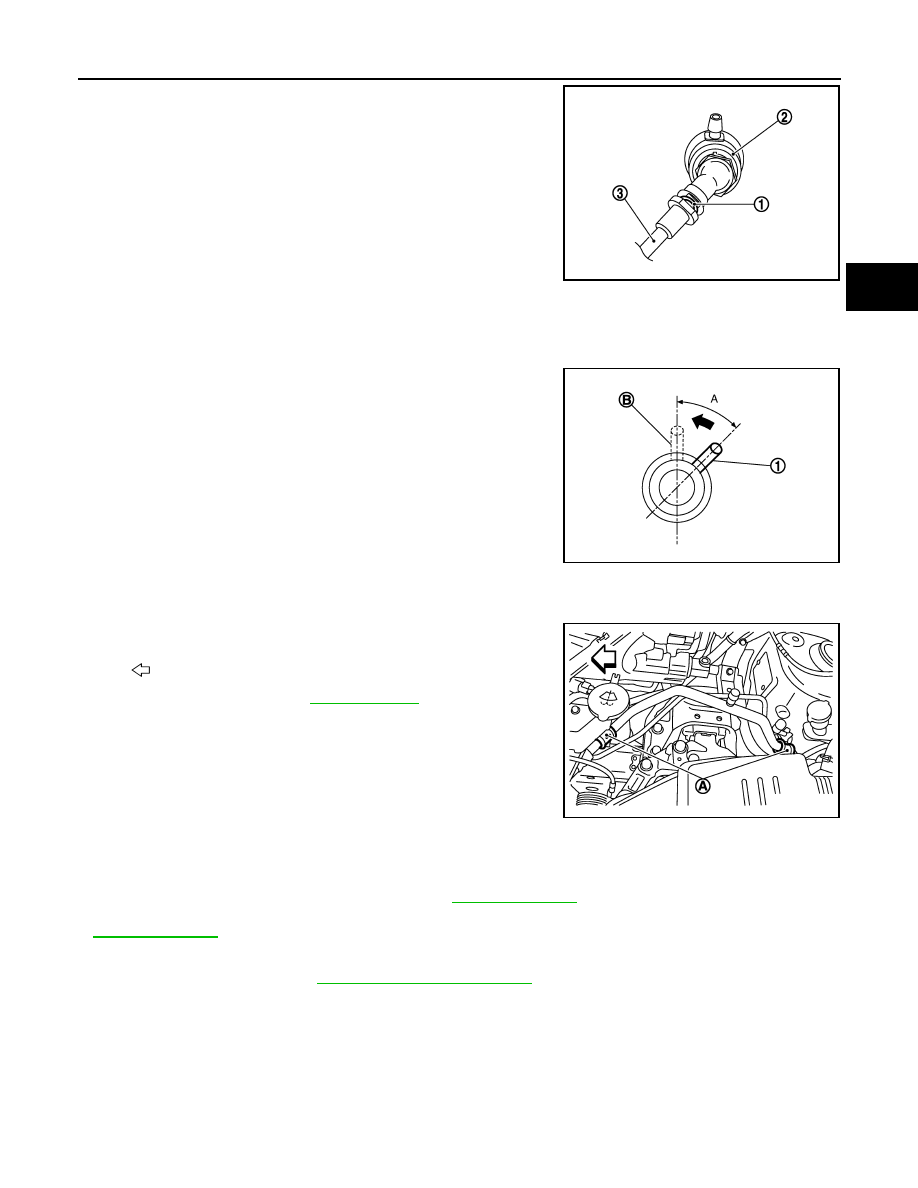
5.
Pull up the lock pin (1) from connector of master cylinder (2) and
separate clutch tube (3).
6.
Rotate master cylinder clockwise by 45 degrees and then
remove master cylinder from the vehicle.
INSTALLATION
CAUTION:
Keep painted surface on the body or other parts free of clutch fluid. If it spills, wipe up immediately
and wash the affected area with water.
1.
Tilt master cylinder clockwise by 45 degrees (A) and insert it to
the mounting hole. Rotate counterclockwise and secure it. At
this time, nipple (1) is upward of the vehicle.
2.
Install master cylinder rod end to clutch pedal.
CAUTION:
Press master cylinder rod end into clutch pedal until it
stops.
3.
Install reservoir hose to reservoir tank and master cylinder.
4.
Press down the lock pin into connector of master cylinder until it
stops.
5.
Install clutch tube into connector of master cylinder until it stops.
6.
Install clips (A) for cooler pipe (low-pressure pipe).
7.
Fill with clutch fluid. Refer to
.
Inspection and Adjustment
INFOID:0000000006056610
INSPECTION AFTER INSTALLATION
• Check the fluid leakage and the fluid level. Refer to
.
• Check the clutch pedal height, clutch pedal height at clutch disengagement, and clutch pedal play. Refer to
.
ADJUSTMENT AFTER INSTALLATION
Perform the air bleeding. Refer to
CL-9, "Air Bleeding Procedure"
JPDIB0169ZZ
B
: Mounting condition
: Vehicle front
JPDIB0114ZZ
JPDIB0226ZZ
CL-14
< REMOVAL AND INSTALLATION >
CLUTCH PIPING
CLUTCH PIPING
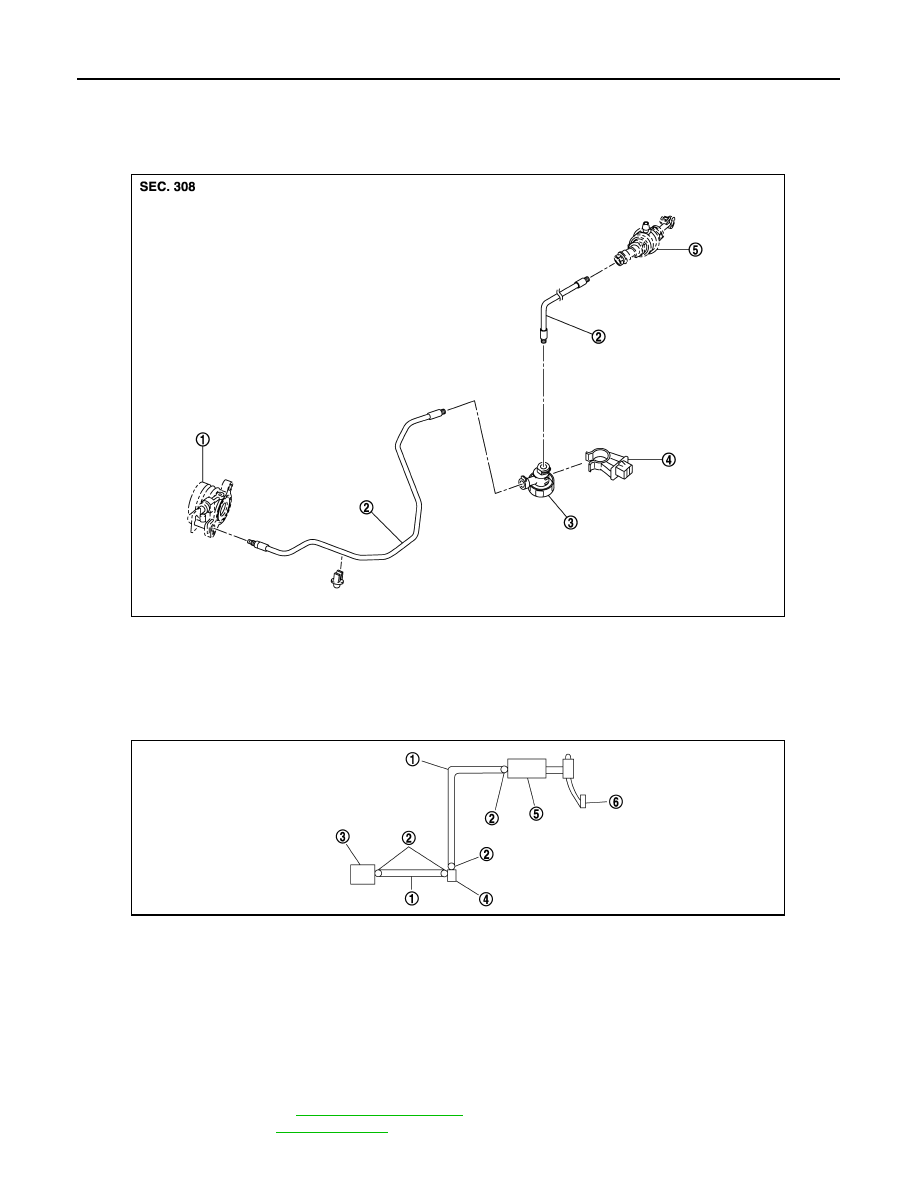
Exploded View
INFOID:0000000006056611
Hydraulic Layout
INFOID:0000000006056612
Removal and Installation
INFOID:0000000006056613
CAUTION:
Keep painted surface on the body or other parts free of clutch fluid. If it spills, wipe up immediately
and wash the affected area with water.
REMOVAL
Note the following, and refer to
• Drain clutch fluid. Refer to
.
1.
CSC (Concentric Slave Cylinder)
2.
Clutch tube
3.
Clutch damper
4.
Bracket
5.
Master cylinder
JPDIB0181ZZ
1.
Clutch tube
2.
Lock pin
3.
CSC (Concentric Slave Cylinder)
4.
Clutch damper
5.
Master cylinder
6.
Clutch pedal
PCIB1499E

CLUTCH PIPING
CL-15
< REMOVAL AND INSTALLATION >
C
E
F
G
H
I
J
K
L
M
A
B
CL
N
O
P
• Press the lock pin into the bleeding connector of the CSC and then remove clutch tube from CSC.
• Pull the lock pins from the connectors of the clutch damper until the pins stop and then remove clutch tubes
from clutch damper.
• Pull the lock pin from the connector of the clutch master cylinder until the pin stop and then remove clutch
tube from clutch master cylinder.
INSTALLATION
Note the following, and refer to
for installation procedure.
CAUTION:
Never damage clutch tube.
• Insert each clutch tube into the CSC bleeding connector, the clutch damper connector, and the clutch master
cylinder connector until it contacts the end of each connector.
• Install each lock pin into the clutch damper connector and the clutch master cylinder connector until it con-
tacts the end of each connector.
Inspection and Adjustment
INFOID:0000000006056614
INSPECTION AFTER REMOVAL
• Check the clutch tube for cracks and damage. If the clutch tube has cracks or damage, replace it with a new
one.
• Check the O-ring of the clutch tube for cracks and damage. If the O-ring of the clutch tube has cracks or
damage, replace clutch tube with a new one.
• Check the clutch damper for cracks and damage. If the clutch damper has cracks or damage, replace it with
a new one.
INSPECTION AFTER INSTALLATION
• Check the fluid leakage and the fluid level. Refer to
.
• Check the clutch pedal height, clutch pedal height at clutch disengagement, and clutch pedal play. Refer to
.
ADJUSTMENT AFTER INSTALLATION
Perform the air bleeding. Refer to
Нет комментариевНе стесняйтесь поделиться с нами вашим ценным мнением.
Текст