Nissan Murano (2022 year). Manual in english — page 8
For additional information, see “Cruise con-
trol” (P. 5-55).
Currently Unavailable
This message appears when the Vehicle
Dynamic Control (VDC) system is turned
off. The Intelligent Lane Intervention (I-LI)
system will be turned off automatically. For
additional information, see “Vehicle Dy-
namic Control (VDC) system” (P. 5-122) and
“Intelligent Lane Intervention (I-LI)” (P. 5-32).
Driver Attention Alert -
Take a Break?
This alert appears when the system has
detected that the driver may be displaying
fatigue or a lack of attention.
Driver Attention Alert
Malfunction
This warning appears when the Intelligent
Driver Alertness (I-DA) system is not func-
tioning properly. For additional information,
see “Intelligent Driver Alertness (I-DA)”
(P. 5-111).
Forward Driving Aids Temporarily
Disabled Front Sensor Blocked See
Owner’s Manual
This message appears when the front ra-
dar sensor may be obstructed due to:
• mud, dirt, snow, ice, etc.
• inclement weather (rain, fog, snow, etc.)
All forward driving aids are temporarily dis-
abled until the system detects that the
front radar sensor is no longer obstructed.
For additional information, see:
• Automatic Emergency Braking (AEB) with
Pedestrian Detection (P. 5-87)
• Intelligent Cruise Control (ICC) (P. 5-58)
• Intelligent Forward Collision Warning (I-
FCW) (P. 5-98)
Lane Departure Warning
(LDW)/ Intelligent Lane
Intervention (I-LI) indicator
This indicator appears when the LDW
and/or Intelligent Lane Intervention (I-LI)
systems are engaged.
For additional information, see “Lane De-
parture Warning (LDW)” (P. 5-27) and “Intelli-
gent Lane Intervention (I-LI)” (P. 5-32).
Intelligent Cruise Control
(ICC) indicators
These
indicators
show
the
Intelligent
Cruise Control (ICC) system status. For ad-
ditional information, see “Intelligent Cruise
Control (ICC)” (P. 5-58).
Intelligent Cruise ON
This message appears if the
Intelli-
gent Cruise Control (ICC) switch on the
steering wheel is pressed and Cruise Con-
trol Alerts are enabled in the vehicle infor-
mation display.
For additional information, see “Intelligent
Cruise Control (ICC)” (P. 5-58).
Malfunction See Owner’s Manual
This warning appears when one of the fol-
lowing systems (if so equipped) is not func-
tioning properly:
• Automatic Emergency Braking (AEB) with
Pedestrian Detection
• Blind Spot Warning (BSW)
• Intelligent Driver Alertness (I-DA)
• Intelligent
Forward
Collision
Warning
(I-FCW)
• Lane Departure Warning (LDW)
• Rear Automatic Braking (RAB)
• Rear Cross Traffic Alert (RCTA)
Instruments and controls
2-29
-------------------------------------------------------------------------------------------------------------------------------------------------------------
If one or more of these warning appears,
have the system checked. It is recom-
mended that you visit a NISSAN dealer for
this service.
For additional information, see “Automatic
Emergency Braking (AEB) with Pedestrian
Detection” (P. 5-87), “Blind Spot Warning
(BSW)” (P. 5-38), “Driver Attention Alert”
(P.
“Intelligent
Forward
Collision
Warning (I-FCW)” (P. 5-98), “Lane Departure
Warning (LDW)” (P. 5-27), “Rear Automatic
Braking (RAB)” (P. 5-82) and “Rear Cross Traf-
fic Alert (RCTA)” (P. 5-47).
Parking Sensor
This indicator appears when the sensor is
activated. Pressing the
button while
the sonar screen is displayed will dismiss
this message until the next time the sen-
sors are activated. The Parking Sensor sys-
tem will remain on, unless it is disabled in
the vehicle information display. For addi-
tional information, see “Front and rear so-
nar system” (P. 5-126).
Rear Automatic Braking
(RAB) indicator
This indicator appears to indicate the sta-
tus of the Rear Automatic Braking (RAB)
system. For additional information, see
“Rear Automatic Braking (RAB)” (P. 5-82).
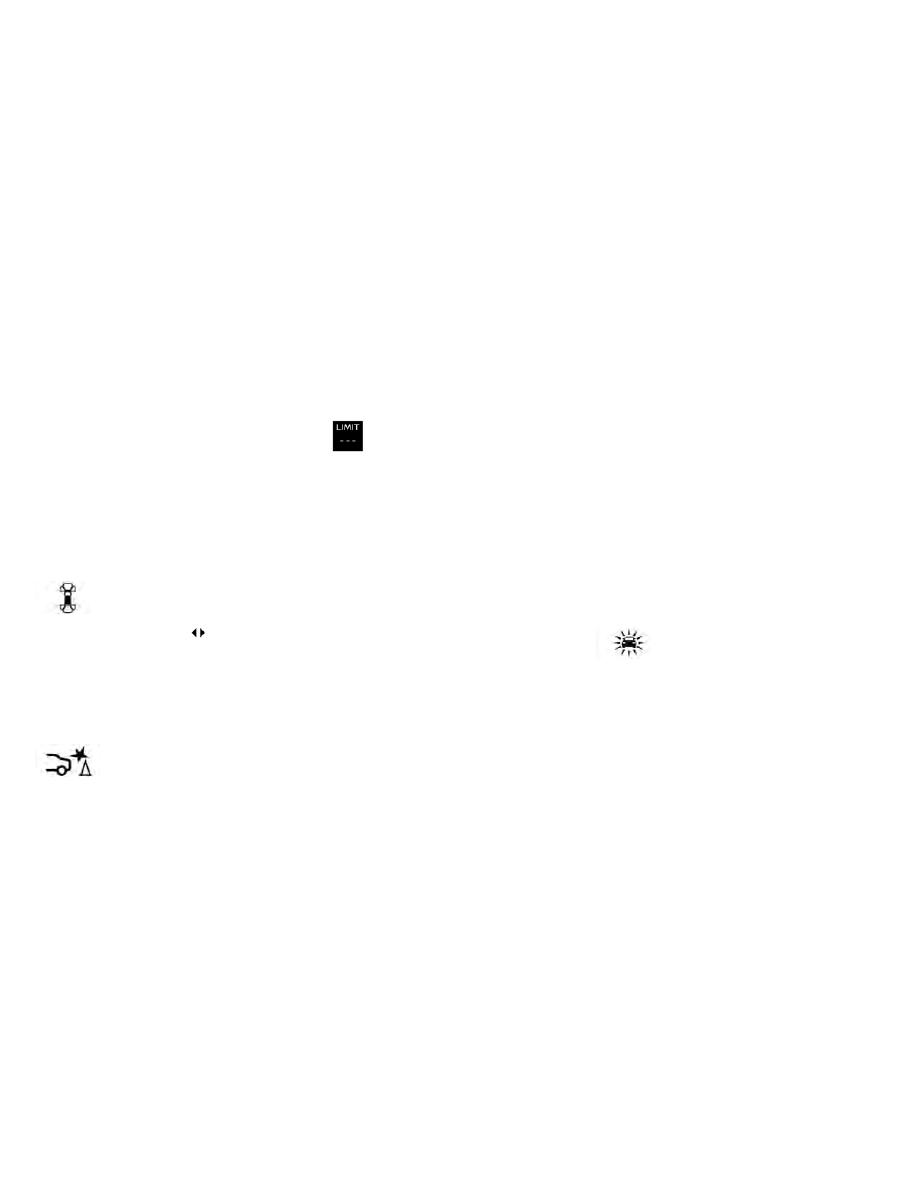
Speed Limit Sign indicator
This message may appear when the Traffic
Sign Recognition system is engaged.
For additional information, see “Traffic Sign
Recognition” (P. 5-24).
Target Speed SET with Intelligent
Distance Control
This message will appear if the Intelligent
Cruise Control system is on when the SET
switch is pushed and the Cruise Control
Alerts are enabled.
For additional information, see “Intelligent
Cruise Control (ICC)” (P. 5-58).
Unavailable: High Cabin Temperature
This message appears when the camera
detects an interior temperature of more
than 104°F (40°C). For additional informa-
tion, see “Automatic Emergency Braking
(AEB) with Pedestrian Detection” (P. 5-87),
“Intelligent Cruise Control (ICC)” (P. 5-58), “In-
telligent Lane Intervention (I-LI)” (P. 5-32),
“Lane Departure Warning (LDW)” (P. 5-27) or
“Traffic Sign Recognition (TSR)” (P. 5-24).
Unavailable: Road is Slippery
This message appears when the Intelligent
Cruise Control (ICC) or the Intelligent Lane
Intervention (I-LI) systems become un-
available because the road is slippery. For
additional
information,
see
“Intelligent
Cruise Control (ICC)” (P. 5-58) or “Intelligent
Lane Intervention (I-LI)” (P. 5-32).
Unavailable: Side Radar Obstruction
This message appears when one of the
following systems (if so equipped) be-
comes unavailable because a radar block-
age is detected.
• Blind Spot Warning (BSW) (P. 5-38)
• Rear Cross Traffic Alert (RCTA) (P. 5-47)
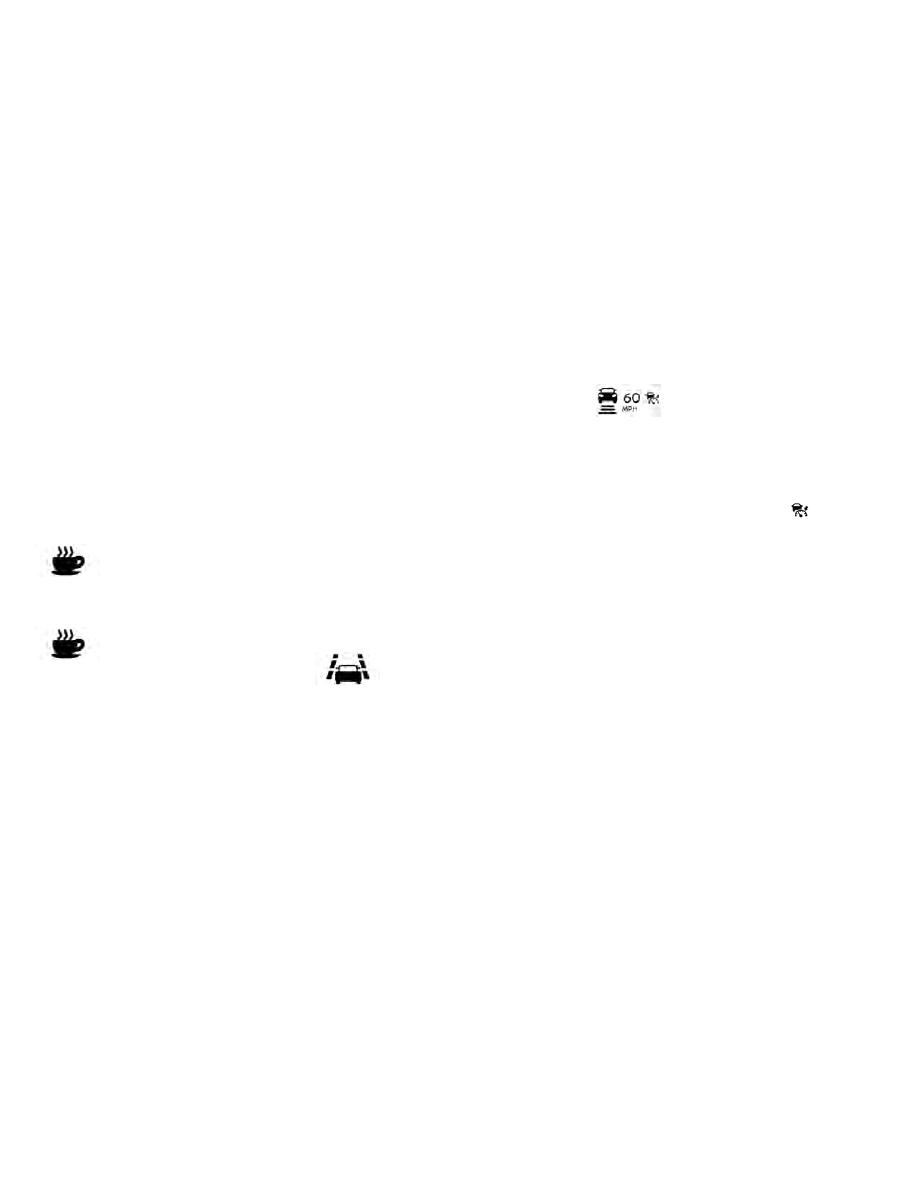
Vehicle ahead detection
indicator
This indicator appears when the Auto-
matic Emergency Braking (AEB) with Pe-
destrian Detection system is engaged and
has detected a vehicle.
For additional information, see “Automatic
Emergency Braking (AEB) with Pedestrian
Detection” (P. 5-87).
2-30
Instruments and controls
-------------------------------------------------------------------------------------------------------------------------------------------------------------

Your vehicle has two types of security
systems:
• Vehicle security system
• NISSAN Vehicle Immobilizer System
VEHICLE SECURITY SYSTEM
The vehicle security system provides visual
and audible alarm signals if someone
opens the doors, liftgate or the hood when
the system is armed. It is not, however, a
motion detection type system that acti-
vates when a vehicle is moved or when a
vibration occurs.
The system helps deter vehicle theft but
cannot prevent it, nor can it prevent the
theft of interior or exterior vehicle compo-
nents in all situations. Always secure your
vehicle even if parking for a brief period.
Never leave your Intelligent Key in the ve-
hicle, and always lock the vehicle when un-
attended. Be aware of your surroundings,
and park in secure, well-lit areas whenever
possible.
Many devices offering additional protec-
tion, such as component locks, identifica-
tion markers, and tracking systems, are
available at auto supply stores and spe-
cialty shops. A NISSAN dealer may also offer
such equipment. Check with your insur-
ance company to see if you may be eligible
for discounts for various theft protection
features.
How to arm the vehicle security
system
1. Close all windows and the moonroof (if
so equipped).
The system can be
armed even if the windows and moon-
roof are open.
2. Remove the Intelligent Key from the
vehicle.
3. Close all doors, hood and liftgate. Lock
all doors. The doors can be locked with
the Intelligent Key, door handle request
switch or power door lock switch.
Key fob operation:
4. Confirm that the
indicator light
comes on. The
indicator stays
illuminated for a period of time indicat-
ing that the system is in the pre-armed
phase.
The
indicator light will blink every
3 seconds once the security system is
armed.
If during the pre-armed phase one of
the following occurs, the system will not
arm:
• A door is opened with the release button
with the Intelligent Key on your person.
• The doors are unlocked using the unlock
button on the Intelligent Key.
• The ignition switch is placed in the ACC or
ON position.
LIC2930
SECURITY SYSTEMS
Instruments and controls
2-31
-------------------------------------------------------------------------------------------------------------------------------------------------------------

•
Even when the driver and/or passen-
gers are in the vehicle, the system will
activate when all the doors, hood and
liftgate are locked with the ignition
switch placed in the LOCK position.
When placing the ignition switch in the
ACC or ON position, the system will be
released.
Vehicle security system activation
The vehicle security system will give the
following alarm:
• The turn signals blink and the horn
sounds intermittently.
• The alarm automatically turns off after a
period of time. However, the alarm reacti-
vates if the vehicle is tampered with
again. The alarm can be shut off by un-
locking the driver's door or liftgate by
pressing the
button on the Intelli-
gent Key.
The alarm is activated by:
• Opening the door or liftgate without us-
ing the Intelligent Key (even if the door is
unlocked by releasing the door inside
lock switch).
How to stop an activated alarm
The alarm stops only by unlocking the driv-
er’s door or the liftgate by pressing the
button on the Intelligent Key or push-
ing the request switch on the driver's or
passenger's door with the Intelligent Key in
range of the door handle.
NISSAN VEHICLE IMMOBILIZER
SYSTEM
The NISSAN Vehicle Immobilizer System
will not allow the engine to start without
the use of a registered key.
Never leave these keys in the vehicle.
FCC Notice:
For USA:
This device complies with Part 15 of the
FCC Rules. Operation is subject to the fol-
lowing two conditions: (1) This device
may not cause harmful interference, and
(2) this device must accept any interfer-
ence received, including interference
that may cause undesired operation.
NOTE:
Changes or modifications not expressly
approved by the party responsible for
compliance could void the user's author-
ity to operate the equipment.
For Canada:
This
device
contains
licence-exempt
transmitter(s)/receiver(s) that comply
with Innovation, Science and Economic
Development Canada’s licence-exempt
RSS(s). Operation is subject to the fol-
lowing two conditions: (1) This device
may not cause interference. (2) This de-
vice must accept any interference, in-
cluding interference that may cause un-
desired operation of the device.
2-32
Instruments and controls
-------------------------------------------------------------------------------------------------------------------------------------------------------------

Security indicator light
The security indicator light blinks whenever
the ignition switch is placed in the OFF,
LOCK or ACC position.
This function indicates the NISSAN Vehicle
Immobilizer System is operational.
If the NISSAN Vehicle Immobilizer System is
malfunctioning, the light will remain on
while the ignition switch is placed in the ON
position.
If the light still remains on and/or the
engine will not start, seek service for the
NISSAN Vehicle Immobilizer System as
soon as possible. Please bring all regis-
tered keys that you have. It is recom-
mended that you visit a NISSAN dealer
for this service.
SWITCH OPERATION
WARNING
In freezing temperatures the washer
solution may freeze on the windshield
and obscure your vision which may
lead to an accident. Warm the wind-
shield with the defroster before you
wash the windshield.
LIC0474
LIC3028
WIPER AND WASHER SWITCH
Instruments and controls
2-33
-------------------------------------------------------------------------------------------------------------------------------------------------------------
CAUTION
•
Do not operate the washer continu-
ously for more than 30 seconds.
•
Do not operate the washer if the
windshield-washer fluid reservoir is
empty.
•
Do not fill the windshield-washer
fluid
reservoir
with
windshield-
washer fluid concentrates at full
strength.
Some
methyl
alcohol
based windshield-washer fluid con-
centrates may permanently stain the
grille
if
spilled
while
filling
the
windshield-washer fluid reservoir.
•
Pre-mix
windshield-washer
fluid
concentrates
with
water
to
the
manufacturer’s recommended levels
before pouring the fluid into the
windshield-washer fluid reservoir.
Do not use the windshield-washer
fluid reservoir to mix the windshield-
washer fluid concentrate and water.
NOTE:
If the windshield wiper operation is in-
terrupted by snow or ice, the wiper may
stop moving to protect its motor. If this
occurs, turn the wiper switch to the OFF
position and remove the snow or ice that
is on and around the wiper arms. In ap-
proximately 1 minute, turn the switch on
again to operate the wiper.
The windshield wiper and washer operates
when the ignition switch is in the ON
position.
Push the lever down to operate the wiper
at the following speed:
䊊
1
Intermittent (INT) — intermittent opera-
tion can be adjusted by turning the
knob toward
O
A
(slower) or
O
B
(faster).
Also, the intermittent operation speed
varies in accordance with the vehicle
speed (if so equipped). (For example,
when the vehicle speed is high, the in-
termittent operation speed will be
faster.)
䊊
2
Low (LO) — continuous low speed
operation
䊊
3
High (HI) — continuous high speed
operation
Push the lever up
O
4
to have one sweep
operation (MIST) of the wiper.
Pull the lever toward you
O
5
to operate the
washer. The wiper will also operate several
times.
NOTE:
The Speed Dependent feature may be
disabled. For additional information, see
“Vehicle information display” (P. 2-16).
2-34
Instruments and controls
-------------------------------------------------------------------------------------------------------------------------------------------------------------

REAR SWITCH OPERATION
If the rear window wiper operation is inter-
rupted by snow, etc., the wiper may stop
moving to protect its motor. If this occurs,
turn the wiper switch to OFF and remove
the snow, etc. on and around the wiper
arms. After about 1 minute, turn the switch
ON again to operate the wiper.
The rear window wiper and washer oper-
ate when the ignition switch is in the ON
position. Turn the switch clockwise from
the OFF position to operate the wiper.
䊊
1
Intermittent (INT) — intermittent opera-
tion (not adjustable)
䊊
2
Low (ON) — continuous low speed
operation
Push the switch forward
O
3
to operate the
washer. The wiper will also operate several
times.
WARNING
In freezing temperatures the washer
solution may freeze on the window and
obscure your vision. Warm the rear win-
dow with the defroster before you
wash the rear window.
CAUTION
•
Do not operate the washer continu-
ously for more than 30 seconds.
•
Do not operate the washer if the
windshield-washer fluid reservoir is
empty.
•
Do not fill the windshield-washer
fluid
reservoir
with
windshield-
washer fluid concentrates at full
strength.
Some
methyl
alcohol
based windshield-washer fluid con-
centrates may permanently stain the
grille
if
spilled
while
filling
the
windshield-washer fluid reservoir.
•
Pre-mix
windshield-washer
fluid
concentrates
with
water
to
the
manufacturer's recommended lev-
els before pouring the fluid into the
windshield-washer fluid reservoir.
Do not use the windshield-washer
fluid reservoir to mix the windshield-
washer fluid concentrate and water.
LIC3101
Instruments and controls
2-35
-------------------------------------------------------------------------------------------------------------------------------------------------------------

To defrost the rear window glass and out-
side mirrors (if so equipped), place the igni-
tion switch in the ON position and push the
rear window defroster switch on. The rear
window defroster indicator light on the
switch comes on. Push the switch again to
turn the defroster off.
The rear window defroster automatically
turns off after approximately 15 minutes.
CAUTION
When cleaning the inner side of the rear
window, be careful not to scratch or
damage the rear window defroster.
NOTE:
The top and bottom few rows of wires on
the rear window are not part of the rear
window defroster system. These wires
make up the antenna for the audio
system.
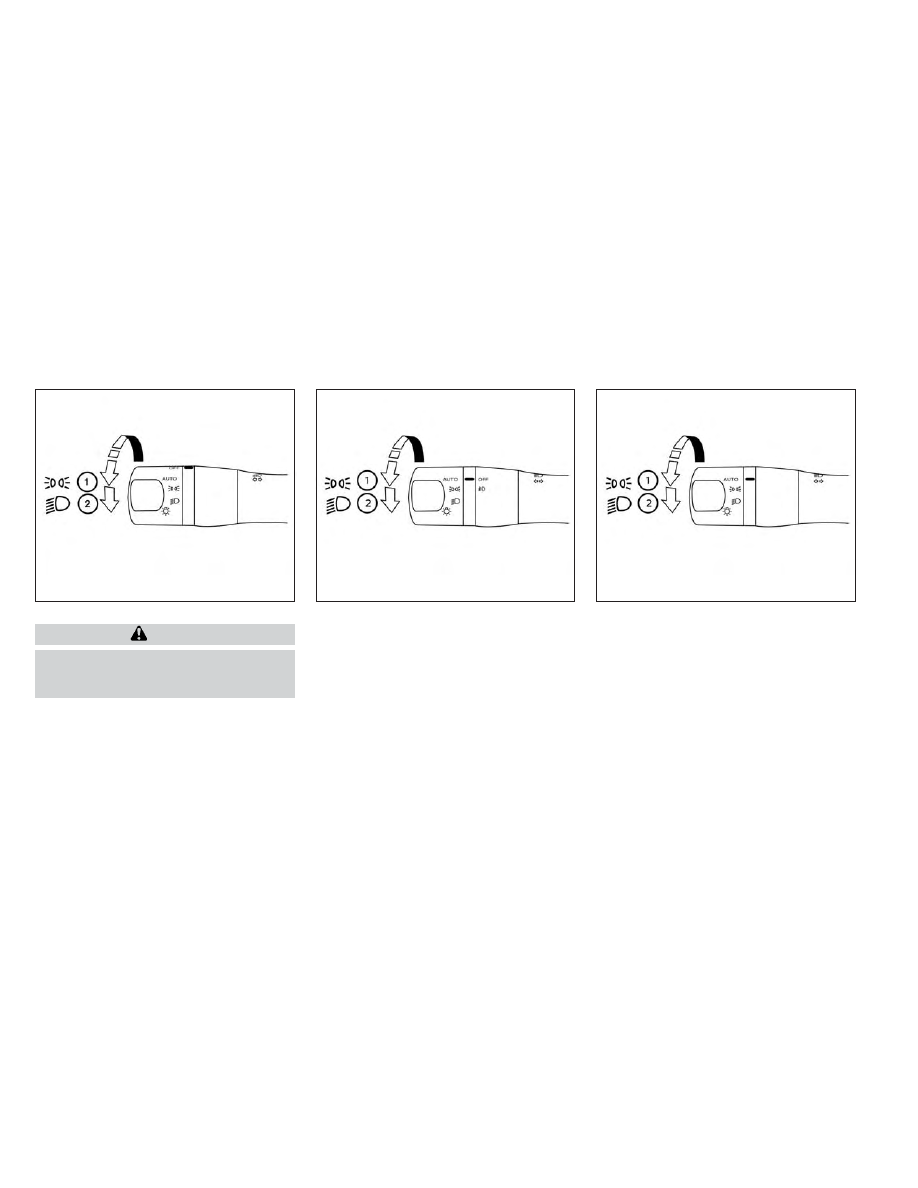
HEADLIGHT CONTROL SWITCH
Lighting
䊊
1
Rotate the switch to the
position,
and the front parking, tail, license plate,
and instrument panel lights will come
on.
䊊
2
Rotate the switch to the
position,
and the headlights will come on and all
the other lights remain on.
LIC2923
LIC3240
Type A (if so equipped)
REAR WINDOW AND OUTSIDE
MIRROR (if so equipped)
DEFROSTER SWITCH
HEADLIGHT AND TURN SIGNAL
SWITCH
2-36
Instruments and controls
-------------------------------------------------------------------------------------------------------------------------------------------------------------
CAUTION
Use the headlights with the engine run-
ning to avoid discharging the vehicle
battery.
LIC3241
Type B (if so equipped)
LIC4564
Type C (if so equipped)
LIC4597
Type D (if so equipped)
Instruments and controls
2-37
-------------------------------------------------------------------------------------------------------------------------------------------------------------
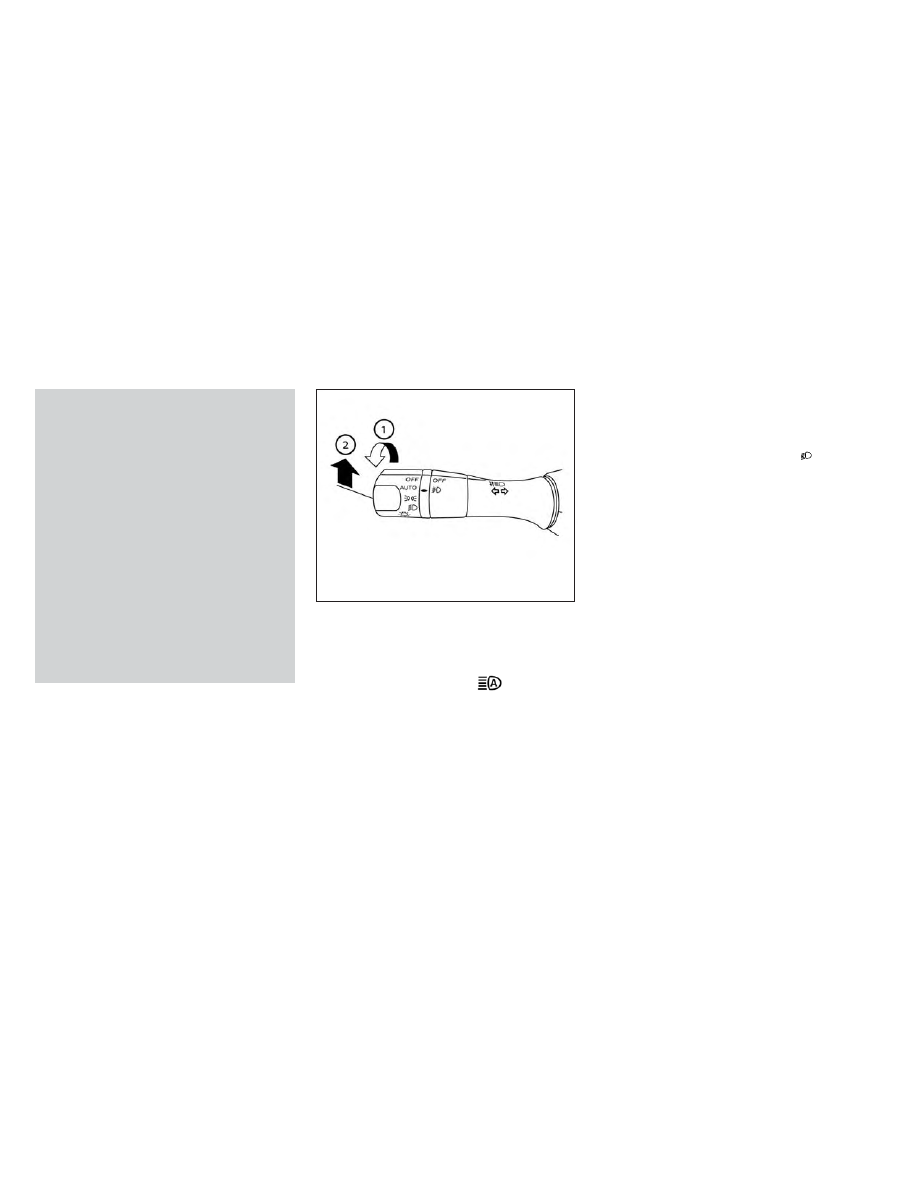
Autolight system
The autolight system allows the headlights
to turn on and off automatically. The auto-
light system can:
• Turn on the headlights, front parking, tail,
license plate and instrument panel lights
automatically when it is dark.
• Turn off all the lights (except daylight run-
ning lights) when it is light.
• Keep all the lights on for a period of time
after you place the ignition switch in the
OFF position and all doors are closed.
NOTE:
Autolight activation sensitivity and
the time delay for autolight shutoff
can be adjusted. For additional infor-
mation, see “Vehicle information dis-
play” (P. 2-16).
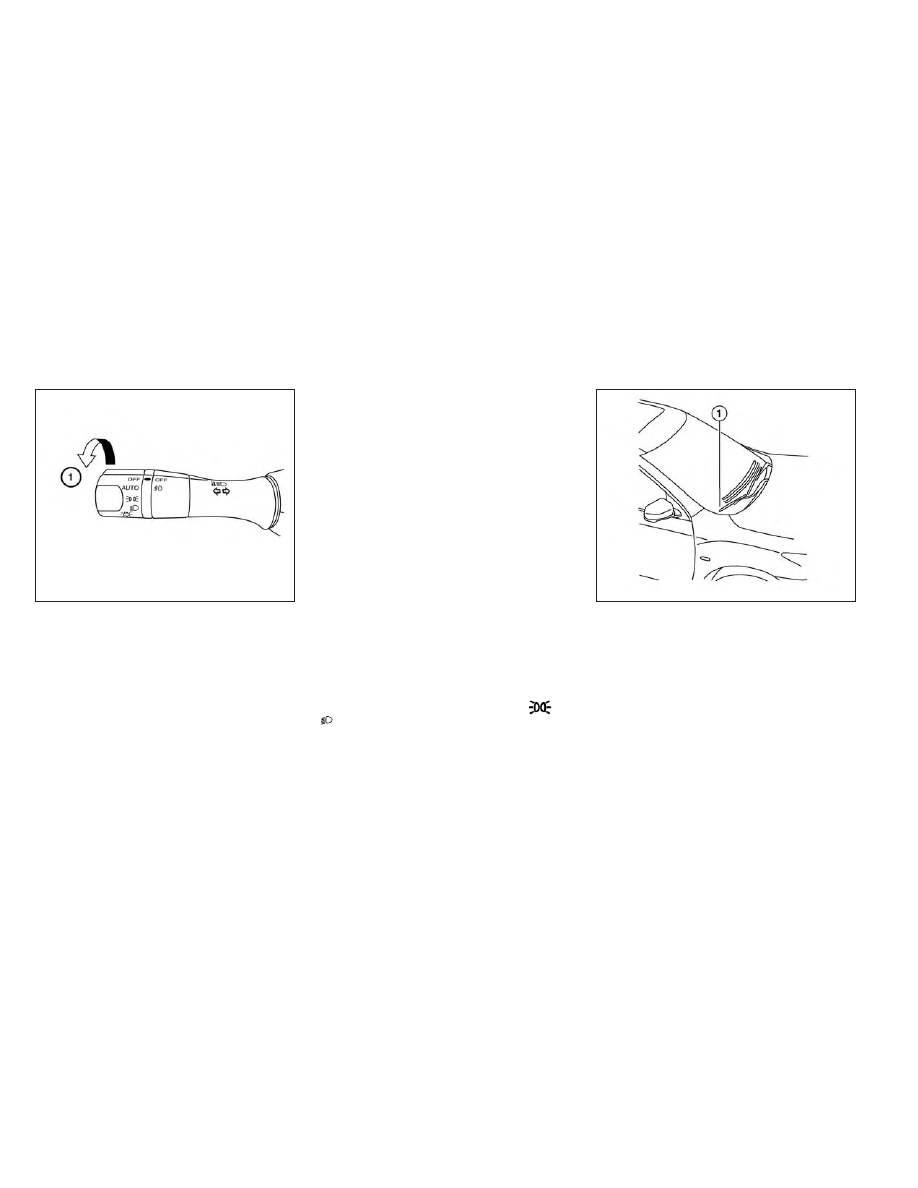
To turn on the autolight system:
1. Turn the headlight switch to the AUTO
position
O
1
.
2. Place the ignition switch in the ON
position.
3. The
autolight
system
automatically
turns the headlights on and off.
Initially, if the ignition switch is turned off
and a door is opened and left open, the
headlights remain on for a period of time. If
another door is opened while the head-
lights are on, then the timer is reset.
To turn the autolight system off, turn the
switch to the OFF (if so equipped),
, or
position.
Be sure you do not put anything on top
of the autolight sensor located in the top
side
O
1
of the instrument panel. The au-
tolight sensor controls the autolight; if it
is covered, the autolight sensor reacts as
if it is dark out and the headlights will
illuminate. If this occurs while parked
with the engine off and the ignition
switch placed in the ON position, your
vehicle's
battery
could
become
discharged.
LIC3474
LIC2237
2-38
Instruments and controls
-------------------------------------------------------------------------------------------------------------------------------------------------------------

Headlight beam select
䊊
1
To select the high beam function, push
the lever forward while the low beams
are on. The high beam lights come on
and the
indicator light illuminates.
䊊
2
Pull the lever back to return to the low
beams.
䊊
3
Pulling and releasing the lever flashes
the headlight high beams on and off.
The low beams do not need to be on
for this to function.
High Beam Assist
The High Beam Assist system will operate
when the vehicle is driven at speeds of ap-
proximately 25 mph (40 km/h) and above. If
an oncoming vehicle or leading vehicle ap-
pears in front of your vehicle when the
headlight high beam is on, the headlight
will
be
switched
to
the
low
beam
automatically.
WARNING
•
The High Beam Assist system is a
convenience but it is not a substitute
for safe driving operation. The driver
should remain alert at all times, en-
sure
safe
driving
practices
and
switch the high beams and low beam
manually when necessary.
•
The high beam or low beam may not
switch automatically under the fol-
lowing conditions. Switch the high
beam and low beam manually.
–
During bad weather (rain, fog,
snow, wind, etc.).
–
When a light source similar to a
headlight or tail light is in the vi-
cinity of the vehicle.
–
When the headlights of the on-
coming vehicle or the leading ve-
hicle are turned off, when the color
of the light is affected due to for-
eign materials on the lights, or
when the light beam is out of
position.
–
When there is a sudden, continu-
ous change in brightness.
–
When driving on a road that
passes over rolling hills, or a road
that has level differences.
–
When driving on a road with many
curves.
–
When a sign or mirror-like surface
is reflecting intense light towards
the front of the vehicle.
–
When the container, etc. being
towed by a leading vehicle is re-
flecting intense light.
–
When a headlight on your vehicle
is damaged or dirty.
–
When the vehicle is leaning at an
angle due to a punctured tire, be-
ing towed, etc.
LIC3250
Instruments and controls
2-39
-------------------------------------------------------------------------------------------------------------------------------------------------------------
•
The timing of switching the low
beam and high beam may change
under the following situations.
–
The brightness of the headlights
of the oncoming vehicle or leading
vehicle.
–
The movement and direction of
the oncoming vehicle and the
leading vehicle.
–
When only one light on the on-
coming vehicle or the leading ve-
hicle is illuminated.
–
When the oncoming vehicle or the
leading vehicle is a two-wheeled
vehicle.
–
Road conditions (incline, curve,
the road surface, etc.).
–
The number of passengers and
the amount of luggage.
High Beam Assist operation
To activate the High Beam Assist system,
turn the headlight switch to the AUTO po-
sition
O
1
and push the lever forward
O
2
(high beam position). The
High Beam
Assist indicator light in the meter will illumi-
nate while the headlights are turned on.
If the High Beam Assist indicator light does
not illuminate in the above condition, it may
indicate that the system is not functioning
properly. Have the system checked, it is
recommended that you visit a NISSAN
dealer for this service.
When the vehicle speed lowers to less than
approximately 16 mph (25 km/h), the head-
light uses the low beam.
To turn off the High Beam Assist system,
turn the headlight switch to the
posi-
tion or select the low beam position by
placing the lever in the neutral position.
LIC4115
2-40
Instruments and controls
-------------------------------------------------------------------------------------------------------------------------------------------------------------
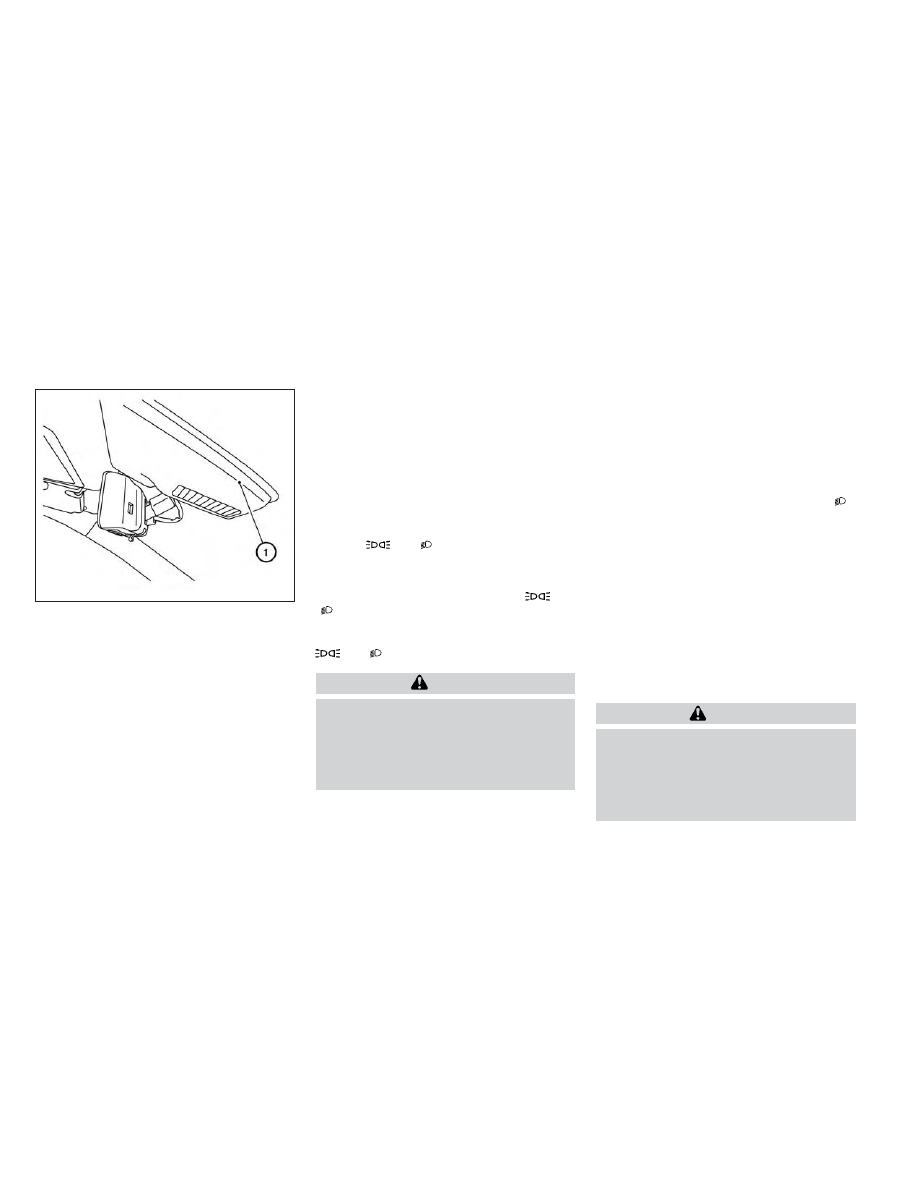
Ambient image sensor maintenance
The ambient image sensor
O
1
for the High
Beam Assist system is located in front of
the inside mirror. To maintain the proper
operation of the high beam assist system
and prevent a system malfunction, be sure
to observe the following:
• Always keep the windshield clean.
• Do not attach a sticker (including trans-
parent material) or install an accessory
near the ambient image sensor.
• Do not strike or damage the areas
around the ambient image sensor. Do
not touch the sensor lens that is located
on the ambient image sensor.
If the ambient image sensor is damaged
due to an accident, it is recommended that
you visit a NISSAN dealer.
Battery saver system
The battery saver system automatically
turns off the following lights after a period
of time when the ignition switch is placed in
the OFF position and the doors are closed:
• Headlights, when the headlight switch is
in the
or
position
• Interior lights, when left in the ON position
After the headlights automatically turn off
with the headlight switch in the
or
position, the headlights will illuminate
again if the headlight switch is moved to
the OFF position and then turned to the
or
position.
CAUTION
Even though the battery saver feature
automatically turns off the headlights
after a period of time, you should turn
the headlight switch to the OFF posi-
tion when the engine is not running to
avoid discharging the vehicle battery.
LED DAYTIME RUNNING LIGHTS
(DRL) SYSTEM
The LED DRL automatically illuminate at
100% intensity when the engine is started
and the parking brake released. The LED
Daytime Running Lights (DRL) operate with
the headlight switch in any position. When
you turn the headlight switch to the
position for full illumination, the LED DRL
illuminate at a lower intensity.
If the parking brake is applied before the
engine is started, the LED DRL do not illumi-
nate. The LED DRL illuminate when the
parking brake is released. The LED DRL will
remain on until the ignition switch is placed
in the OFF position.
At dusk, the headlights, interior controls
and switches will automatically illuminate if
the headlight switch is in the AUTO
position.
WARNING
When the LED DRL system is active, tail
lights on your vehicle are not on. It is
necessary at dusk to turn on your
headlights. Failure to do so could cause
an
accident
injuring
yourself
and
others.
LSD2712
Instruments and controls
2-41
-------------------------------------------------------------------------------------------------------------------------------------------------------------

INSTRUMENT BRIGHTNESS
CONTROL
Press the “+” button
O
A
to increase the
brightness of instrument panel lights.
Press the “-” button
O
B
to decrease the
brightness of instrument panel lights.
TURN SIGNAL SWITCH
Turn signal
䊊
1
Move the lever up or down to signal the
turning direction. When the turn is com-
pleted,
the
turn
signal
cancels
automatically.
Lane change signal
䊊
2
Move the lever up or down until the turn
signal begins to flash, but the lever
does not latch, to signal a lane change.
Hold the lever until the lane change is
completed.
Move the lever up or down until the turn
signal begins to flash, but the lever does
not latch, and release the lever. The turn
signal will automatically flash three times.
Choose the appropriate method to signal
a lane change based on road and traffic
conditions.
NOTE:
The 3 Flash Pass feature may be dis-
abled. For additional information, see
“How to use the vehicle information dis-
play” (P. 2-17).
LIC4161
LIC3252
2-42
Instruments and controls
-------------------------------------------------------------------------------------------------------------------------------------------------------------

FOG LIGHT SWITCH (if so
equipped)
To turn the fog lights on, turn the headlight
switch to the
position, then turn the
fog light switch to the
position.
To turn the fog lights on with the headlight
switch in the AUTO position, the headlights
must be on, then turn the fog light switch to
the
position.
To turn the fog lights off, turn the fog light
switch to the OFF position.
The headlights must be on and the low
beams selected for the fog lights to oper-
ate. The fog lights automatically turn off
when the high beam headlights are
selected.
To sound the horn, push near the horn icon
on the steering wheel.
WARNING
Do not disassemble the horn. Doing so
could affect proper operation of the
supplemental front air bag system.
Tampering
with
the
supplemental
front air bag system may result in seri-
ous personal injury.
LIC3256
LIC2227
HORN
Instruments and controls
2-43
-------------------------------------------------------------------------------------------------------------------------------------------------------------

The climate controlled seat warms up or
cools down the front seat by blowing warm
or cool air from under the surface of the
seat. The climate control switch is located
on the center console.
The climate controlled seat can be oper-
ated as follows:
1. Place the ignition switch in the ON
position.
2. Turn the control knob
O
A
to the heat side
O
1
or the cool side
O
2
. The indicator light
O
B
on the control knob will illuminate.
3. Adjust the desired amount of air using
the control knob. The climate controlled
seat blower remains on low speed for
approximately 60 seconds after turning
the switch on or selecting the desired
temperature.
4. When the vehicle's interior is warmed or
cooled, or before you leave the vehicle,
be sure to turn the control knob to the
off (center) position. The indicator light
O
B
on the control knob goes off with the
switch in the off (center) position.
To check the air filter for the climate con-
trolled seat, it is recommended that you
visit a NISSAN dealer.
WARNING
Do not use or allow occupants to use
the climate controlled seats if you or
the occupants cannot monitor seat
temperatures or have an inability to
feel pain in those body parts in contact
with the seat. Use of the climate con-
trolled seats by such people could re-
sult in serious injury.
CAUTION
•
The battery could run down if the cli-
mate control seat is operated while
the engine is not running.
•
Do not use the climate control seat
for extended periods or when no one
is using the seat.
•
Do not put anything on the seat
which insulates heat, such as a blan-
ket, cushion, seat cover, etc. Other-
wise,
the
seat
may
become
overheated.
•
Do not place anything hard or heavy
on the seat or pierce it with a pin or
similar objects. This may result in
damage to the climate controlled
seat.
•
Any liquid spilled on the seat should
be removed immediately with a dry
cloth.
•
The climate controlled seat has an air
filter. Do not operate the climate con-
trolled seat without an air filter. This
may result in damage to the system.
•
When cleaning the seat, never use
gasoline, benzine, thinner, or any
similar materials.
SIC4334
CLIMATE CONTROLLED SEAT
SWITCHES (if so equipped)
2-44
Instruments and controls
-------------------------------------------------------------------------------------------------------------------------------------------------------------
Нет комментариевНе стесняйтесь поделиться с нами вашим ценным мнением.
Текст