Nissan Murano. Manual — part 1225
HEATED SEAT SWITCH
SE-123
< REMOVAL AND INSTALLATION >
C
D
E
F
G
H
I
K
L
M
A
B
SE
N
O
P
HEATED SEAT SWITCH
FRONT SEAT
FRONT SEAT : Exploded View
INFOID:0000000009718783
FRONT SEAT : Removal and Installation
INFOID:0000000009718784
REMOVAL
CAUTION:
When removing and installing, use shop cloths to protect from damage.
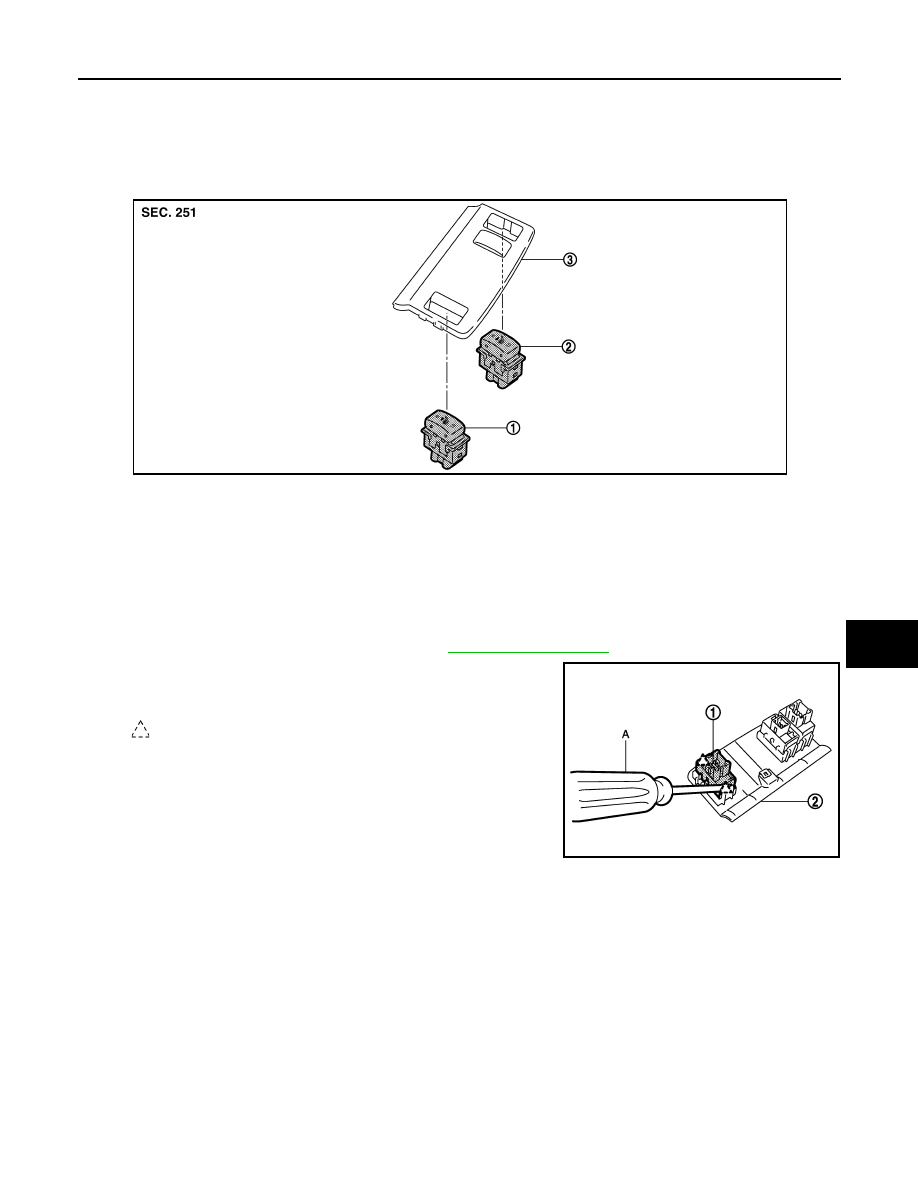
1.
Remove the console switch finisher (1). Refer to
2.
Remove front heated seat switch (driver side) (2) from console
switch finisher using remover tool (A).
NOTE:
The same procedure is also performed for passenger side.
INSTALLATION
Install in the reverse order of removal.
REAR SEAT
1.
Front heated seat switch (driver
side)
2.
Front heated seat switch (passenger
side)
3.
Console switch finisher
JMJIA1453ZZ
: Pawl
JMJIA1454ZZ
SE-124
< REMOVAL AND INSTALLATION >
HEATED SEAT SWITCH
REAR SEAT : Exploded View
INFOID:0000000009718785
REAR SEAT : Removal and Installation
INFOID:0000000009718786
REMOVAL
CAUTION:
When removing and installing, use shop cloths to protect parts from damage.
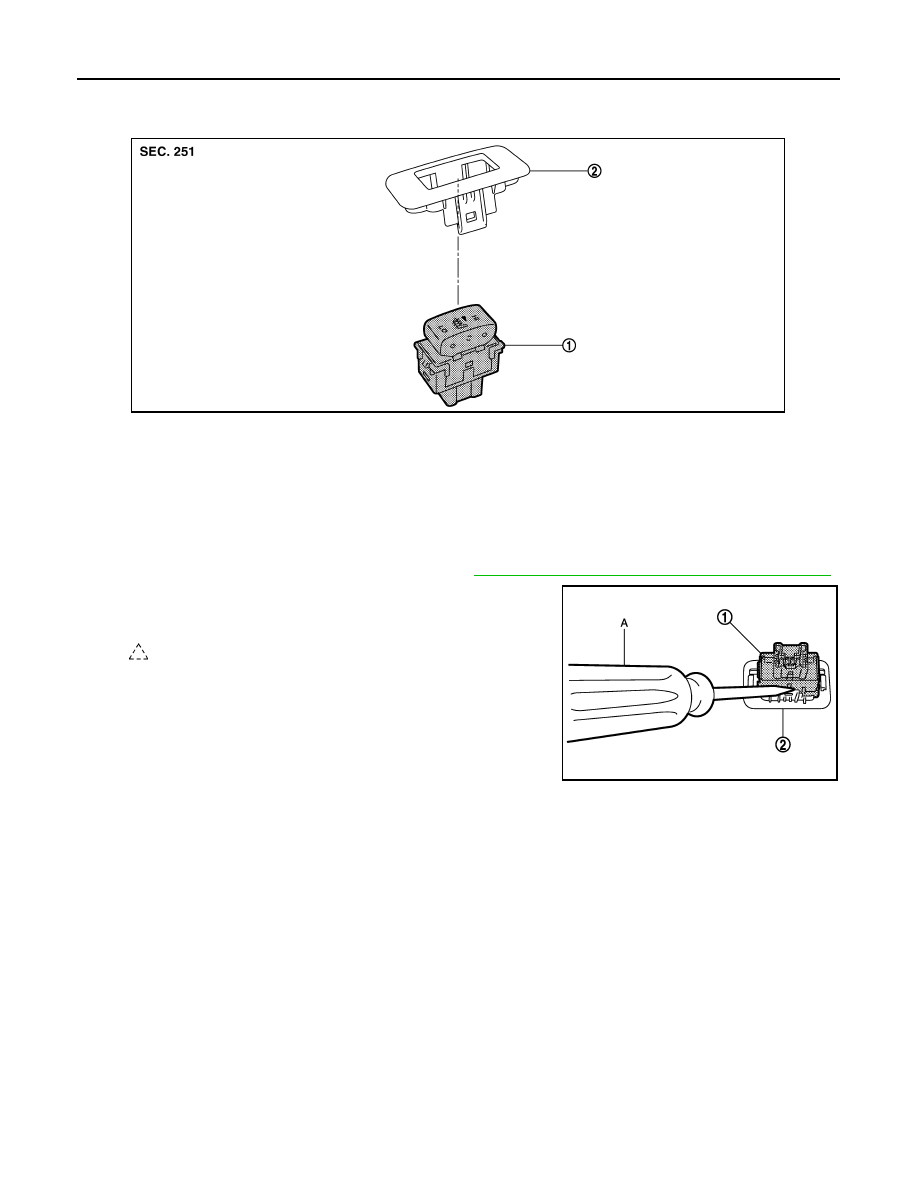
1.
Remove the heated seat switch finisher (2). Refer to
INT-16, "REAR DOOR FINISHER : Exploded View"
2.
Remove rear heated seat switch (1) from heated seat switch fin-
isher using remover tool (A).
INSTALLATION
Install in the reverse order of removal.
1.
Rear heated seat switch
2.
Heated seat switch finisher
JMJIA1456ZZ
: Pawl
JMJIA1455ZZ
FRONT POWER RETURN SWITCH
SE-125
< REMOVAL AND INSTALLATION >
C
D
E
F
G
H
I
K
L
M
A
B
SE
N
O
P
FRONT POWER RETURN SWITCH
Exploded View
INFOID:0000000009718787
.
Removal and Installation
INFOID:0000000009718788
REMOVAL
CAUTION:
When removing and installing, use shop cloths to protect parts from damage.
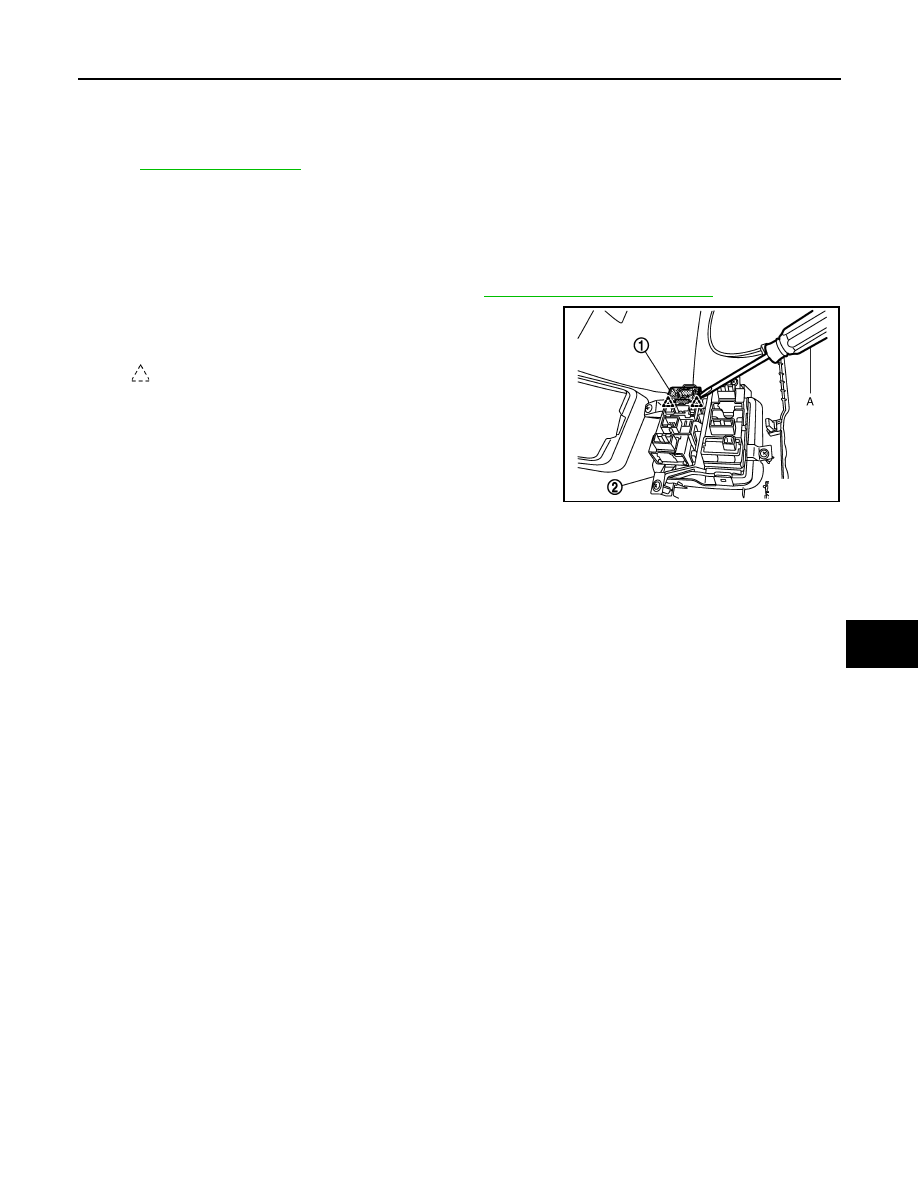
1.
Remove the instrument lower panel (LH) (1). Refer to
IP-15, "Removal and Installation"
2.
Remove front power return switch (1) from switch bracket using
remover tool (A).
INSTALLATION
Install in the reverse order of removal.
: Pawl
JMJIA1415ZZ
SE-126
< REMOVAL AND INSTALLATION >
REAR POWER RETURN SWITCH
REAR POWER RETURN SWITCH
Exploded View
INFOID:0000000009718789
Removal and Installation
INFOID:0000000009718790
REMOVAL
CAUTION:
When removing and installing, use shop cloths to protect parts from damage.
1.
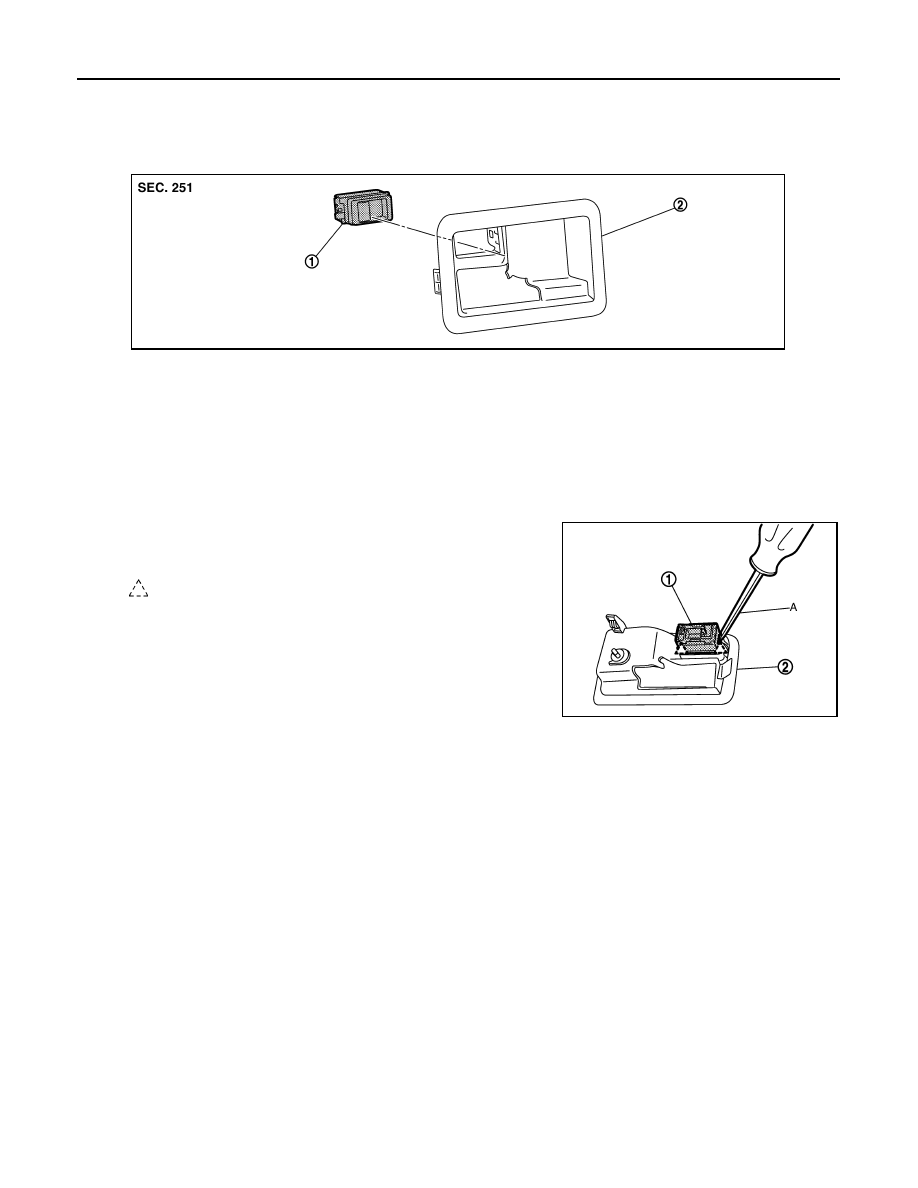
Remove the seatback control lever escutcheon.
2.
Remove rear power return switch (1) from seatback control lever
escutcheon using remover tool (A).
INSTALLATION
Install in the reverse order of removal.
1.
Rear power return switch
2.
Seatback control lever escutcheon
JMJIA1411ZZ
: Pawl
JMJIA1412ZZ
Нет комментариевНе стесняйтесь поделиться с нами вашим ценным мнением.
Текст