Daewoo Musso. Manual — part 318
MANUAL & SEMIAUTO-HVAC 7B/C-7
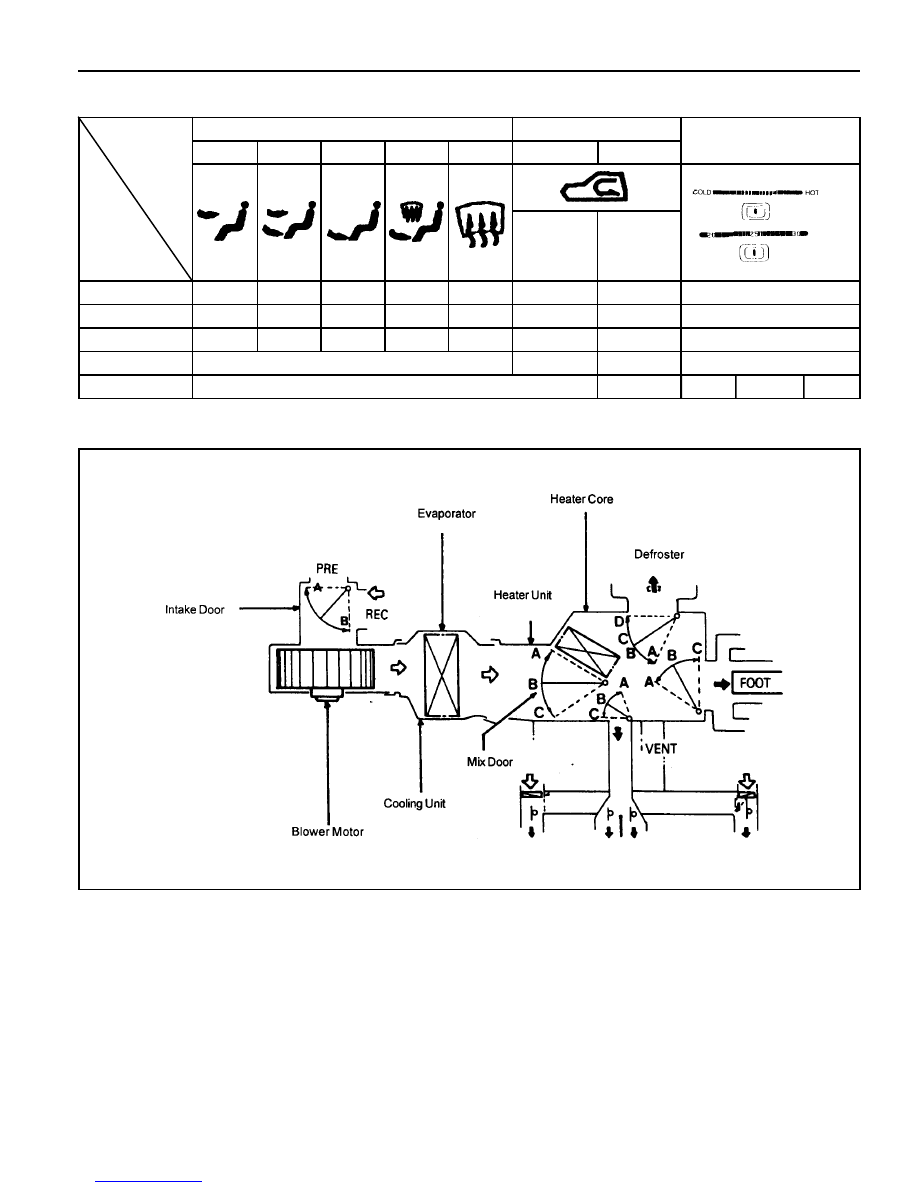
Switch
Door
VENT Door
FOOT Door
DEF Door
INTAKE Door
AIR MIX Door
Air Flow
Mode Switch
VENT
A
C
D
Recirculation Switch
Temperature
Control Lever
[MANUAL]
[SEMI AUTO]
-
-
-
-
B/L
B
B
D
FOOT
C
A
D
D/F
C
B
B
DEF
C
C
A
REC
FRE
-
-
A
B
C
INDI.
On
-
-
-
A
INDI.
Off
-
-
-
B
7B/C-8 MANUAL & SEMIAUTO-HVAC
AIR CONDITIONER SYSTEM
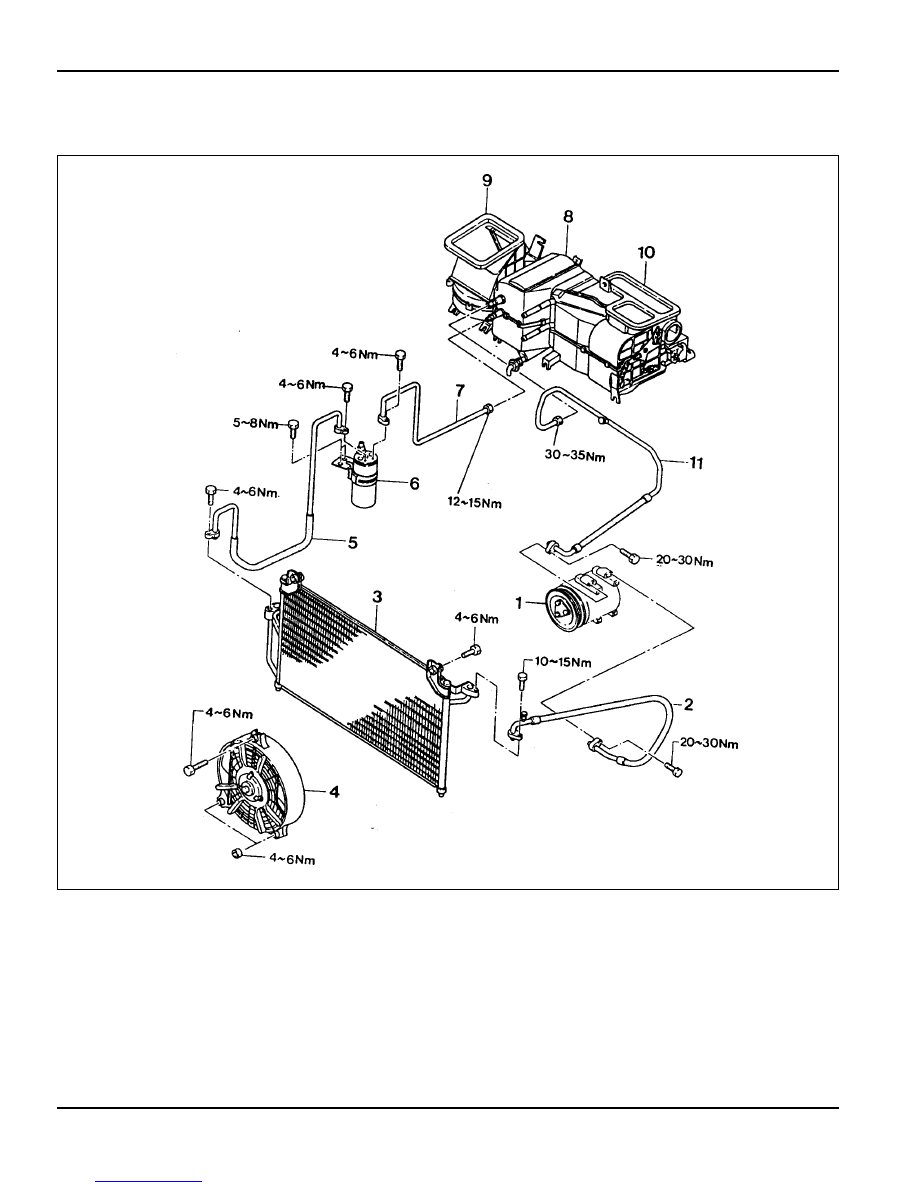
DIESEL ENGINE
1 Compressor
2 High Pressure Hose
3 Condenser Fan
4 Condenser
5 Liquid Pipe (A)
6 Receiver Drier
7 Liquid (B)
8 Evaporator Assembly
9 Low Pressure Hose
10 Water Inlet Hose
11 Water Outlet Hose
12 Control Assembly
13 Heater Unit Amplifier
14 Mix Actuator Assembly
15 Blower Unit
16 Heater Unit
17 Mode Actuator Assembly
MANUAL & SEMIAUTO-HVAC 7B/C-9
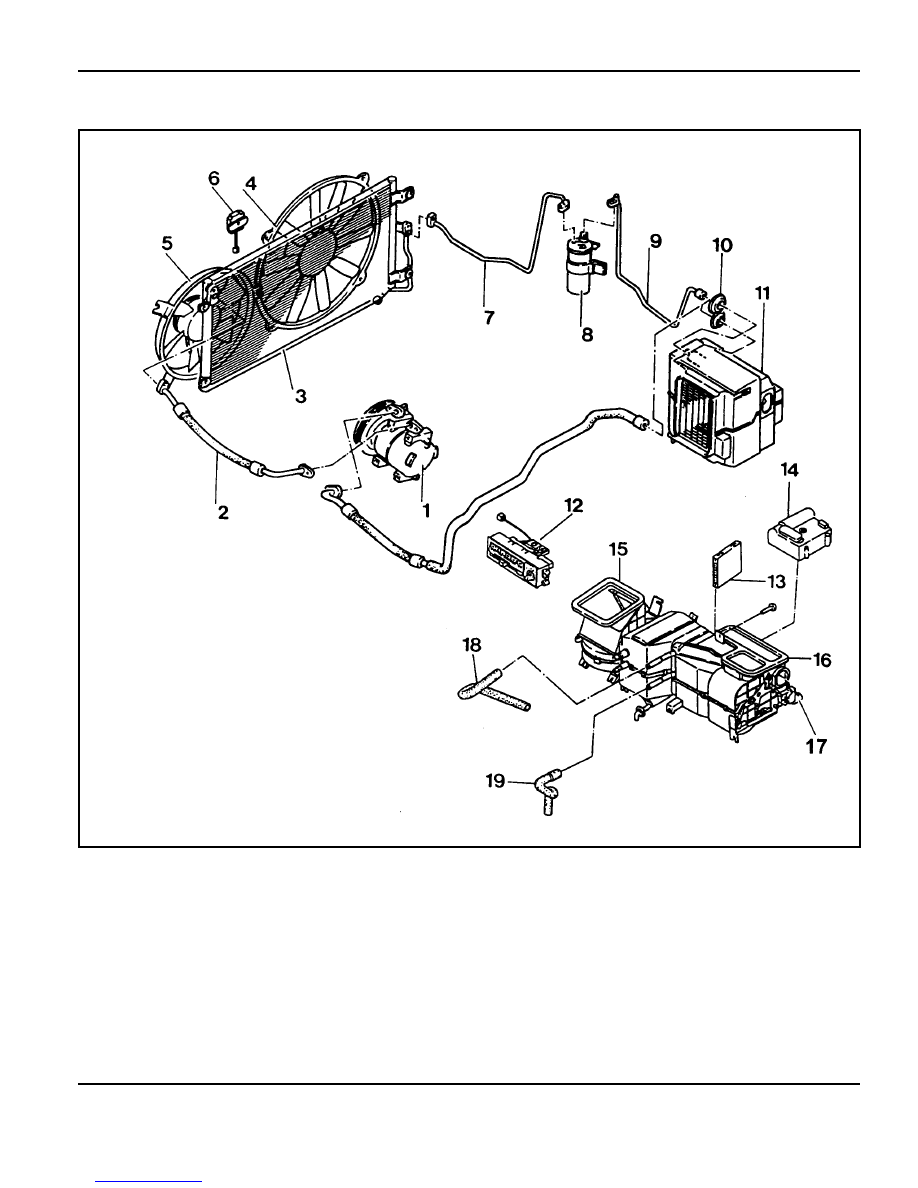
GASOLINE ENGINE
1 Compressor
2 High Pressure Hose
3 Condenser
4 Main Condenser Fan
5 Sub Condenser Fan
6 Condenser Fan Resistor
7 Liquid Pipe(A)
8 Receiver Dryer
9 Liquid Pipe(B)
10 Grommet
11 Evaporator Assembly
12 Control Assembly
13 Heater Unit Amp
14 Mix Actuator
15 Blower Unit
16 Heater Unit
17 Mode Actuator Assembly
18 Water Inlet Hose
19 Water Outlet Hose
7B/C-10 MANUAL & SEMIAUTO-HVAC
REFRIGERANT CHARGING
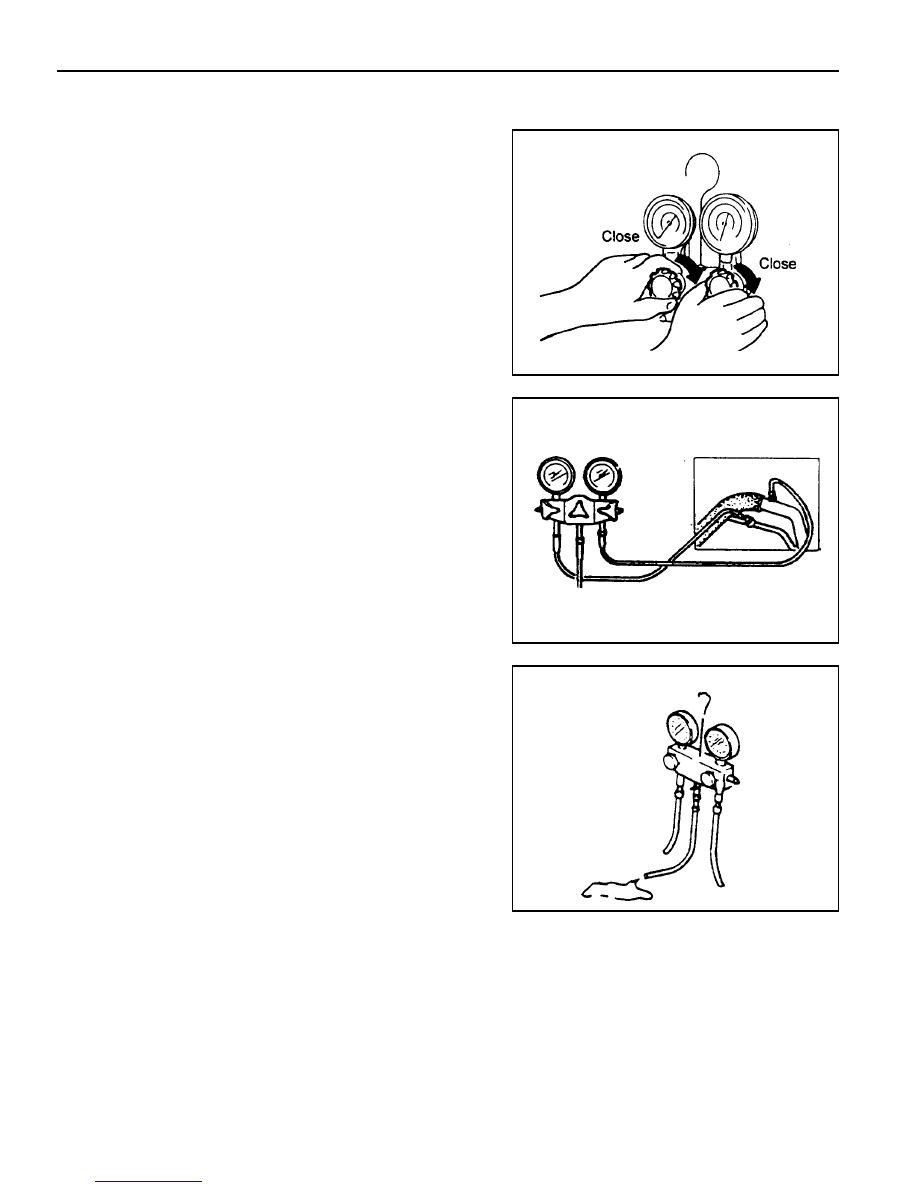
Installation of Manifold Gauge
1. Close both high/low pressure hand valve of gauge before
installation of gauge to the charging valve.
2. Connect the low pressure hose of the gauge to the low
pressure charging valve and the high pressure hose of the
gauge to high pressure charging valve. Tighten the hose
nuts by hand.
Discharging of Refrigerant
1. Connect the manifold gauge to the charging valve.
2. Place the free end of center hose in a shop towel.
3. Slowly open the high pressure hand valve and discharge
refrigerant.
Notice
If refrigerant is allowed to escape too fast, compressor oil
will be drawn out of the system.
MAINTENANCE AND REPAIR
Нет комментариевНе стесняйтесь поделиться с нами вашим ценным мнением.
Текст