Daewoo Tacuma: Body Repair Manual — part 8

3–8 WELDING AND TOOLS
Item
Work
Tools. equipment used
Measuring
Measuring tools
Edge preparation
Flange tools
Cutting tools
Cleaning
DISC SANDER
Air type: Electric type: BELT SANDER
Sanding tools
AIR IMPACT CUTTER
AIR JIGSAW
HAND NIBBLER
HANDSAW
CHISEL
RULES
CONVEX RULES
FRONT 4–1
SECTION 4
FRONT
CONTENTS
1. FRONT PANEL . . . . . . . . . . . . . . . . . . . . . . . . . . . . . . . . 4-2
• General description . . . . . . . . . . . . . . . . . . . . . . . . . . . . . . 4-2
• Repair procedure . . . . . . . . . . . . . . . . . . . . . . . . . . . . . . ... 4-3
2. FRONT WHEELHOUSE . . . . . . . . . . . . . . . . . . . . . . . . . . . . . 4-6
• General description . . . . . . . . . . . . . . . . . . . . . . . . . . . . . . 4-6
• Repair procedure . . . . . . . . . . . . . . . . . . . . . . . . . . . . . . ... 4-7
3. FRONT LONGITUDINAL . . . . . . . . . . . . . . . . . . . . . . . . . . . .. 4-11
• General description . . . . . . . . . . . . . . . . . . . . . . . . . . . . . .. 4-11
• Repair procedure . . . . . . . . . . . . . . . . . . . . . . . . . . . . . . . 4-11
4. SUPPORT CONTROL ARM . . . . . . . . . . . . . . . . . . . . . . . . . . 4-14
• General description . . . . . . . . . . . . . . . . . . . . . . . . . . . . . .. 4-14
• Repair procedure . . . . . . . . . . . . . . . . . . . . . . . . . . . . . . . 4-15
5. FRONT PILLAR . . . . . . . . . . . . . . . . . . . . . . . . . . . . . . . . 4-18
• General description . . . . . . . . . . . . . . . . . . . . . . . . . . . . . .. 4-18
• Repair procedure . . . . . . . . . . . . . . . . . . . . . . . . . . . . . . . 4-20
4–2 FRONT
1. FRONT PANEL
1-1. GENERAL DESCRIPTION
The front panel is joined to the front wheelhouse and
front longitudinal. It forms the base for the headlamps
and other parts and maintains the rigidity of the front
section of the body. Pay particular attention to twists
and parallelism and check mounting of related parts
when welding.
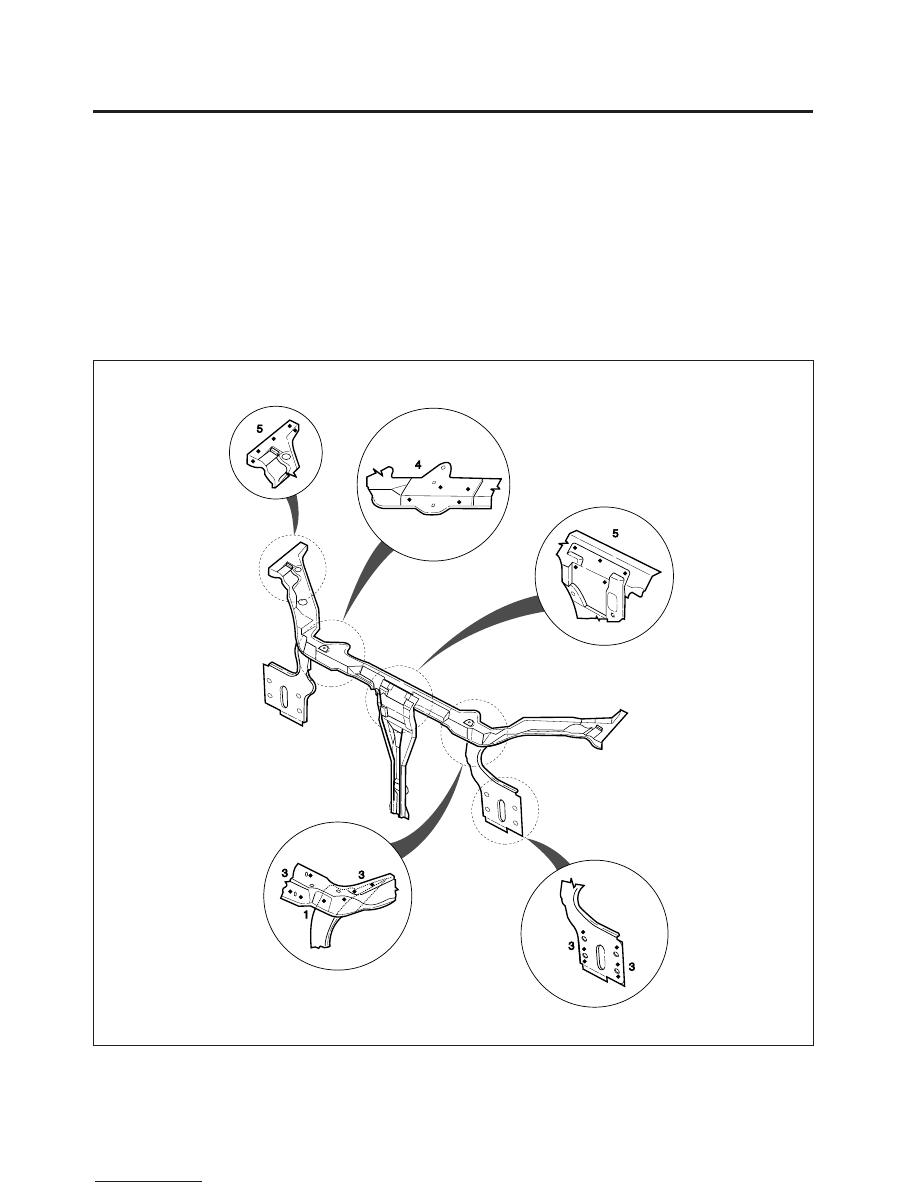
Fig. 1 Front Welding Assembly

FRONT 4–3
1-2. REPAIR PROCEDURE
1. Remove the related parts.
•
Hood, radiator grill and front bumper.
•
Head lamps and fender.
•
Engine, radiator and related parts.
•
Aircon condenser and related parts.
•
Others.
2. Roughly pull out and straighten the damaged area.
•
Check the damage to the front wheelhouse and
front longitudinal before removing the front panel.
Use the frame straightener to roughly pull out and
repair the damaged front panel before removing
the front panel.
NOTE: Check the fit of the door, taking care not to
pull the damaged area out more than necessary.
•
Use the horizontal pinch weld clamps and attach
the car to the frame straightener at the clamping
points securely.
3. Keep the body, level.
•
Jack up the body, and place safety stands at the
four designated places of the frame door open-
ing.
Fig. 2
4. Cut and pry off the front panel.
•
Center punch around the spot weld imprints.
•
Use the special spot cutter to drill holes at the
spot weld nuggets on the front wheel house and
longitudinal.
NOTE: When drilling holes be careful not to drill down
to the front wheelhouse and longitudinal themselves.
•
Cut off the front panel with an air chisel, leaving
the welding flanges intact.
•
Level and finish the burrs from the pried off spot
welds with disc sander.
CAUTION: To prevent eye injury, wear goggles or
safety glasses whenever sanding, cutting, or grind-
ing.
Fig. 3
5. Mold damaged related parts.
•
Use a hammer and dolly to mold damaged areas
of the front wheelhouse and longitudinal.
•
Even out the welding flanges with a hammer and
dolly.
•
Fill any holes drilled by welding.
Нет комментариевНе стесняйтесь поделиться с нами вашим ценным мнением.
Текст