Chery Tiggo 5 (T21). Service manual — part 527
49–
19
49
A-pillar Lower Protector Assembly
Removal
HINT:
Use the same procedures for the right side and left side.
Procedures listed below are for the left side.
1. Remove the front left doorsill pressure plate assembly (
2. Remove the front left door opening weatherstrip (
).
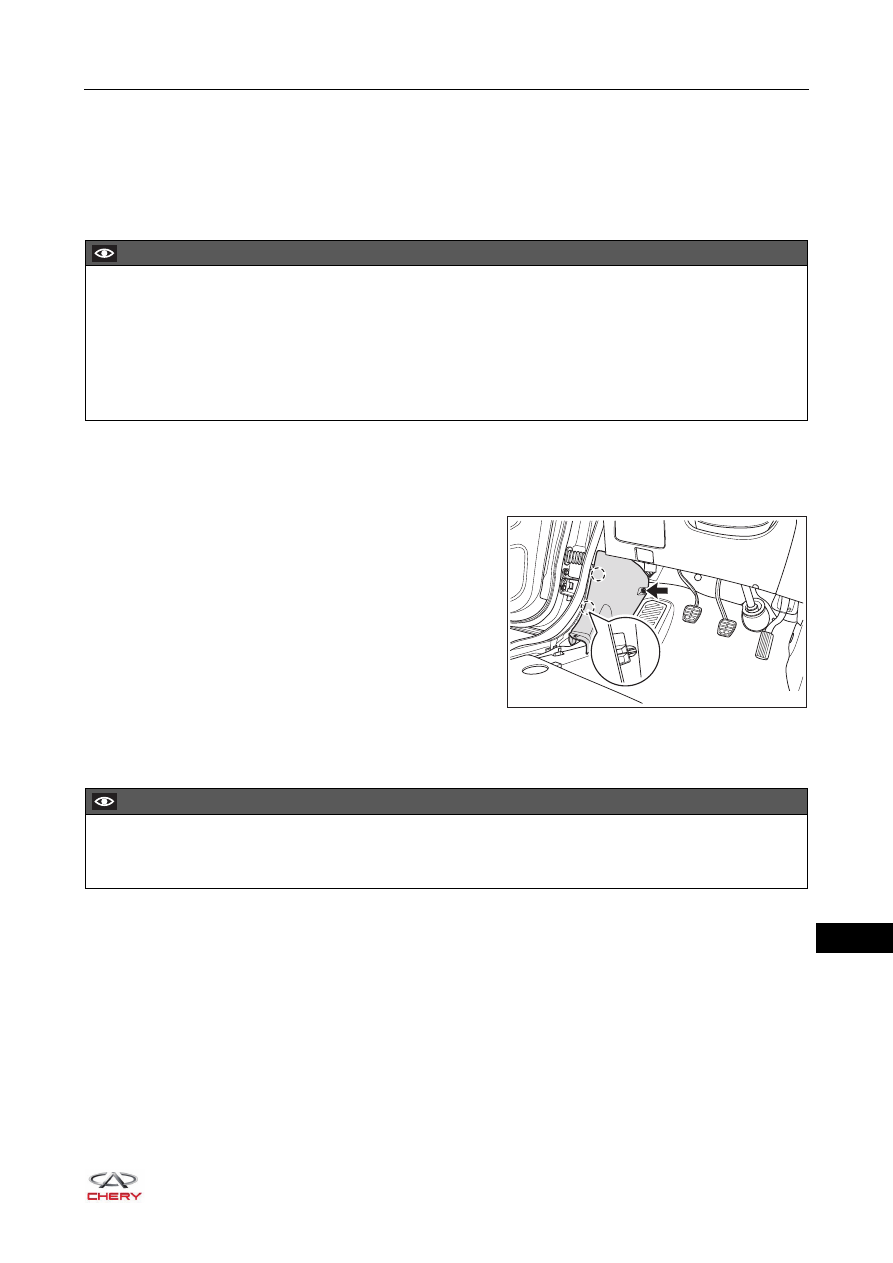
3. Remove the left A-pillar lower protector assembly.
a. Remove the fixing nut (arrow) from the A-pillar lower
protector assembly.
(Tightening torque: 5 ± 1 N·m)
b. Using an interior crow plate, pry up the claws of
A-pillar lower protector assembly, and remove the
A-pillar lower protector assembly.
Installation
Installation is in the reverse order of removal.
CAUTION
Make sure to wear safety equipment to prevent accidents when removing the A-pillar lower protector
assembly.
Appropriate force should be applied when removing the A-pillar lower protector assembly. Be careful not
to operate roughly.
Prevent interior and body paint from being scratched when removing the A-pillar lower protector
assembly.
RT21490110
CAUTION
A-pillar lower protector assembly and front door opening weatherstrip should be fitted closely after
installing A-pillar lower protector assembly.
49–
20
49
B-pillar Lower Protector Assembly
Removal
HINT:
Use the same procedures for the right side and left side.
Procedures listed below are for the left side.
1. Remove the front left doorsill pressure plate assembly (
2. Remove the front left door opening weatherstrip (
).
3. Remove the rear left doorsill pressure plate assembly (
4. Remove the rear left door opening weatherstrip (
5. Remove the left B-pillar lower protector assembly.
a. Using an interior crow plate, pry off the clips from the
B-pillar protector assembly, and remove the left
B-pillar lower protector assembly.
Installation
Installation is in the reverse order of removal.
CAUTION
Make sure to wear safety equipment to prevent accidents when removing the B-pillar lower protector
assembly.
Appropriate force should be applied when removing the B-pillar lower protector assembly. Be careful not
to operate roughly.
Prevent interior and body paint from being scratched when removing the B-pillar lower protector
assembly.
RT21490120
CAUTION
Make sure damaged clips are replaced and B-pillar lower protector assembly is installed in place when
installing B-pillar lower protector assembly.
B-pillar lower protector assembly and front and rear door opening weatherstrips should be fitted closely
after installing B-pillar lower protector assembly.
B-pillar lower protector assembly and front and rear doorsill pressure plate assemblies should be fitted
closely after installing B-pillar lower protector assembly.

49–
21
49
B-pillar Upper Protector Assembly
Removal
HINT:
Use the same procedures for the right side and left side.
Procedures listed below are for the left side.
1. Remove the front left doorsill pressure plate assembly (
2. Remove the front left door opening weatherstrip (
).
3. Remove the rear left doorsill pressure plate assembly (
4. Remove the rear left door opening weatherstrip (
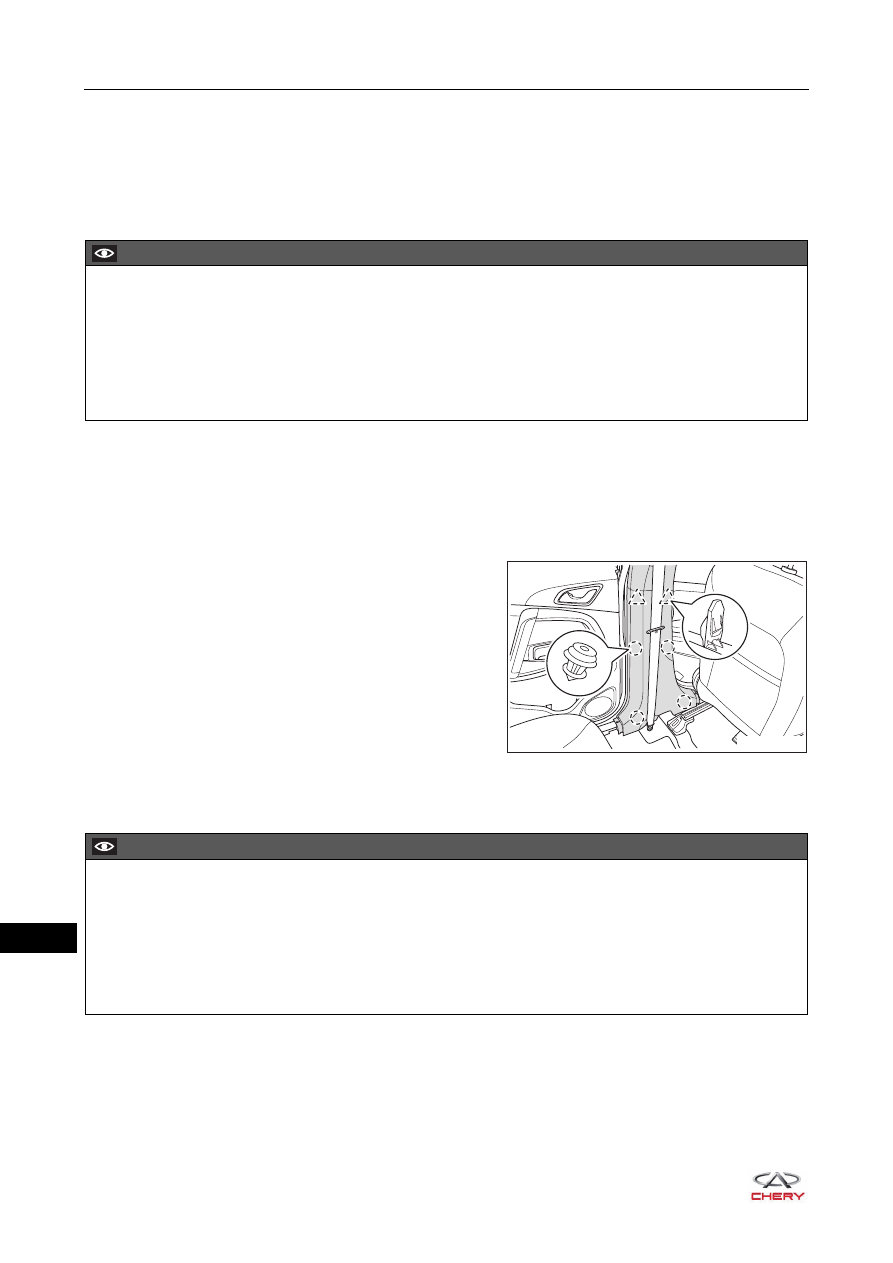
5. Loosen the lower part of front seat belt assembly.
a. Using a screwdriver wrapped with protective tape, pry
off the front seat belt assembly lower bolt protective
cap (arrow).
b. Remove the fixing bolt (arrow) from the lower part of
front seat belt assembly.
(Tightening torque: 50 ± 5 N·m)
6. Remove the left B-pillar lower protector assembly (
).
CAUTION
Make sure to wear safety equipment to prevent accidents when removing the B-pillar upper protector
assembly.
Appropriate force should be applied when removing the B-pillar upper protector assembly. Be careful not
to operate roughly.
Prevent interior and body paint from being scratched when removing the B-pillar upper protector
assembly.
RT21490330
RT21490340

49–
22
49
7. Remove the left B-pillar upper protector assembly.
a. Remove 2 fixing screws (arrow) from the B-pillar
upper protector assembly.
(Tightening torque: 1.5 ± 1 N·m)
b. Using an interior crow plate, pry off the clip from the
B-pillar upper protector assembly, pull out the front
seat belt from the B-pillar upper protector assembly,
and remove the left B-pillar upper protector assembly.
Installation
Installation is in the reverse order of removal.
RT21490130
CAUTION
Make sure damaged clip are replaced and B-pillar upper protector assembly is installed in place when
installing B-pillar upper protector assembly.
B-pillar upper protector assembly and front and rear door opening weatherstrips should be fitted closely
after installing B-pillar upper protector assembly.
B-pillar upper protector assembly and B-pillar lower protector assembly and roof headlining should be
fitted closely after installing B-pillar upper protector assembly.
Нет комментариевНе стесняйтесь поделиться с нами вашим ценным мнением.
Текст