Chery Tiggo 5 (T21). Service manual — part 495
46–
30
46
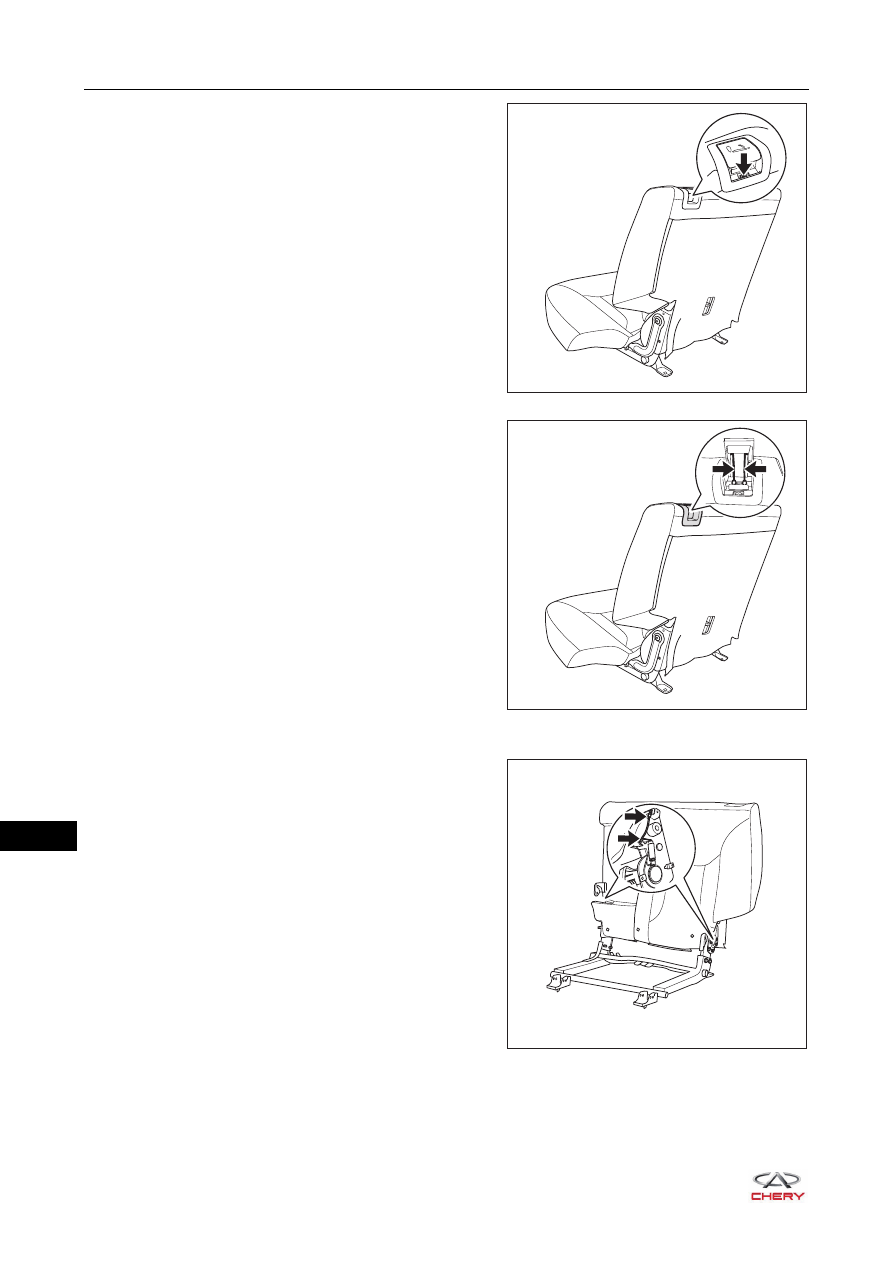
b. Remove the fixing screw (arrow) from the rear
seatback unlock mechanism assembly.
(Tightening torque: 4.8 ± 0.5 N·m)
c. Disconnect the rear seatback unlock mechanism
cables (arrow), and remove the rear seatback unlock
mechanism assembly.
6. Remove the rear seatback unlock mechanism cable.
a. Remove the rear seatback unlock mechanism cables
(arrow) from the groove as shown in the illustration.
RT21460430
RT21460440
RT21460431
46–
31
46
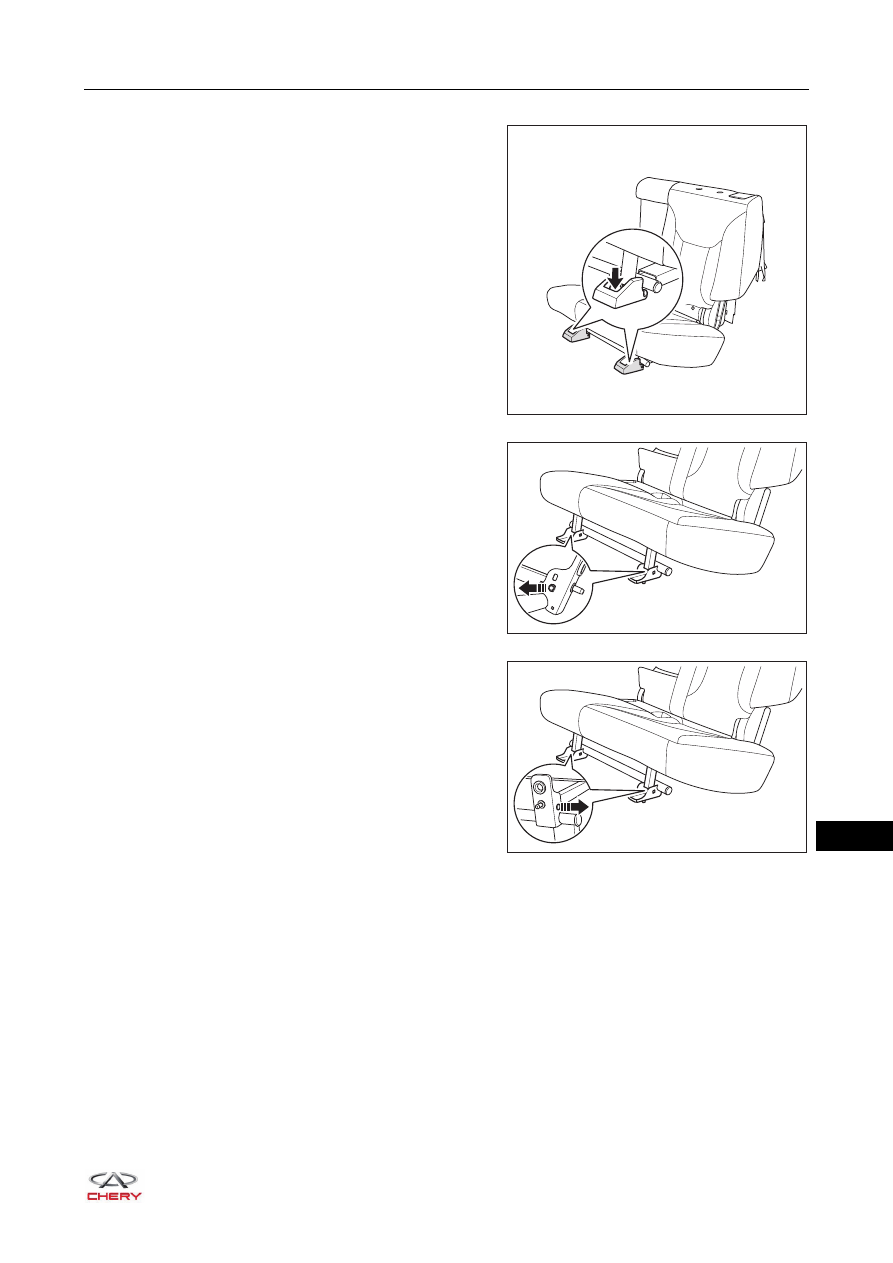
7. Separate the rear seat cushion assembly and seatback assembly.
a. Remove 2 fixing screws (arrow) from the rear seat
mounting foot cover assembly, and remove the rear
seat mounting foot cover assembly.
(Tightening torque: 4.8 ± 0.5 N·m)
b. Remove the snap ring in the direction of arrow as
shown in the illustration.
c. Pull out the coupling shaft in the direction of arrow as
shown in the illustration.
RT21460450
RT21460460
RT21460470
46–
32
46
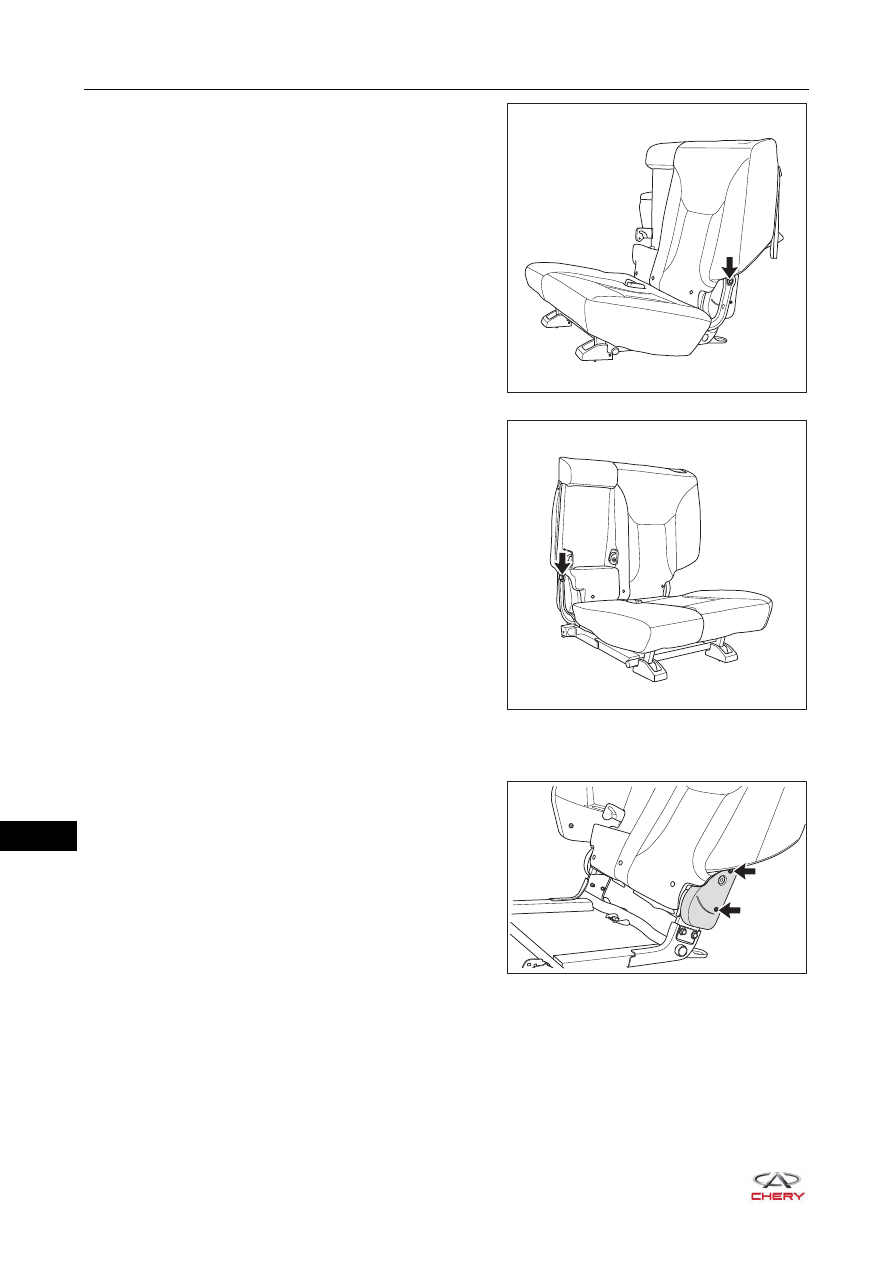
d. Remove the fixing bolt (arrow) between rear seat
cushion assembly and left side of seatback assembly.
(Tightening torque: 48 ± 4.8 N·m)
e. Remove the fixing bolt (arrow) between rear seat
cushion assembly and right side of seatback
assembly.
(Tightening torque: 48 ± 4.8 N·m)
f. Separate the rear seat cushion assembly and seatback assembly.
8. Remove the rear left seat folder mechanism assembly outer cover (take left side as an example).
a. Remove 2 fixing screws (arrow) from the rear left seat
folder mechanism assembly outer cover.
(Tightening torque: 4.8 ± 0.5 N·m)
b. Remove the rear left seat folder mechanism assembly
outer cover.
RT21460441
RT21460442
RT21460480
46–
33
46
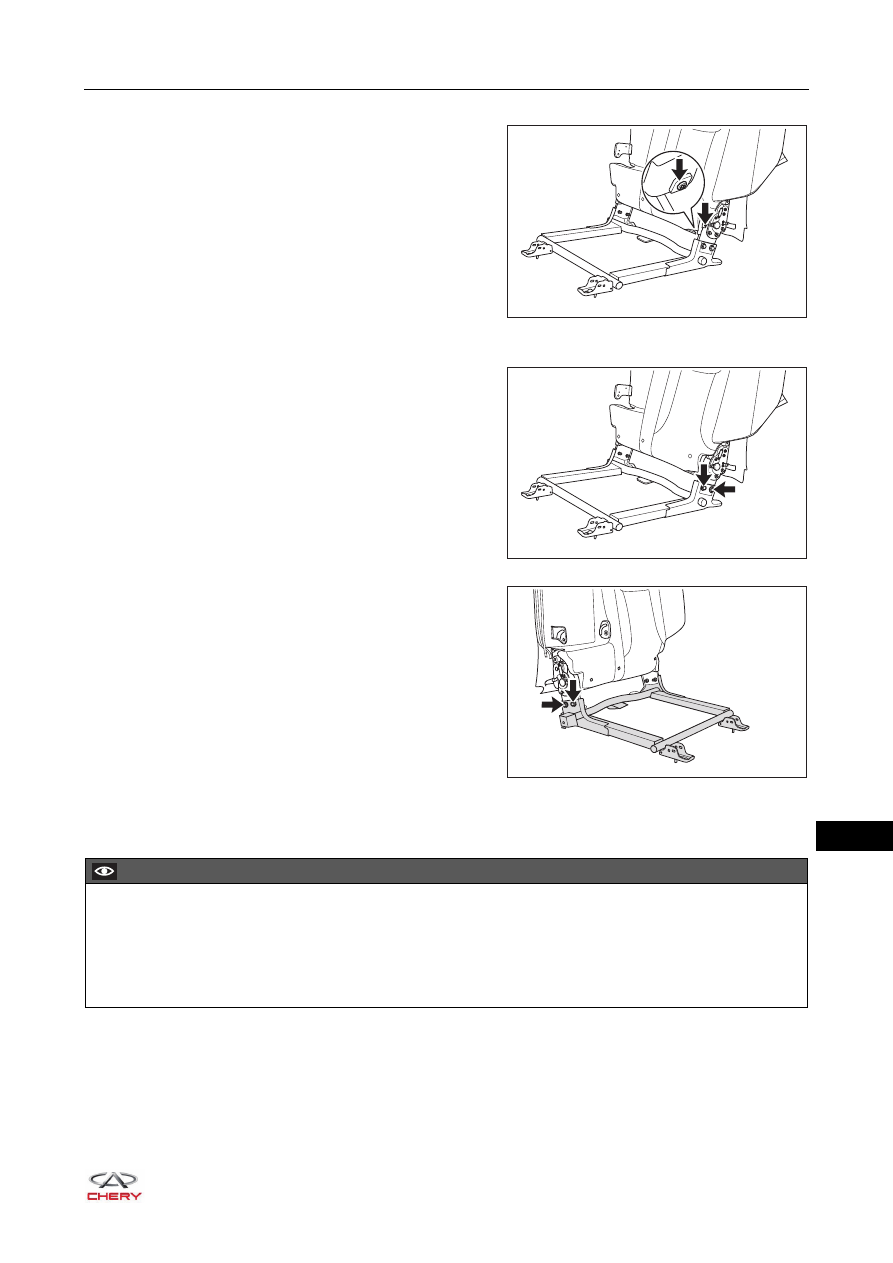
9. Remove the rear left seat reclining adjuster inner cover (take left side as an example).
a. Remove 2 fixing screws (arrow) from the rear left seat
reclining adjuster inner cover.
(Tightening torque: 4.8 ± 0.5 N·m)
b. Remove the rear left seat reclining adjuster inner
cover.
10.Remove the rear seat bracket assembly.
a. Remove 2 fixing bolts (arrow) from the left side of rear
seat bracket assembly.
(Tightening torque: 48 ± 4.8 N·m)
b. Remove 2 fixing bolts (arrow) from the right side of
rear seat bracket assembly.
(Tightening torque: 48 ± 4.8 N·m)
c. Remove the rear seat bracket assembly.
Assembly
Assembly is in the reverse order of disassembly.
RT21460500
RT21460520
RT21460530
CAUTION
Be sure to wear safety equipment to prevent accidents when assembling rear seat assembly.
Be careful not to damage the seat cover during assembly.
Replace the damaged hog rings during assembly.
Keep the seat cover clean and tidy, and try to prevent wrinkles during assembly.
Нет комментариевНе стесняйтесь поделиться с нами вашим ценным мнением.
Текст