Jaguar XJ (X350). Service manual — part 1047
Transmission - 4.2L NA V8 - AJV8/4.2L SC
V8 - AJV8/3.5L NA V8 - AJV8 (44.20.01)
Special Service Tools
Powertrain Assembly Jack
HTJ1200-2
Removal
1 . Place the selector lever in the N position.
2 . Disconnect the battery ground cable.
For additional information, refer to
3 . Remove the exhaust system.
For additional information, refer to
4
.
CAUTION: Under no circumstances must the flexible coupling (or its fixings) be
loosened or removed from the driveshaft.
CAUTION: Make sure the front of the driveshaft does not put an excessive load on
the center bearing. Failure to follow this instruction may result in damage to the vehicle.
Detach the driveshaft from the transmission flange.
Mark the position of the driveshaft in relation to the transmission flange.
Mark the position of each nut and bolt in relation to the transmission
flexible joint.
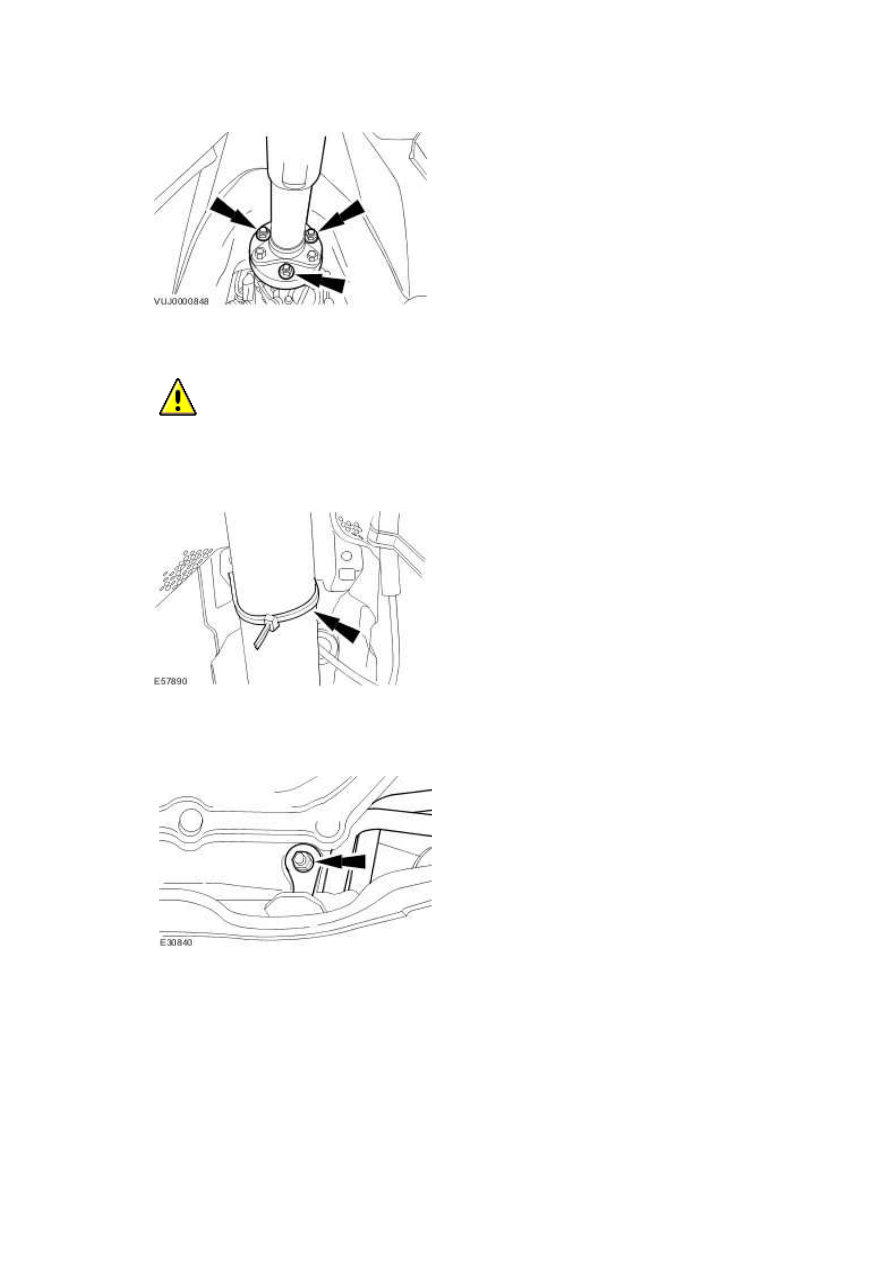
5
.
CAUTION: Make sure the front of the driveshaft does not put an excessive load on
the center bearing. Failure to follow this instruction may result in damage to the vehicle.
Using a suitable securing strap, reposition and support the driveshaft to the vehicle body.
6 . Detach the transmission fluid cooler tubes from the oil pan.
7 . Detach the transmission fluid cooler tubes.
1) Remove the retaining bolt.
2) Remove the retaining plate.
www.
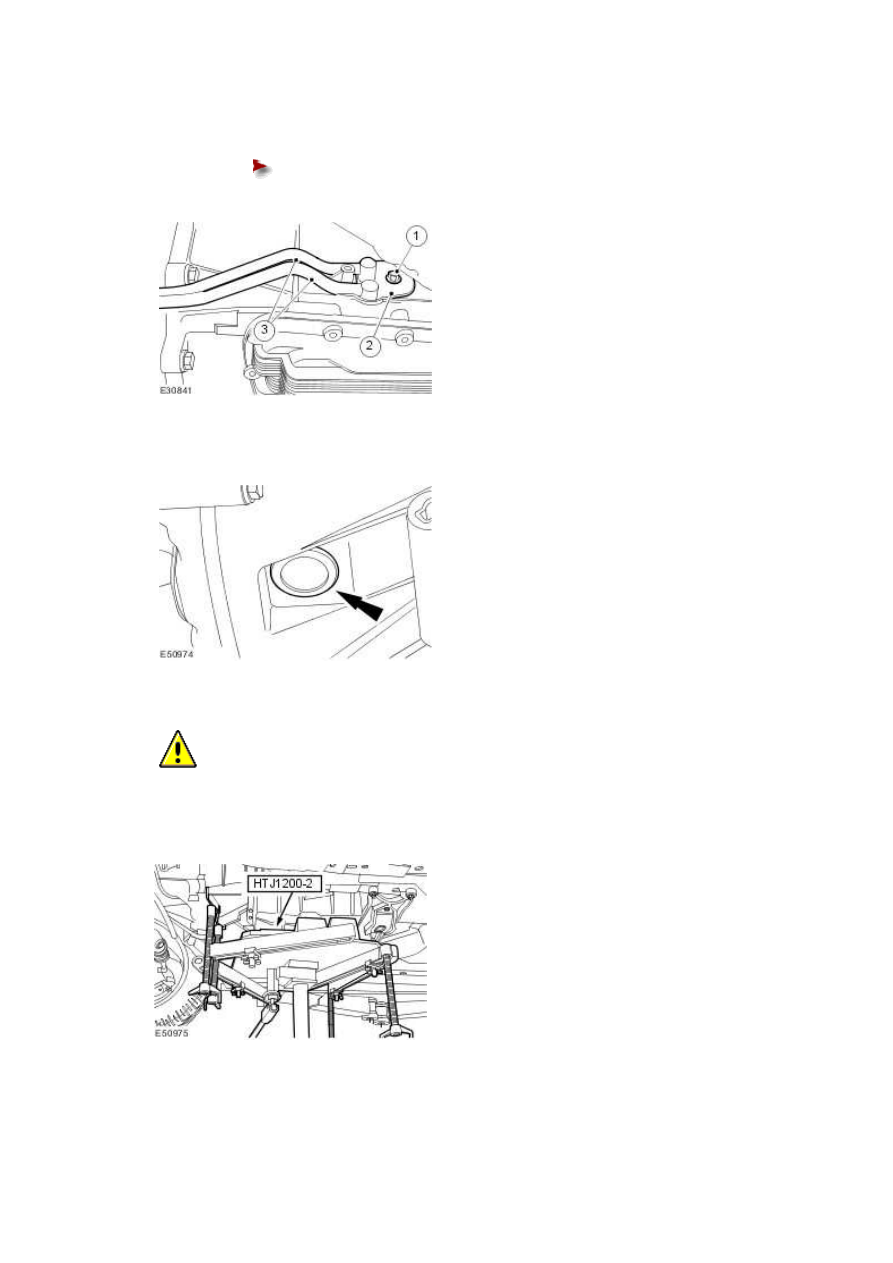
3) Detach the transmission fluid cooler tubes.
Allow the transmission fluid to drain into a suitable container.
8 . Remove the torque converter rubber inspection cover.
9
.
CAUTION: Make sure the automatic transmission weight is evenly supported on the
special tool. Failure to follow this instruction may result in damage to the vehicle.
Install the special tool.
10 Install the rubber blocks supplied with special tool HTJ1200-2, between the front subframe
and the oil pan.
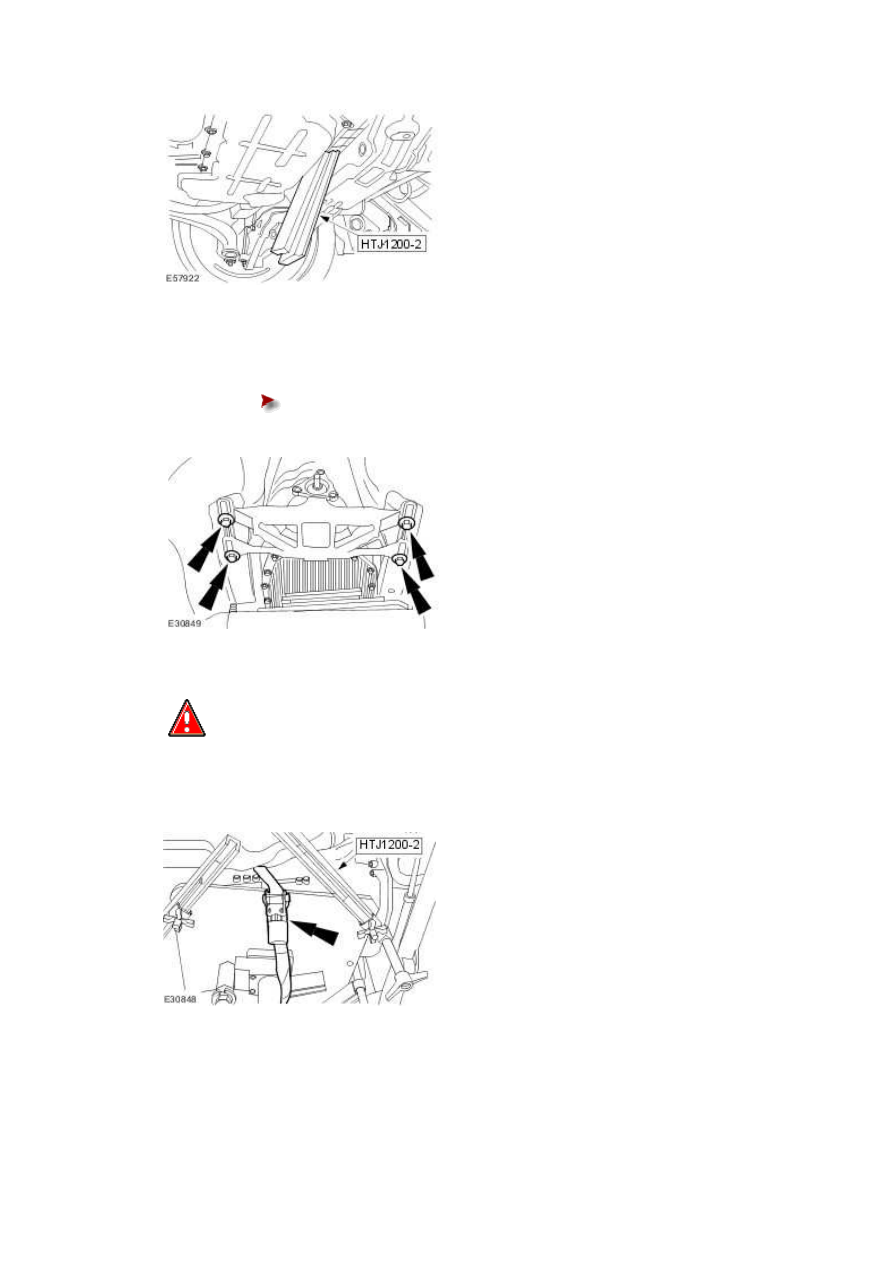
.
11 . Lower the rear of the transmission.
Remove the automatic transmission support retaining bolts.
12
.
WARNING: Secure the automatic transmission to the special tool using the tie
down straps. Failure to follow this instruction may result in personal injury.
Install the tie down strap.
13 . Detach the selector lever cable.
www.
Нет комментариевНе стесняйтесь поделиться с нами вашим ценным мнением.
Текст