Toyota FJ Cruiser (GSJ 10, 15 series). Manual — part 460
SE–22
SEAT – FRONT SEAT ASSEMBLY
SE
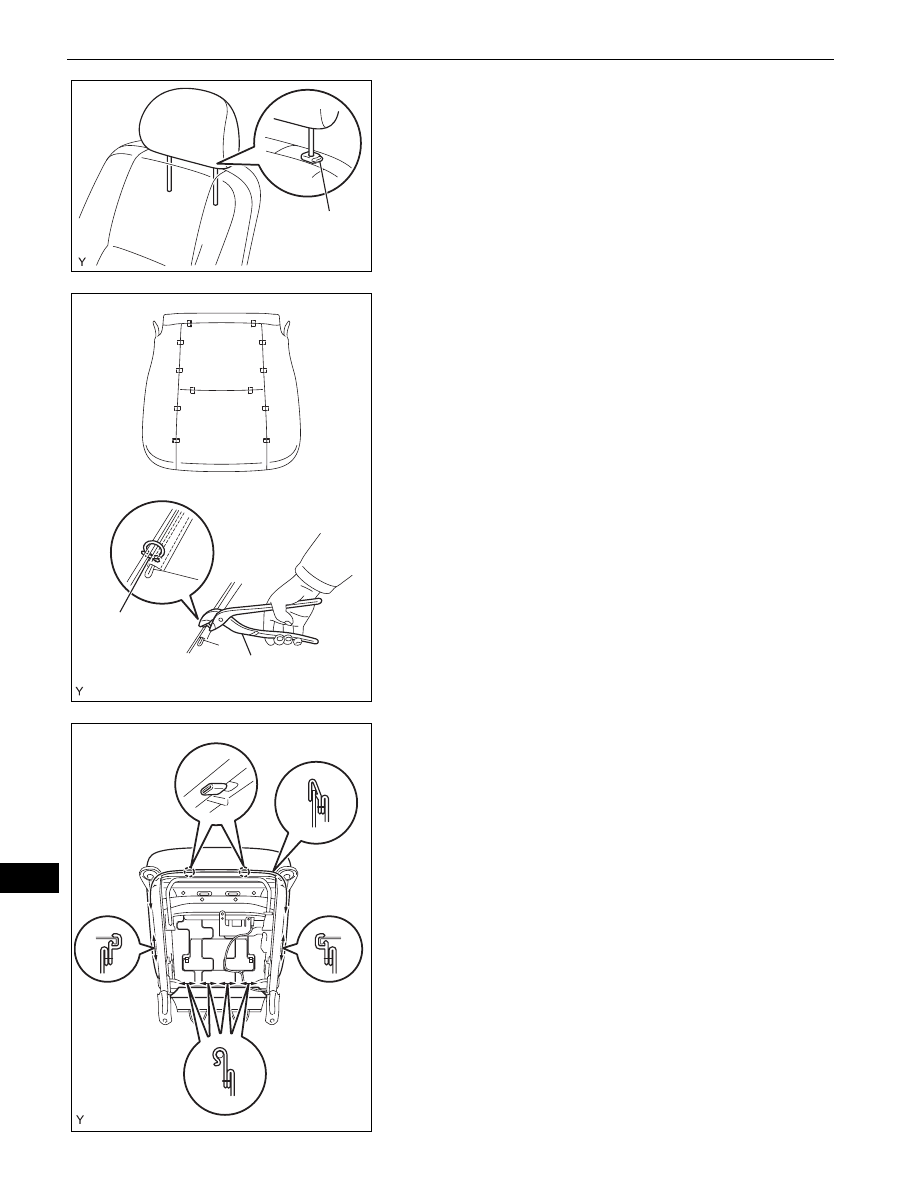
18. INSTALL FRONT SEAT HEADREST ASSEMBLY
(a) Push in the lock button of the front seat headrest
support and install the front seat headrest.
19. INSTALL FRONT SEAT CUSHION COVER
(a) Using hog ring pliers, install the front seat cushion
cover with 12 new hog rings.
NOTICE:
•
Do not soil or scratch the front seat cushion
cover.
•
When installing the hog rings, minimize
wrinkles as far as possible.
20. INSTALL FRONT SEAT CUSHION ASSEMBLY
(a) Engage the 2 claws and the 7 hooks and install the
front seat cushion.
Lock Button
B130684E01
New Hog Ring
Hog Ring Pliers
B130683E01
B130681
SEAT – FRONT SEAT ASSEMBLY
SE–23
SE
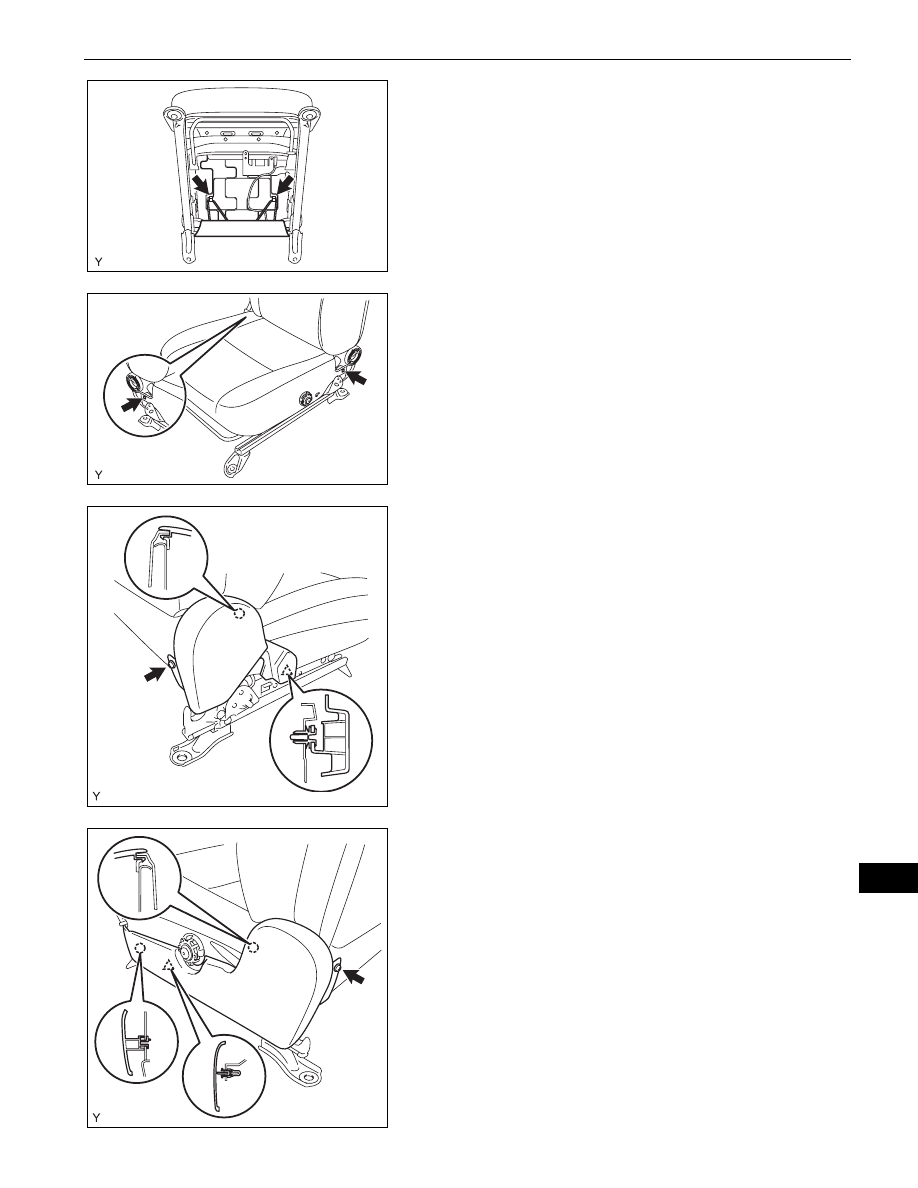
(b) Install the 2 front seatback cover bands.
(c) Install the 2 clips.
21. INSTALL FRONT SEAT CUSHION INNER SHIELD
(a) Engage the claw and the clip and install the front
seat cushion inner shield.
(b) Tighten the screw.
22. INSTALL FRONT SEAT INNER BELT ASSEMBLY (See
page
23. INSTALL FRONT SEAT CUSHION OUTSIDE SHIELD
(a) Engage the 2 claws and the clip and install the front
seat cushion outside shield.
(b) Tighten the screw.
B130680
B130701
B130678
B130676
SE–24
SEAT – FRONT SEAT ASSEMBLY
SE
24. INSTALL RECLINING ADJUSTER RELEASE HANDLE
(a) Engage the claw and install the reclining adjuster
release handle.
25. INSTALL VERTICAL SEAT ADJUSTER HANDLE (for
Driver Side)
(a) Install the vertical seat adjuster handle with the 2
screws.
26. INSTALL VERTICAL SEAT ADJUSTER HANDLE
COVER (for Driver Side)
(a) Engage the 3 claws and install the vertical seat
adjuster handle cover.
27. INSTALL VERTICAL SEAT ADJUSTER KNOB (for
Driver Side)
(a) Engage the snap ring and install the vertical seat
adjuster knob.
B130674
B130672
B130671
B130669

SEAT – FRONT SEAT ASSEMBLY
SE–25
SE
INSTALLATION
HINT:
The procedure described below is for the driver side. Use the
same procedure for both the driver and front passenger
sides, unless otherwise specified.
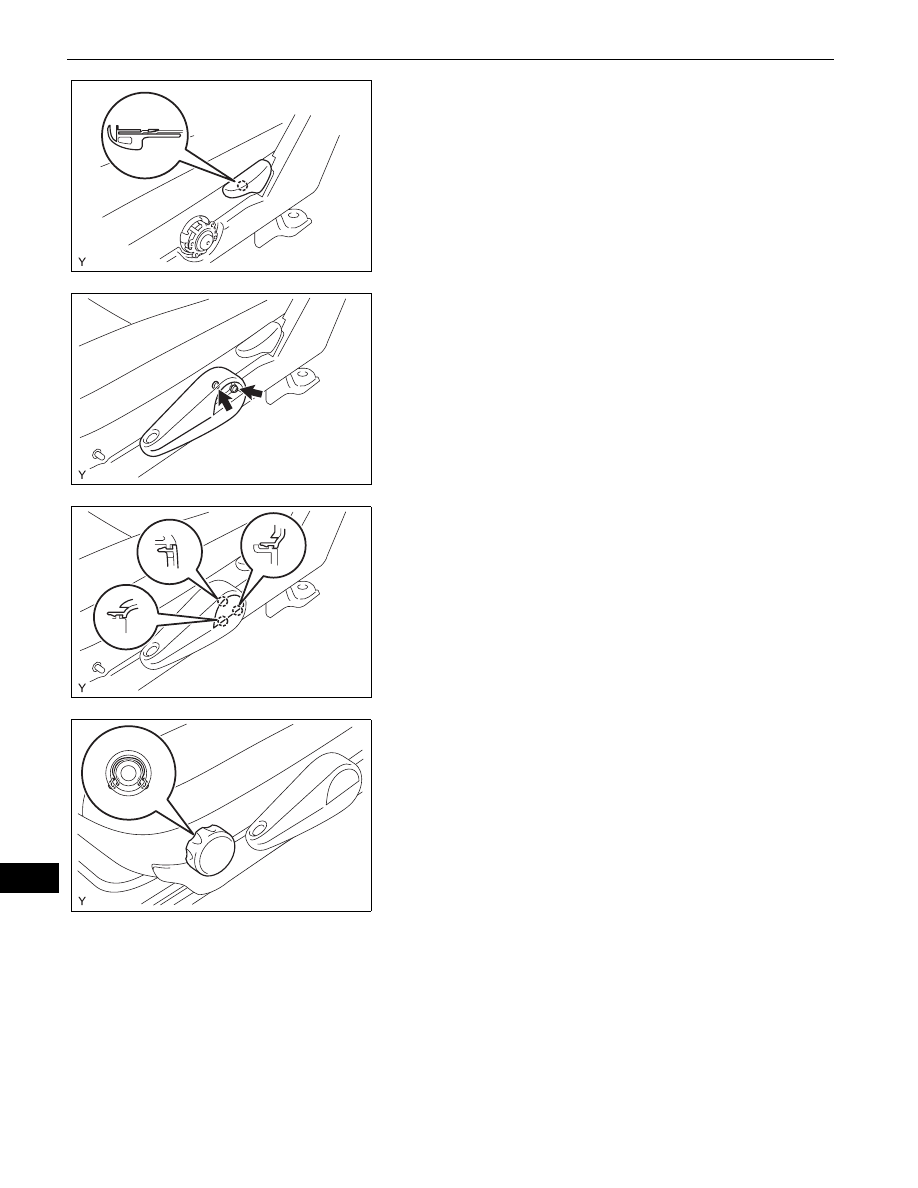
1.
INSTALL FRONT SEAT ASSEMBLY
NOTICE:
Follow the procedure described below in order to
prevent the seat tracks from locking separately.
(a) Insert the 2 locating pins through the 2 body holes,
place the front seat in the most rearward position
and make sure that the inner and outer seat tracks
are locked securely.
(b) Tighten bolt 1 and then bolt 2 onto the front side.
Torque: 37 N*m (375 kgf*cm, 27 ft.*lbf)
(c) Move the front seat to the most forward position,
and then make sure that the inner and outer seat
tracks are locked securely.
(d) Tighten bolt 3 and then bolt 4 onto the rear side.
Torque: 37 N*m (375 kgf*cm, 27 ft.*lbf)
(e) Make sure that the inner and outer seat tracks lock
simultaneously after the seat is moved.
HINT:
If the inner and outer seat tracks do not lock
simultaneously, loosen the bolts and adjust the seat
tracks.
(f)
for Driver Side:
(1) Connect the 2 buckle switch connectors.
(2) w/ Front Seat Side Airbag:
1. Connect the airbag connector.
(3) Install the clamp.
1
2
4
3
B130666E01
B135118
Нет комментариевНе стесняйтесь поделиться с нами вашим ценным мнением.
Текст