Lexus ES300 (2002 year). Service manual — part 272

01041-03
D26606
A
B
D26143
A
D26742
B
01-4
-
INTRODUCTION
IDENTIFICATION INFORMATION
4
2002 LEXUS ES300 REPAIR MANUAL (RM911U)
IDENTIFICATION INFORMATION
VEHICLE IDENTIFICATION AND SERIAL NUMBERS
1.
VEHICLE IDENTIFICATION NUMBER
(a)
The vehicle identification number is stamped on the ve-
hicle identification number plate and the certification la-
bel, as shown in the illustration.
A: Vehicle Identification Number Plate
B: Certification Label
2.
ENGINE SERIAL NUMBER AND TRANSAXLE SERIAL
NUMBER
(a)
The engine serial number is stamped on the cylinder
block of the engine, and the transaxle serial number is
stamped on the housing, as shown in the illustration.
A: Engine Serial Number
B: Transaxle Serial Number
0109P-01
1
2
3
4
6
5
D25016
-
INTRODUCTION
REPAIR INSTRUCTION
01-5
5
2002 LEXUS ES300 REPAIR MANUAL (RM911U)
REPAIR INSTRUCTION
PRECAUTION
1.
BASIC REPAIR HINT
(a)
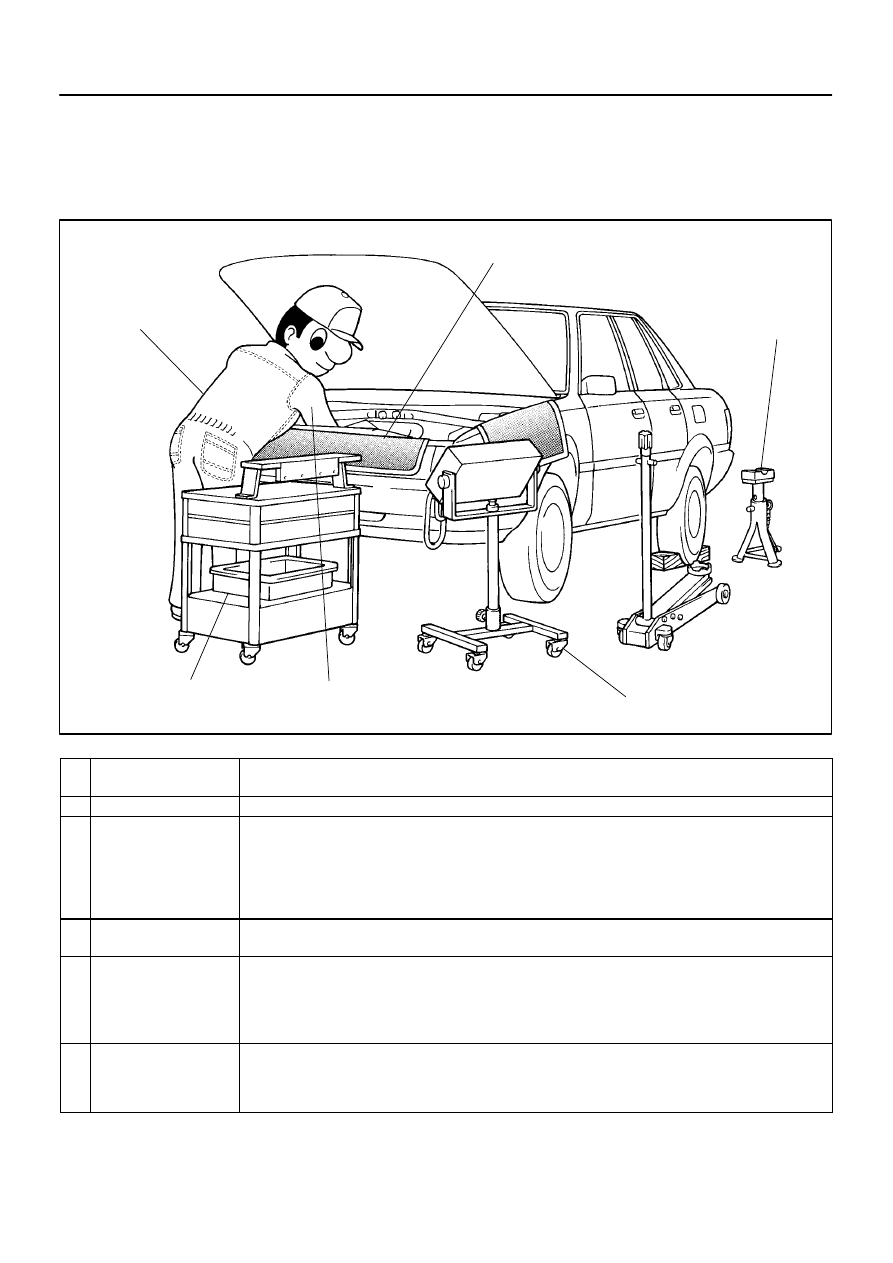
HINTS ON OPERATIONS
1
Looks
Always wear a clean uniform.
Hat and safety shoes must be worn.
2
Vehicle protection
Set a grill cover, fender cover, seat cover and floor mat before starting the operation.
3
Safe operation
In case of working with 2 or more persons, be sure to check safety of one another.
When working with the engine running, pay attention to the ventilation of the workshop.
In case of operating on a high-temperature parts, rotating, moving and vibrating parts, pay attention to not
burn or injure yourself.
When jacking up the vehicle, be sure to support the specified location with a safety stand.
When lifting up the vehicle, apply a safety equipment.
4
Preparation of tools and
measuring gauge
Before starting operation, prepare a tool stand, SST, gauge, oil, shop rag and parts for replacement.
5
Removal and installation,
disassembly and assem-
bly operations
Diagnose with a thorough understanding of the trouble phenomenon and perform effective operations.
Before removing the parts, check the assembly for general condition, deformation and damage.
When the structure is complicated, take a note for general put matchmarks so as not to make mistakes that
aftect the function of the parts.
Clean and wash the removed parts if necessary, and assemble them after a thorough check.
6
Removed parts
Place the removed parts in the correct order to avoid mixing up or making them dirty.
As for non-reusable parts such as gasket, O-ring, and self lock nut, change them to new ones following the
instruction of this manual.
Sort out the parts for replacement in a box and show them to the customer.
(b)
JACKING UP AND SUPPORTING VEHICLE
(1)
Care must be taken when jacking up and supporting the vehicle. Be sure to lift and support the
vehicle at the proper locations (See page
Z11554
Seal Lock Adhesive
BE1367
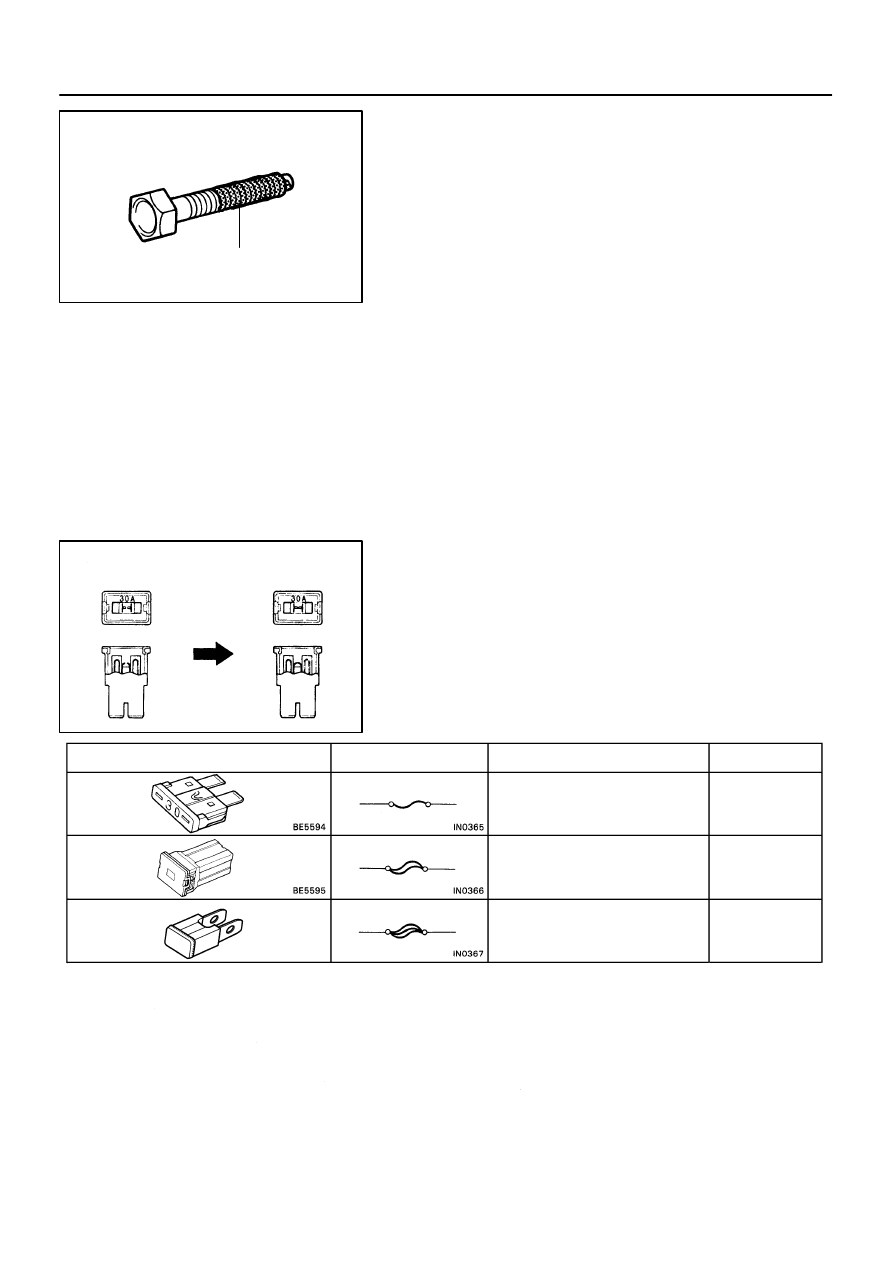
Medium Current Fuse and High Current
Fuse Equal Amperage Rating
D27353
V35001
Illustration
Symbol
Part Name
Abbreviation
FUSE
MEDIUM CURRENT FUSE
HIGH CURRENT FUSE
FUSE
M-FUSE
H-FUSE
01-6
-
INTRODUCTION
REPAIR INSTRUCTION
6
2002 LEXUS ES300 REPAIR MANUAL (RM911U)
(c)
PRECOATED PARTS
(1)
Precoated parts are bolts, nuts, etc. that are coated
with a seal lock adhesive at the factory.
(2)
If a precoated part is retightened, loosened or
caused to move in any way, it must be recoated with
the specified adhesive.
(3)
When reusing precoated parts, clean off the old
adhesive and dry the part with compressed air.
Then apply the specified seal lock adhesive to the
bolt, nut or threads.
NOTICE:
Perform the torque checking with the lower limit value of
the torque tolerance.
(4)
Depending on the seal lock agent to apply, there
may be a case where it is necessary to leave it for
a specified time until it hardens.
(d)
GASKETS
(1)
When necessary, use a sealer on gaskets to prevent leaks.
(e)
BOLTS, NUTS AND SCREWS
(1)
Carefully observe all the specifications for tightening torques. Always use a torque wrench.
(f)
FUSES
(1)
When replacing fuses, be sure that a new fuse has
the correct amperage rating. DO NOT exceed the
rating, or use one with a lower rating.
D25786
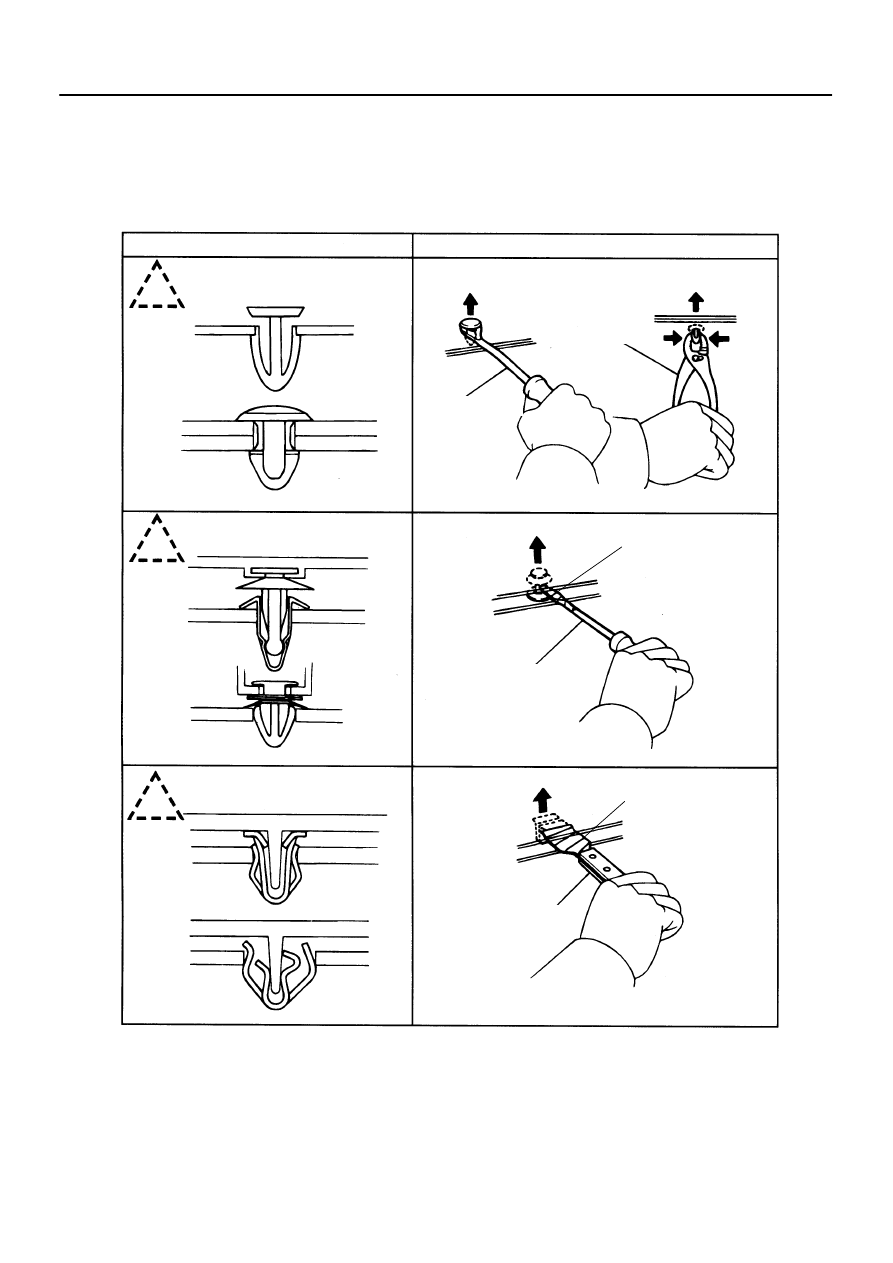
Shape (Example)
Removal/Installation
Clip Remover
Pliers
Screwdriver
Scraper
Protective Tape
Clip
Protective Tape
-
INTRODUCTION
REPAIR INSTRUCTION
01-7
7
2002 LEXUS ES300 REPAIR MANUAL (RM911U)
(g)
CLIPS
(1)
The removal and installation methods of typical clips used in body parts are shown in the table
below.
HINT:
If the clip is damaged during the operation, always replace it with a new clip.
Нет комментариевНе стесняйтесь поделиться с нами вашим ценным мнением.
Текст