Lexus ES300 (2002 year). Service manual — part 140

2002
All rights reserved. This book may not be
reproduced or copied, in whole or in part, without the
written permission of Toyota Motor Corporation.
FOREWORD
This manual has been prepared for use when
performing terminal repairs, wire repairs, or connector
repairs on vehicles.
A step–by–step section on connector repair and
terminal repair is included.
There is a section of charts with terminal and connector
illustrations, part numbers, and notes on terminal
removal.
By using this guide, a satisfactory repair of the wiring
harness and connectors in Toyota vehicles will be easy
to achieve.
All information in this manual is based on the latest
product information at the time of publication. However,
specifications and procedures are subject to change
without notice.
Push
Equal Amperage Rating
A–8
INTRODUCTION–CIRCUIT PROTECTION
9
Wire Harness Repair Manual (RM1022E)
CIRCUIT PROTECTION
All electrical circuits are protected against excessive loads which might occur because of shorts or
overloads in the wiring system. Such protection is provided by a fuse, circuit breaker, or fusible link, A
short circuit may cause a fuse to blow or a circuit breaker to open.
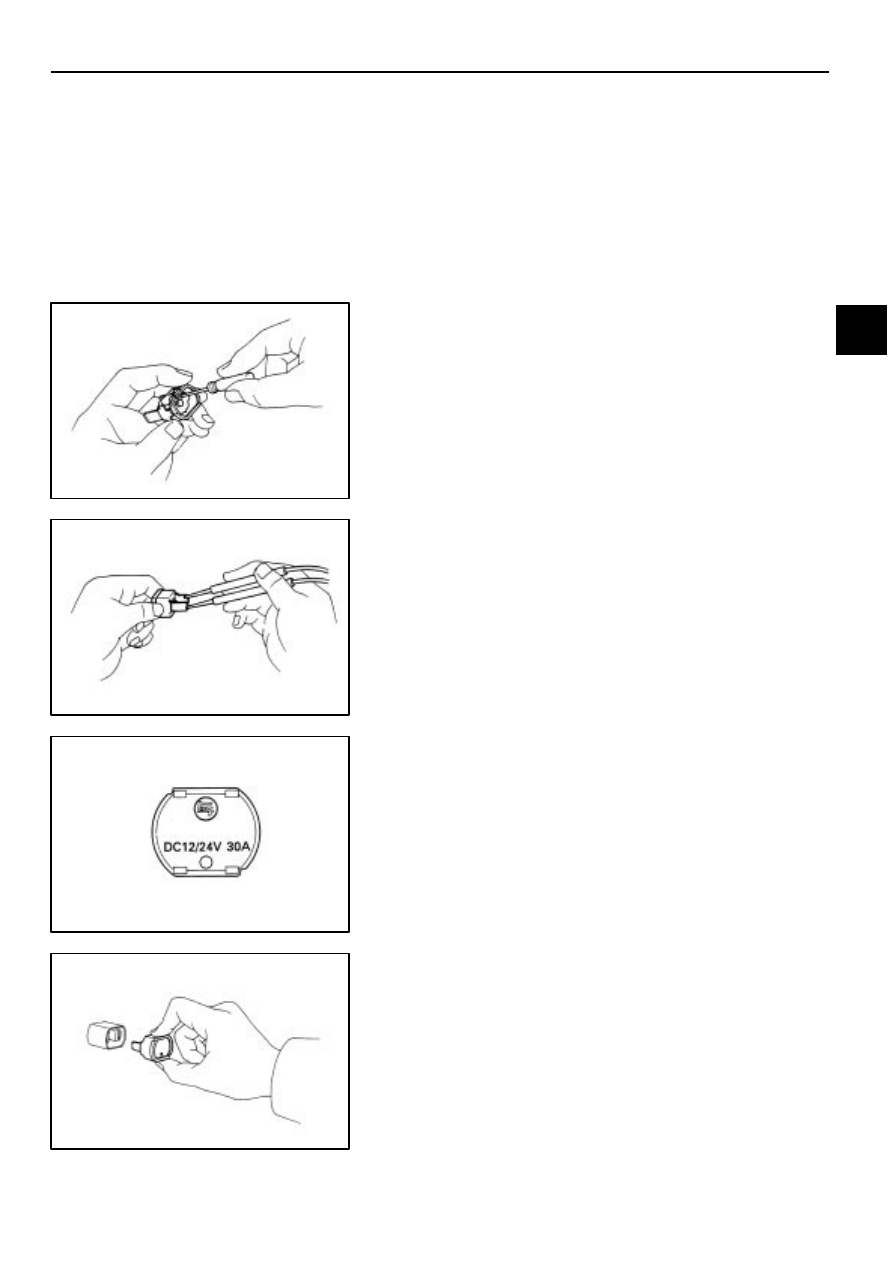
RESET CIRCUIT BREAKER
1.
Remove Circuit Breaker
(a)
Disconnect the negative (–) cable from the battery.
(b)
Remove the circuit breaker.
2.
Reset Circuit Breaker
(a)
Insert the needle into the reset hole and push it.
(b)
Using an ohmmeter, check that there is continuity
between both terminals of the circuit breaker.
If continuity is not as specified, replace the circuit breaker.
HINT:
If replacing the circuit breaker, be sure to replace
it with a breaker with an equal amperage rating.
3.
Install Circuit Breaker
(a)
Install the circuit breaker.
(b)
Connect the negative (–) cable to the battery.
HINT:
If a circuit breaker continues to cut out, a short
circuit is indicated. Have the system checked by a qualified
technician.
A

Equal Amperage Rating
Equal Amperage Rating
Puller
INTRODUCTION–CIRCUIT PROTECTION
A–9
10
Wire Harness Repair Manual (RM1022E)
REPLACEMENT OF FUSE AND FUSIBLE LINK
HINT:
If replacing the fuse or fusible link, be sure to
replace it with a fuse or fusible link with an equal amperage
rating.
NOTICE:
1.
Turn off all electrical components and the ignition
switch before replacing a fuse or fusible link. Do
not exceed the fuse or fusible link amperage rating.
2.
Always use a fuse puller for removing and
inserting a fuse. Remove and insert straight in and
out without twisting. Twisting could force open the
terminals too much, resulting in a bad connection.
If a fuse or fusible link continues to blow, a short circuit is
indicated. The system must be checked by a qualified
technician.
HINT:
The puller is located at Junction Block No.2.
A
TERMINAL AND CONNECTOR REPAIR–CONNECTOR REPAIR
B–2
12
Wire Harness Repair Manual (RM1022E)
CONNECTOR REPAIR
The repair parts now in supply are limited to those connectors having common shapes and terminal
cavity numbers. Therefore, when there is no available replacement connector of the same shape or
terminal cavity number, please use one of the alternative methods described below. Make sure that the
terminals are placed in the original order in the connector cavities, if possible, to aid in future diagnosis.
1. When a connector with a different number of terminals than the original part is used, select a connector
having more terminal cavities than required, and replace both the male and female connector parts.
EXAMPLE:
You need a connector with six terminals, but the only replacement available is a connector
with eight terminal cavities. Replace both the male and female connector parts with the eight terminal part,
transferring the terminals from the old connectors to the new connectors.
2. When several different type terminals are used in one connector, select an appropriate male and female
connector part for each terminal type used, and replace both male and female connector parts.
EXAMPLE:
You need to replace a connector that has two different types of terminals in one connector.
Replace the original connector with two new connectors, one connector for one type of terminal, another
connector for the other type of terminal.
3. When a different shape of connector is used, first select from available parts a connector with the
appropriate number of terminal cavities, and one that uses terminals of the same size as, or larger than,
the terminal size in the vehicle. The wire lead on the replacement terminal must also be the same size as,
or larger than, the nominal size of the wire in the vehicle. (”Nominal” size may be found by looking at the
illustrations in the section F or by direct measurement across the diameter of the insulation). Replace all
existing terminals with the new terminals, then insert the terminals into the new connector.
EXAMPLE:
You need to replace a connector that is round and has six terminal cavities. The only round
replacement connector has three terminal cavities. You would select a replacement connector that has
six or more terminal cavities and is not round, then select terminals that will fit the new connector. Replace
the existing terminals, then insert them into the new connector and join the connector together.
B
Нет комментариевНе стесняйтесь поделиться с нами вашим ценным мнением.
Текст