Lexus ES300 (1997 year). Service manual — part 87

AUTOMATIC TRANSAXLE
VALVE BODY
-
AX-75
2.
REMOVE LOCK PLATE
3.
REMOVE B
0
ACCUMULATOR ASSEMBLY
(a)
Remove the 3 bolts.
(b)
Remove the B
0
accumulator assembly.
4.
DISASSEMBLE B
0
ACCUMULATOR ASSEMBLY
(a)
Applying compressed air to the cylinder hole, remove the
piston and spring.
(b)
Remove the 2 O-rings from the piston.
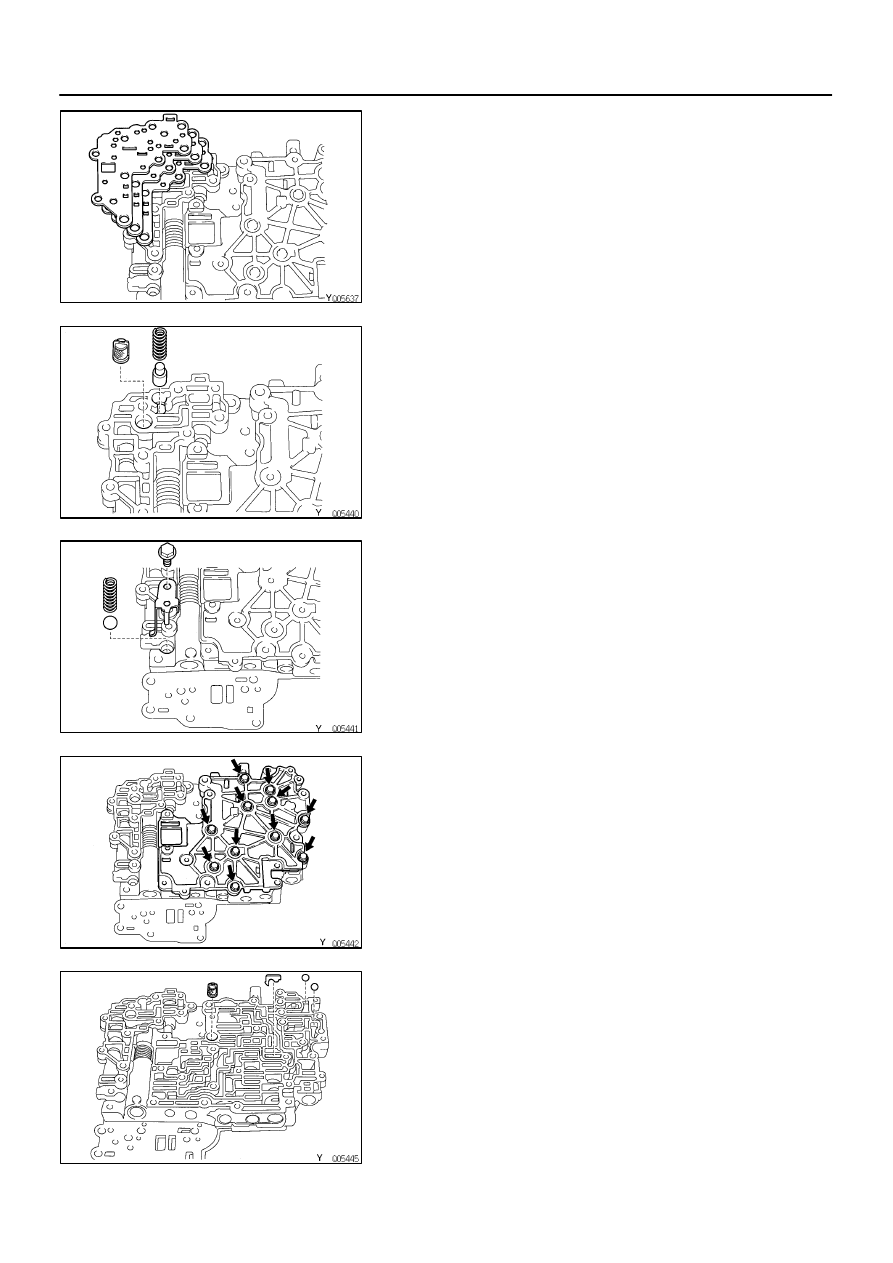
5.
REMOVE NO.4 SOLENOID
(a)
Remove the No.4 solenoid.
(b)
Remove the O-ring from the solenoid.
6.
REMOVE NO.1 LOWER VALVE BODY COVER
Remove the 5 bolts and No.1 lower valve body cover.
AUTOMATIC TRANSAXLE
VALVE BODY
-
AX-76
7.
REMOVE OIL STRAINER, NO.1 LOWER VALVE BODY
COVER GASKETS AND CHECK VALVE
(a)
Remove the 2 gaskets and plate from the lower valve
body.
(b)
Remove the oil strainer, check valve and spring.
8.
REMOVE PRESSURE RELIEF VALVE
9.
REMOVE NO.2 LOWER VALVE BODY COVER, OIL
STRAINER, CHECK BALLS AND VIBRATING STOP-
PER
Remove the 11 bolts and lower valve body cover.
(b)
Remove the 2 check balls, oil strainer and vibrating stop-
per.
AUTOMATIC TRANSAXLE
VALVE BODY
-
AX-77
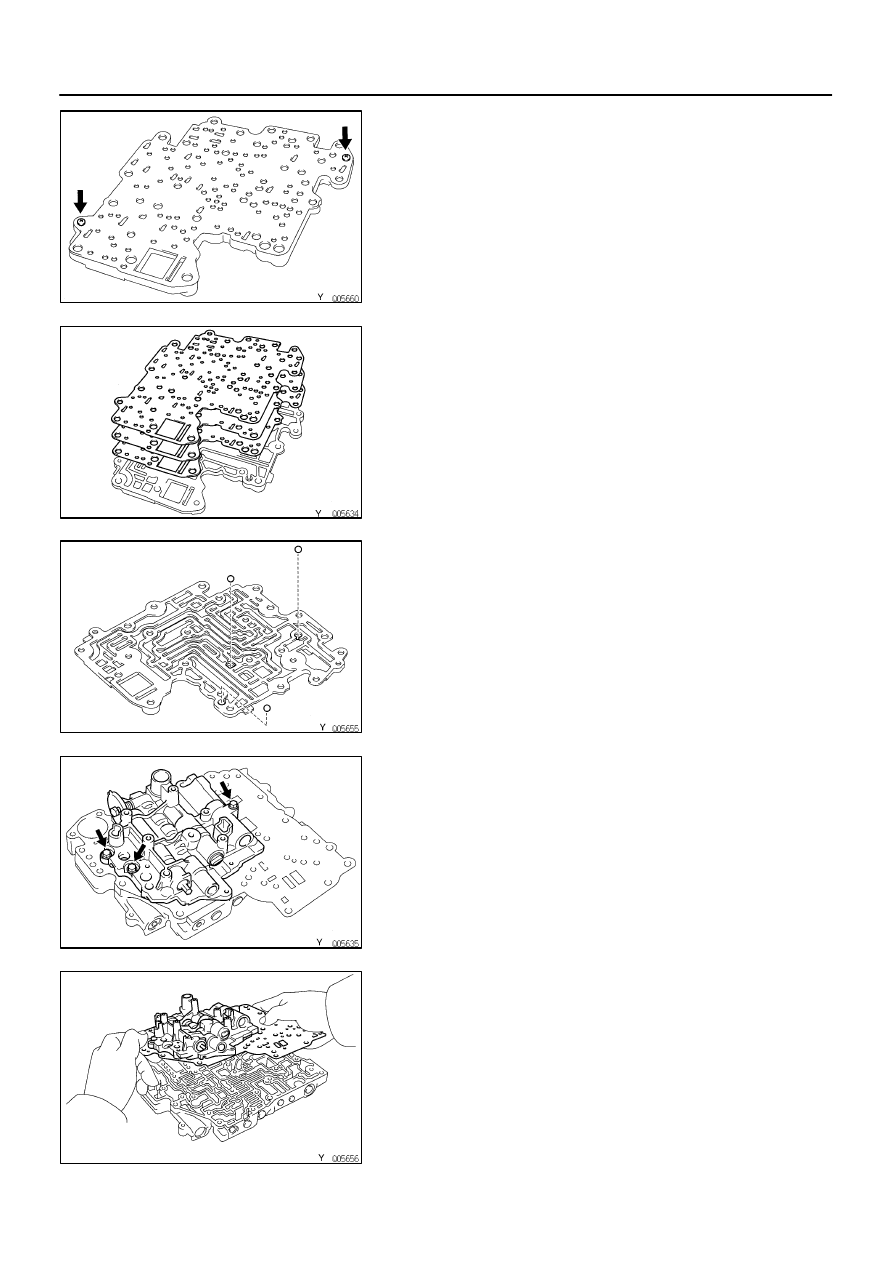
10. REMOVE NO.2 LOWER VALVE BODY COVER GAS-
KETS AND CHECK BALLS
(a)
Remove the 2 screws from the lower valve body cover.
(b)
Remove the 2 gaskets and plate.
(c)
Remove the 3 check balls from the cover.
11. REMOVE BOLTS FROM UPPER VALVE BODY
Remove the 3 bolts.
12. LIFT OFF UPPER VALVE BODY AND NO.1 PLATE AS
A SINGLE UNIT
Hold No.1 plate to the upper valve body and lift off the up-
per valve body.
HINT: Be careful that the check balls and oil strainer do
not fall out.

AUTOMATIC TRANSAXLE
VALVE BODY
-
AX-78
13. REMOVE 2 CHECK BALLS AND VIBRATING STOP-
PER FROM UPPER VALVE BODY
14. REMOVE 2 OIL STRAINERS AND CHECK BALL FROM
LOWER VALVE BODY
VALVE BODY ASSEMBLY
1.
INSTALL 2 CHECK BALLS AND VIBRATING STOP-
PER TO UPPER VALVE BODY
2.
INSTALL 2 OIL STRAINERS AND CHECK BALL TO
LOWER VALVE BODY
3.
POSITION PLATE AND NEW GASKETS ON UPPER
VALVE BODY
Position new No.1 gasket, plate and the new No.2 gasket
on the upper valve body.
HINT: Since No.1 gasket and No.2 gasket are similar, use
the illustration below to discriminate between them.
AX0TX-01
Нет комментариевНе стесняйтесь поделиться с нами вашим ценным мнением.
Текст