Lexus ES300 (1997 year). Service manual — part 527
S05036
Vacuum Gauge
SF06B–01
S05037
Approx.
26.7 kPa
Pull
SF–42
–
SFI
ACOUSTIC CONTROL INDUCTION SYSTEM (ACIS)
893
1997 LEXUS ES300 (RM511U)
ACOUSTIC CONTROL INDUCTION
SYSTEM (ACIS)
ON–VEHICLE INSPECTION
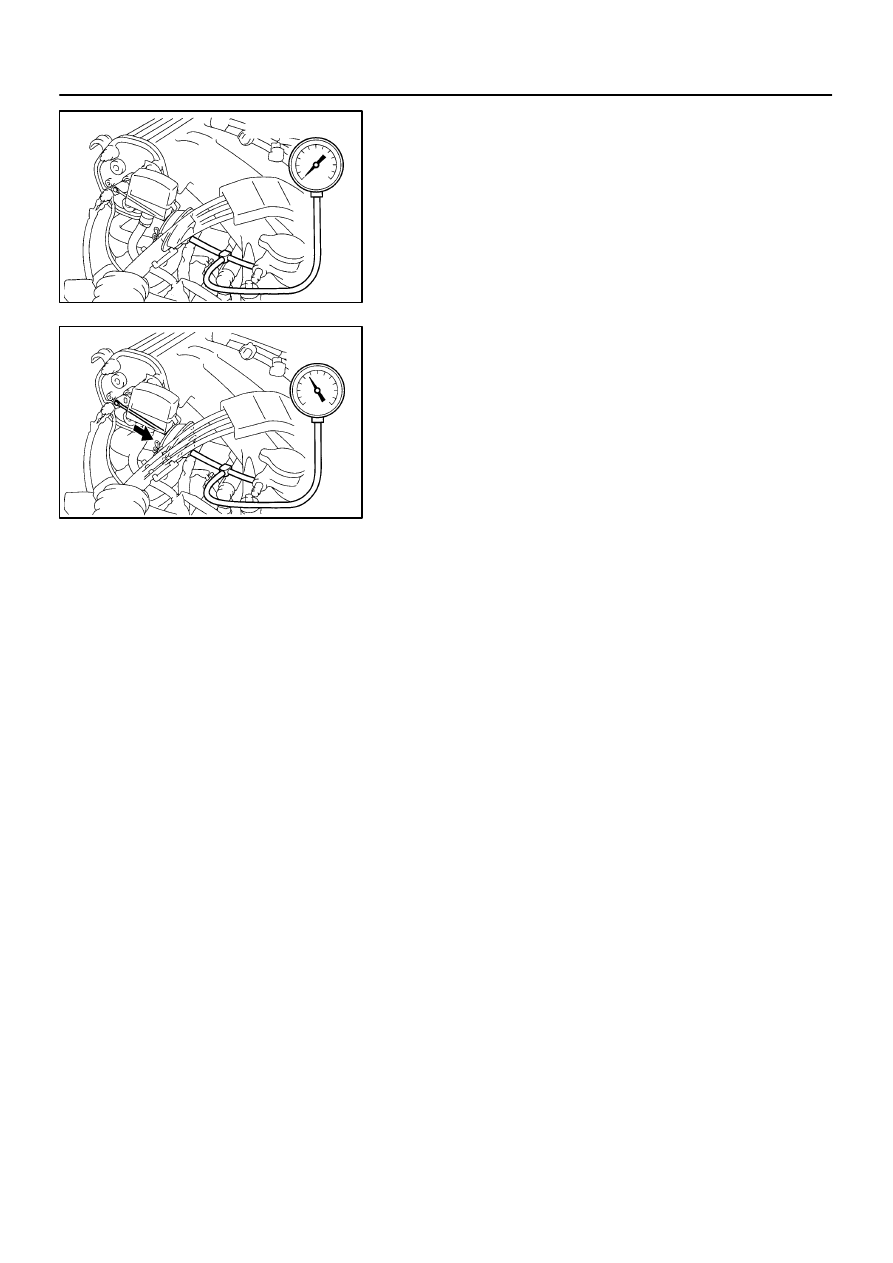
INSPECT INTAKE AIR CONTROL VALVE
(a)
Using a 3–way connector, connect vacuum gauge to the
actuator hose.
(b)
Start the engine.
(c)
While the engine is idling, check that the vacuum gauge
needle does not move.
(d)
Rapidly depress the accelerator pedal to fully open posi-
tion and check that the vacuum gauge needle momentari-
ly fluctuates up to approx. 26.7 kPa (200 mmHg, 7.9
in.Hg). (The actuator rod is pulled out.)

SF06C–04
S05108
Intake Air Control Valve
DLC1 Bracket
DLC1
Gasket
Actuator Vacuum Hose
Ground Strap
Ground Cable
N·m (kgf·cm, ft·lbf)
: Specified torque
Non–reusable part
14.5 (145, 10)
–
SFI
ACOUSTIC CONTROL INDUCTION SYSTEM (ACIS)
SF–43
894
1997 LEXUS ES300 (RM511U)
COMPONENTS
SF06D–01
S05033
(2)
(1)
S05032
SF–44
–
SFI
ACOUSTIC CONTROL INDUCTION SYSTEM (ACIS)
895
1997 LEXUS ES300 (RM511U)
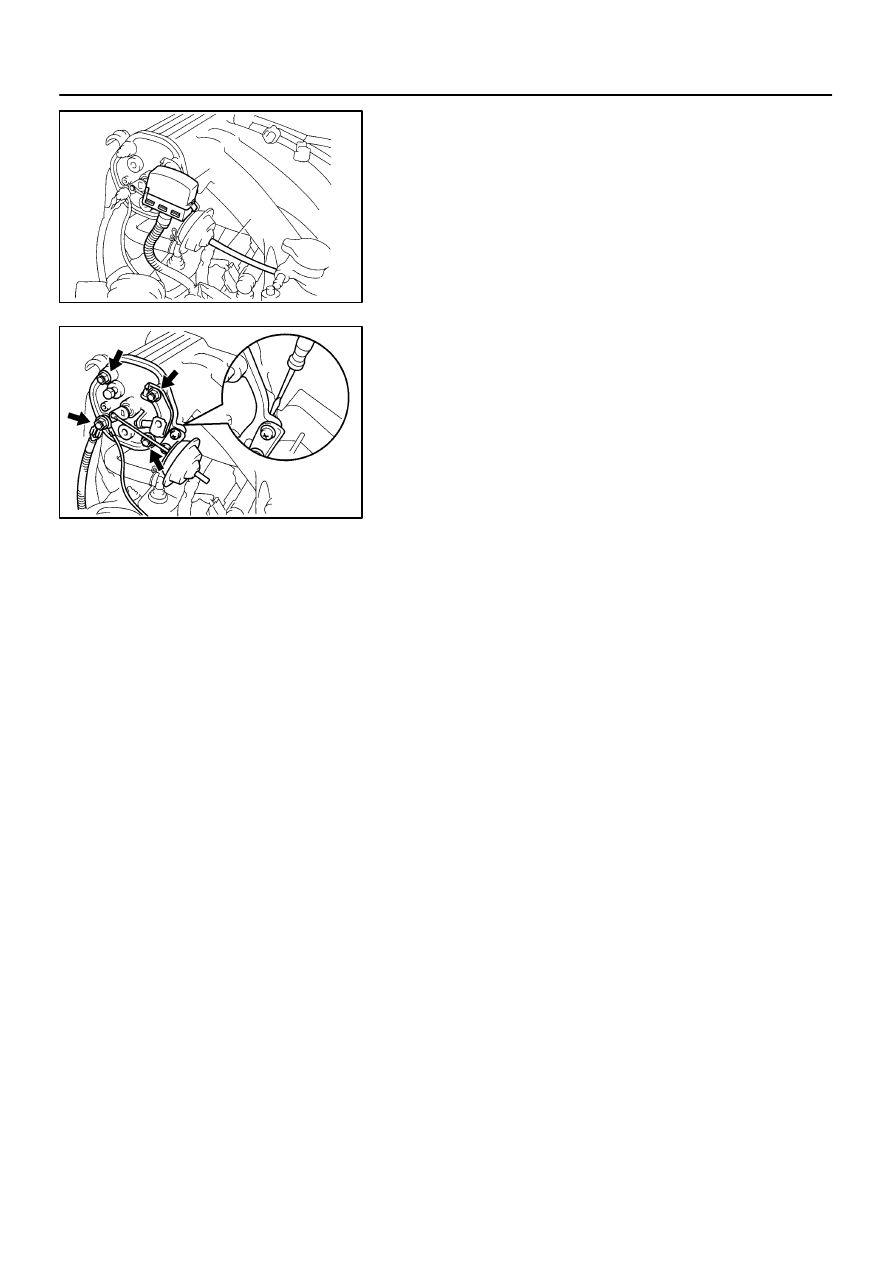
REMOVAL
1.
DISCONNECT ACTUATOR VACUUM HOSE
2.
DISCONNECT DLC1 FROM DLC1 BRACKET
3.
REMOVE INTAKE AIR CONTROL VALVE
(a)
Remove the 4 nuts and DLC1 bracket, and disconnect the
ground strap and cable.
(b)
Remove the intake air control valve by prying a screwdriv-
er between the intake air control valve and air intake
chamber.
(c)
Remove the gasket.
SF06E–01
S05041
Vacuum
S05689
Air
Air
S05688
Vacuum
–
SFI
ACOUSTIC CONTROL INDUCTION SYSTEM (ACIS)
SF–45
896
1997 LEXUS ES300 (RM511U)
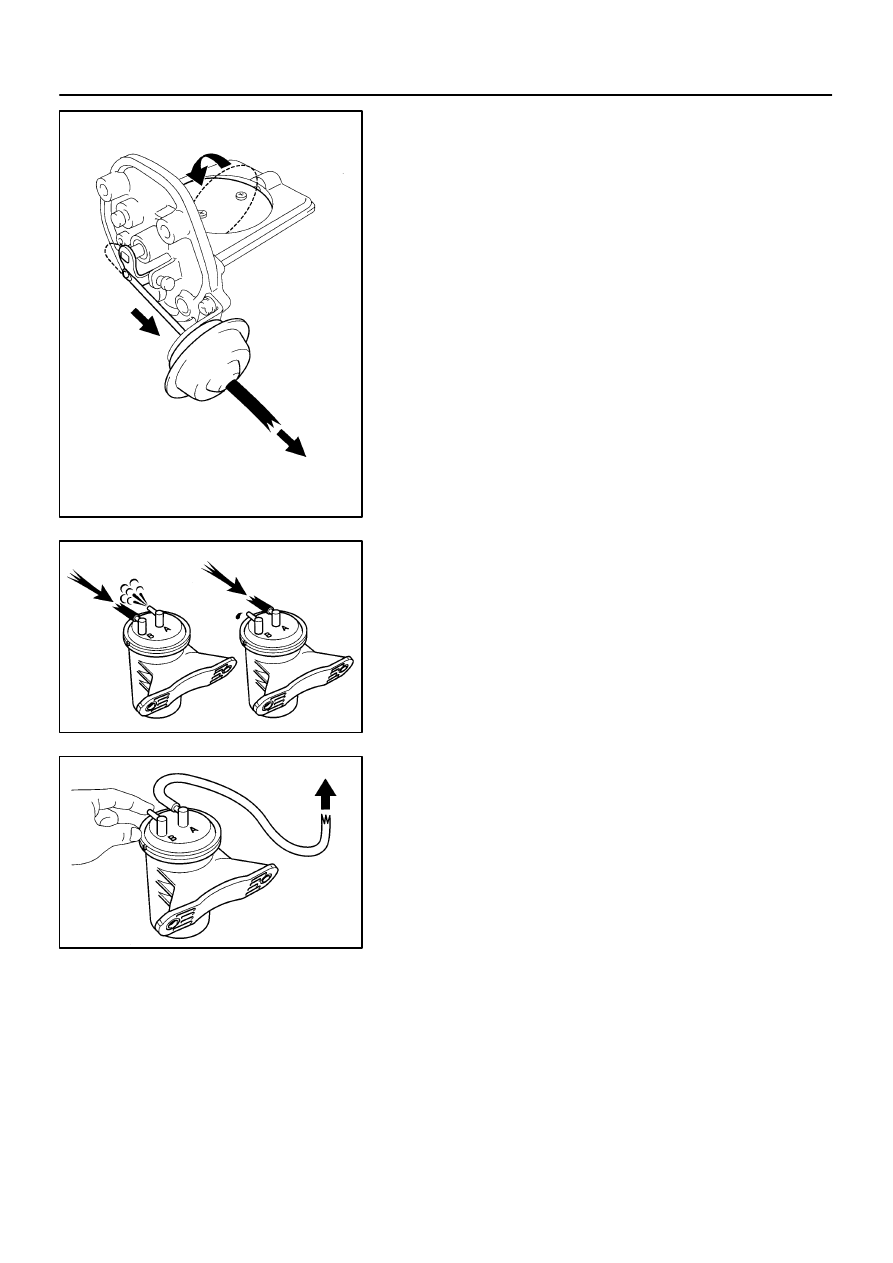
INSPECTION
1.
INSPECT INTAKE AIR CONTROL VALVE
(a)
With 26.7 kPa (200 mmHg, 7.9 in.Hg) of vacuum applied
to the actuator, check that the actuator rod moves.
(b)
One minute after applying the vacuum in (a), check that
the actuator rod does not return.
If the operation is not as specified, replace the intake air control
valve.
2.
INSPECT VACUUM TANK
LOCATION: The LH side member under the battery
tray.
(a)
Check that air flows from port B to port A.
(b)
Check that air does not flow from port A to port B.
(c)
Plug port B with your finger, and apply 26.7 kPa (200
mmHg, 7.9 in.Hg) of vacuum to port A, and check that
there is no change is vacuum after one minute.
If the operation is not as specified, replace the vacuum tank.
3.
INSPECT VSV (See page
)
Нет комментариевНе стесняйтесь поделиться с нами вашим ценным мнением.
Текст