Volvo XC60 Twin Engine (2019 year). Manual — part 13

CLIMATE CONTROL
* Option/accessory.
225
•
Climate comfort retaining function (p. 230)
•
Parking climate symbols and messages
(p. 231)
Preconditioning
Preconditioning the vehicle before driving can
help reduce wear and reduce energy consump-
tion during a trip.
Preconditioning can be started immediately or
started at a preset time using a timer.
The function utilizes several of the vehicle's sys-
tems:
•
In cold weather, the parking heater heats the
passenger compartment to a comfortable
temperature.
•
In warm weather, air conditioning cools the
passenger compartment to a comfortable
temperature.
•
The electrically heated steering wheel* and
seats* can be activated.
•
Heating for the windshield, rear window and
door mirrors are automatically activated as
needed.
During preconditioning in a hot climate, conden-
sation from the air conditions may drip under the
vehicle. This is normal.
Preconditioning is only available when the car
is connected to an electrical outlet. A charg-
ing post that is not always active, for example
because of a timer, can cause loss of function
for preconditioning.
If the car is not connected to an electrical
socket it is still possible in a warm climate to
achieve brief cooling of the passenger com-
partment by direct starting preconditioning.
During preconditioning of the passenger
compartment, the vehicle works to reach a
comfortable temperature and not the tem-
perature set in the climate system.
Related information
•
•
Starting and stopping preconditioning
(p. 226)
•

CLIMATE CONTROL
* Option/accessory.
226
Starting and stopping
preconditioning
Preconditioning heats or cools the passenger
compartment before driving. Preconditioning
can be started in the center display or from a
cellular phone.
Starting and stopping from the vehicle
Preconditioning button in the Parking climate tab in
Climate view.
1. Open Climate view in the center display.
2. Select the
Parking climate
tab.
Window for seat/steering wheel heating in the Parking
climate tab in Climate view.
3. Tap the boxes to select if seat/steering
wheel heating should be activated along with
preconditioning.
4. Tap
Preconditioning
.
> Preconditioning starts/stops and the but-
ton lights up/goes out.
Preconditioning is only available when the car
is connected to an electrical outlet. A charg-
ing post that is not always active, for example
because of a timer, can cause loss of function
for preconditioning.
If the car is not connected to an electrical
socket it is still possible in a warm climate to
achieve brief cooling of the passenger com-
partment by direct starting preconditioning.
The vehicle doors and windows should be
closed during preconditioning of the passen-
ger compartment.
Starting from app*
A device with the Volvo On Call* app can be used
to start preconditioning or check settings. Pre-
conditioning heats or cools the passenger com-
partment (using the vehicle's air conditioning) to
a comfortable temperature.
The passenger compartment can also be precon-
ditioned using the Engine Remote Start (ERS)
5
function using the Volvo On Call* app.
5
Certain markets only.
CLIMATE CONTROL
}}
227
Related information
•
•
•
Preconditioning timer (p. 227)
Preconditioning timer
The timer can be set to finish preconditioning at
a predetermined time.
The timer can store up to 8 preset times for:
•
A time on a particular date
•
A time on one or more days of the week, with
or without the repeat function.
Preconditioning is only available when the car
is connected to an electrical outlet. A charg-
ing post that is not always active, for example
because of a timer, can cause loss of function
for preconditioning.
If the car is not connected to an electrical
socket it is still possible in a warm climate to
achieve brief cooling of the passenger com-
partment by direct starting preconditioning.
Related information
•
•
Adding and editing timer settings for precon-
ditioning (p. 227)
•
Activating and deactivating preconditioning
timer (p. 228)
•
Deleting preconditioning timer settings
(p. 229)
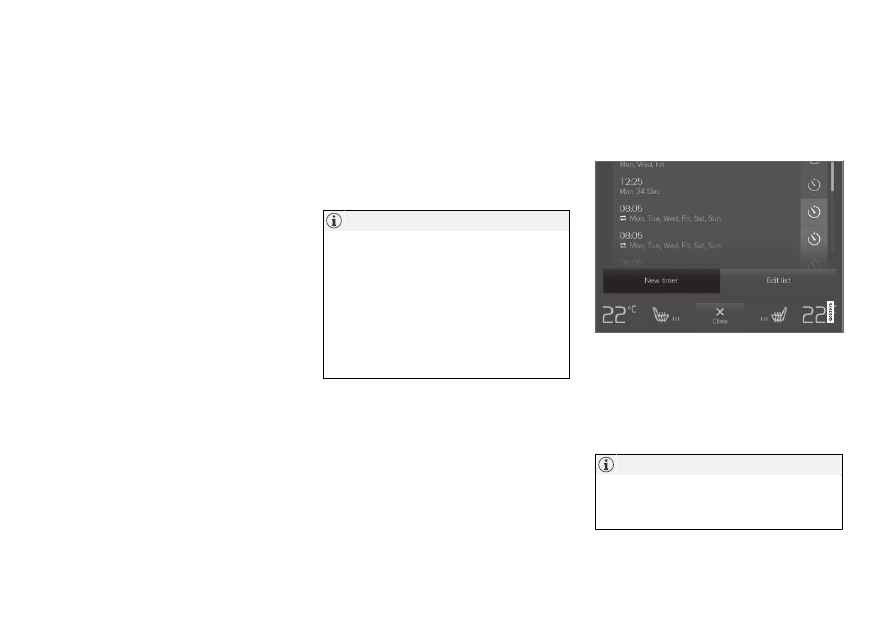
Adding and editing timer settings
for preconditioning
The preconditioning timer can store up to 8 pre-
set timer settings.
Adding a timer setting
Button for adding a timer setting in the Parking climate
tab in Climate view.
1. Open Climate view in the center display.
2. Select the
Parking climate
tab.
3. Tap
Add timer
.
> A pop-up window will appear.
It is not possible to add a time setting if there
are already 8 settings for the timer. Delete a
time setting to be able to add a new one.

||
CLIMATE CONTROL
228
4. Tap
Date
to set a time for a specific date.
Tap
Days
to set a time for one or more days
of the week.
With
Days
: Activate/deactivate the repeat
function by selecting/deselecting the
Repeat weekly
checkbox.
5. With
Date
: Select a date for preconditioning
by scrolling in the date list using the arrows.
With
Days
: Select days of the week for pre-
conditioning by tapping the buttons for the
days.
6. Set the time at which preconditioning should
be completed by scrolling using the arrows in
the clock.
7. Tap
Confirm
to add a timer setting.
> The timer setting will be added to the list
and activated.
Editing a timer setting
1. Open Climate view in the center display.
2. Select the
Parking climate
tab.
3. Tap the timer setting you would like to
change.
> A pop-up window will appear.
4. To edit a timer setting, follow the procedures
described under the heading "Adding a timer
setting" above.
Related information
•
•
Preconditioning timer (p. 227)
•
Activating and deactivating preconditioning
timer (p. 228)
•
Deleting preconditioning timer settings
(p. 229)
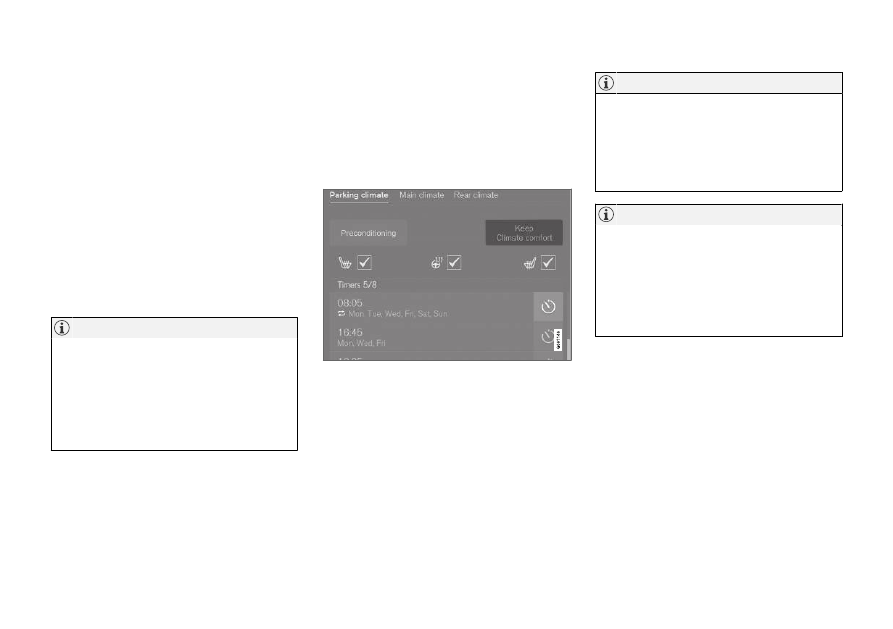
Activating and deactivating
preconditioning timer
Timer settings in the preconditioning timer can
be activated or deactivated as needed.
Timer buttons in the Parking climate tab in Climate
view.
1. Open Climate view in the center display.
2. Select the
Parking climate
tab.
3. Activate/deactivate a timer setting by tap-
ping the timer button to the right of the set-
ting.
> The timer setting is activated/deactivated
and the button lights up/goes out.
Related information
•
•
CLIMATE CONTROL
229
•
Adding and editing timer settings for precon-
ditioning (p. 227)
•
Deleting preconditioning timer settings
(p. 229)
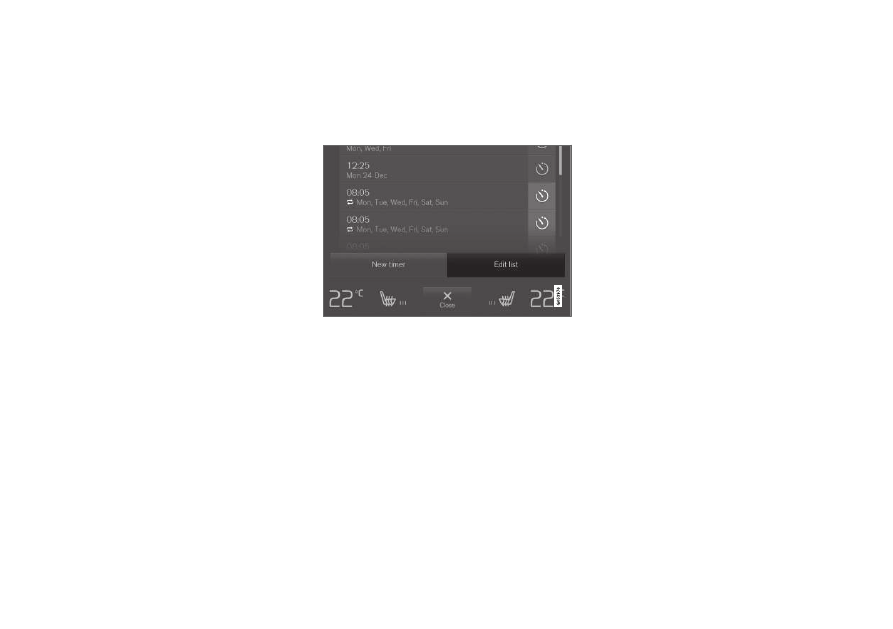
Deleting preconditioning timer
settings
A preconditioning timer setting that is no longer
needed can be deleted.
The button for editing a list/deleting a timer setting in
the Parking climate tab in Climate view.
1. Open Climate view in the center display.
2. Select the
Parking climate
tab.
3. Tap
Edit list
.
4. Tap the editing icon to the right in the list.
> The icon will change to the text
Delete
.
5. Tap
Delete
to confirm.
> The timer setting will be deleted from the
list.
Related information
•
•
Preconditioning timer (p. 227)
•
Adding and editing timer settings for precon-
ditioning (p. 227)
•
CLIMATE CONTROL
230
Climate comfort retaining function
The climate in the passenger compartment can
be maintained when the vehicle is parked, e.g. if
the engine is turned off but the driver or passen-
gers remain in the vehicle.
This function can only be direct-started.
The function utilizes several of the vehicle's sys-
tems:
•
Residual heat from the engine is used to
help heat the passenger compartment to a
comfortable temperature.
•
In warm weather, the ventilation system cools
the passenger compartment by blowing air in
from outside.
Climate comfort maintenance will be deacti-
vated if the vehicle is locked from the outside
in order to avoid using residual engine heat
unnecessarily. This function is intended to be
used to maintain climate comfort when the
driver or a passenger remains in the vehicle
after the engine is turned off.
Related information
•
•
Starting and switching off the climate retain-
ing function when parking (p. 230)
Starting and switching off the
climate retaining function when
parking
The climate retaining function maintains the cli-
mate settings in the vehicle after the engine has
been switched off. The function can be activated
in the center display.
Button for retaining climate comfort in the Parking
climate tab in Climate view.
1. Open Climate view in the center display.
2. Select the
Parking climate
tab.
3. Tap
Keep climate comfort
.
> The climate comfort retaining function will
be activated/deactivated and the button
light will go on/off.
Maintained climate comfort is not possible
when there is not sufficient residual engine
heat to maintain the climate settings in the
passenger compartment, or if the outside
temperature is above approximately 20 °C
(68 °F).
Climate comfort maintenance will be deacti-
vated if the vehicle is locked from the outside
in order to avoid using residual engine heat
unnecessarily. This function is intended to be
used to maintain climate comfort when the
driver or a passenger remains in the vehicle
after the engine is turned off.
Related information
•

CLIMATE CONTROL
* Option/accessory.
231
Parking climate symbols and
messages
A number of symbols and messages related to
parking climate may be displayed in the instru-
ment panel.
Messages related to parking climate can also be
displayed in a device that has the Volvo On Call*
app.
Symbol
Message
Meaning
Parking climate
Service required
Parking climate is not functioning properly. Contact a workshop
A
to have the system checked as
soon as possible.
Parking climate
Temporarily unavailable
Parking climate is temporarily not functioning properly. If the problem persists, contact a work-
shop
A
to have the system checked.
Parking climate
Unavailable Charge level too low
The parking climate cannot be activated because the hybrid battery's charge level is too low to
start the parking heater. Start the vehicle.
Parking climate
Unavailable, not connected to power
supply
The parking climate cannot be activated if the charging cable is not connected. Connect the
charging cable.
Parking climate
Limited Charge level too low
Parking climate will only run for a limited time when the hybrid battery's charge level is too low.
Start the vehicle.
A
An authorized Volvo workshop is recommended.
Related information
•
CLIMATE CONTROL
232
Heater
The heater helps the engine and passenger
compartment reach the correct temperature
before and while driving.
The heater has two sub-functions:
•
Parking heater - heats the passenger com-
partment as needed when the parking cli-
mate's preconditioning is activated.
•
Auxiliary heater - heats the passenger com-
partment and engine while driving.
The heater is a high-voltage coolant heater and is
mounted in the front right-side wheel housing.
Battery and charging
The heater is powered by the vehicle's hybrid bat-
tery. If the charge level in the hybrid battery is too
low, the heater will switch off automatically and a
message will be displayed in the instrument
panel.
Make sure that the battery has sufficient
charge if the heater must be used.
Related information
•
Parking heater
The parking heater heats the passenger com-
partment as needed before driving if precondi-
tioning is activated.
The parking heater is one of two sub-functions of
the vehicle's heater. The heater is mounted in the
front right-side wheel housing.
The parking heater starts automatically if the
parking climate's preconditioning is activated and
the passenger compartment needs to be heated.
It switches off automatically when a set timer
time or the heater's maximum run time expires, or
if the car is restarted.
The heater's maximum running time is 40
minutes.
Additional heater
The auxiliary heater helps heat the passenger
compartment and engine while driving.
The auxiliary heater is one of two sub-functions
of the vehicle's heater. The heater is mounted in
the front right-side wheel housing.
The auxiliary heater is started and controlled
automatically when extra heat is required while
the vehicle is being driven.
It switches off automatically when the ignition is
switched off.
CLIMATE CONTROL
233
Activating and deactivating the
auxiliary heater
The auxiliary heater helps heat the passenger
compartment and engine while driving.
It is possible to set whether automatic start for
the auxiliary heater should be activated or deacti-
vated.
1. Tap
Settings
in the Top view in the center
display.
2. Tap
Climate
.
3. Select
Additional Heater
to activate/deac-
tivate automatic start for the auxiliary heater.
If automatic start of the auxiliary heater is
deactivated, this may impair comfort in the
passenger compartment since the climate
system then does not have a heat source dur-
ing electrical operation.
KEY, LOCKS AND ALARM
KEY, LOCKS AND ALARM
* Option/accessory.
236
Lock indication
When the vehicle is locked or unlocked, the turn
signals will flash to indicate that the vehicle has
been locked or unlocked correctly.
Exterior confirmation
Locking
•
The turn signals will flash once and the door
mirrors will fold in
1
to confirm the vehicle is
locked.
Unlocking
•
The turn signals will flash twice and the door
mirrors will fold out
1
to confirm the vehicle is
unlocked.
All doors, tailgate and hood must be closed for
confirmation to be given. If only the driver's door
is closed when the vehicle is locked
2
, the vehicle
will be locked but the turn signals will only flash
to indicate locking when all doors and the hood
and tailgate have been closed.
Lock and alarm indicator
The locks and alarm indicator on the dashboard will dis-
play the status of the locking system.
A long flash indicates that the vehicle is locked.
When the vehicle is locked, this will be indicated
by short, pulsing flashes.
Other indicators
The home safe lighting and approach lighting
functions also indicate when the vehicle is locked
or unlocked.
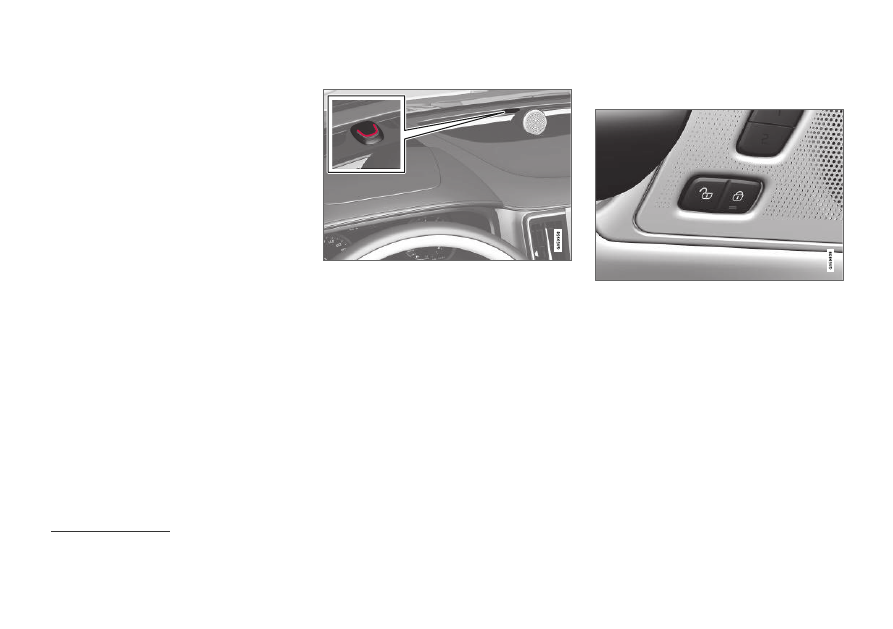
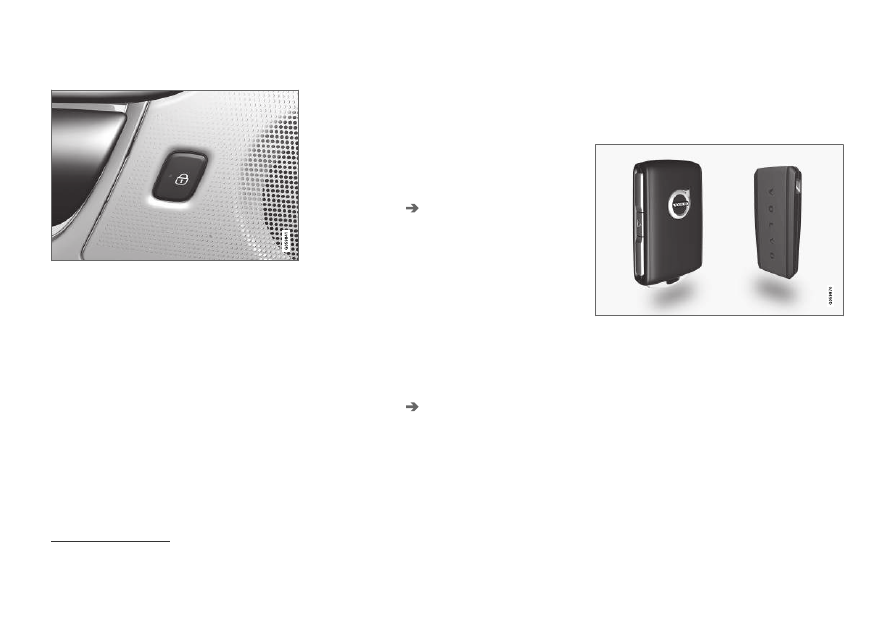
Lock button indicators
Front door
Lock buttons with indicator lights in front door.
Illuminated indicator lights in both front door lock
buttons indicate that all doors are locked. If any
door is opened, the lights in both doors will go
out.
1
Only vehicles with power folding mirrors.
2
Does not apply to vehicles equipped with keyless locking/unlocking (Passive Entry*).
KEY, LOCKS AND ALARM
}}
* Option/accessory.
237
In rear door*
Lock button with indicator light in rear door.
Illuminated indicator lights in each door indicate
that that particular door is locked. If any door is
unlocked and opened, the indicator light in that
door will go out. The lights in the other doors will
remain illuminated.
Related information
•
Lock confirmation settings (p. 237)
•
•
Using home safe lighting (p. 161)
Lock confirmation settings
Settings for how the vehicle confirms locking
and unlocking can be adjusted in the center dis-
play's Settings menu.
Locking response:
1. Tap
Settings
in the center display's Top
view.
2. Tap
My Car
Locking
.
3. Tap
Visible Locking Feedback
to deacti-
vate the function or to select when the vehi-
cle should provide a visible response: during
Lock
,
Unlock
or
Both
.
4. Select to receive an audible response when
locking the vehicle by marking
Audible
Locking Feedback
.
Folding door mirrors* confirmation:
1. Tap
Settings
in the center display's Top
view.
2. Tap
My Car
Mirrors and Convenience
.
3. Select
Fold Mirror When Locked
to acti-
vate or deactivate the function.
Related information
•
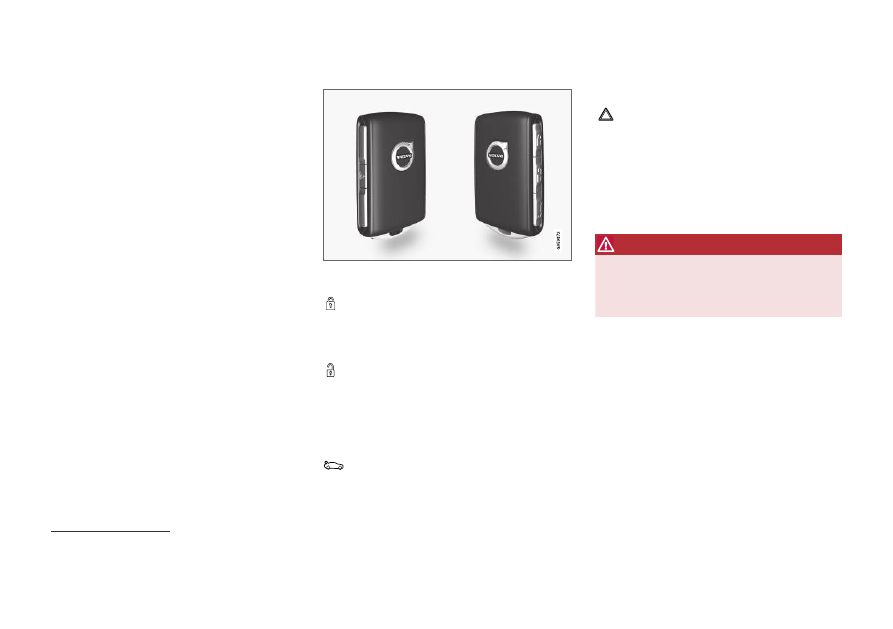
Remote key
The remote key is used to lock and unlock doors
and the tailgate. The remote key must be in the
vehicle in order to start the engine.
Remote control key
3
, on left, and button-less key ((Key
Tag)*), on right.
The remote key is not physically used to start the
ignition because the vehicle is standard-equipped
with keyless start (Passive Start).
To start the vehicle, the key must be in the front
section of the passenger compartment, e.g. in the
driver's pocket or in a cup holder in the tunnel
console.
3
The illustration is generic - details may vary according to vehicle model.
||
KEY, LOCKS AND ALARM
* Option/accessory.
238
The keyless system for locking/unlocking the
doors and tailgate (Passive Entry*) is available as
an option. This system has a range in a semicircle
with a radius of approximately 1.5 meter (5 feet)
out from the driver's door and approx. 1 meter
(3 feet) out from the tailgate.
With keyless start in combination with keyless
locking and unlocking, the remote key can be
located anywhere in the passenger compartment
or cargo compartment in order to start the
engine.
Each remote key supplied with the vehicle can be
linked to a driver profile with unique settings for
the vehicle. When a key with a specific profile is
used, the vehicle settings are adjusted according
to that profile.
Buttonless key, Key Tag
For vehicles equipped with keyless locking and
unlocking*, a smaller, lighter and button-less key
(Key Tag
4
) is also provided. It works the same
way as the regular remote key as regard keyless
start and keyless locking and unlocking. The key
is waterproof up to a depth of approx. 10 meters
(30 feet) for up to 60 minutes. It does not have a
detachable key blade and its battery cannot be
replaced.
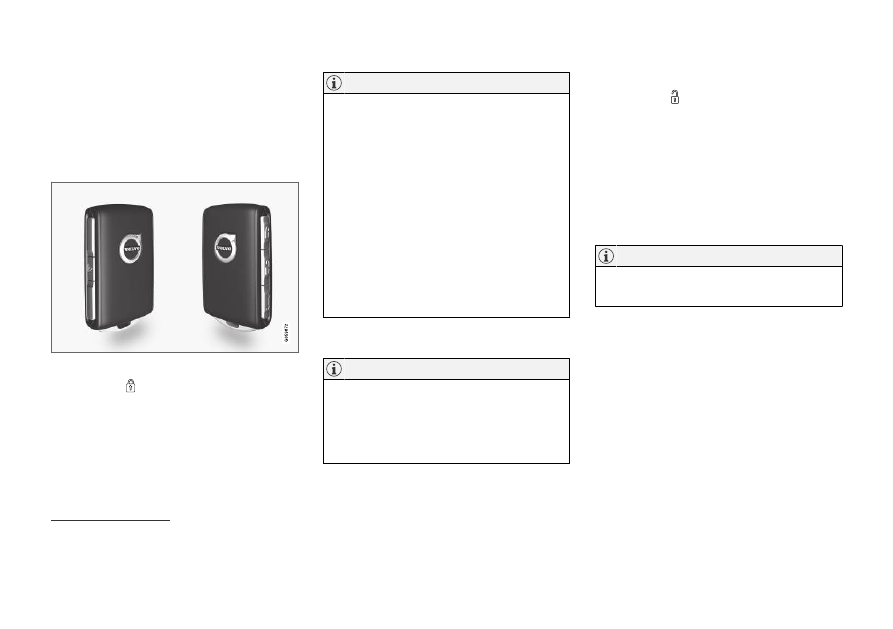
Remote key buttons
The remote key has four buttons, one on the left side
and three on the right
3
.
Locking - Press once to lock the doors,
tailgate and fuel filler door and arm the
alarm.
Press and hold to close all windows.
Unlocking - Press once to unlock the
doors and tailgate and disarm the alarm.
Press and hold to open all windows at the
same time. This total airing function can be
used to e.g. quickly air out the vehicle in hot
weather.
Tailgate - Unlock and disarm the tailgate
only. On vehicles equipped with the power
tailgate*, press and hold to automatically
open the tailgate. Press and hold to close an
open tailgate (an audible warning signal will
be given).
Panic alarm - Used to attract attention in
emergency situations. Press and hold the
button for at least 3 seconds or press twice
within 3 seconds to activate the turn signals
and horn. To deactivate, wait at least 5 sec-
onds and press the button again. If no action
is taken, the panic alarm will deactivate auto-
matically after 3 minutes.
WARNING
If anyone is left in the vehicle, make sure that
power to the power windows and panoramic
roof* is cut off by always taking the remote
key with you when you leave the vehicle.
4
Även kallad sportnyckel.
3
The illustration is generic - details may vary according to vehicle model.
KEY, LOCKS AND ALARM
* Option/accessory.
239
Be aware of the risk of locking the remote
key in the vehicle.
•
If the remote key or Key Tag is left in the
vehicle, it will be deactivated when the
vehicle is locked and the alarm set using
another valid key. The deactivated key will
be reactivated when the vehicle is
unlocked.
•
If the remote key or Red Key is left in the
vehicle, it will be deactivated even if the
vehicle is locked using Volvo On Call, and
will be reactivated when the vehicle is
unlocked using Volvo On Call or by
pressing the unlock button on the key.
Interference
Electromagnetic fields or obstructing objects may
interfere with the remote key's functions for key-
less start and keyless locking and unlocking*.
Avoid storing the remote control key near
metal objects or electronic devices, e.g. cell
phones, tablets, laptops or chargers – pref-
erably no closer than 10-15 cm (4-6 in.).
If you experience interference, use the remote
key's detachable blade to unlock the vehicle and
place the remote key in the backup key reader in
the tunnel console cup holder to disarm the
alarm.
When the remote control key is placed in the
cup holder, make sure that no other vehicle
keys, metal objects or electronic devices (e.g.
cell phones, tablets, laptops or chargers) are
found in the cup holder. Multiple vehicle keys
close to each other in the cup holder can dis-
rupt their functionality.
WARNING
California Proposition 65
Operating, servicing and maintaining a pas-
senger vehicle can expose you to chemicals
including engine exhaust, carbon monoxide,
phthalates, and lead, which are known to the
State of California to cause cancer and birth
defects or other reproductive harm. To mini-
mize exposure, avoid breathing exhaust, do
not idle the engine except as necessary, serv-
ice your vehicle in a well ventilated area and
wear gloves or wash your hands frequently
when servicing your vehicle. For more infor-
mation go to www.P65Warnings.ca.gov/
Related information
•
Locking and unlocking using the remote key
(p. 240)
•
•
Replacing the remote key's battery (p. 243)
•
•
Electronic immobilizer (p. 251)
•
KEY, LOCKS AND ALARM
* Option/accessory.
240
Locking and unlocking using the
remote key
All doors and tailgate can be locked and
unlocked simultaneously using the buttons on
the remote key.
Locking with remote key
Remote key
5
.
–
Press the
button on the remote key to
lock.
To activate the locking sequence, the driver's
door must be closed
6
. If any of the other doors or
the tailgate are open, they will be locked and the
alarm will be armed once they are closed.
Be aware of the risk of locking the remote
key in the vehicle.
•
If the remote key or Key Tag is left in the
vehicle, it will be deactivated when the
vehicle is locked and the alarm set using
another valid key. The deactivated key will
be reactivated when the vehicle is
unlocked.
•
If the remote key or Red Key is left in the
vehicle, it will be deactivated even if the
vehicle is locked using Volvo On Call, and
will be reactivated when the vehicle is
unlocked using Volvo On Call or by
pressing the unlock button on the key.
Locking when the tailgate is open
If the vehicle is locked and the tailgate is still
open, make sure that the remote key is not
left in the cargo compartment when the tail-
gate is closed and the entire vehicle is
locked
7
.
Unlocking with remote key
–
Press the
button on the remote key to
unlock.
Automatic relocking
If none of the doors or tailgate are opened within
two minutes after being unlocked, they will auto-
matically relock. This function reduces the risk of
inadvertently leaving the vehicle unlocked.
Remote key not working
Move closer to the vehicle and try to unlock it
again.
If the remote key is not working to lock or unlock
the vehicle, its battery may be discharged. Use
the detachable key blade to lock/unlock the driv-
er's door instead.
Related information
•
Settings for remote and inside door unlock
(p. 241)
•
Unlocking the tailgate using the remote key
(p. 241)
•
5
The illustration is generic - details may vary according to vehicle model.
6
If the vehicle is equipped with keyless locking/unlocking, all side doors must be closed.
7
If the vehicle is equipped with keyless locking/unlocking and the key is detected inside the vehicle, the tailgate will not lock when it is closed.*
Нет комментариевНе стесняйтесь поделиться с нами вашим ценным мнением.
Текст