Nissan Murano Z51. Instruction — part 452
DLK-316
< REMOVAL AND INSTALLATION >
[WITH INTELLIGENT KEY SYSTEM]
HOOD
HOOD STAY : Disposal
INFOID:0000000005517773
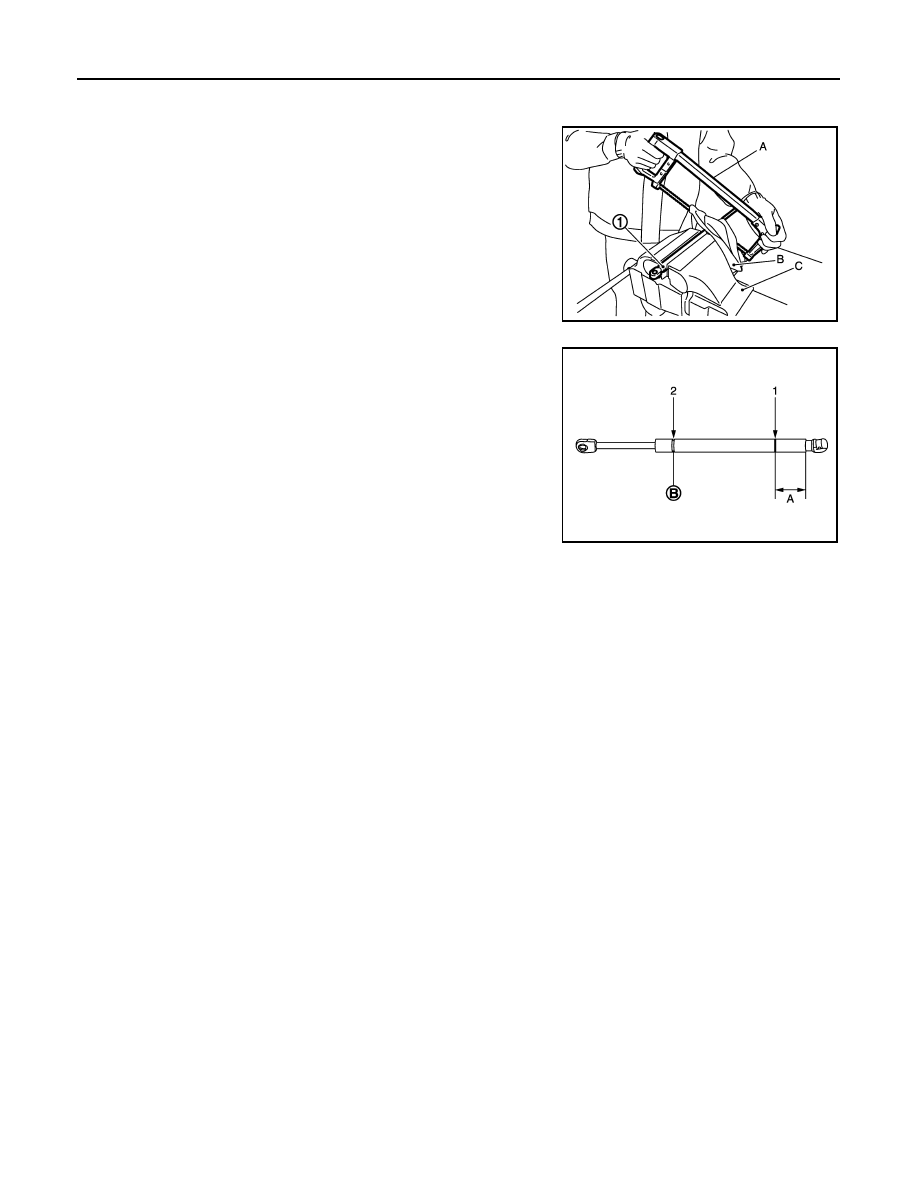
1.
Fix hood stay (1) using a vise (C).
2.
Using hacksaw (A) slowly make 2 holes in the hood stay, in
numerical order as shown in the figure.
CAUTION:
• When cutting a hole on hood stay, always cover a hack-
saw using a shop cloth (B) to avoid scattering metal frag-
ments or oil.
• Wear eye protection (safety glasses).
• Wear gloves.
JMKIA3336ZZ
A:
20 mm (0.787 in)
B:
Cut at the groove.
JMKIA3609ZZ
RADIATOR CORE SUPPORT
DLK-317
< REMOVAL AND INSTALLATION >
[WITH INTELLIGENT KEY SYSTEM]
C
D
E
F
G
H
I
J
L
M
A
B
DLK
N
O
P
RADIATOR CORE SUPPORT
Exploded View
INFOID:0000000005517774
Removal and Installation
INFOID:0000000005517775
REMOVAL
1.
Use a refrigerant collecting equipment to discharge the refrigerant. Refer to
2.
Remove front under cover. Refer to
EXT-27, "Removal and Installation"
.
3.
Drain engine coolant from radiator. Refer to
4.
Remove front grille. Refer to
EXT-19, "Removal and Installation"
5.
Remove front bumper fascia, energy absorber, bumper reinforcement. Refer to
.
6.
Remove air duct assembly. Refer to
.
7.
Remove hood lock. Refer to
DLK-340, "Removal and Installation"
.
8.
Remove front combination lamp (RH/LH). Refer to
EXL-180, "Removal and Installation"
(XENON TYPE)
EXL-363, "Removal and Installation"
(HALOGEN TYPE).
9.
Disconnect connector of refrigerant pressure sensor. Refer to
.
10. Remove bumper retainer assembly. Refer to
EXT-14, "Removal and Installation"
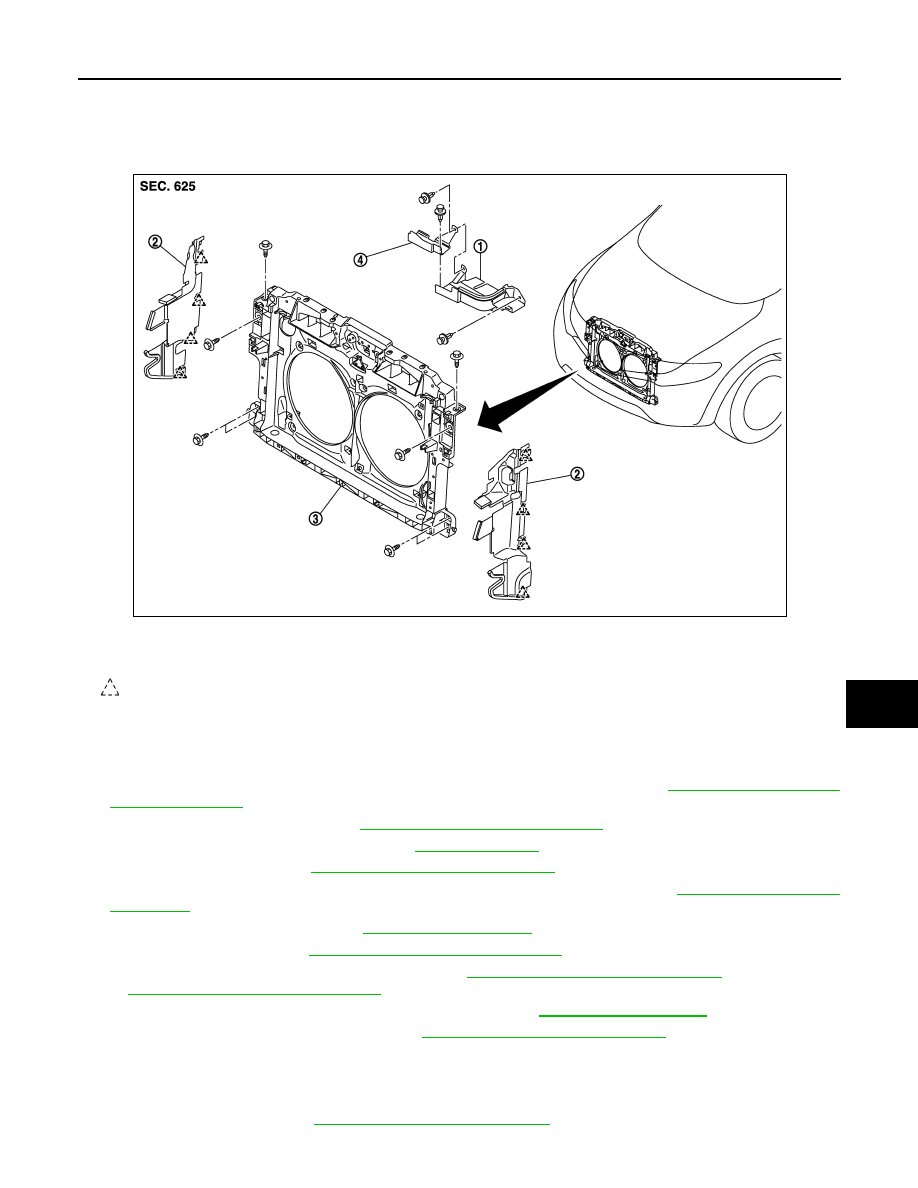
11. Remove clips, and then remove air guide center and air guide upper.
12. Disengage harness clip from air guide side (RH).
13. Disengage pawls, and then remove air guide side (RH/LH).
14. Remove condenser. Refer to
HA-49, "Removal and Installation"
.
1.
Air guide upper
2.
Air guide side (RH/LH)
3.
Radiator core support
4.
Air guide center
: Pawl
JMKIA1805ZZ
DLK-318
< REMOVAL AND INSTALLATION >
[WITH INTELLIGENT KEY SYSTEM]
RADIATOR CORE SUPPORT
15. Remove radiator and engine coolant reservoir tank. Refer to
CO-16, "Removal and Installation"
.
CAUTION:
Operate with two workers, because of it is heavy weight.
16. Disconnect connectors of the following parts.
• Ambient sensor. Refer to
VTL-26, "Removal and Installation"
• Cooling fan (RH/LH) and cooling fan control module. Refer to
• Crash zone sensor. Refer to
SR-21, "Removal and Installation"
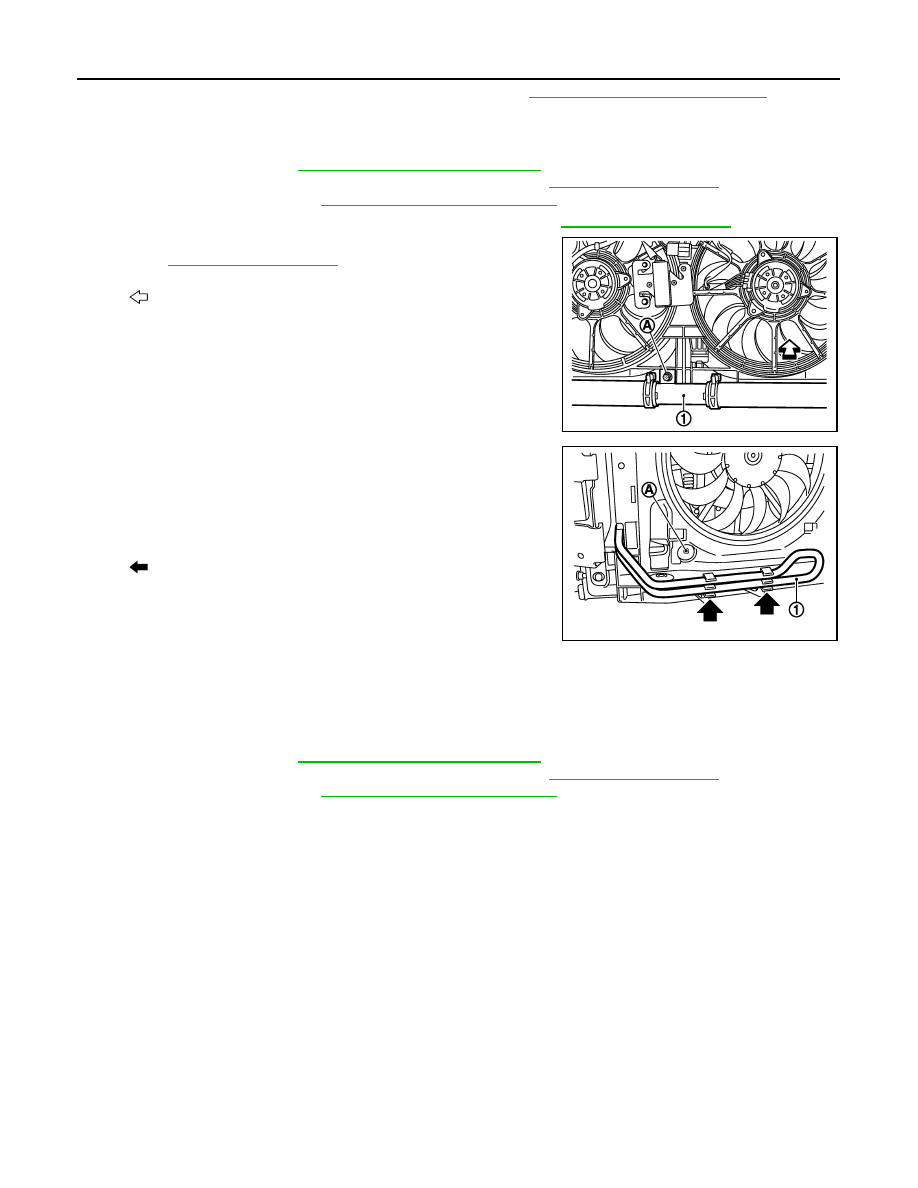
17. Remove radiator upper hose from radiator core support. Refer to
18. Remove mounting bolt (A) of radiator lower hose bracket (1).
19. Remove radiator lower hose clamp (A) from radiator core sup-
port.
20. Remove power steering oil cooler pipe (1) from radiator core
support.
21. Remove power steering oil cooler pipe clips.
22. Remove all harness clips from radiator core support.
23. Remove mounting bolts, and then remove radiator core support.
CAUTION:
Never damage power steering oil cooler pipe.
24. Remove the following parts after removing radiator core support.
• Ambient sensor. Refer to
VTL-26, "Removal and Installation"
• Cooling fan (RH/LH) and cooling fan control module. Refer to
• Crash zone sensor. Refer to
SR-21, "Removal and Installation"
INSTALLATION
Install in the reverse order of removal.
: Vehicle front
JMKIA1915ZZ
: Clip
JMKIA1916ZZ
FRONT FENDER
DLK-319
< REMOVAL AND INSTALLATION >
[WITH INTELLIGENT KEY SYSTEM]
C
D
E
F
G
H
I
J
L
M
A
B
DLK
N
O
P
FRONT FENDER
Exploded View
INFOID:0000000005517776
Removal and Installation
INFOID:0000000005517777
CAUTION:
Use a shop cloth to protect the body from being damaged during removal and installation.
REMOVAL
1.
Remove clips and remove front fender seal (front/rear).
2.
Remove front grille. Refer to
EXT-19, "Removal and Installation"
3.
Remove front bumper fascia. Refer to
EXT-14, "Removal and Installation"
.
4.
Remove front combination lamp. Refer to
EXL-180, "Removal and Installation"
(XENON TYPE),
(HALOGEN TYPE).
5.
Remove fender protector. Refer to
EXT-24, "FENDER PROTECTOR : Removal and Installation"
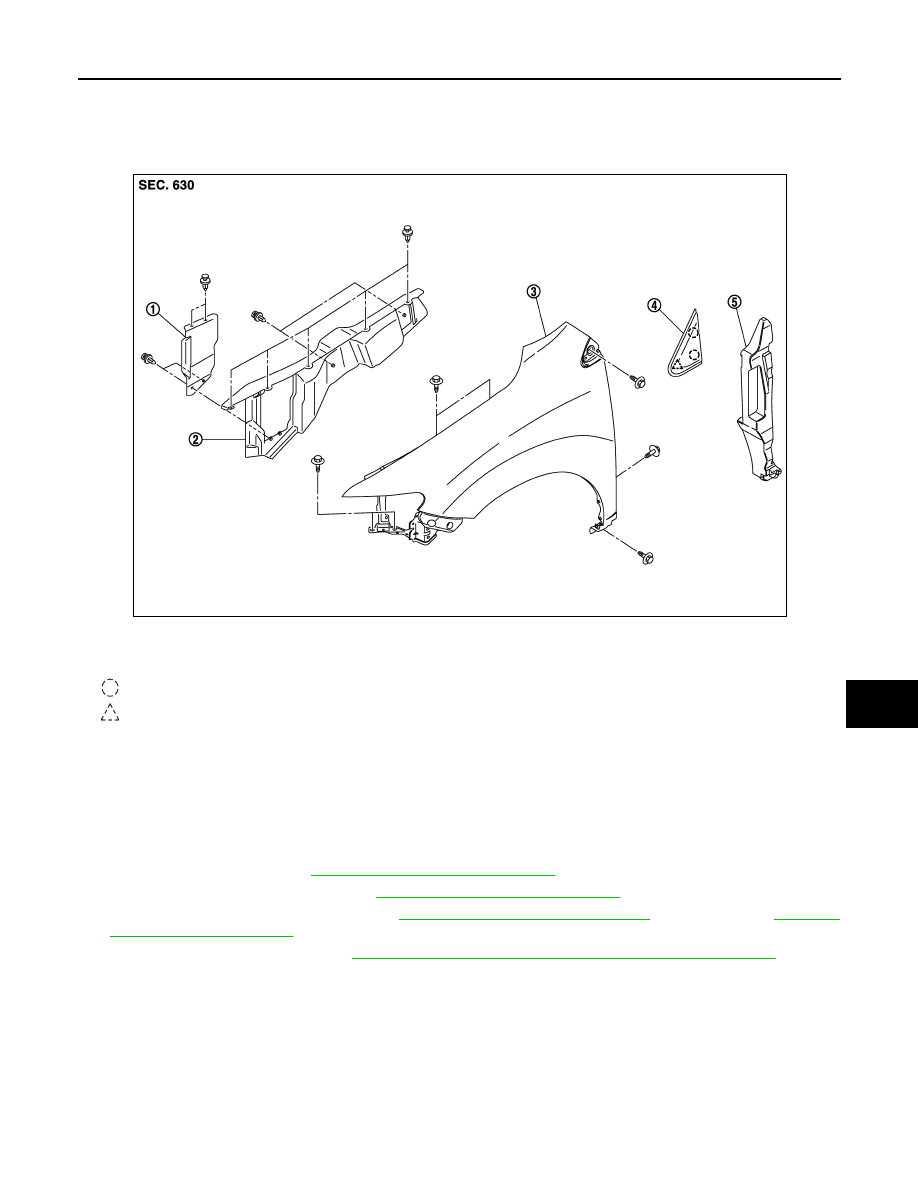
1.
Front fender seal (front)
2.
Front fender seal (rear)
3.
Front fender assembly
4.
Front fender finisher
5.
Insulator
: Clip
: Pawl
JMKIA1806ZZ
Нет комментариевНе стесняйтесь поделиться с нами вашим ценным мнением.
Текст