Nissan Murano Z51. Instruction — part 462
DLK-356
< REMOVAL AND INSTALLATION >
[WITH INTELLIGENT KEY SYSTEM]
BACK DOOR LOCK
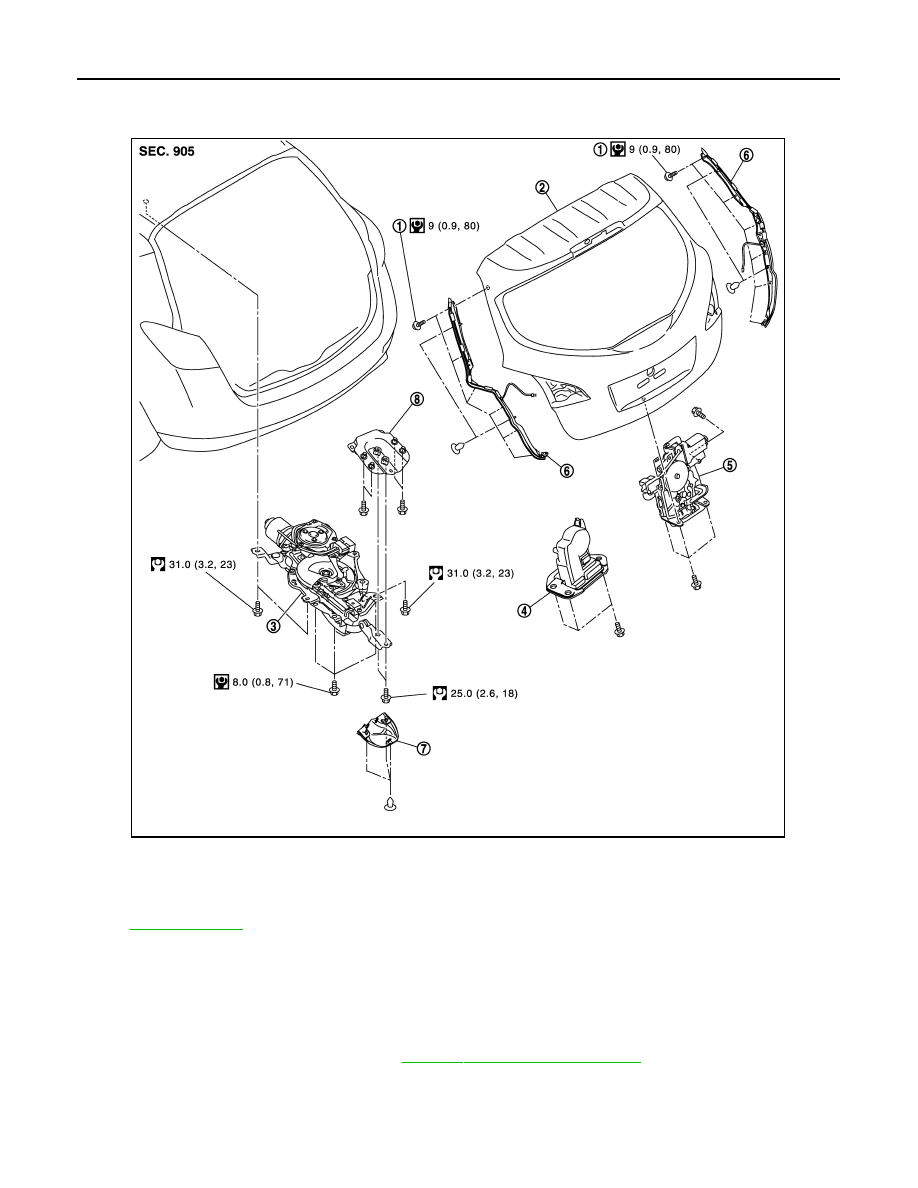
TOUCH SENSOR : Exploded View
INFOID:0000000005517827
TOUCH SENSOR : Removal and Installation
INFOID:0000000005517828
CAUTION:
Take care not to bend touch sensor.
REMOVAL
1.
Remove back door finisher inner. Refer to
INT-38, "Removal and Installation"
2.
Disconnect touch sensor connector.
JMKIA1804GB
1.
TORX bolt
2.
Back door assembly
3.
Power back door drive assembly
4.
Back door lock assembly (normal)
5.
Back door lock assembly (super lock)
6.
Touch sensor (RH/LH)
7.
Cover
8.
Patch
Refer to
for symbols in the figure.
BACK DOOR LOCK
DLK-357
< REMOVAL AND INSTALLATION >
[WITH INTELLIGENT KEY SYSTEM]
C
D
E
F
G
H
I
J
L
M
A
B
DLK
N
O
P
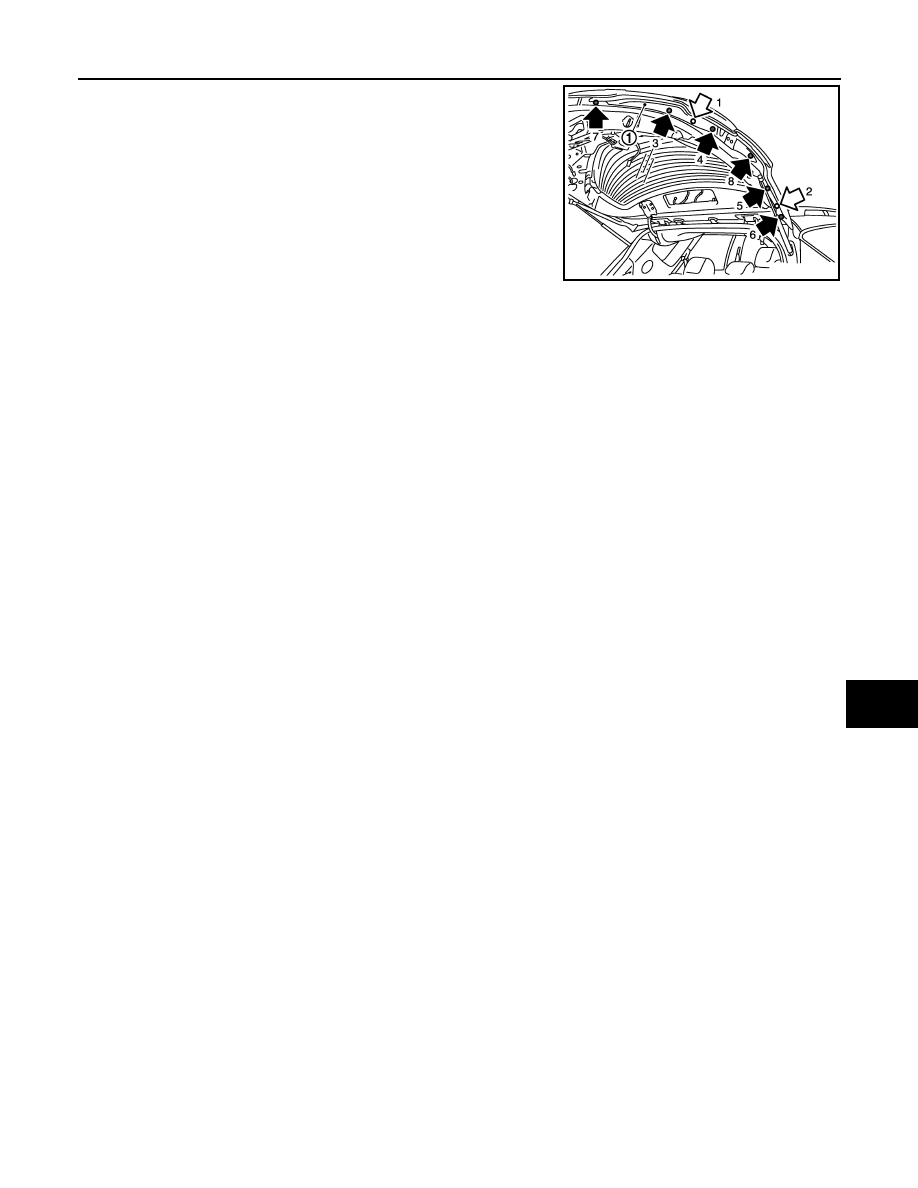
3.
Remove clips and TORX bolts touch sensor (1).
CAUTION:
Remove the TORX bolts (black arrow) and clips (white
arrow) of touch sensor referring to figure.
4.
Pull harness of touch sensor out of back door and remove touch sensor.
INSTALLATION
Install in the reverse order of removal.
CAUTION:
• Install the clips and TORX bolts of touch sensor in the reverse order of removal.
• Never place back door side seal between touch sensor.
• Check back door open/close operation after installation.
JMKIA1920ZZ
DLK-358
< REMOVAL AND INSTALLATION >
[WITH INTELLIGENT KEY SYSTEM]
FUEL FILLER LID OPENER
FUEL FILLER LID OPENER
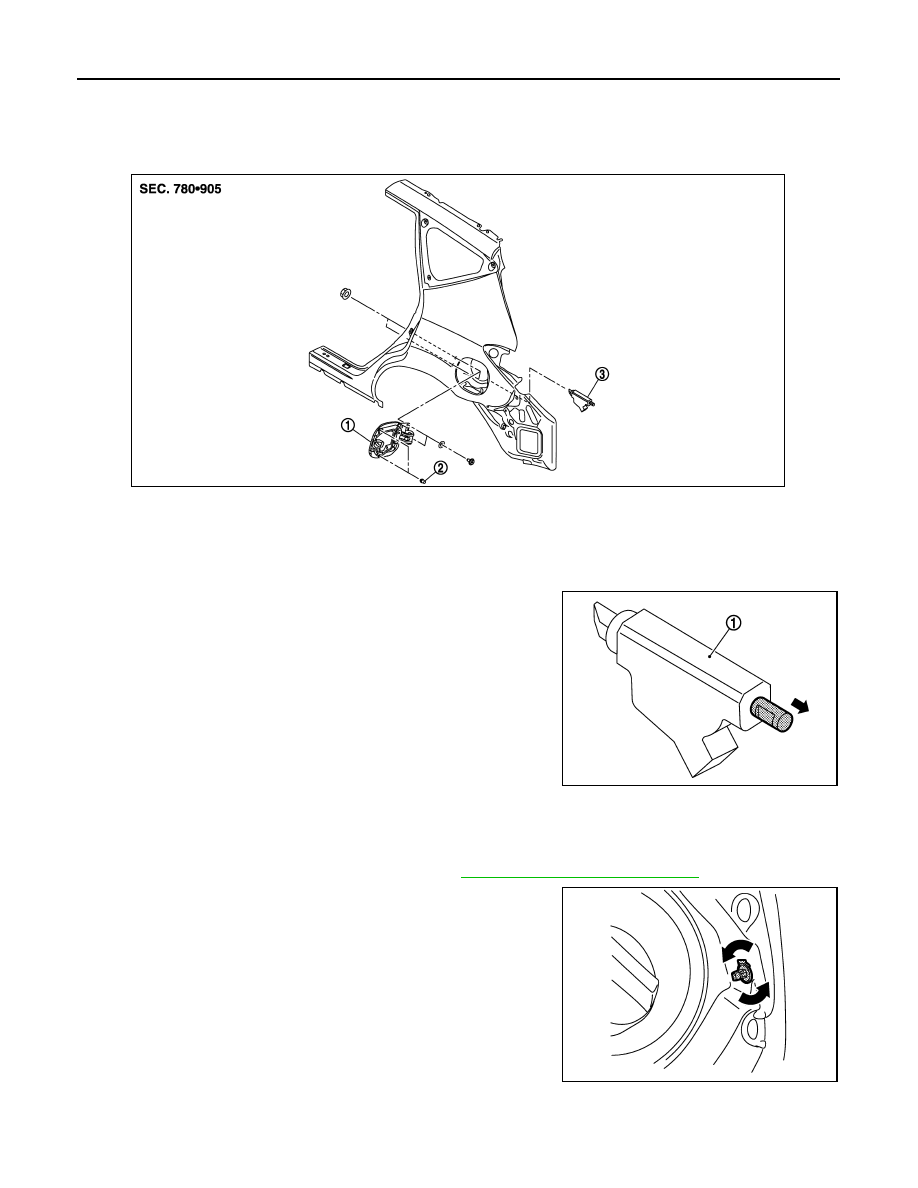
Exploded View
INFOID:0000000005517829
Removal and Installation
INFOID:0000000005517830
NOTE:
When fuel filler lid opener actuator is a defective operation, pull the
rod to open fuel filler lid.
REMOVAL
1.
Remove filler cap.
2.
Remove mounting screws (A), and then remove fuel filler lid (1).
3.
Remove luggage side finisher lower (LH). Refer to
INT-35, "Removal and Installation"
.
4.
Locate fuel filler lid opener actuator, and then remove the fuel
filler lid opener actuator.
INSTALLATION
Install in the reverse order of removal.
CAUTION:
1.
Fuel filler lid assembly
2.
Bumper rubber
3.
Fuel filler lid opener actuator
JMKIA1957ZZ
JMKIA1960ZZ
JMKIA1959ZZ
FUEL FILLER LID OPENER
DLK-359
< REMOVAL AND INSTALLATION >
[WITH INTELLIGENT KEY SYSTEM]
C
D
E
F
G
H
I
J
L
M
A
B
DLK
N
O
P
After installation, apply the touch-up paint (the body color) onto the head of the mounting screws.
Нет комментариевНе стесняйтесь поделиться с нами вашим ценным мнением.
Текст