Nissan Murano Z51. Instruction — part 938
INT-22
< REMOVAL AND INSTALLATION >
BODY SIDE TRIM
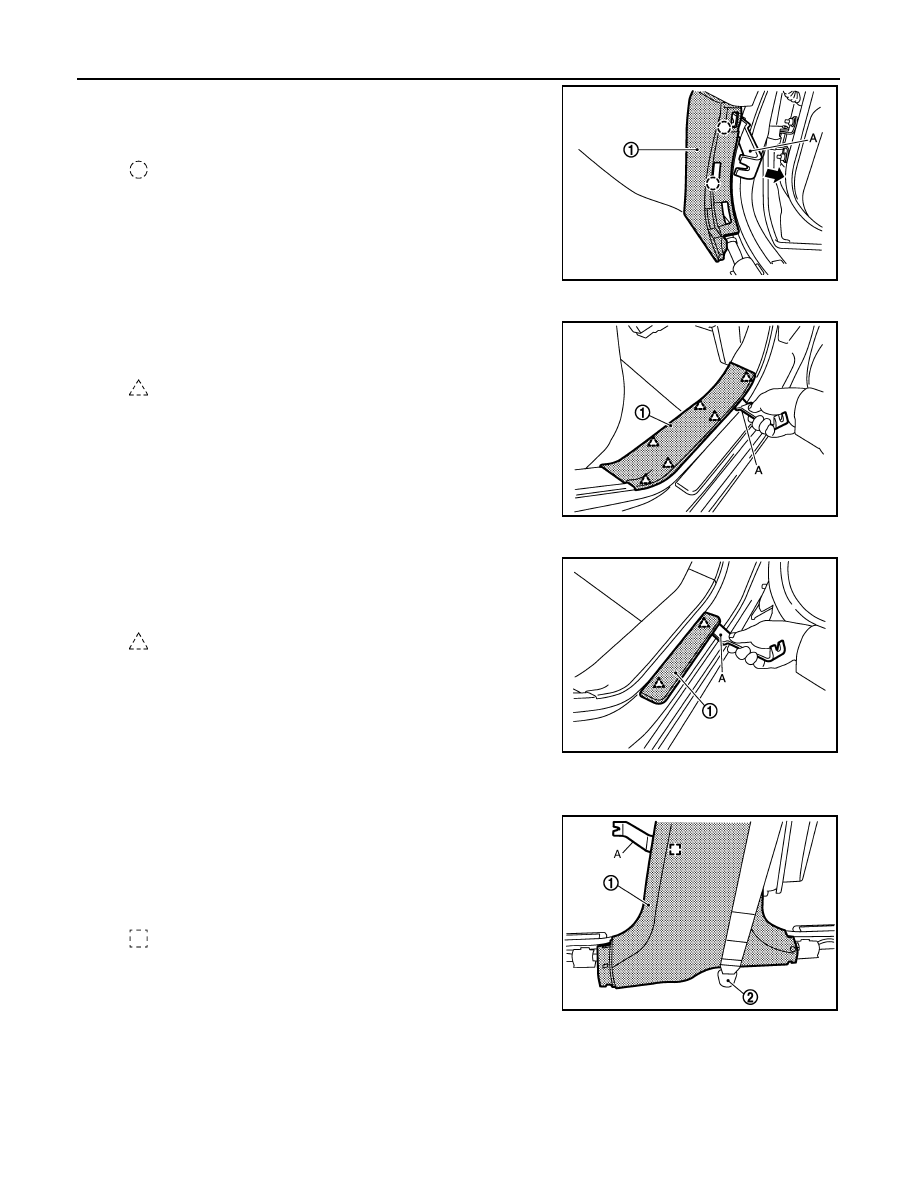
2.
Disengage dash side finisher (1) mounting clip with remover tool
(A).
3.
Remove dash side finisher (1).
REAR KICKING PLATE INNER
1.
Disengage the pawls from the body with remover tool (A).
2.
Remove rear kicking plate inner (1).
REAR KICKING PLATE OUTER
1.
Disengage the pawls from the body side panel with remover tool
(A).
2.
Remove rear kicking plate outer (1).
CENTER PILLAR LOWER GARNISH
1.
Remove front kicking plate inner and rear kicking plate inner.
2.
Insert remover tool (A) between center pillar lower garnish (1)
and body side panel to disengage the metal clips.
3.
Remove anchor bolt cover (2), then remove the anchor bolt
behind the cover.
4.
Remove center pillar lower garnish (1).
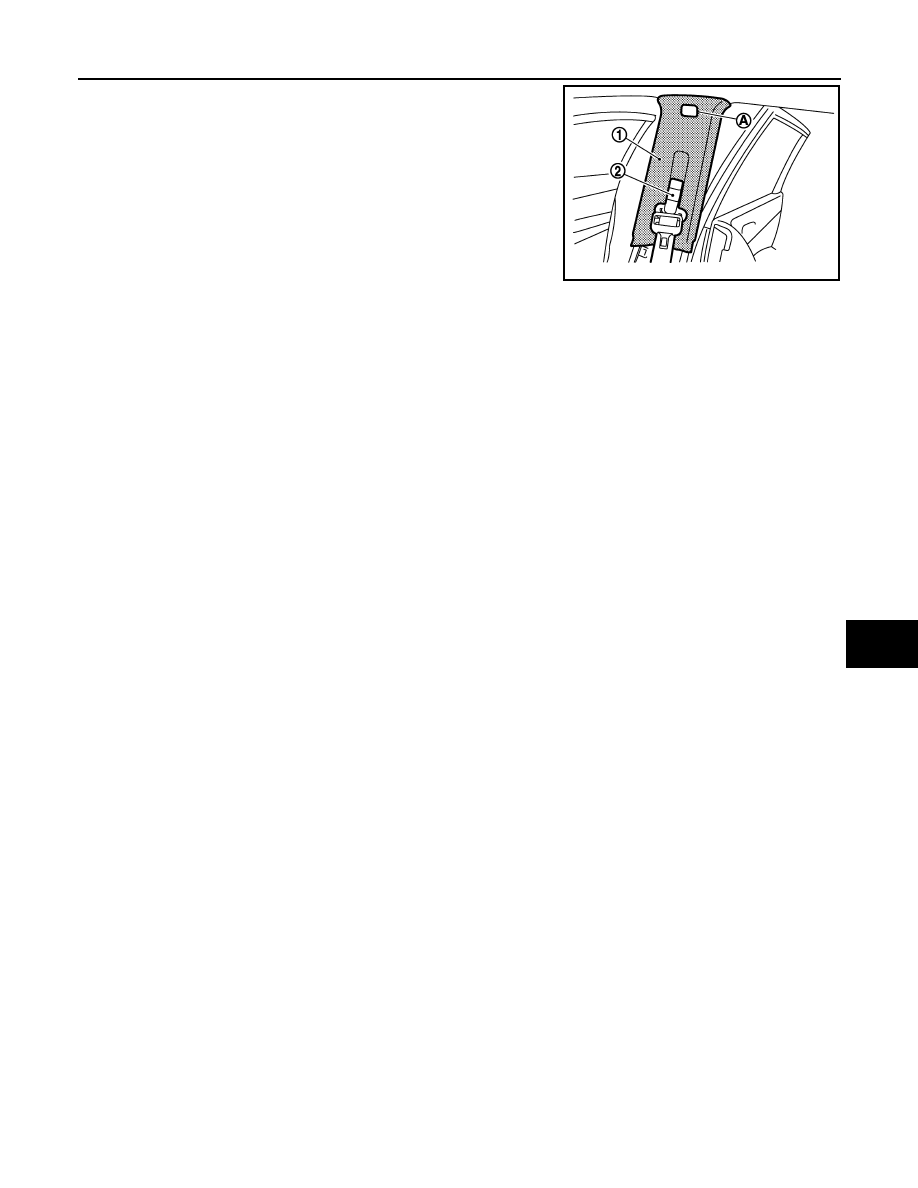
CENTER PILLAR UPPER GARNISH
1.
Remove partially front and rear body side welt.
2.
Remove front kicking plate inner and rear kicking plate inner.
3.
Remove center pillar lower garnish.
4.
Remove front seat belt shoulder anchor (2).
: Clip
JMJIA2448ZZ
: Pawl
JMJIA1368ZZ
: Pawl
JMJIA1369ZZ
: Metal clip
JMJIA1370ZZ
BODY SIDE TRIM
INT-23
< REMOVAL AND INSTALLATION >
C
D
E
F
G
H
I
K
L
M
A
B
INT
N
O
P
5.
Remove the bolt located behind the cover (A).
6.
Pull back center pillar upper garnish to disengage clips and
remove center pillar upper garnish from the body side panel.
INSTALLATION
Install in the reverse order of removal.
CAUTION:
When installing body side trim, check that clips are securely fitted in panel holes on body, and then
press them in.
JMJIA1371ZZ
INT-24
< REMOVAL AND INSTALLATION >
FLOOR TRIM
FLOOR TRIM
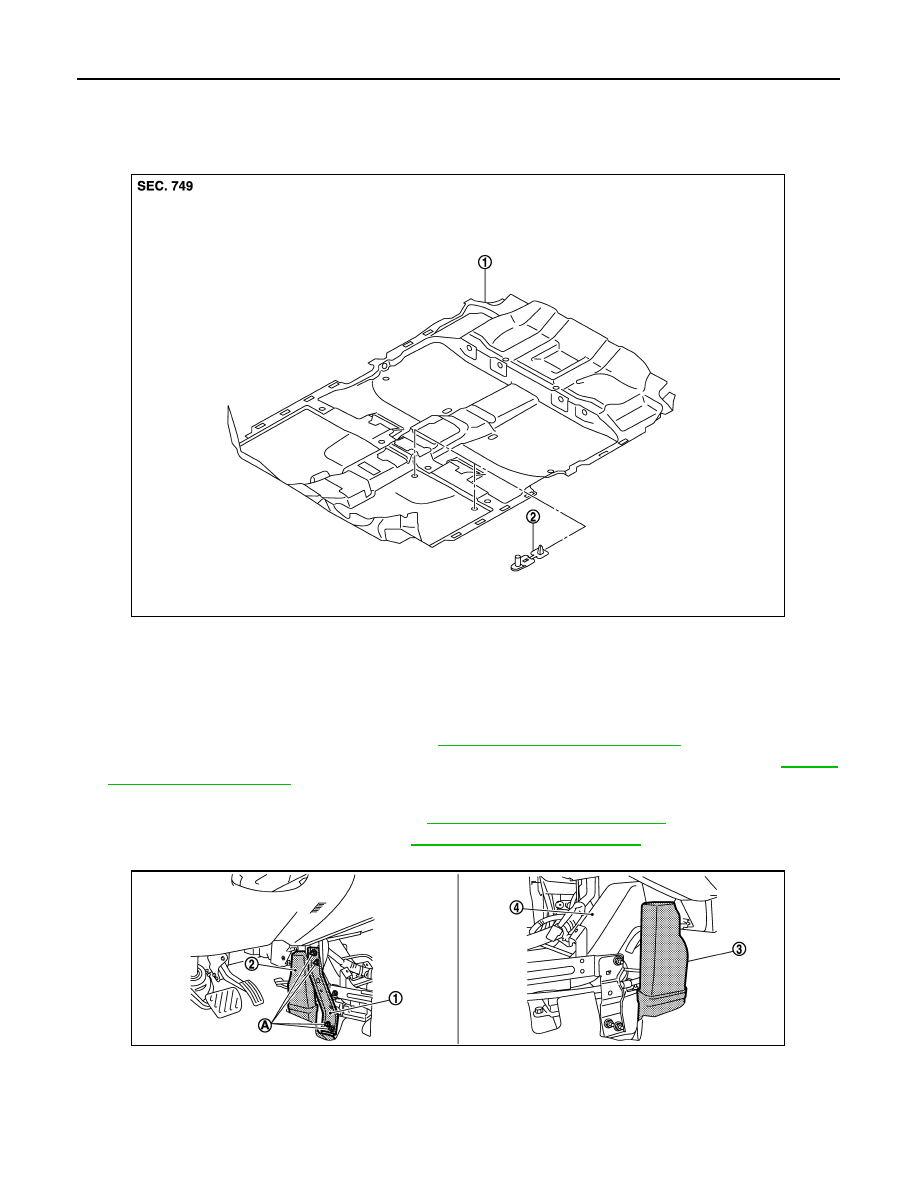
Exploded View
INFOID:0000000005513293
Removal and Installation
INFOID:0000000005513294
REMOVAL
1.
Remove front seat assembly (LH/RH). Refer to
SE-112, "Removal and Installation"
2.
Remove rear seat cushion frame and reclining device assembly mounting bolts. Refer to
3.
Remove dash side finisher (LH/RH), front kicking plate inner (LH/RH), center pillar lower garnish (LH/RH),
and rear kicking plate inner (LH/RH). Refer to
INT-20, "Removal and Installation"
.
4.
Remove center console assembly. Refer to
IP-21, "Removal and Installation"
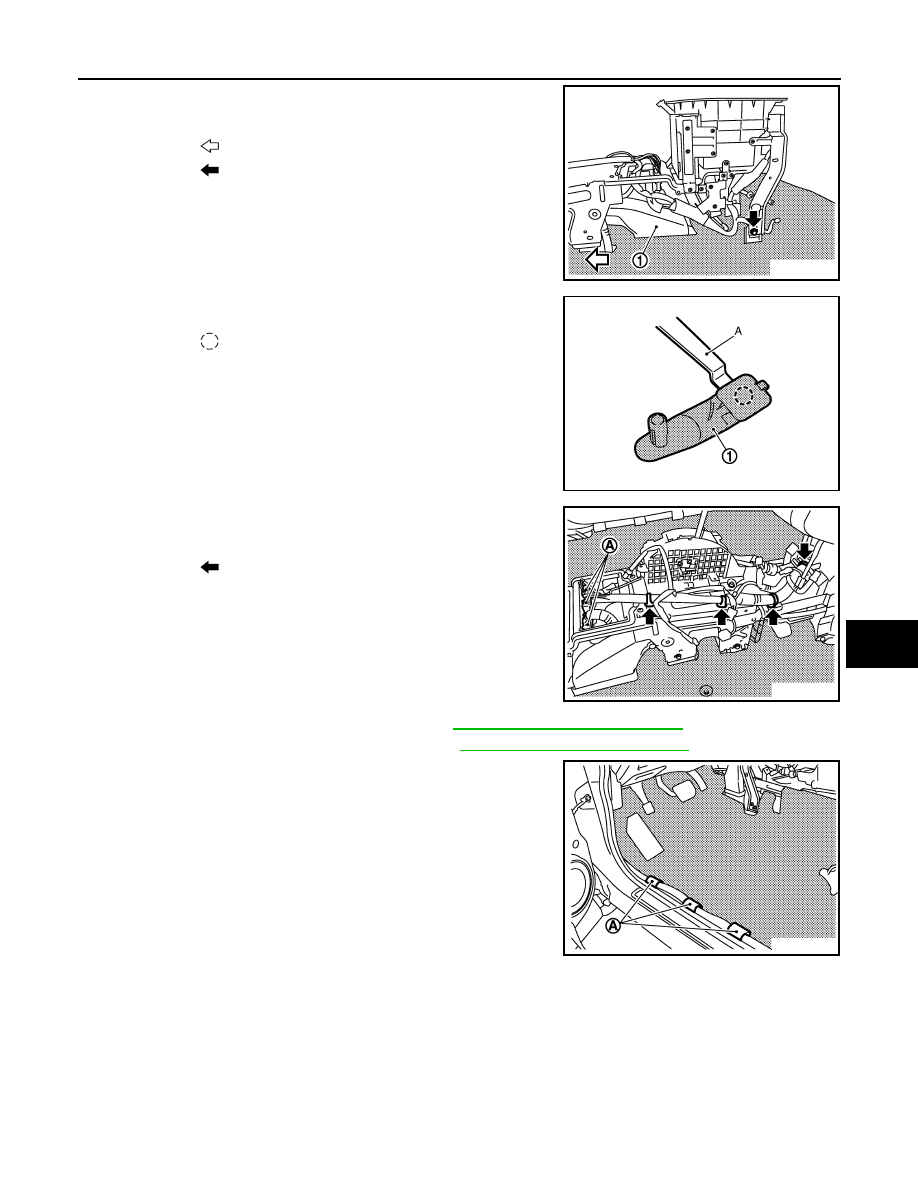
5.
Remove console bracket mounting nuts (A), and then remove console bracket LH (1).
6.
Remove rear foot duct (2), rear foot duct (3) and rear ventilator duct (4).
1.
Floor carpet assembly
2.
Floor hook
JMJIA2449ZZ
JMJIA1373ZZ
FLOOR TRIM
INT-25
< REMOVAL AND INSTALLATION >
C
D
E
F
G
H
I
K
L
M
A
B
INT
N
O
P
7.
Remove screw shown by the arrow in the figure, and then
remove rear ventilator duct (1).
8.
Disengage the clip of floor hook (1) with a remover tool (A).
9.
Disconnect harness connectors (A) and remove floor harness
mounting clips as shown by the arrows in the figure.
10. Remove rear console bracket assembly. Refer to
IP-21, "Removal and Installation"
11. Remove the center console sub harness. Refer to
IP-21, "Removal and Installation"
12. Remove floor carpet fixing clips (A) and then remove floor car-
pet.
INSTALLATION
Install in the reverse order of removal.
: Vehicle front
: Bolt
JMJIA1375ZZ
: Clip
JMJIA0092GB
: Clip
JMJIA1374ZZ
JMJIA1376ZZ
Нет комментариевНе стесняйтесь поделиться с нами вашим ценным мнением.
Текст